AFFiNE is a free, open-source, self-hostable tool that lets you build your own knowledge database similar to Notion or Miro.
AFFiNE, a knowledge management tool that integrates block documents and an infinite canvas, allowing users to organize documents and databases like
AFFiNE - All In One KnowledgeOS
https://affine.pro/

toeverything/AFFiNE: There can be more than Notion and Miro. AFFiNE is a next-gen knowledge base that brings planning, sorting and creating all together. Privacy first, open-source, customizable and ready to use.
◆Demo
https://app.affine.pro/
◆Main features of AFFiNE
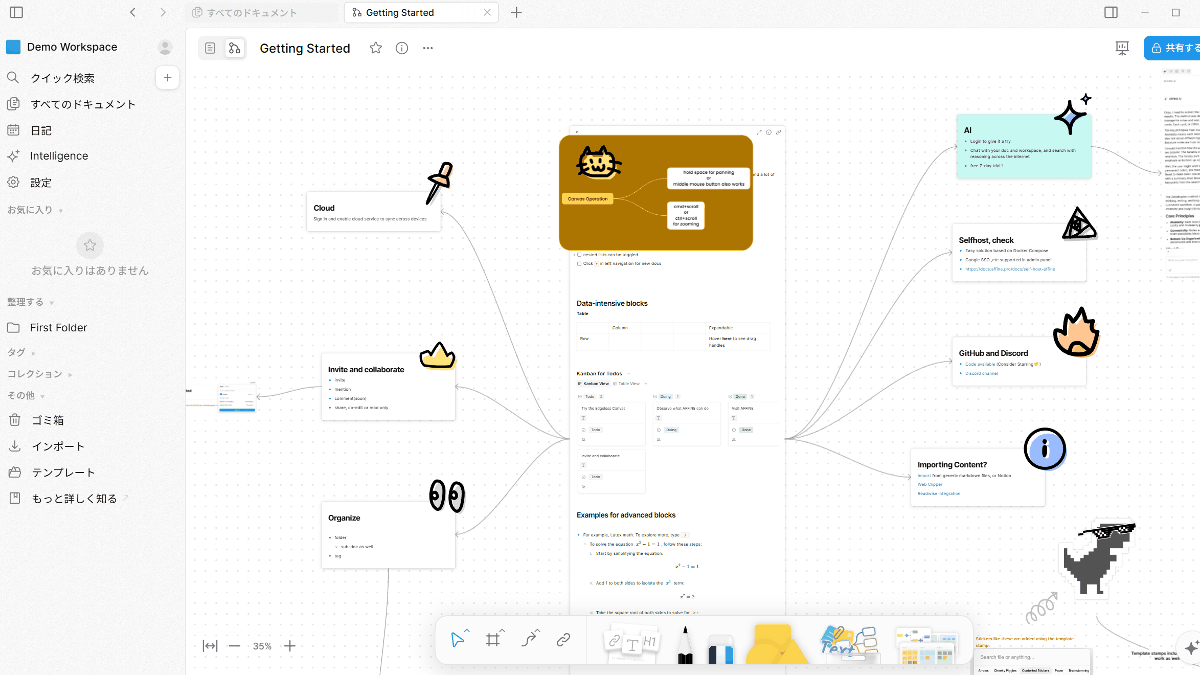
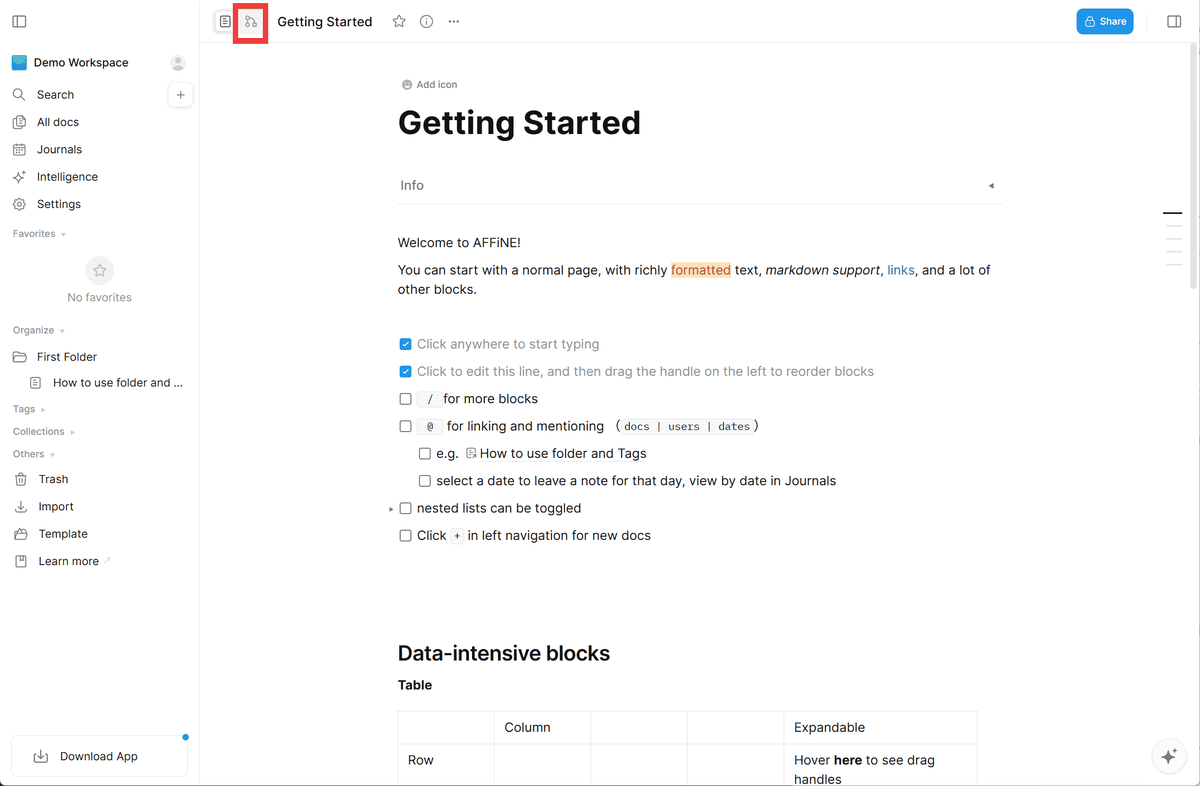
- Integrating text editing and canvas
You can switch editors by simply clicking an icon, and when editing text, clicking the display icon in the top menu will...
The document switches to an edgeless canvas where you can place sticky notes, shapes, mind maps, and other elements next to your document and edit them directly.
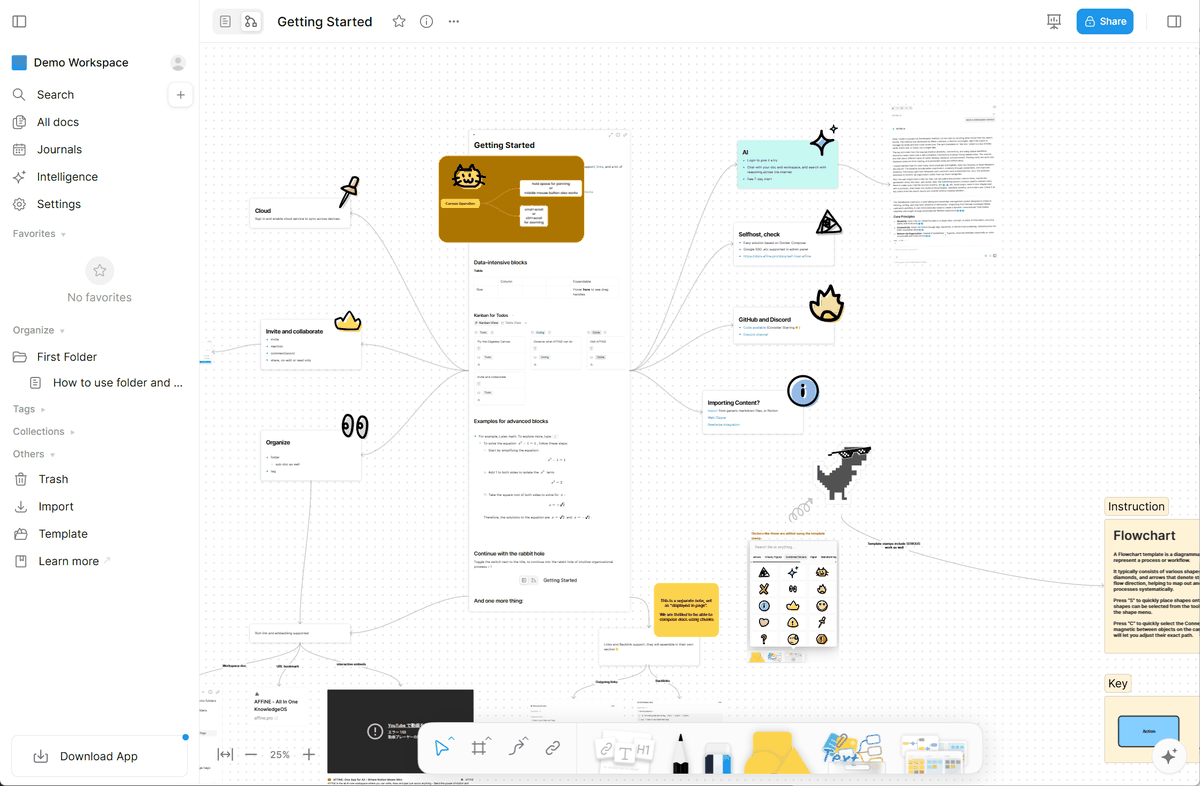
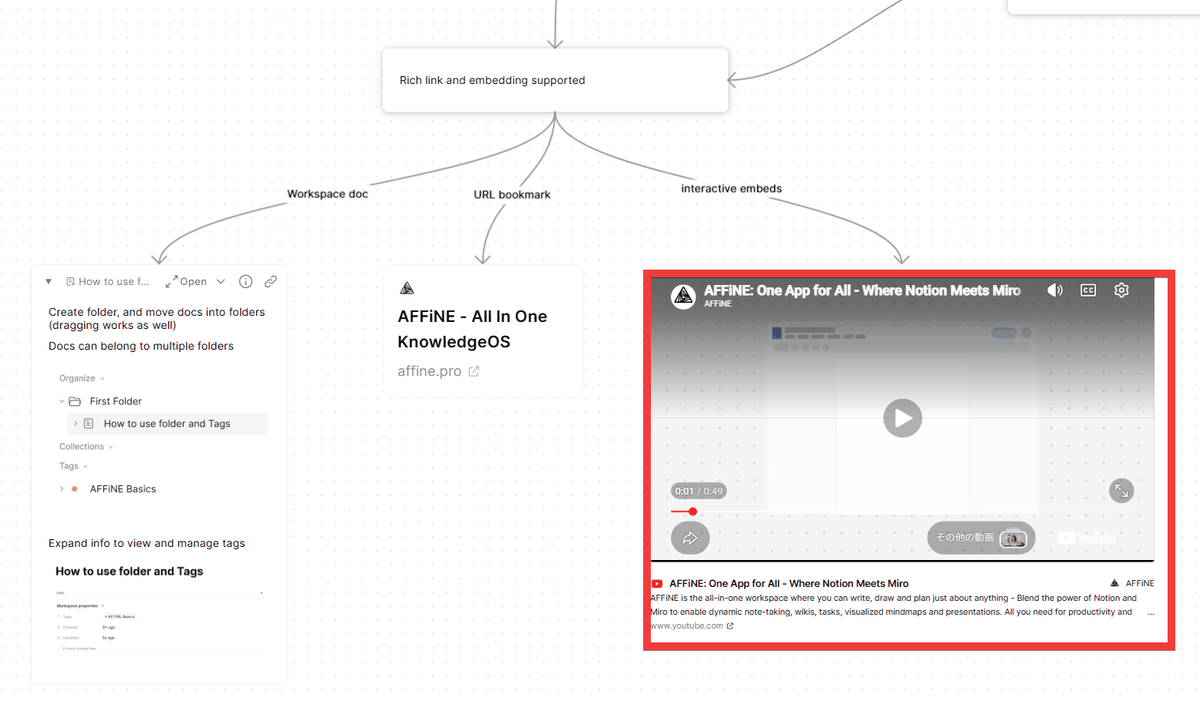
The edgeless canvas also allows you to embed other documents, links to websites, YouTube videos, and more.
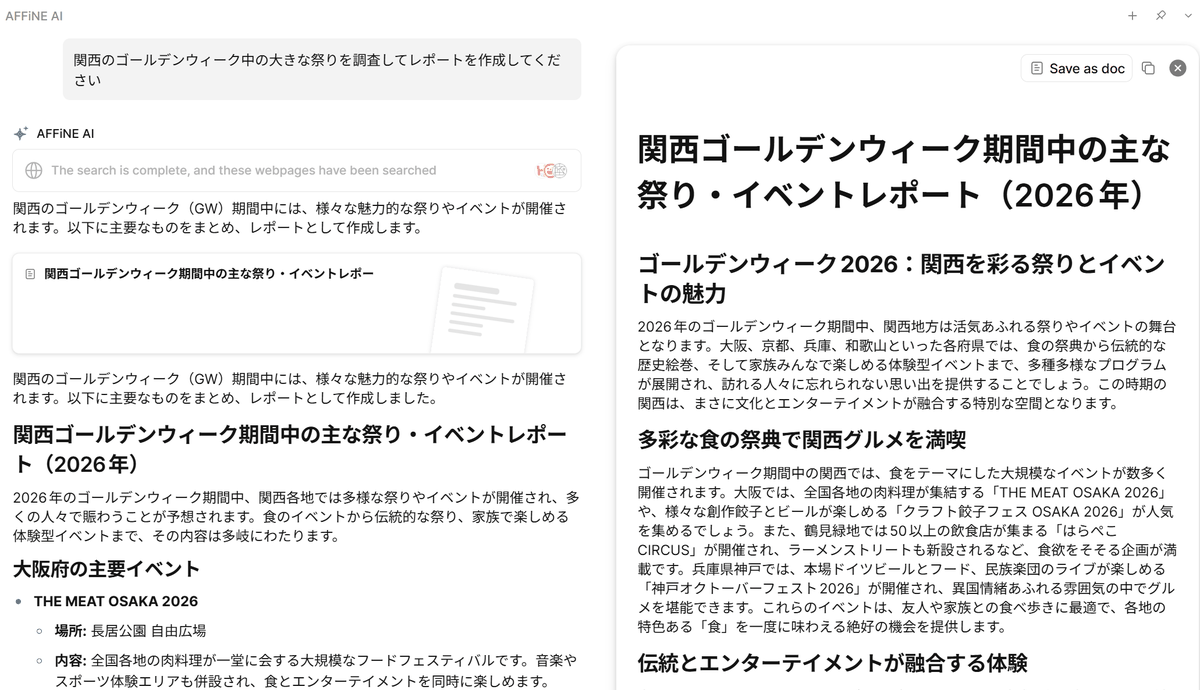
AI-powered creation support
AFFiNE AI assists with tasks such as writing documents, creating slides, summarizing articles, creating mind maps, and organizing tasks.
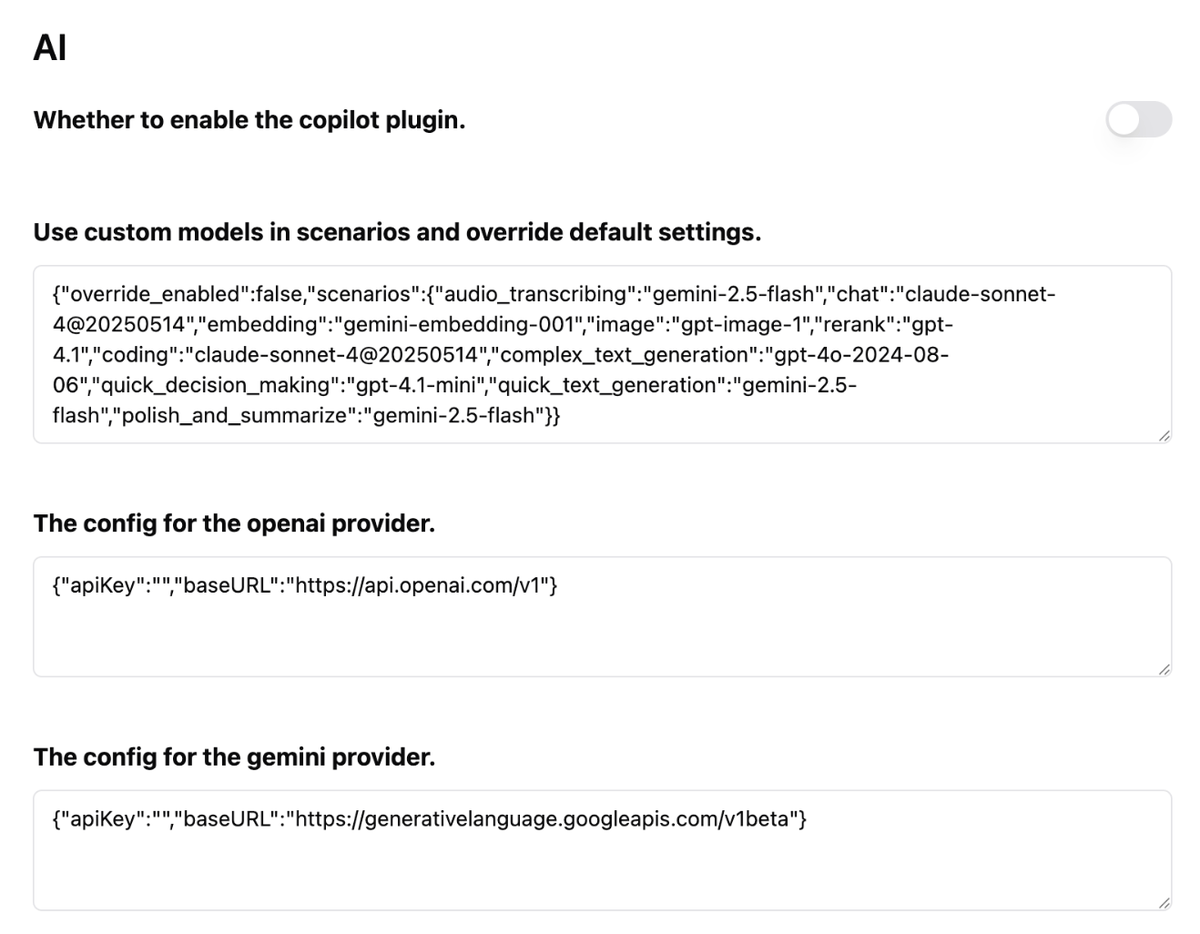
For self-hosted setups, you can use AI features by configuring API keys obtained from various AI providers and local LLMs.
- Offline use and synchronization
Using local storage allows you to edit even when offline, and synchronization with the server ensures consistency.
◆ How to set up a self-hosted server with AFFiNE
We will build this in an environment where
curl -L -o docker-compose.yml https://github.com/toeverything/affine/releases/latest/download/docker-compose.yml
Get the .env file.
curl -L -o .env https://github.com/toeverything/affine/releases/latest/download/default.env.example
Open the .env file with a text editor and enter your desired password in the 'DB_PASSWORD' field.
 # database credentials
 Spring_USERNAME=affine
 DB_PASSWORD=【Any password】
 DB_DATABASE=affine
Start the container.
docker compose up -d
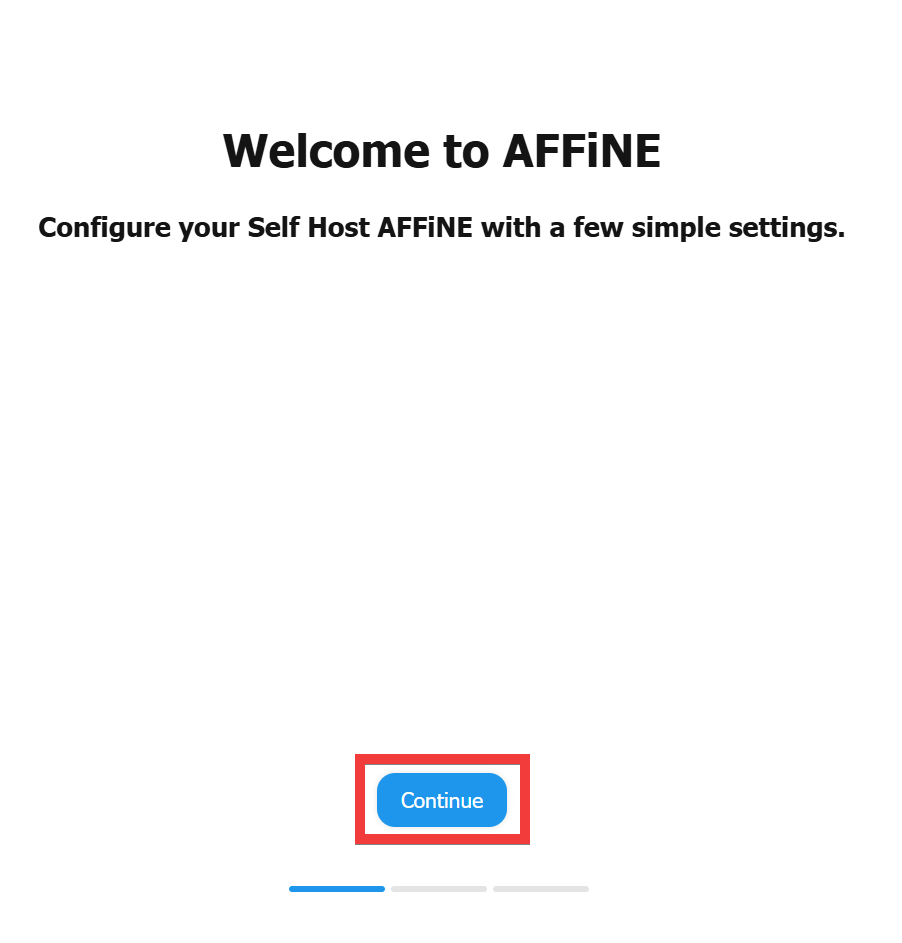
When you access 'http://localhost:3010' in your browser, the initial setup screen will appear, so click 'Continue'.
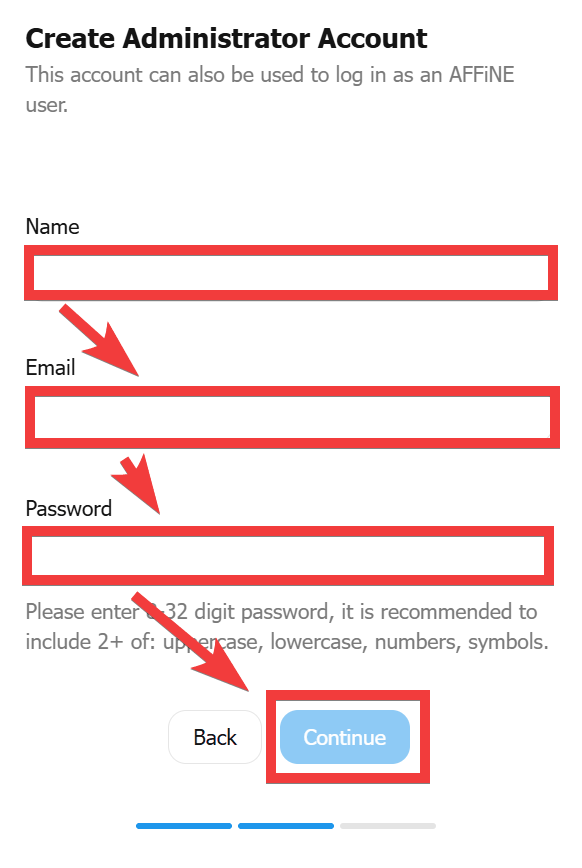
An administrator registration form will appear. Enter a name of your choice in 'Name,' an email address in 'Email,' and a password in 'Password,' then click 'Continue.'
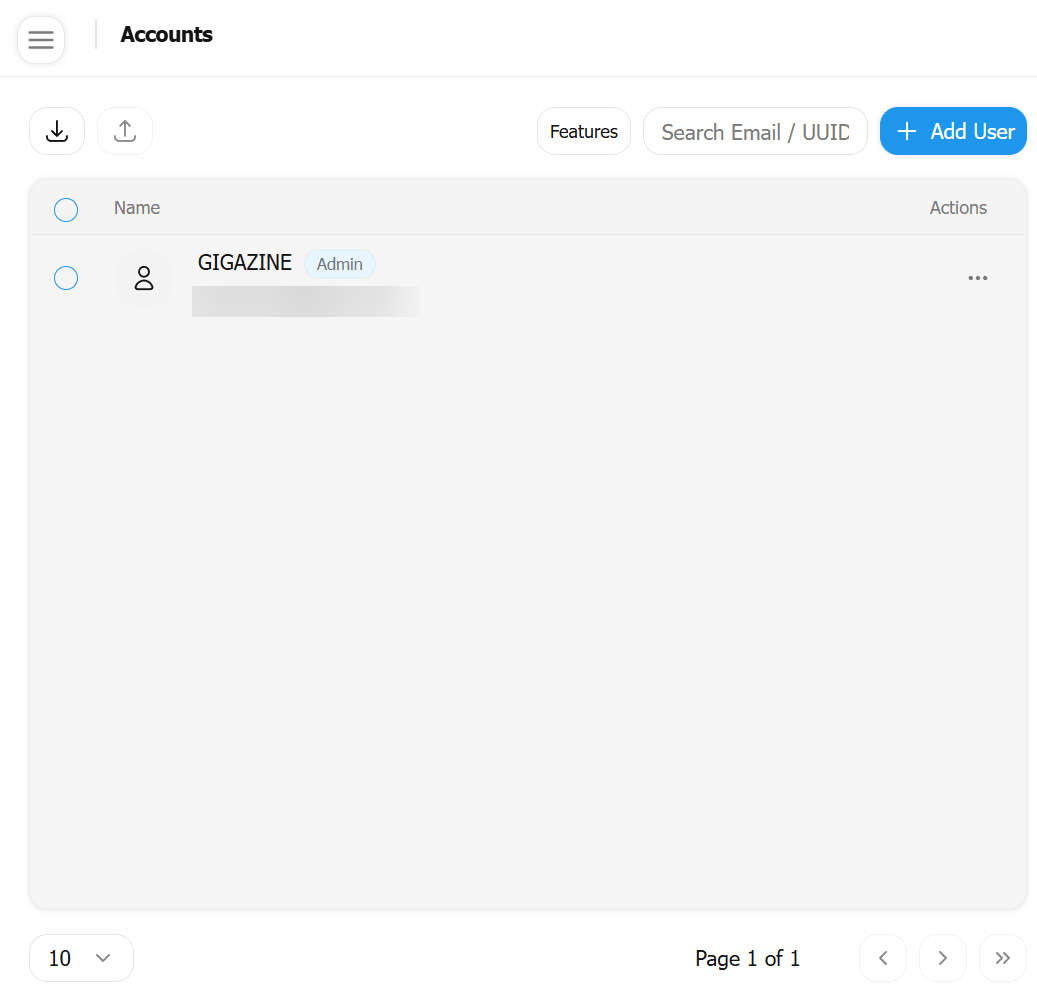
Once the account list page is displayed, the installation is complete.
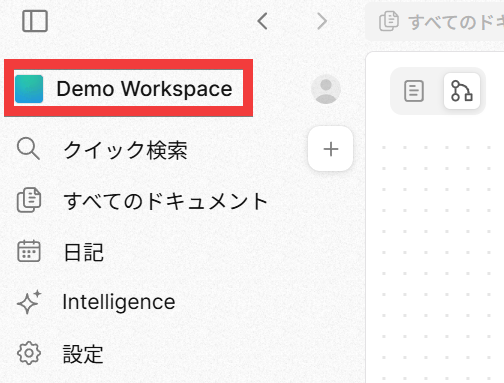
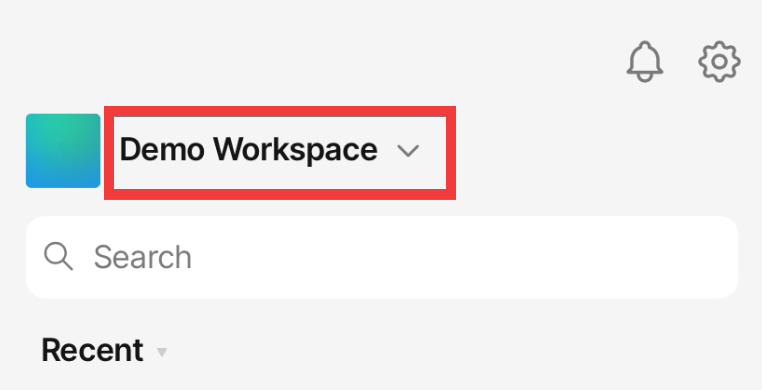
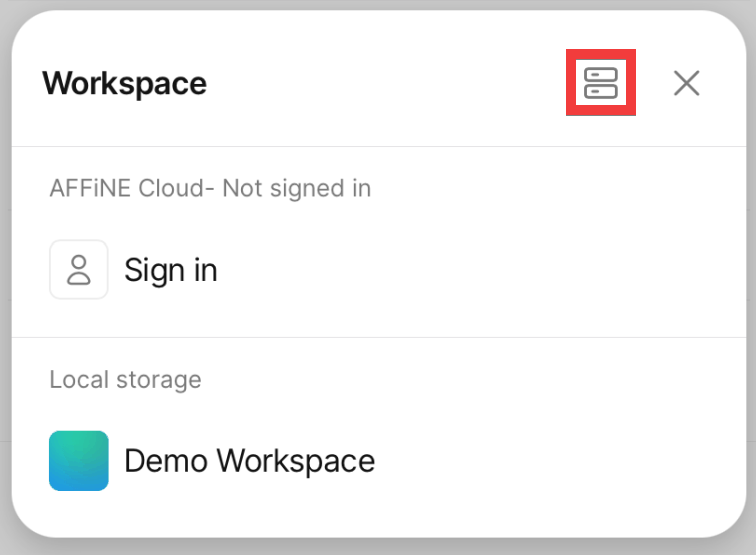
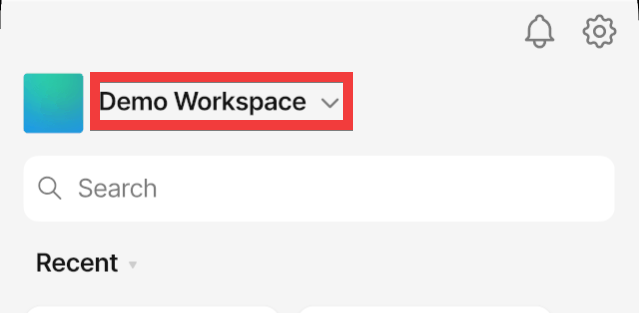
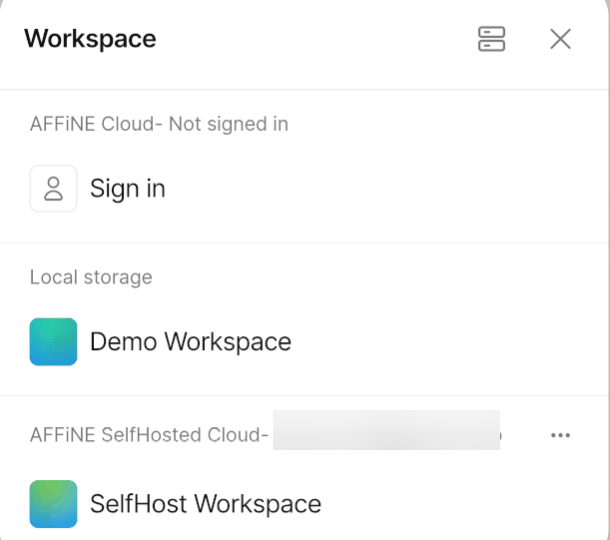
To connect to the self-hosted server, click on the area where the workspace name is displayed.
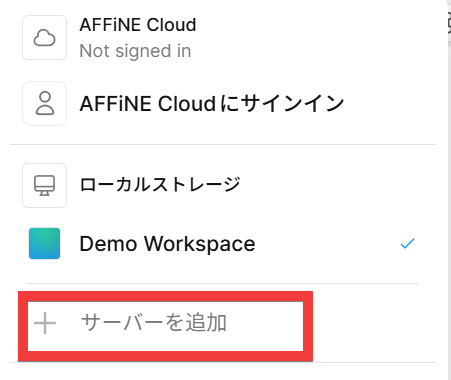
Click 'Add Server'.
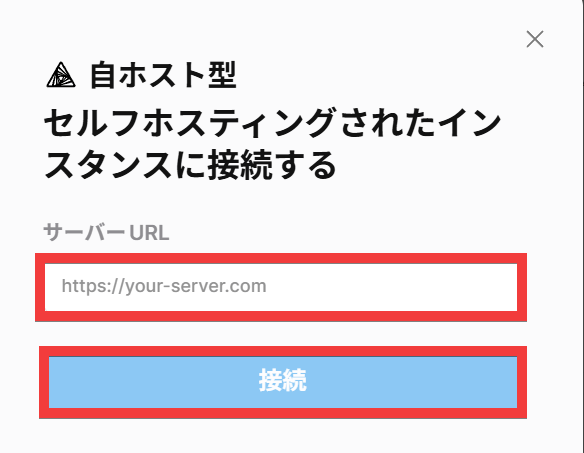
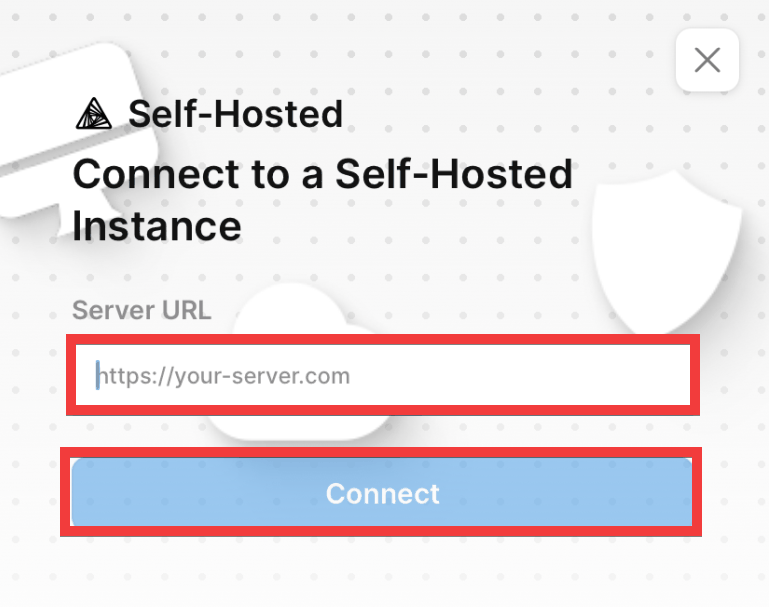
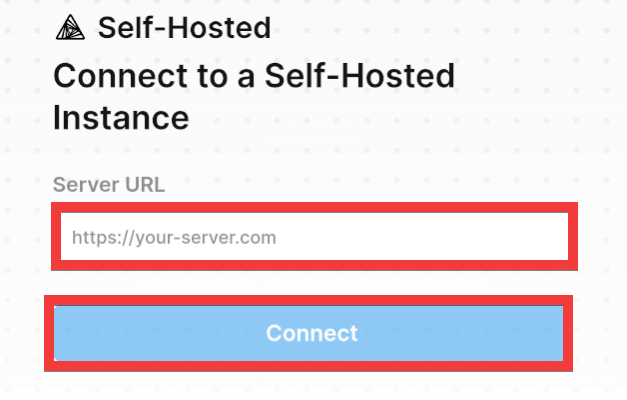
Enter the host server's URL in the 'Server URL' field and click 'Connect'.
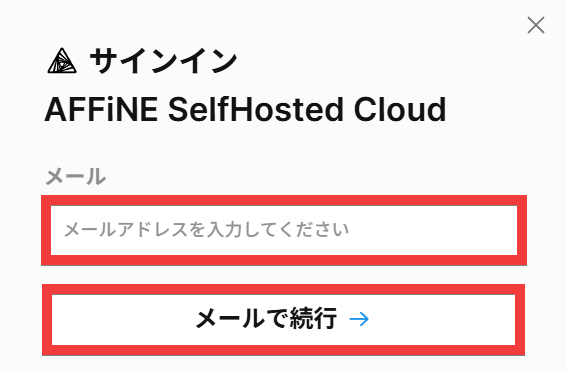
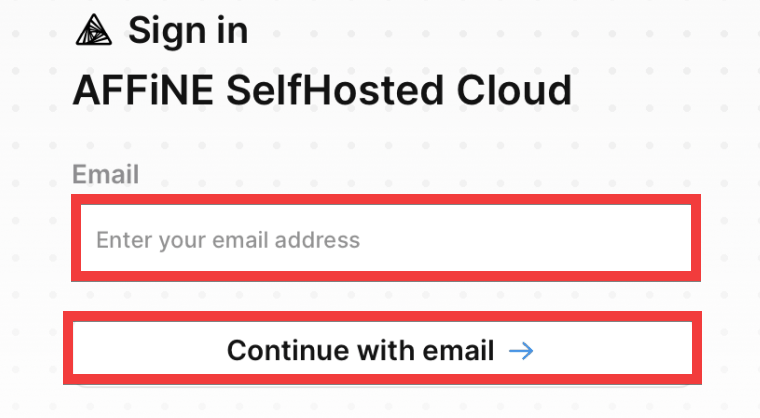
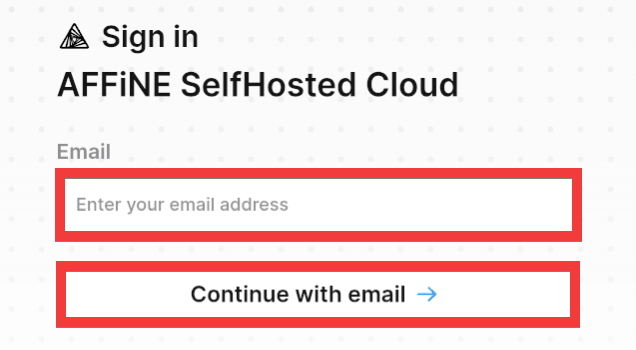
Enter the email address you registered with your self-hosted server in the 'Email' field and click 'Continue with email'.
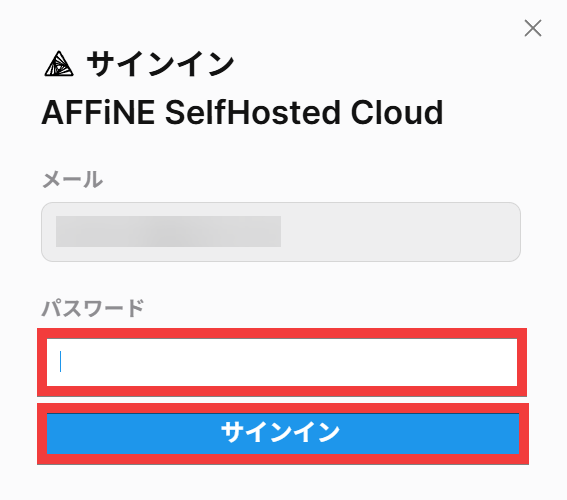
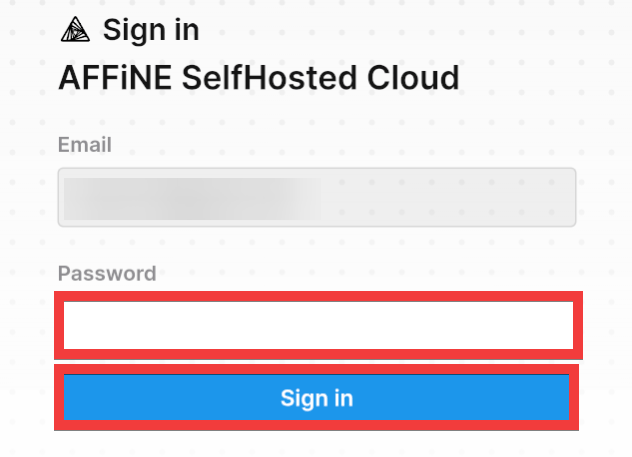
Enter your password in the 'Password' field and click 'Sign In'.
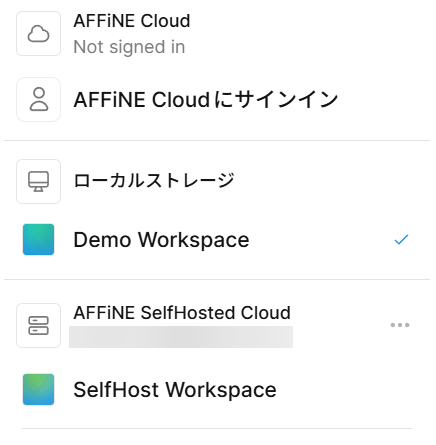
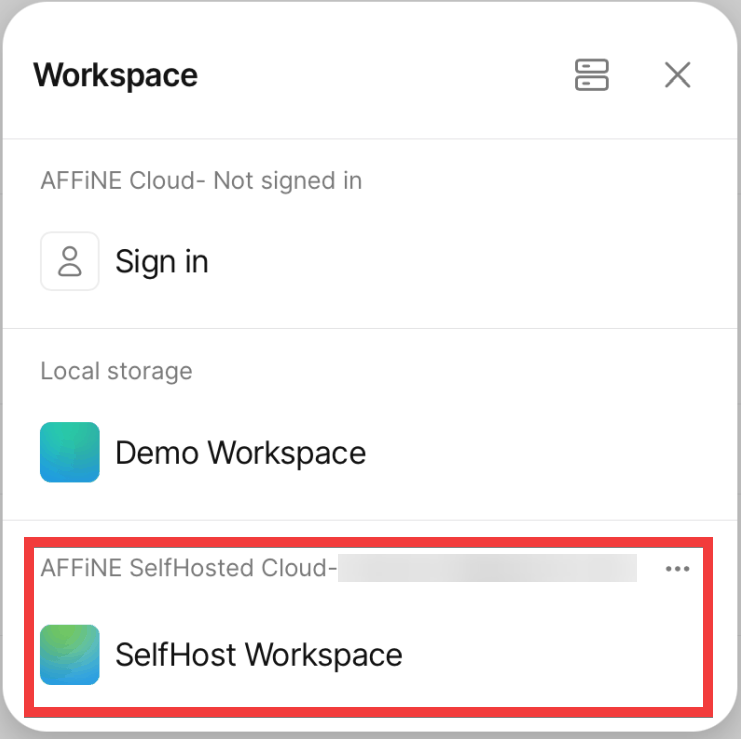
A self-hosted workspace will be added to the workspace list.
◆ How to install the offline client
Download AFFiNE - Offline Notes, Whiteboards, and Local-First Work | AFFiNE
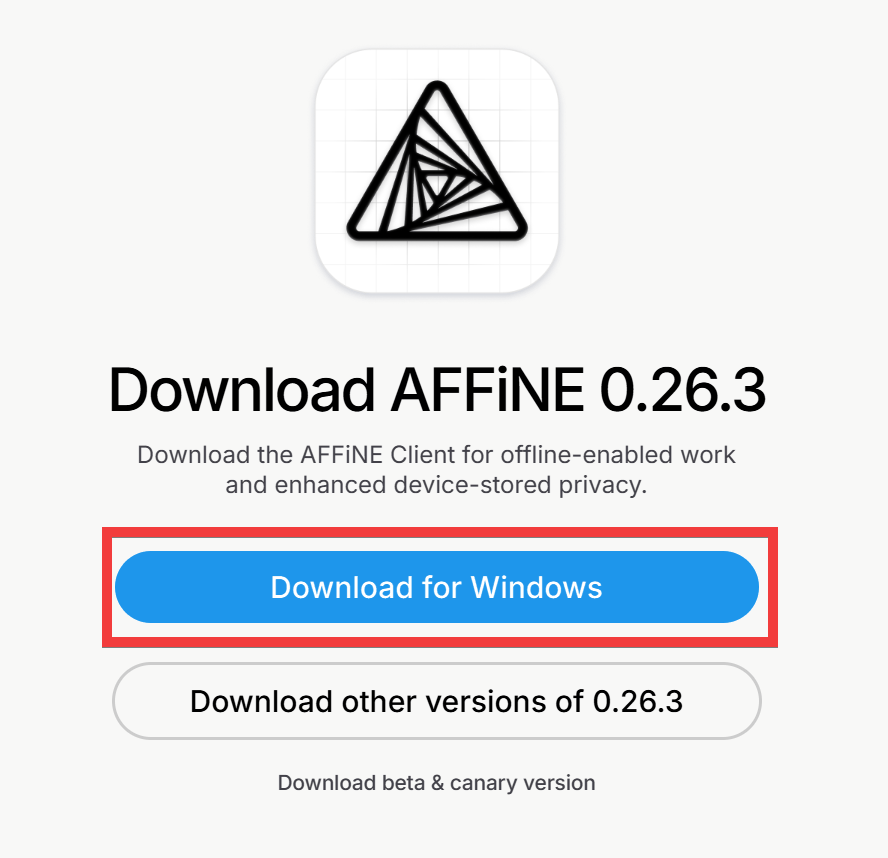
Click 'Download for Windows' on the official download page and save it.
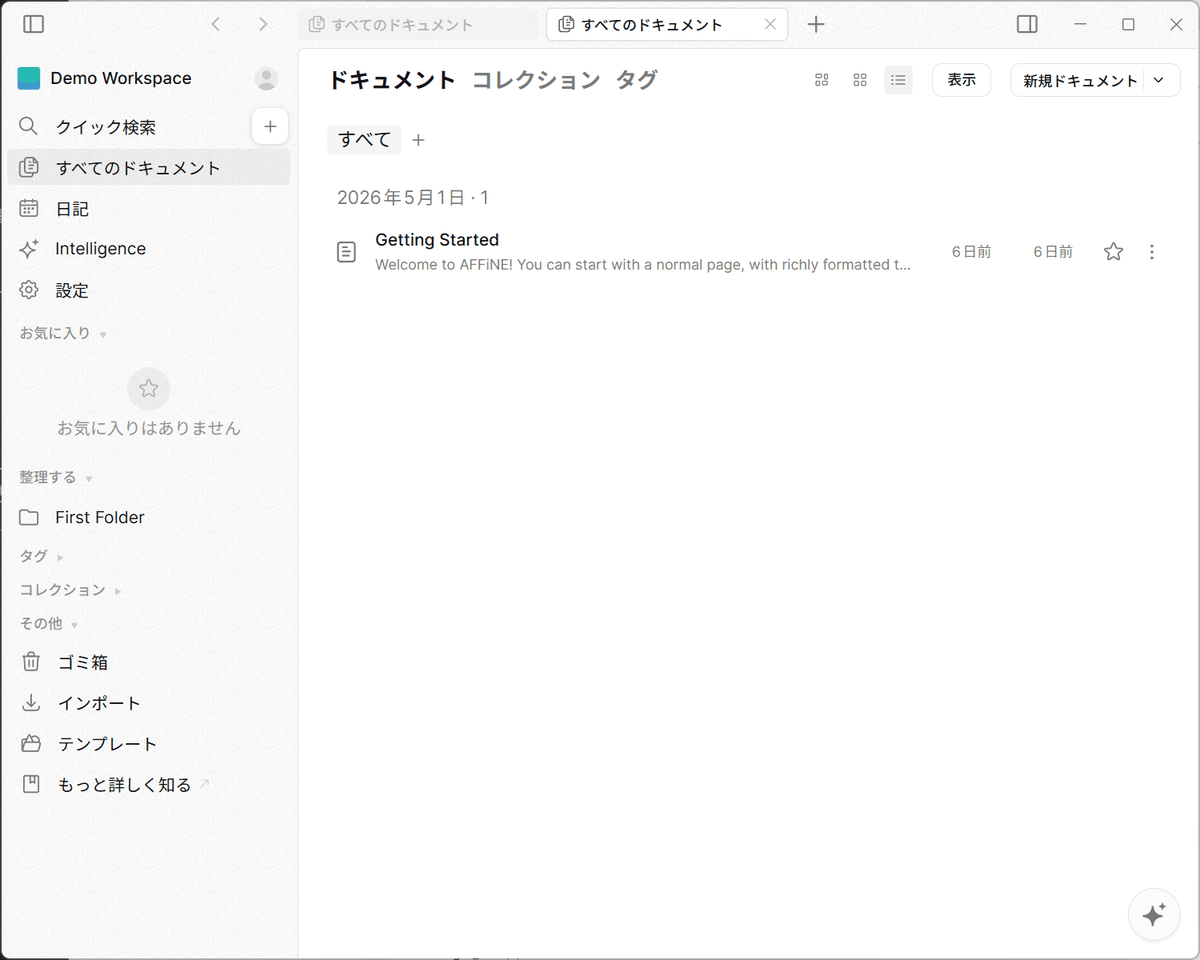
Clicking the saved file will initiate the installation and launch the client.
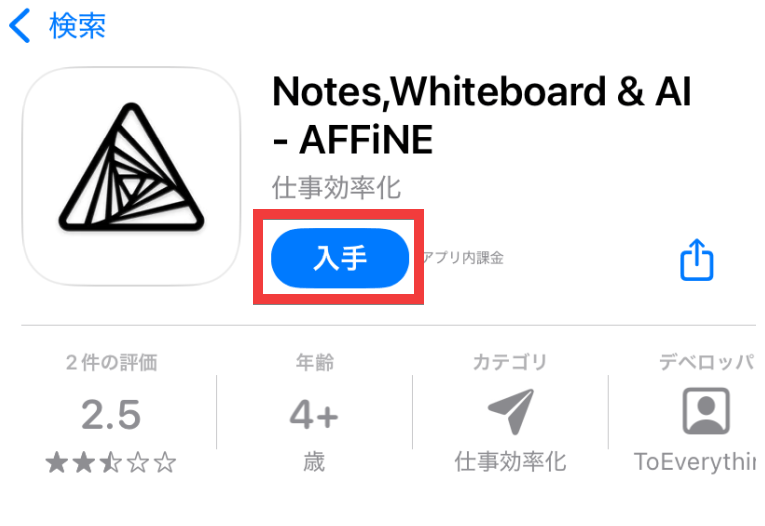
◆How to install the iOS client
Notes,Whiteboard & AI - AFFiNE App - App Store
https://apps.apple.com/us/app/notes-whiteboard-ai-affine/id6736937980
Go to
Once the installation is complete, tap 'Open'.
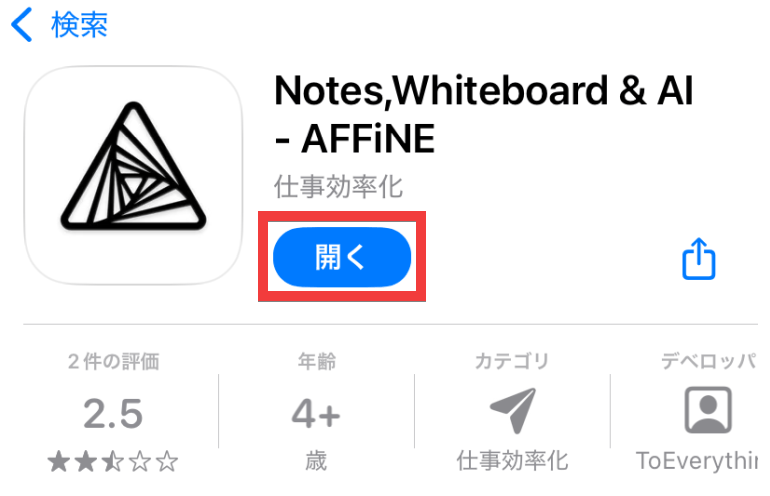
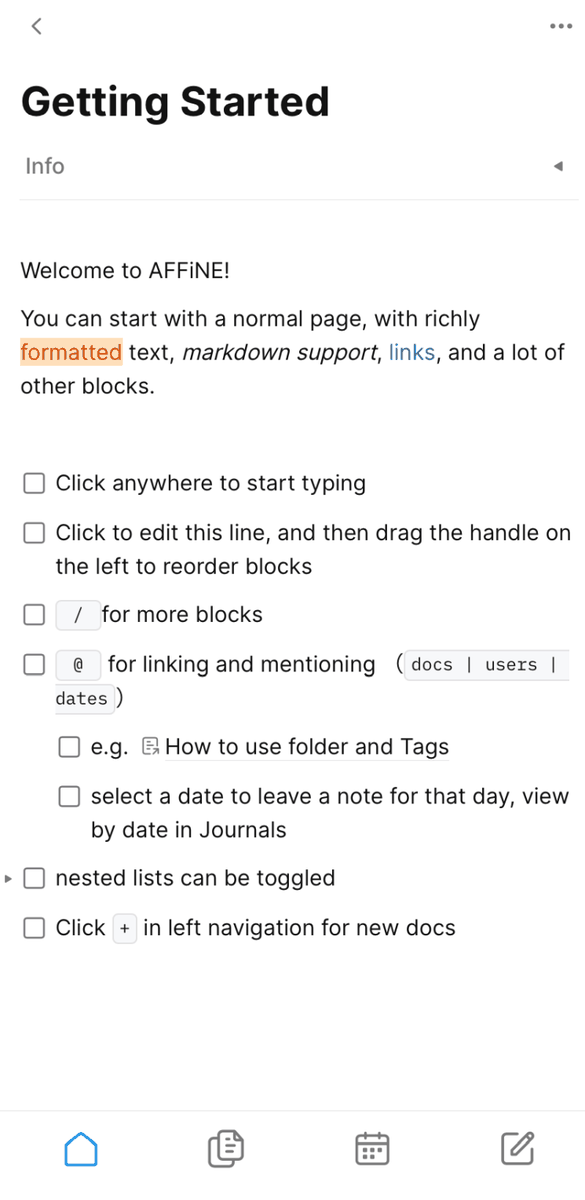
The installation is complete when the document editing screen appears.
To connect to a self-hosted server, tap the 'Back' icon at the top of the editing screen.

Tap the area where the workspace name is displayed.
Tap the 'Server' icon in the upper right corner of the workspace list.
Enter the host server's URL in 'Server URL' and tap 'Connect'.
Enter the email address you registered with your self-hosted server in the 'Email' field and tap 'Continue with email'.
Enter your password in the 'Password' field and tap 'Sign in'.

A self-hosted workspace will be added to the workspace list.
◆How to install the Android client
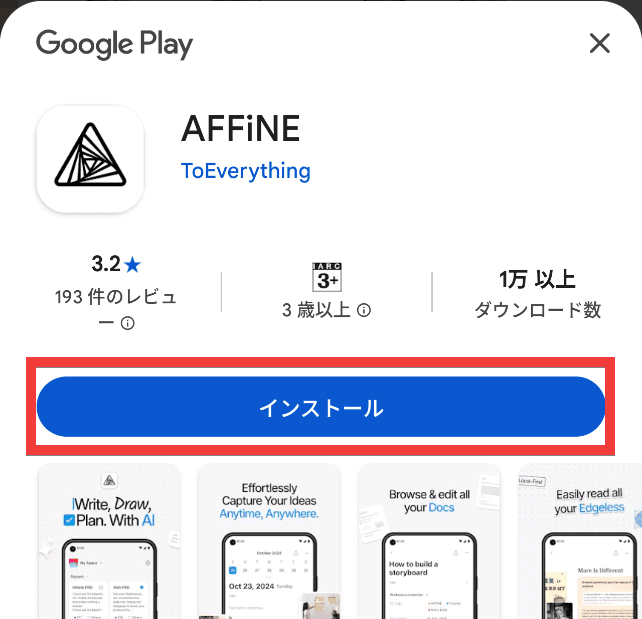
AFFiNE - App on Google Play
Go to the Google Play distribution page and tap 'Install'.
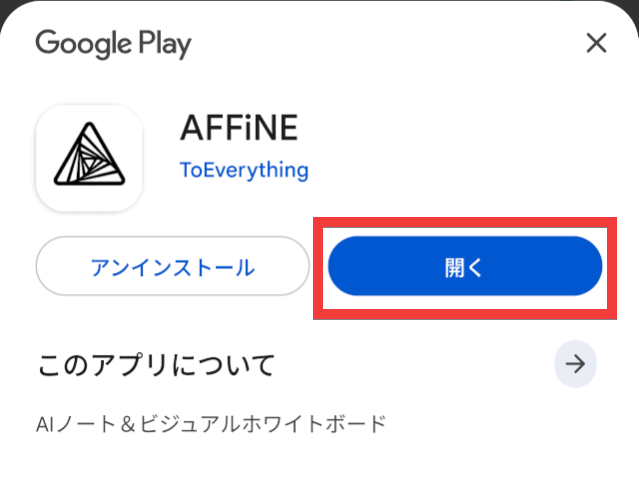
Once the installation is complete, tap 'Open'.
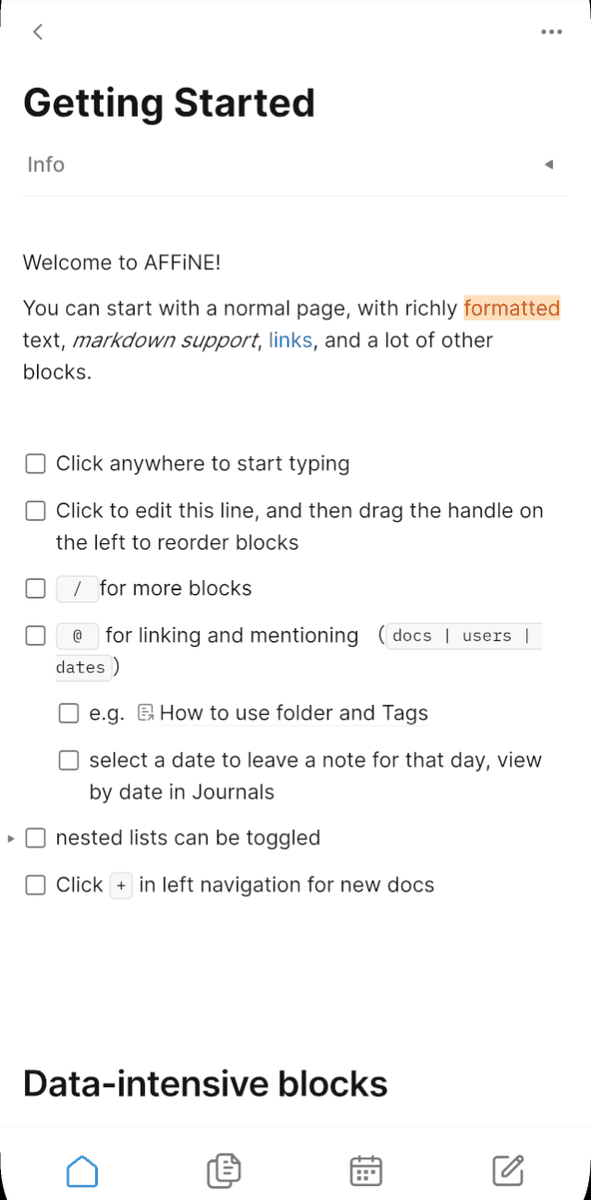
The installation is complete when the document editing screen appears.
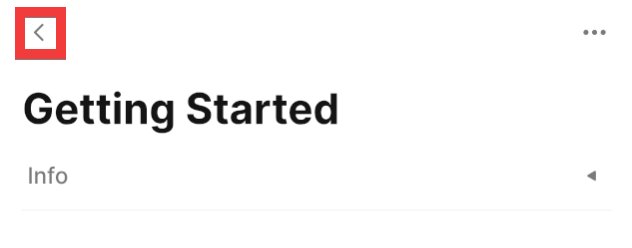
To connect to a self-hosted server, tap the 'Back' icon at the top of the editing screen.
Tap the area where the workspace name is displayed.
Tap the 'Server' icon in the upper right corner of the workspace list.

Enter the host server's URL in 'Server URL' and tap 'Connect'.
Enter the email address you registered with your self-hosted server in the 'Email' field and tap 'Continue with email'.
Enter your password in the 'Password' field and tap 'Sign in'.
A self-hosted workspace will be added to the workspace list.
While there are Firefox add-ons and Chrome extensions available, they reportedly have functional issues such as not saving correctly, so you should wait until they are fixed before using them.
Therefore, because self-hosting allows for complete self-management of data, it is a useful tool for organizing confidential and private information.
Related Posts: