'Craftplan,' an ERP system I created for my wife's bakery, is designed with small-batch, made-to-order production in mind, and its workflow is open source and self-hostable.
Running a business requires various management tasks such as payroll, finance, order management, and inventory management. While a system called
puemos/craftplan: Self-hosted software for managing artisanal D2C micro-businesses
https://github.com/puemos/craftplan
Home · Craftplan
https://puemos.github.io/craftplan/

◆Features of Craftplan
Craftplan's workflow is designed with small-batch, made-to-order production in mind, and it has the following features:
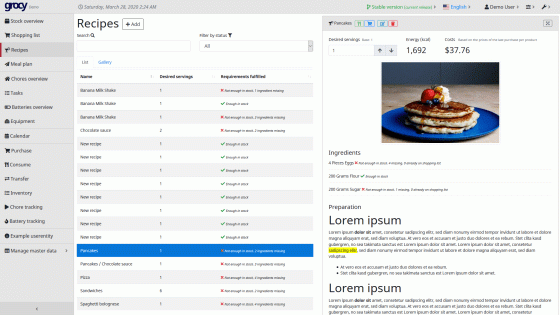
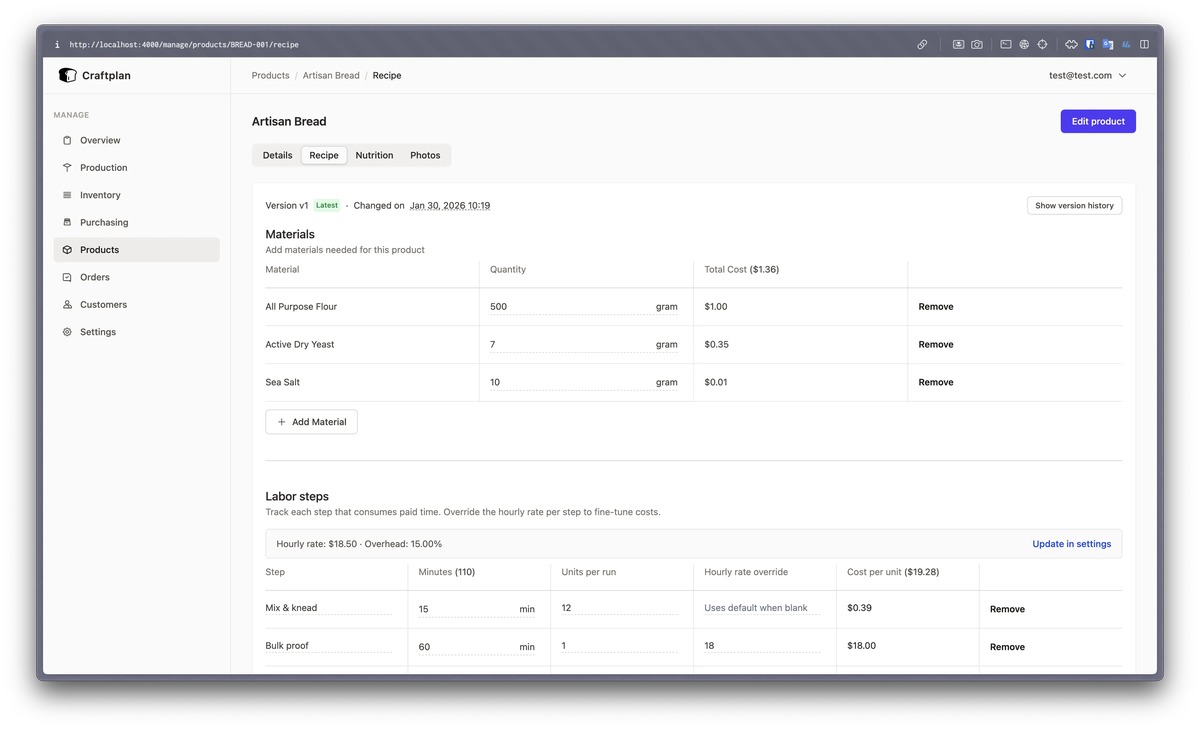
The recipes are optimized for food and crafts, allowing registration in grams or liters and enabling version control. Cost calculations are automatically reflected, and costs and labor for each recipe can be registered together, allowing for a clear understanding of overall costs per product.
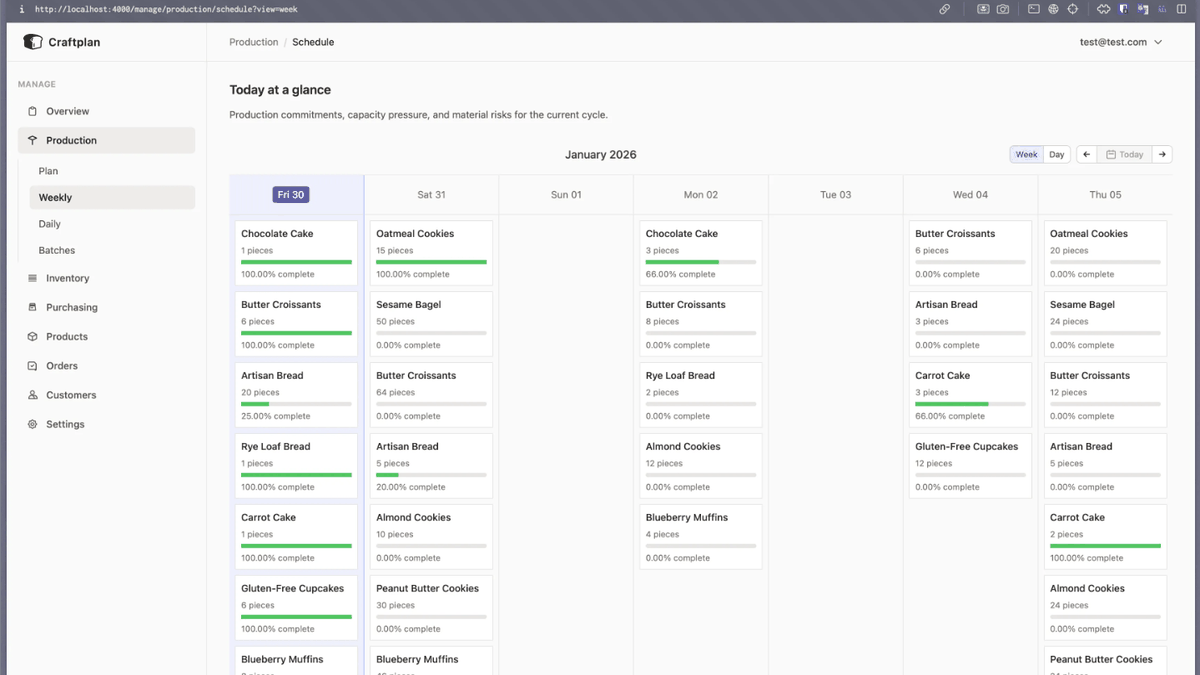
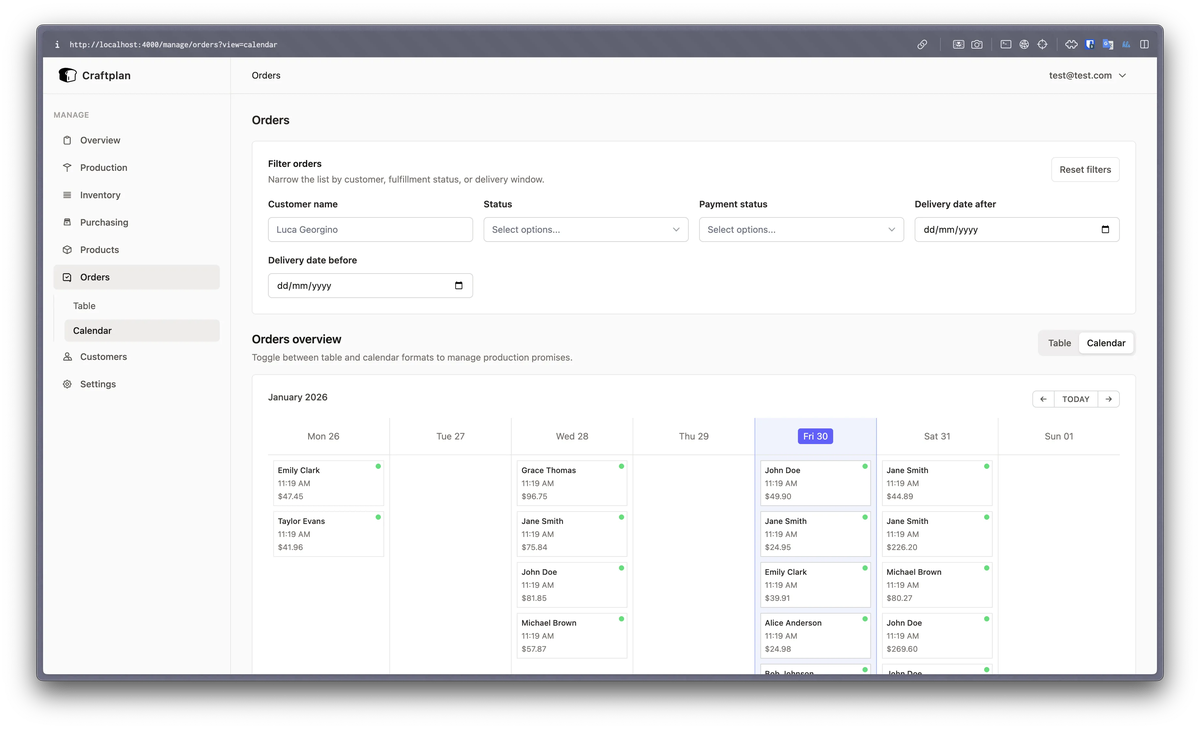
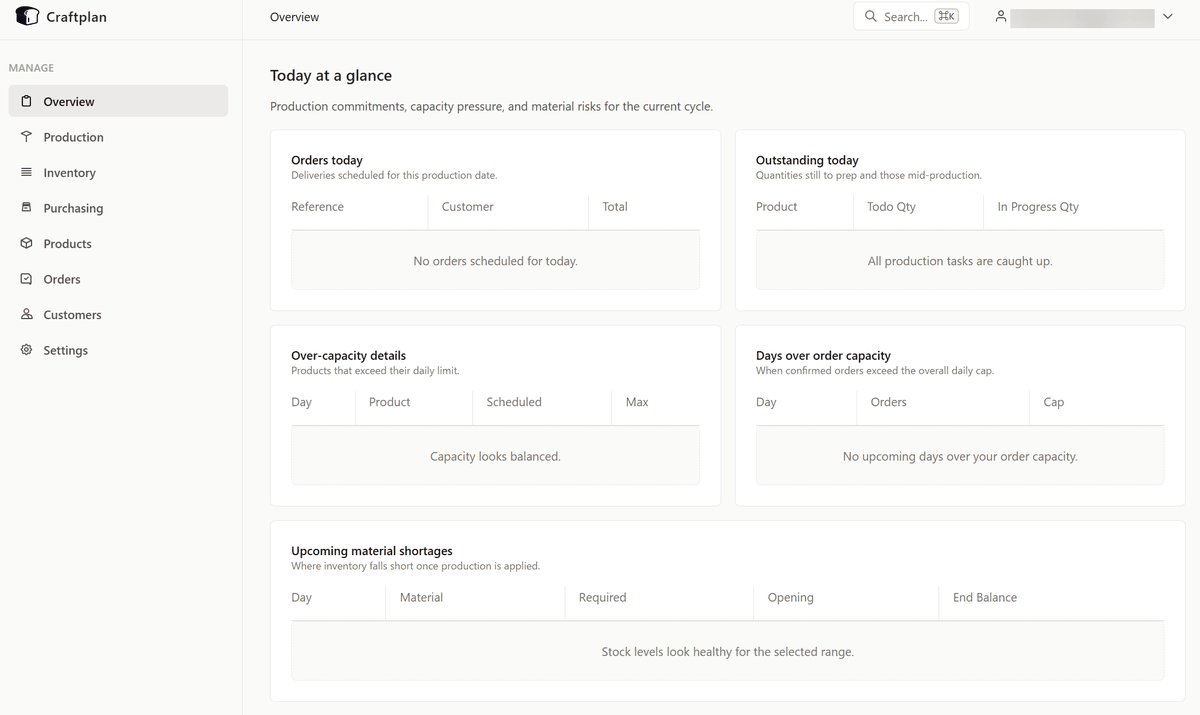
- The order management sheet defaults to a calendar view, making it easier to check delivery dates and deliverables compared to a table view.
• The forecast for future inventory levels for each material is displayed in a calendar format, making it easy to see which materials will be in short supply and when.

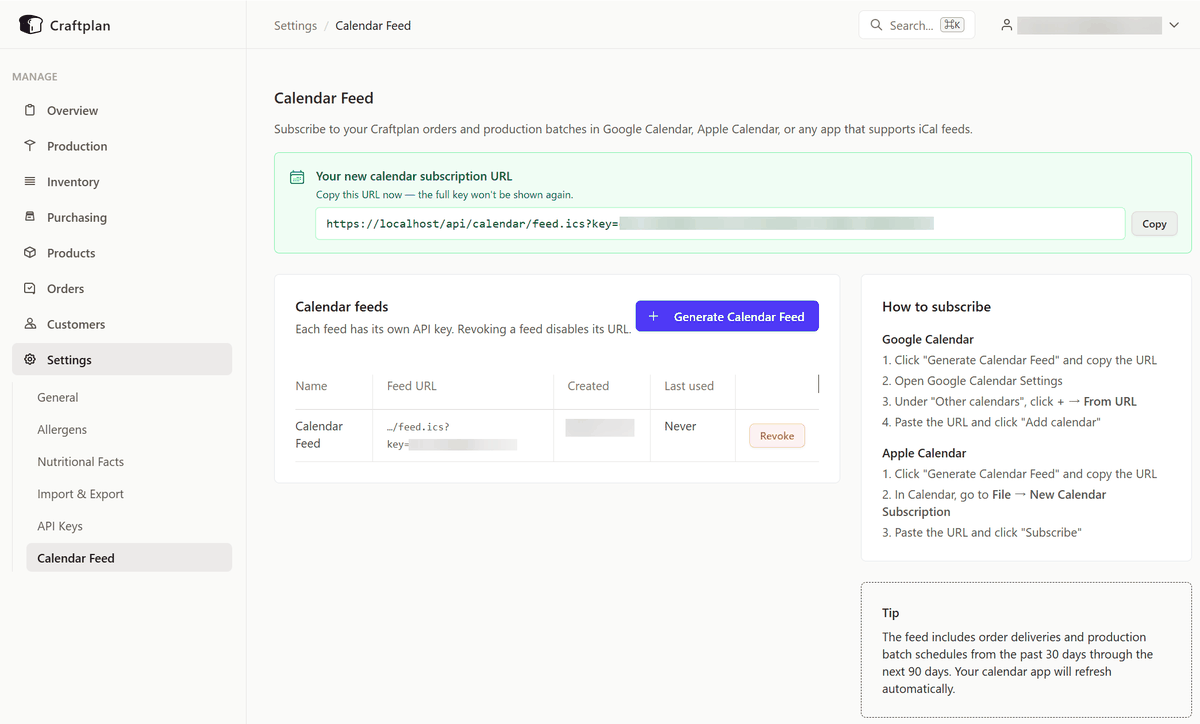
- URLs can be generated in iCalendar format, allowing you to check delivery dates and stock levels in Google Calendar , iOS calendar apps , etc.
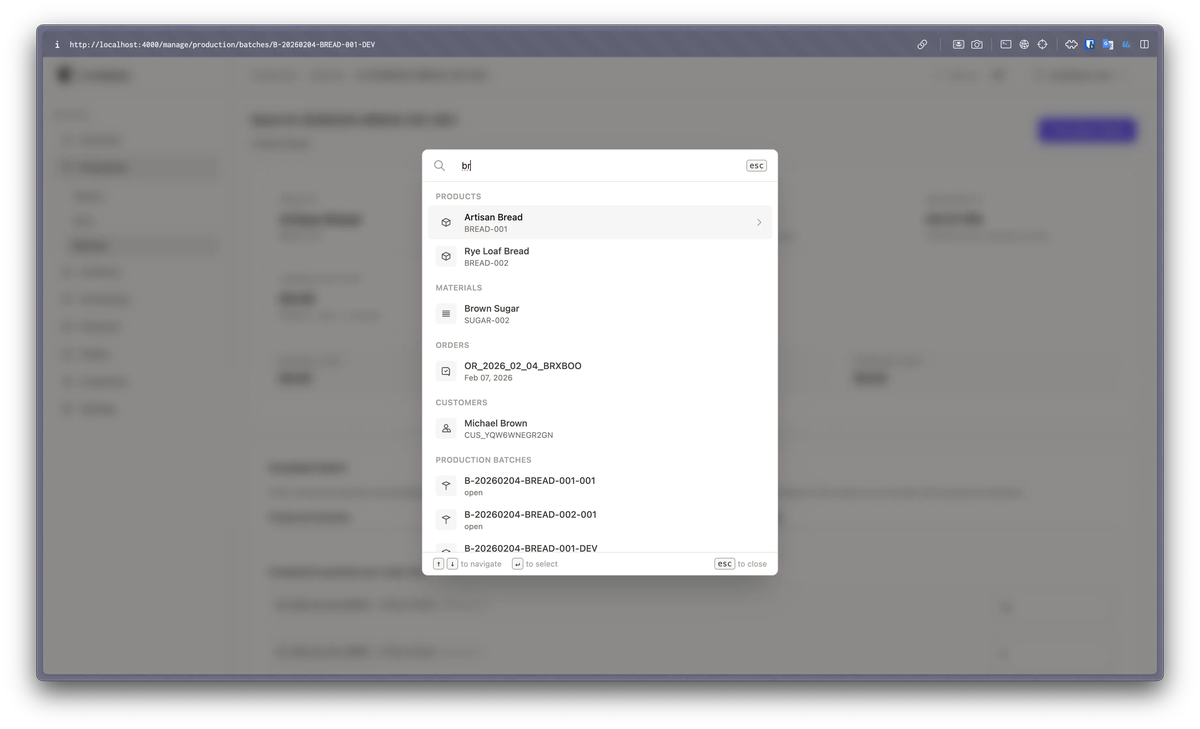
- You can search all categories on a single search screen, allowing you to find what you're looking for in just one search.
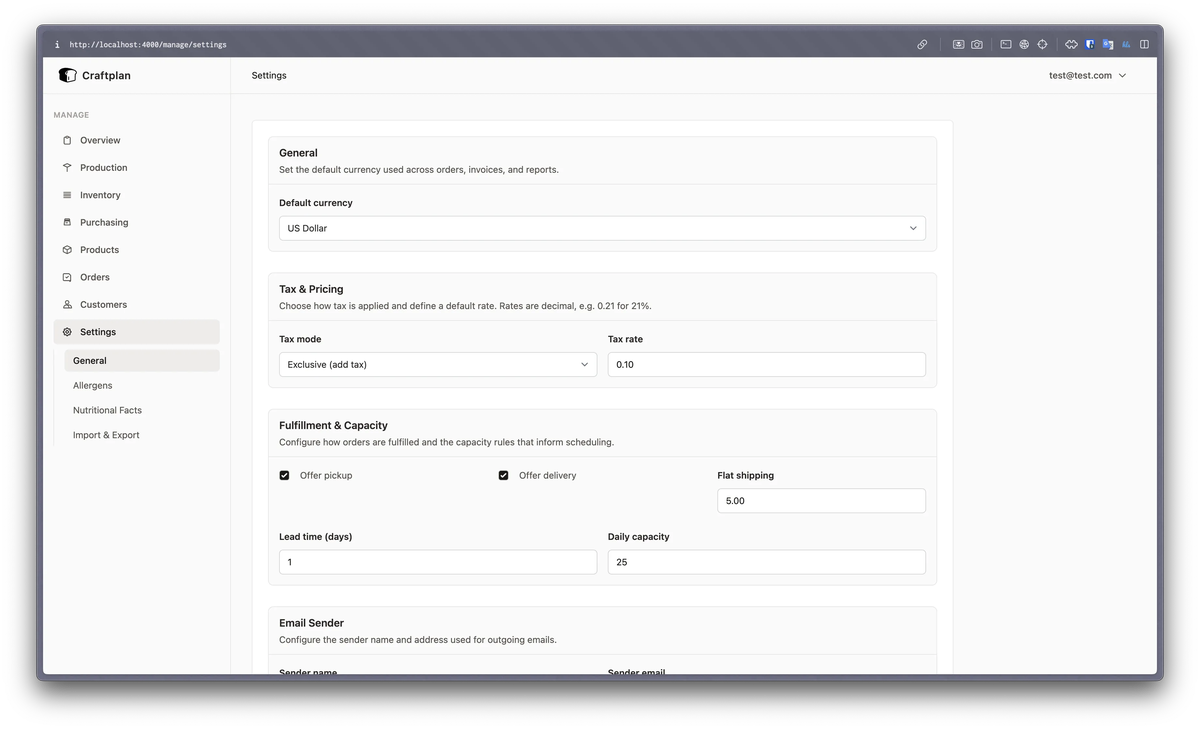
- Currency and tax settings can be easily changed, and an order limit can be set for a specified number of days, making it possible to prevent excessive production orders.
This includes all the essential tools needed for small food and craft shops.
◆How to install Craftplan
This time, we will set it up in an environment where
 mkdir craftplan
 CD Craft Print
 curl -O https://raw.githubusercontent.com/puemos/craftplan/main/docker-compose.yml
 curl -O https://raw.githubusercontent.com/puemos/craftplan/main/.env.example
Copy .env.example to create a new .env file.
cp .env.example .env
Edit the .env file and set the environment variables. Use the keys generated by the openssl command.
 #openssl rand -base64 48
 SECRET_KEY_BASE=【Output of the above command】

 #openssl rand -base64 48
 TOKEN_SIGNING_SECRET=【Output of the above command】

 #openssl rand -base64 32
 CLOAK_KEY=【Output of the above command】

 #Please set the password for PostgreSQL.
 POSTGRES_PASSWORD=【Your chosen password】
Start the container.
docker compose up -d
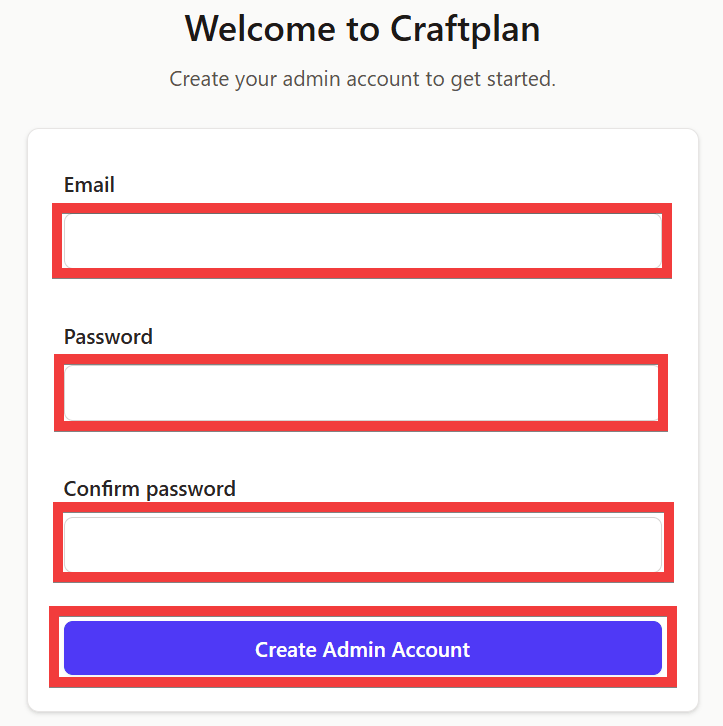
Once you've confirmed it's running in the logs, access 'http://localhost:4000/' in your browser. An administrator registration form will appear. Enter your email address in 'Email,' your password in 'Password' and 'Confirm password,' and click 'Create Admin Account.'
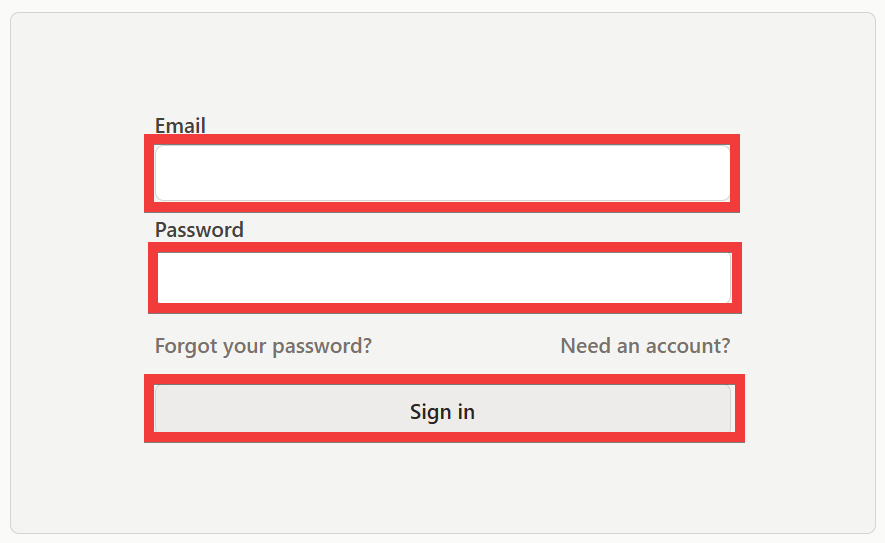
Once the administrator is created, the login screen will appear. Enter your email address in the 'Email' field and your password in the 'Password' field, then click 'Sign in'.
Once you have logged in, the dashboard will be displayed.
◆Regarding use in Japanese
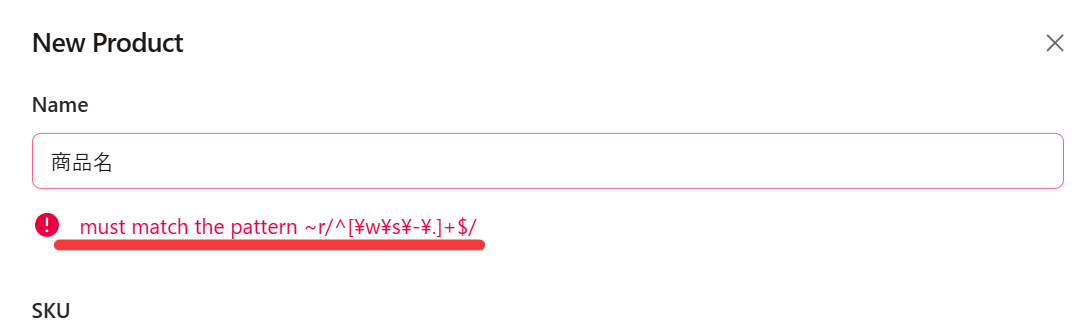
The UI is not available in Japanese, and product names and material names cannot be registered in Japanese.
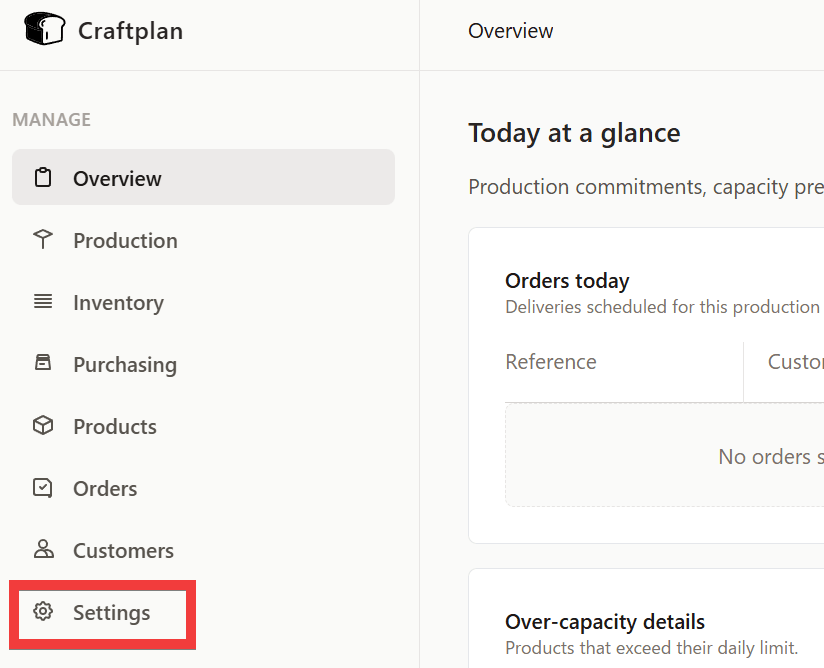
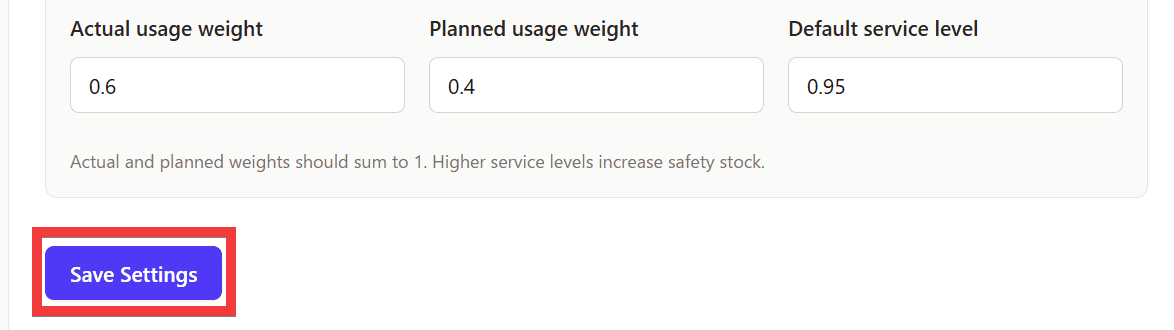
However, it is possible to change the currency unit to 'Yen'. Click 'Settings' from the menu.
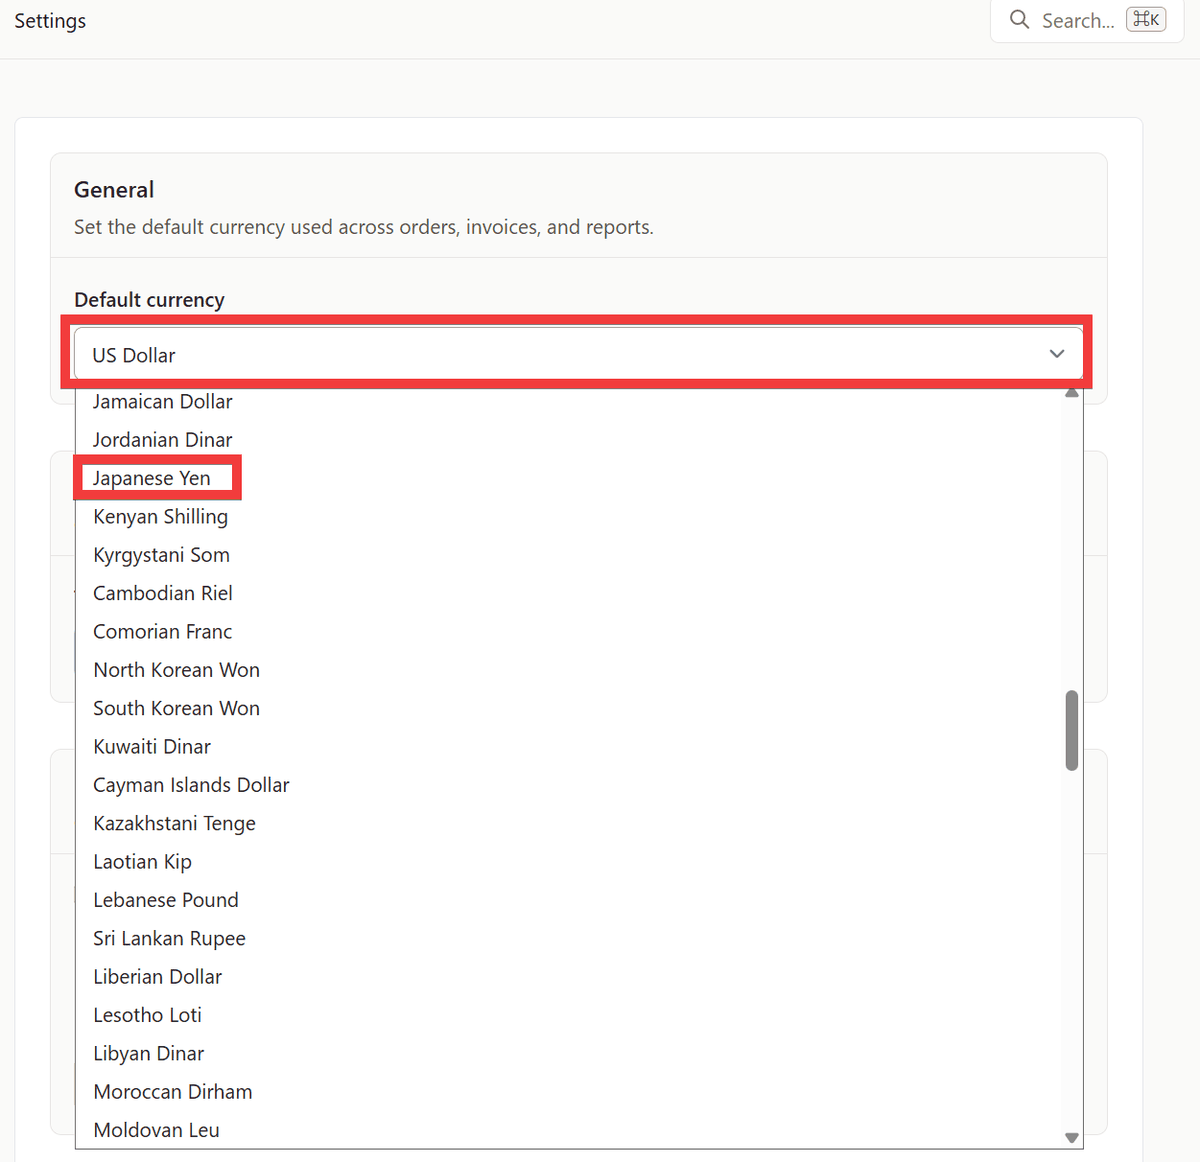
Click on the 'Default currency' option and select 'Japanese Yen'.
Click 'Save Settings' at the bottom of the settings screen to save your settings.
Furthermore, since individual tax rates cannot be set for materials or products, a different registration method is required when multiple tax rates are involved.
Related Posts: