Open source self-hostable & freely customizable billing management system ``Lotus'' usage review
The mechanism of 'billing only for the amount used' is simple and easy to understand, but on the other hand, the mechanism of calculating the billing amount by measuring the usage amount for each user tends to be quite complicated. ' Lotus ' is a tool that can solve such complicated billing management in one shot, so I actually checked what it can do.
Lotus—Open Source Pricing and Billing Infrastructure
Since the Lotus server is started using Docker, install Docker using the method that suits your environment from the link below.
Install Docker Engine | Docker Documentation
https://docs.docker.com/engine/install/
Since I am using CentOS this time, I entered the following command.
[code] sudo yum install -y yum-utils
sudo yum-config-manager \
--add-repo \
https://download.docker.com/linux/centos/docker-ce.repo
sudo yum install docker-ce docker-ce-cli containerd.io docker-buildx-plugin docker-compose-plugin
sudo systemctl start docker[/code]
Connect to the server with ssh and clone the repository with the following command.
[code]git clone https://github.com/uselotus/lotus.git && cd lotus[/code]
Since we will be using Docker-compose version 2 this time, we will partially rewrite 'self-host.sh' in the 'scripts' folder.
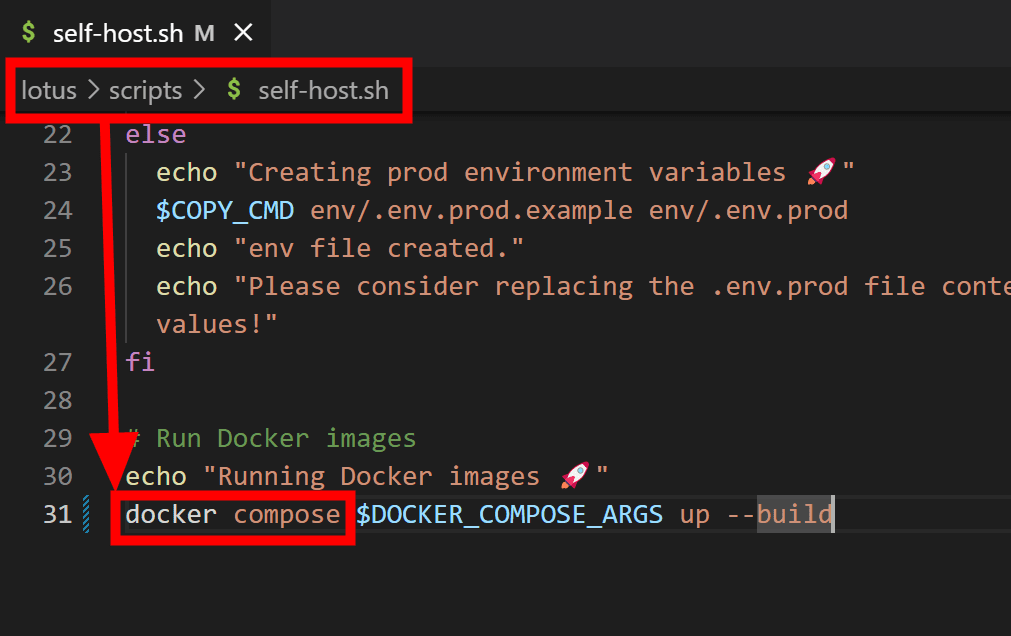
After rewriting, enter the following command. The necessary files will be automatically downloaded and the server build will start. It seems that you need a machine with about 8GB of memory because if you build on a cheap low-spec server of a cloud service, it will fail due to insufficient memory.
[code]sudo ./scripts/self-host.sh[/code]
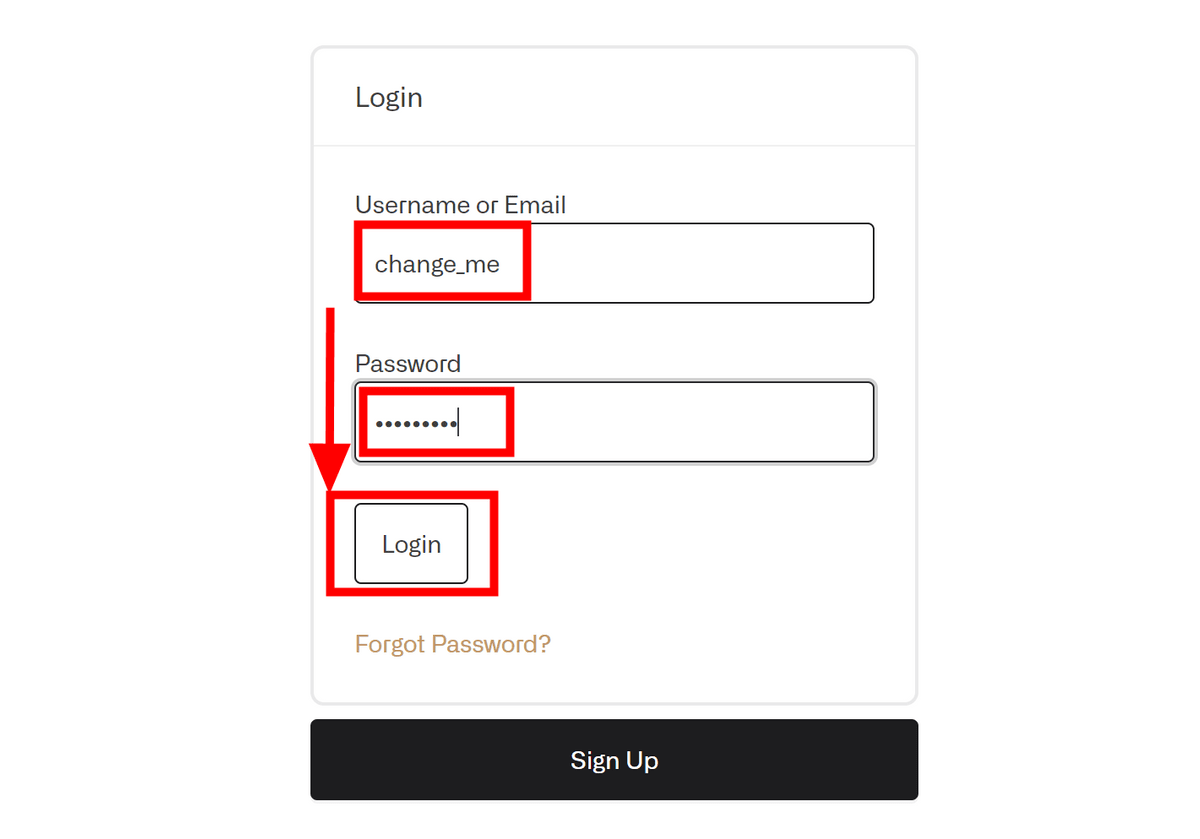
If you wait for several minutes, the build will be completed and the server will start up automatically. When you access the server with a browser, the login screen will be displayed, so enter 'change_me' in the user name and password fields and click 'Login'.
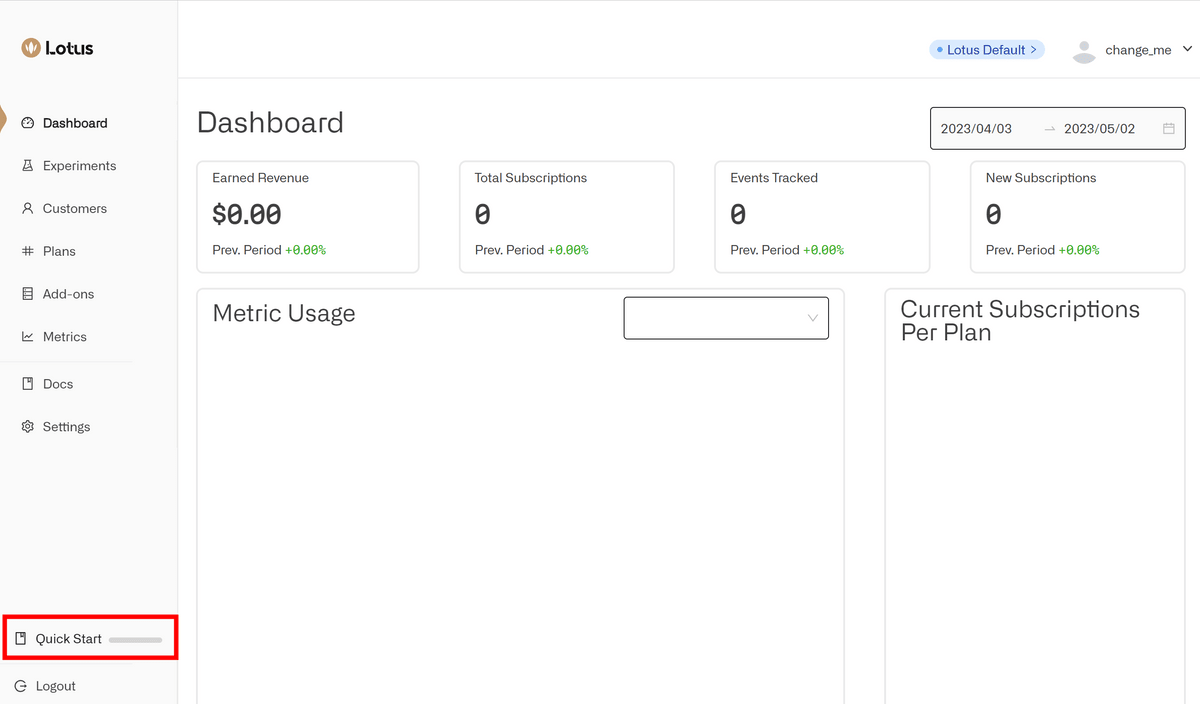
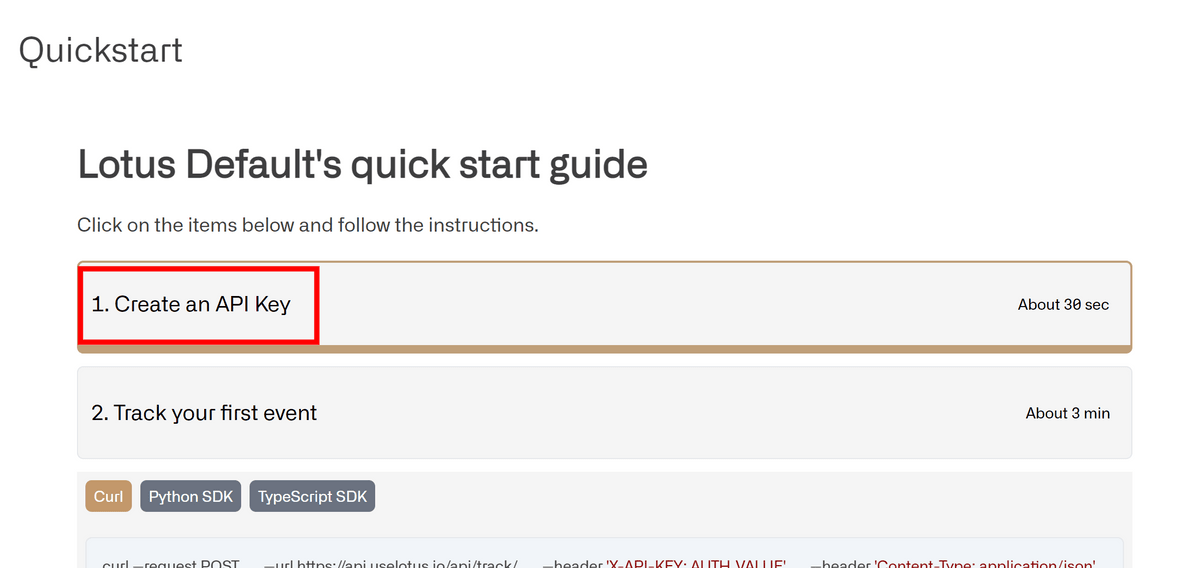
A dashboard is displayed. Since I want to master the general usage, click 'Quick Start' in the lower left to display the quick start guide.
First, you need to create an API key. Click 'Create an API Key'.
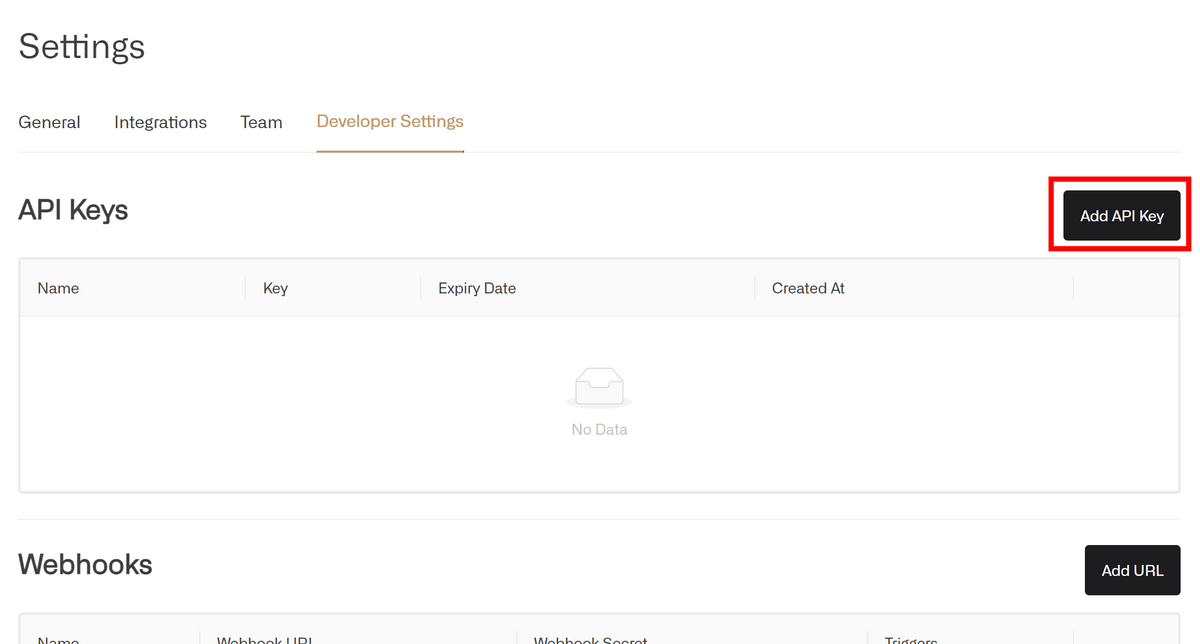
Go to the API key management screen, so click 'Add API Key'.
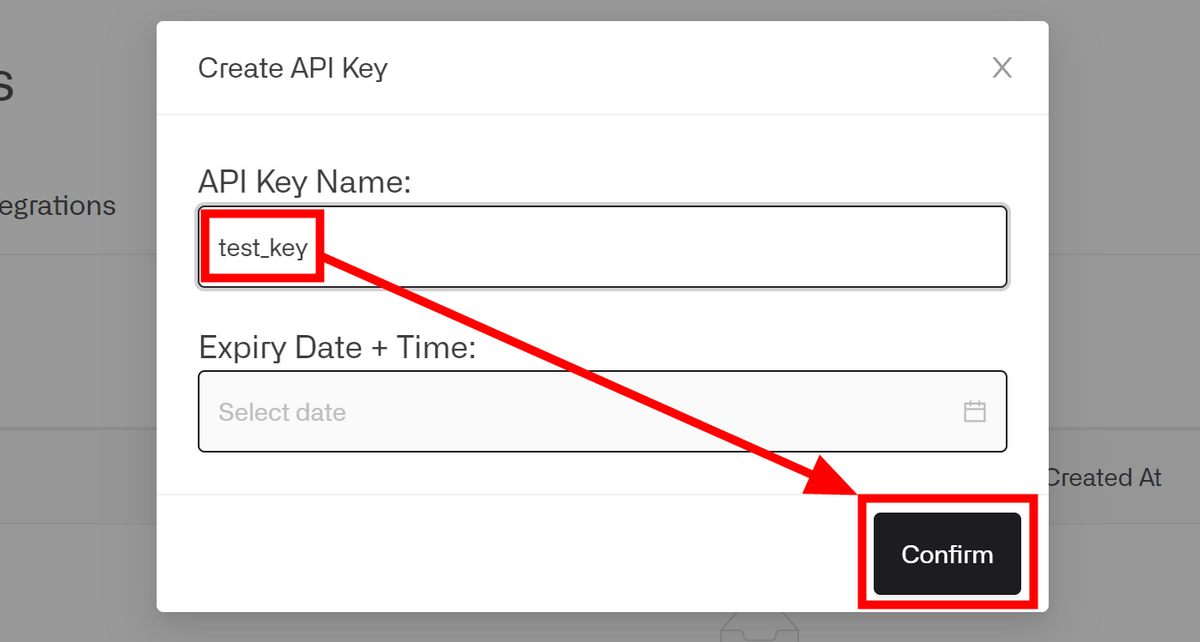
Enter the name of the key and click 'Confirm'.
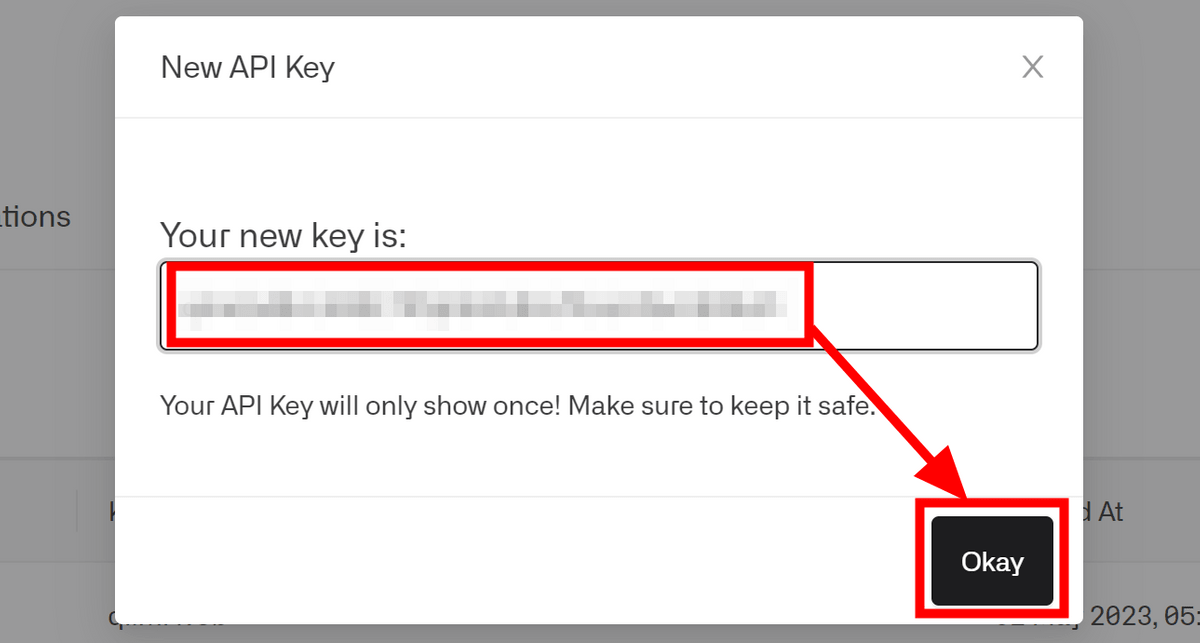
An API key has been created. You can only check the new API key at this time, so copy it and save it. Click 'Okay' when you can save.
Click Quick Start again and click Track your first event. The command for sending the event is displayed below, so copy it ......

Rewrite the URL to the URL of the server, and rewrite the API key part to the API key you copied earlier.
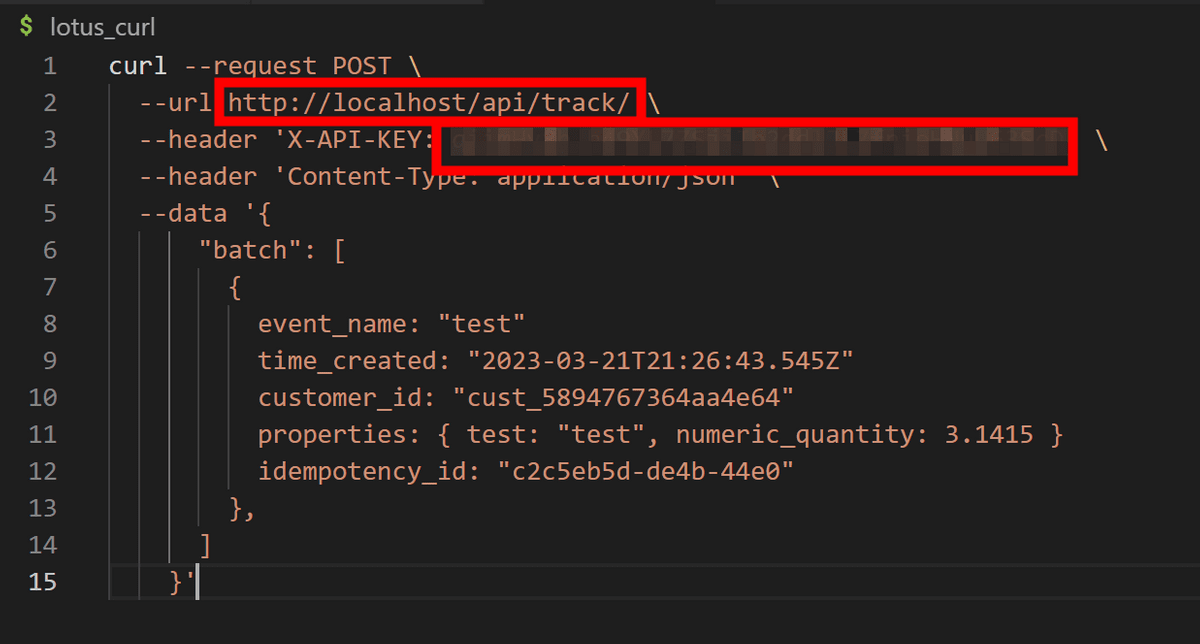
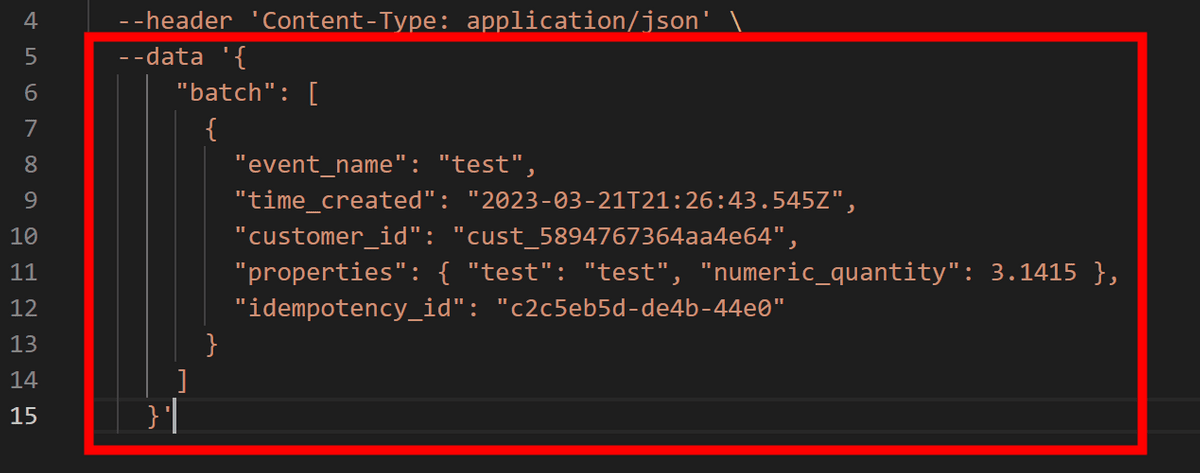
When I tried to send it in this state, I got an error that the JSON format was wrong.

If you look closely, the key is not enclosed in double quotes, there is no comma between items, and it is not correct as a JSON format at all. The future is a little uneasy, but I'm going to fix the format by hand.
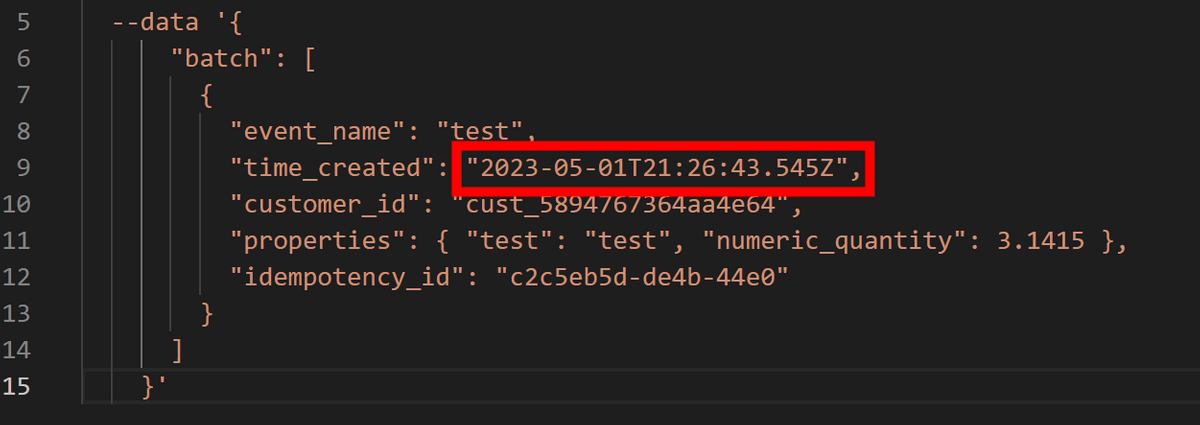
An error occurred again. The date and time of the event must be within 30 days.

So change the date and time accordingly.
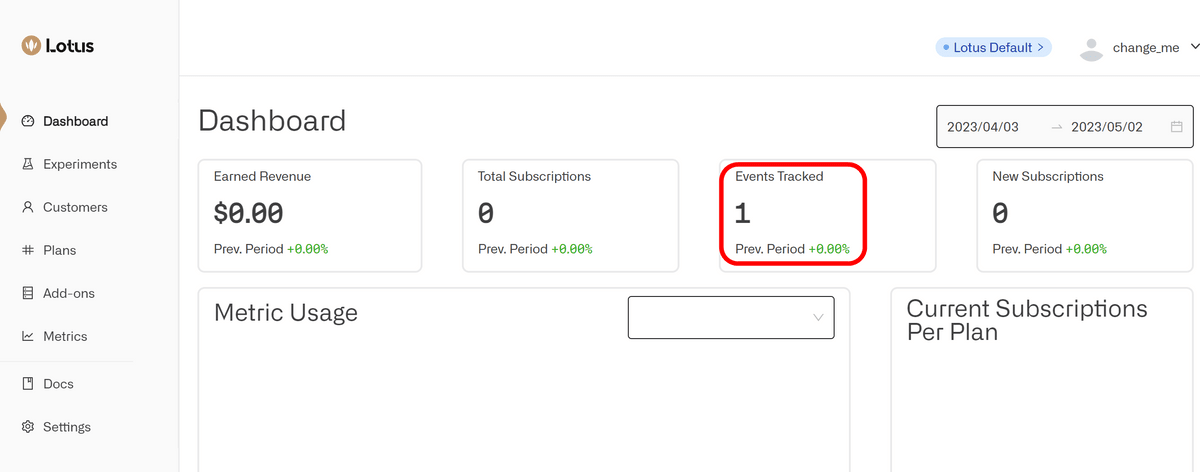
I finally succeeded in sending the event.

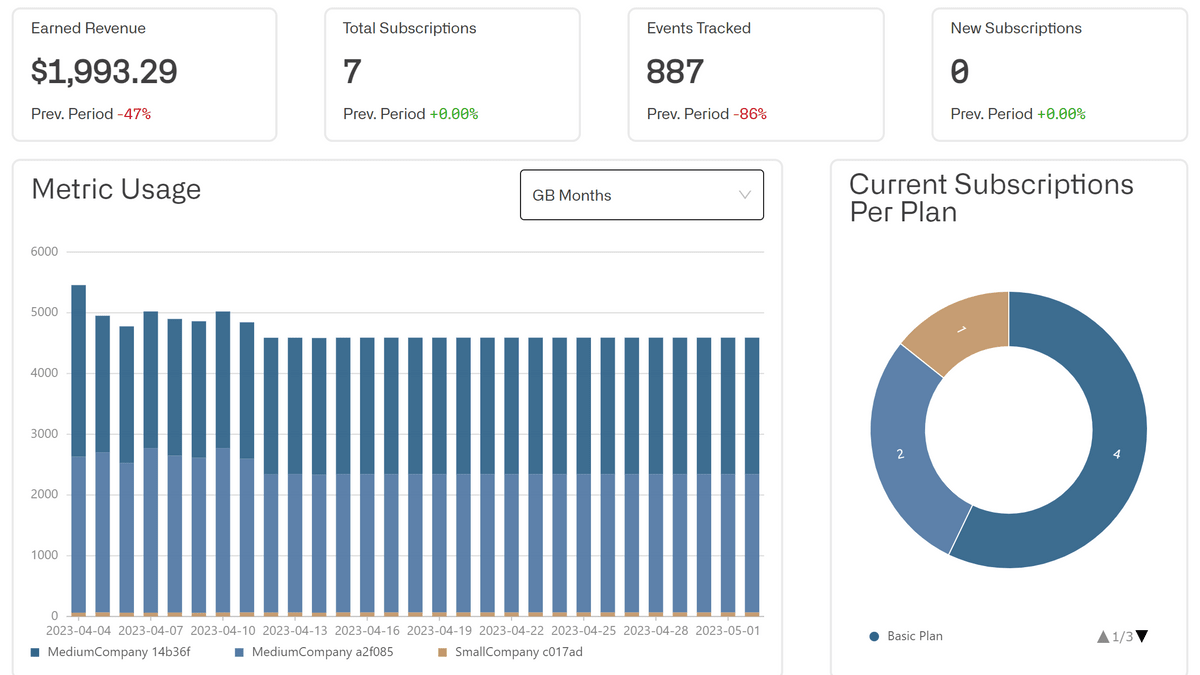
Looking at the dashboard, you can see that the number of 'Events Tracked' is 1 and that the event is being received.
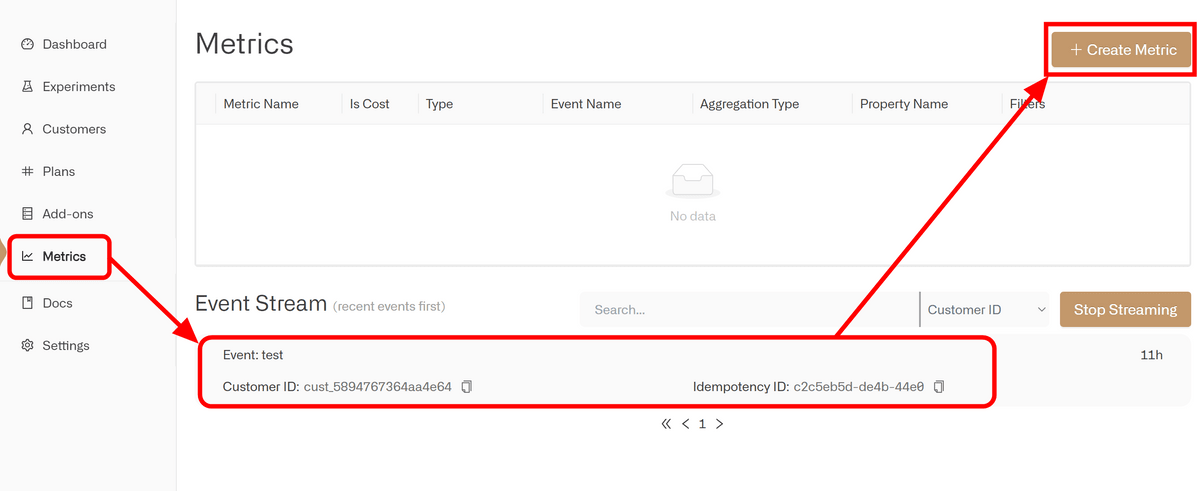
Open 'Quick Start' again and click 'Create a Metric' this time.

Metrics screen opened. You can check the details of the event here. Click Create Metric in the upper right.
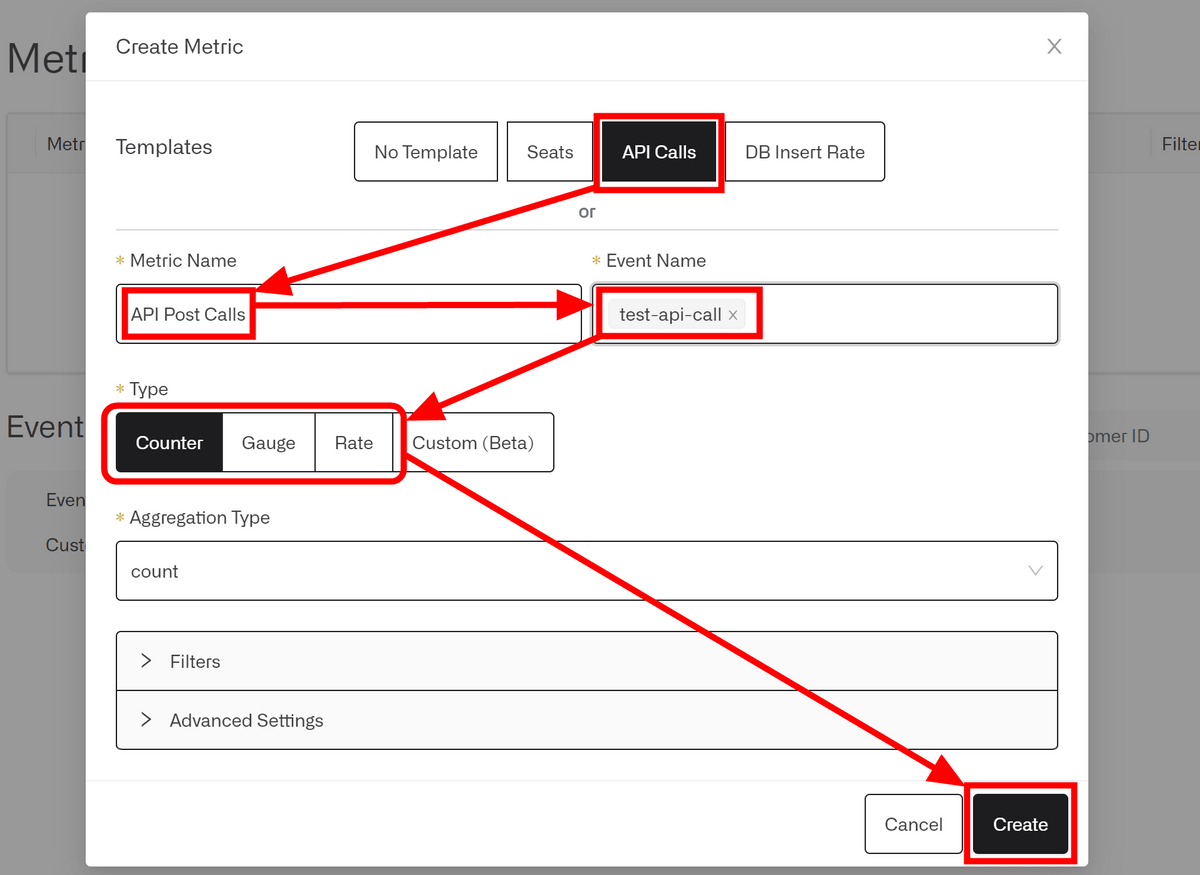
Metric sets how the event is measured. Select 'API Calls' in the template, and clearly describe what you want to measure in Metric Name. Enter the name of the event to be processed by this Metric in the Event Name field. There are three types of types: 'Counter' that calculates simple counts, 'Gauge' that calculates usage within a certain period of time, such as the capacity of saved files, and occurs in a short period of time such as a few seconds or minutes 'Rate' is provided to measure the number of events that occurred. This time, leave 'Counter' as the template and click 'Create'.
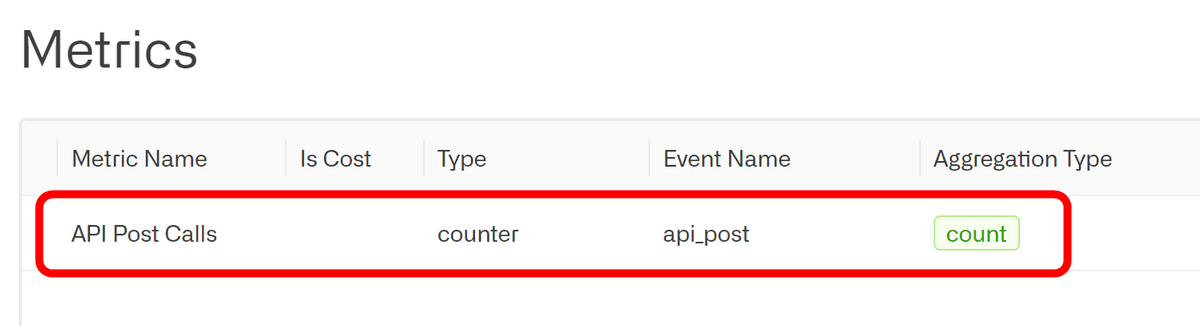
Metric was created.
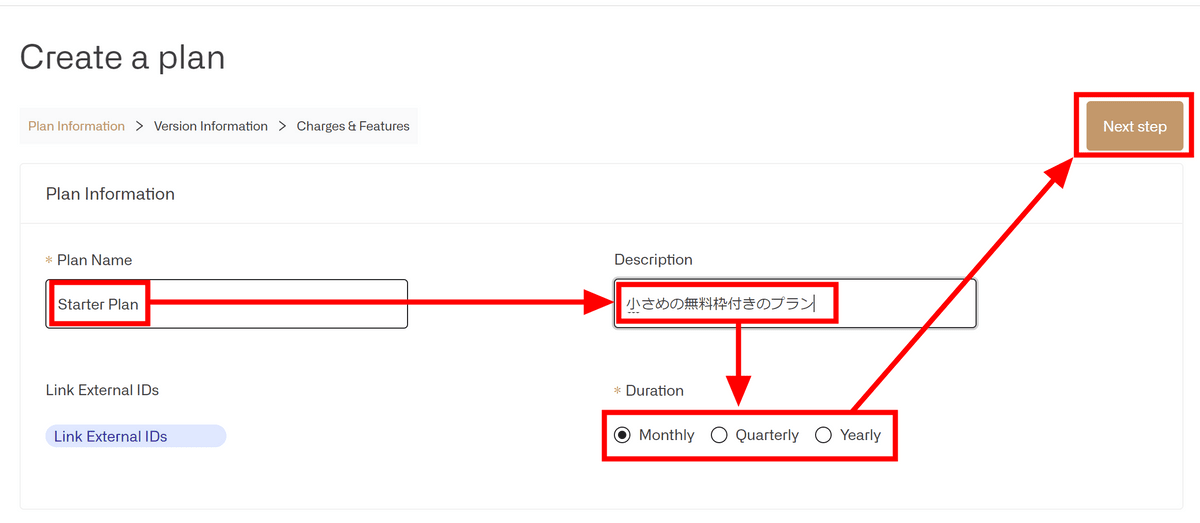
Click Quick Start from the left menu, then click Create a Plan.

The plan creation screen is displayed. You can set the price for your plan. Enter a name and description, and choose when your plan renews. This time, I clicked 'Monthly' to update the plan every month. After setting, click 'Next step'.
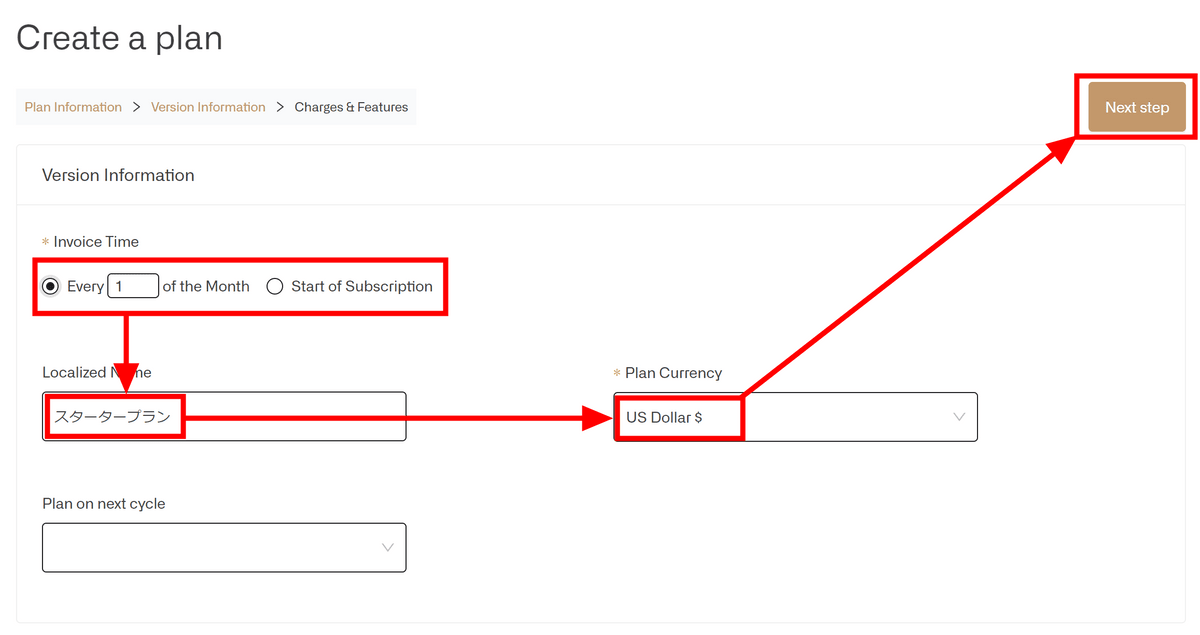
Select the date and time when the charge occurred. I set it to the 1st of every month. Enter the name of this plan corresponding to the currency in the Localized Name field and select the currency. At the time of writing the article, 19 currencies including dollars and euros could be set, but there was no Japanese yen. Select dollars and click 'Next step'.
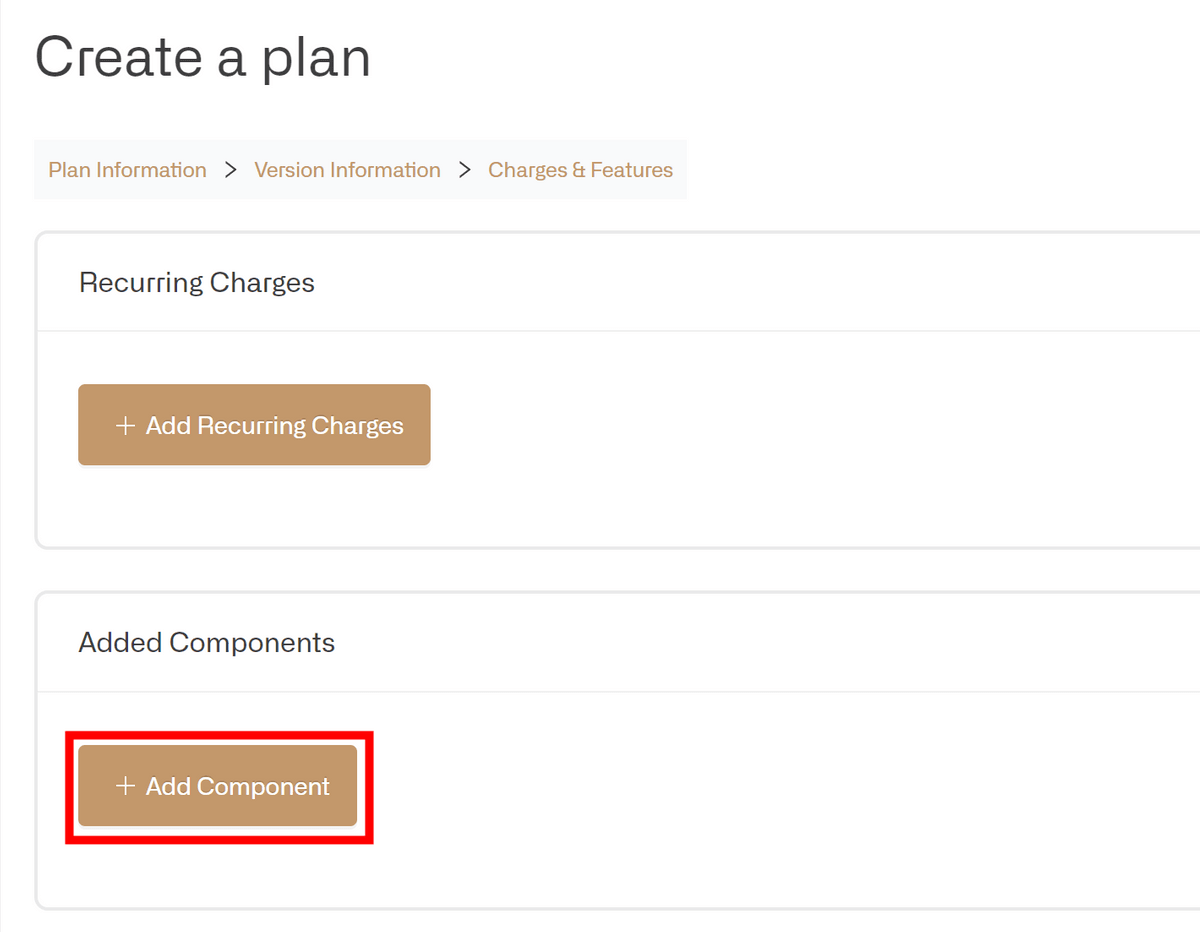
Finally, set the price. Click 'Add Component'.
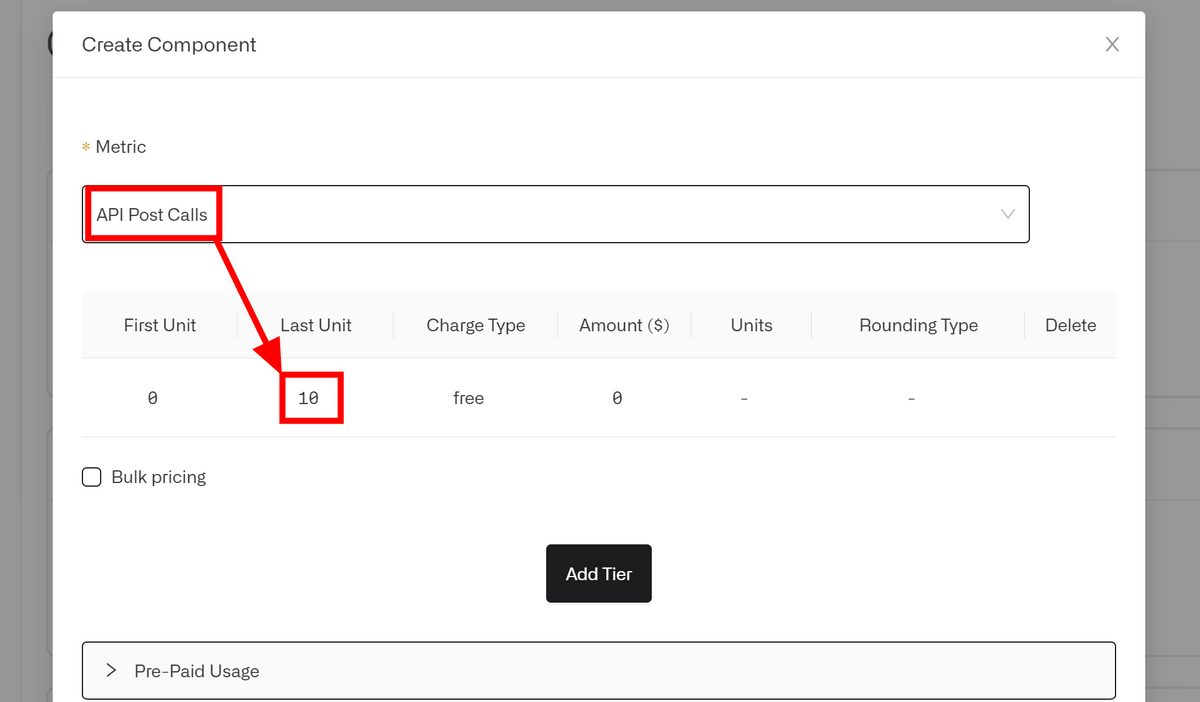
Select the Metric you want to charge from the created Metrics and enter the quantity. Since the quantity was set to '10' this time, it is possible to generate the 'API Post Calls' event for free up to 10 times.
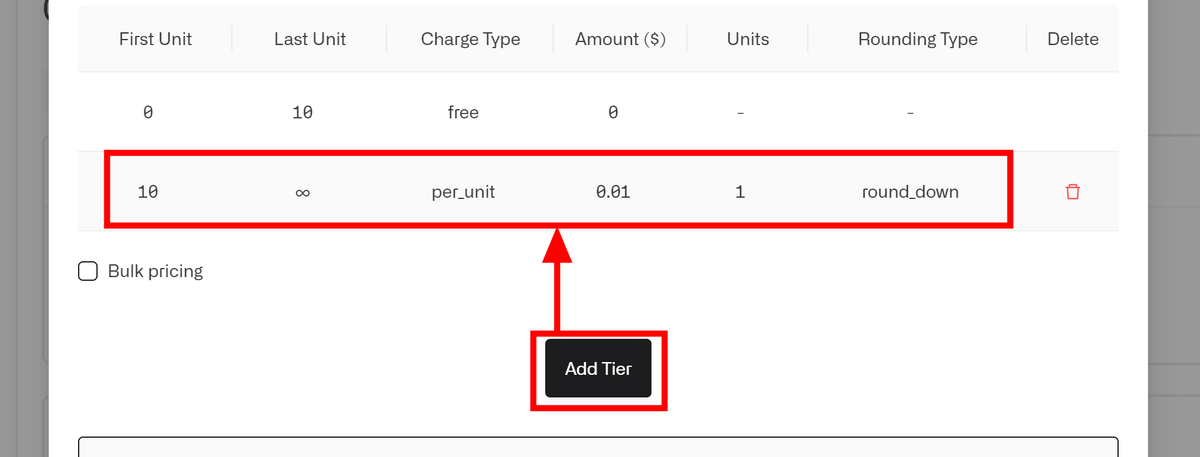
By clicking 'Add Tier', you can set the amount when the quantity increases further. I tried to charge $0.01 for each occurrence of an event after 10.
You can freely customize the usage measurement timing and reset timing, but this time set it to the same as the plan period. When the setting is completed, click 'Create New Component'.
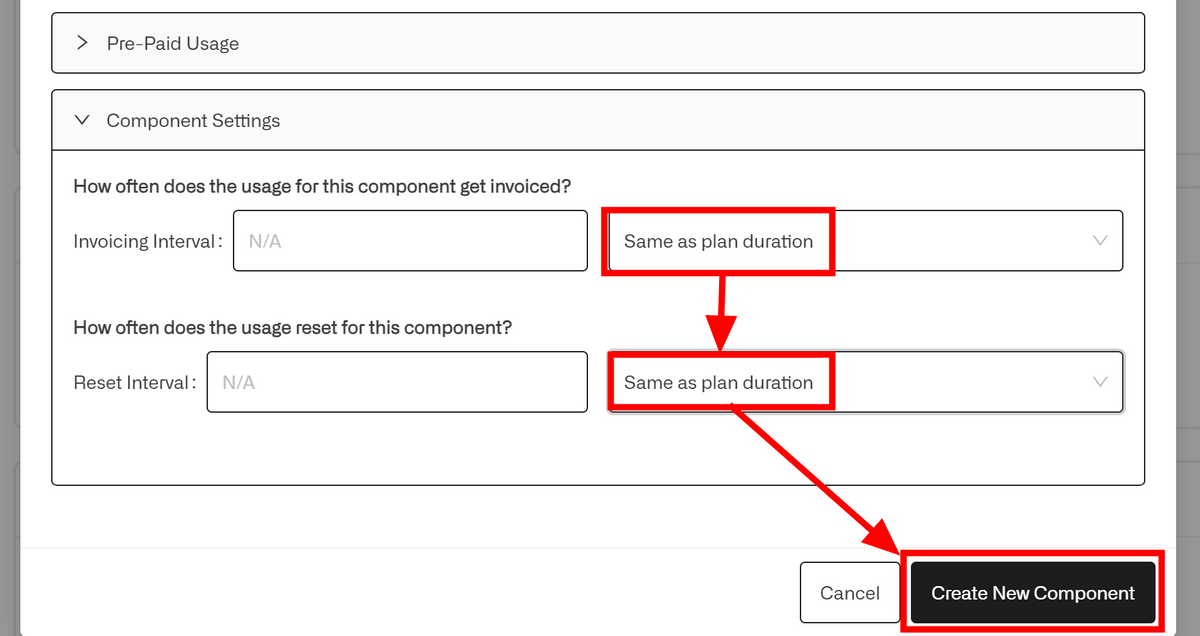
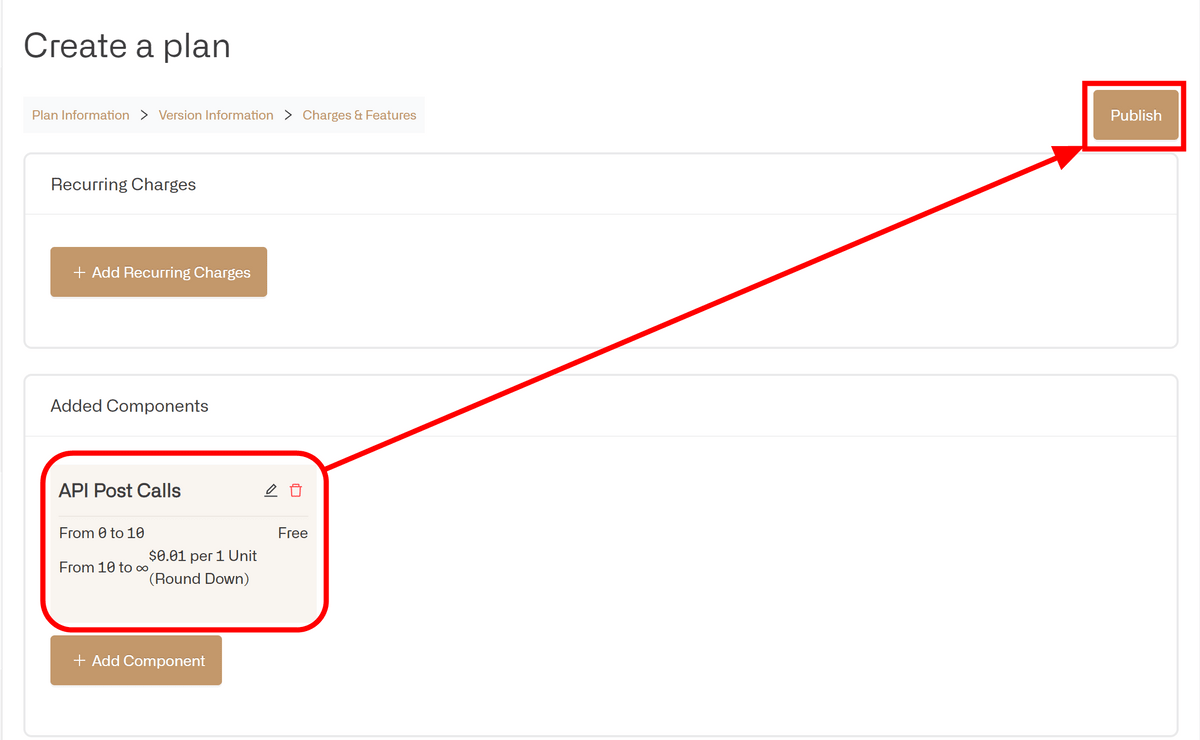
Component was created. In addition to this event-proportional fee setting, you can set a fixed fee, discount amount, and discount rate for each billing period, but this time just click 'Publish'.
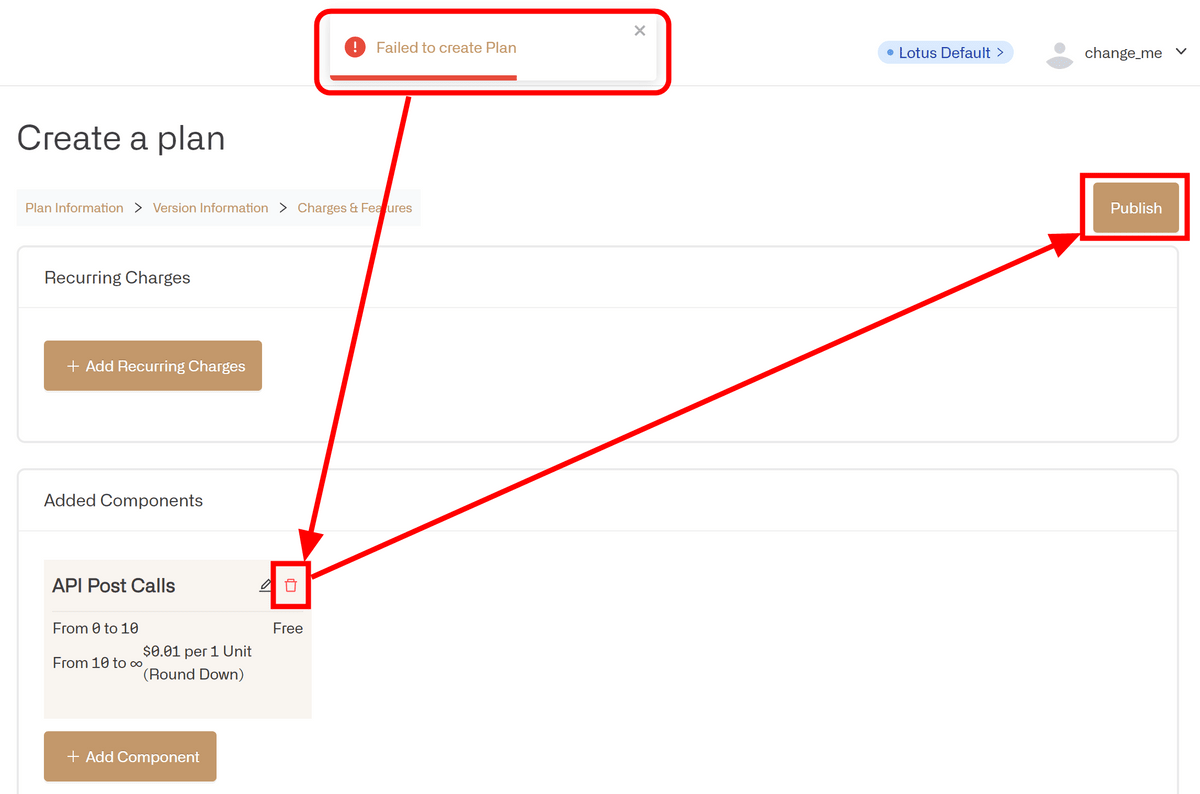
However, an error occurred and the plan could not be created. After repeated verification for a while, it was found that creating a plan failed due to an internal server error if 'Component' was attached, so click the trash can mark in the upper right of Component to delete Component, 'Click.
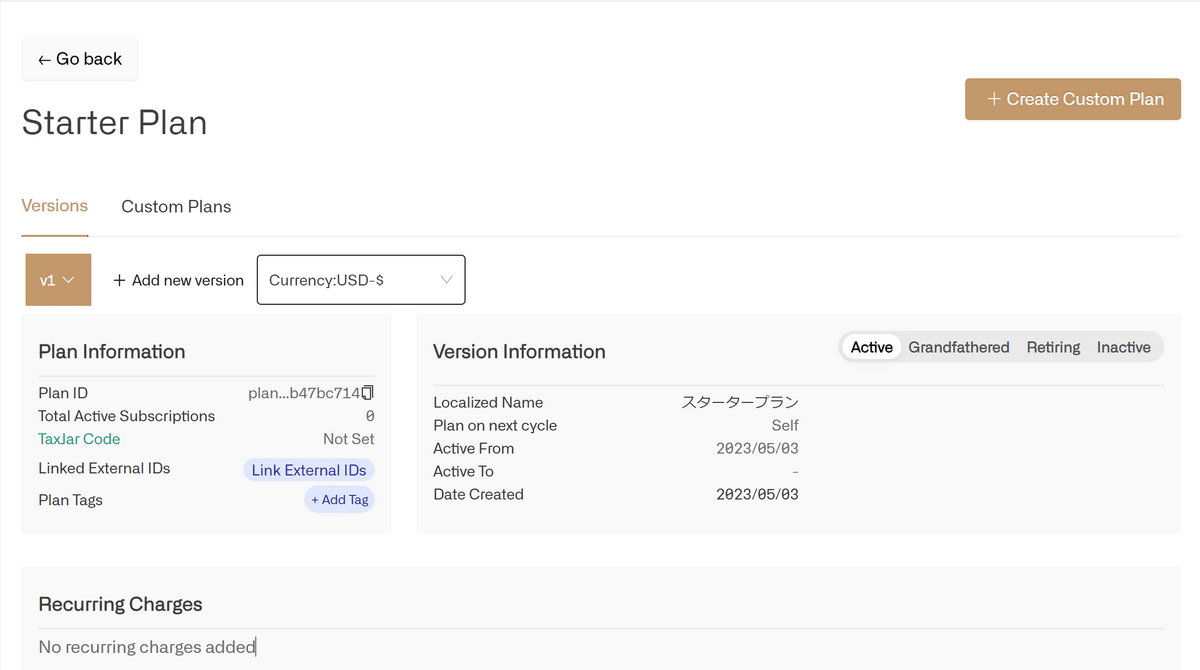
Plan created successfully. Click on the created plan to check the contents.

The plan screen looks something like this. It seems that you can manage custom plans and plan versions that modify the contents of the plan to suit your customers.
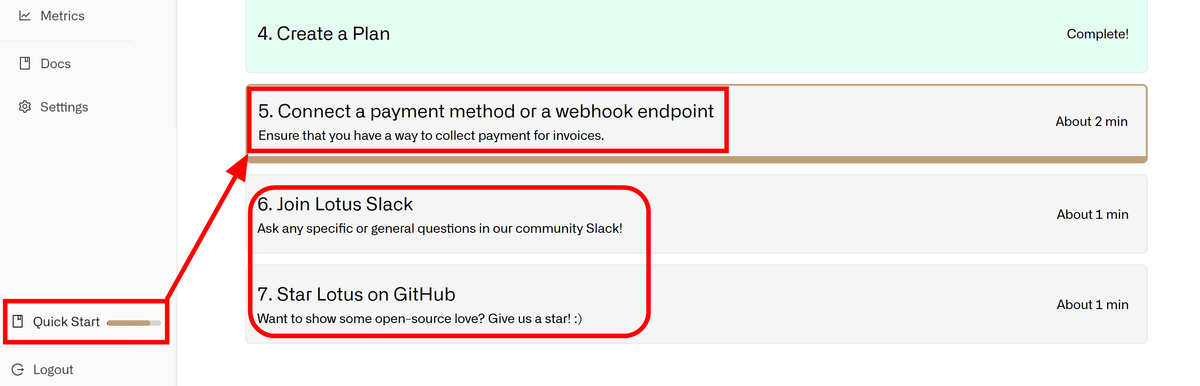
After clicking on 'Quick Start' and confirming, the next step was to process the payment. The last two are for communication with developers, so the payment-related process is effectively the final Quick Start. Click 'Connect a payment method or a webhook endpoint'.
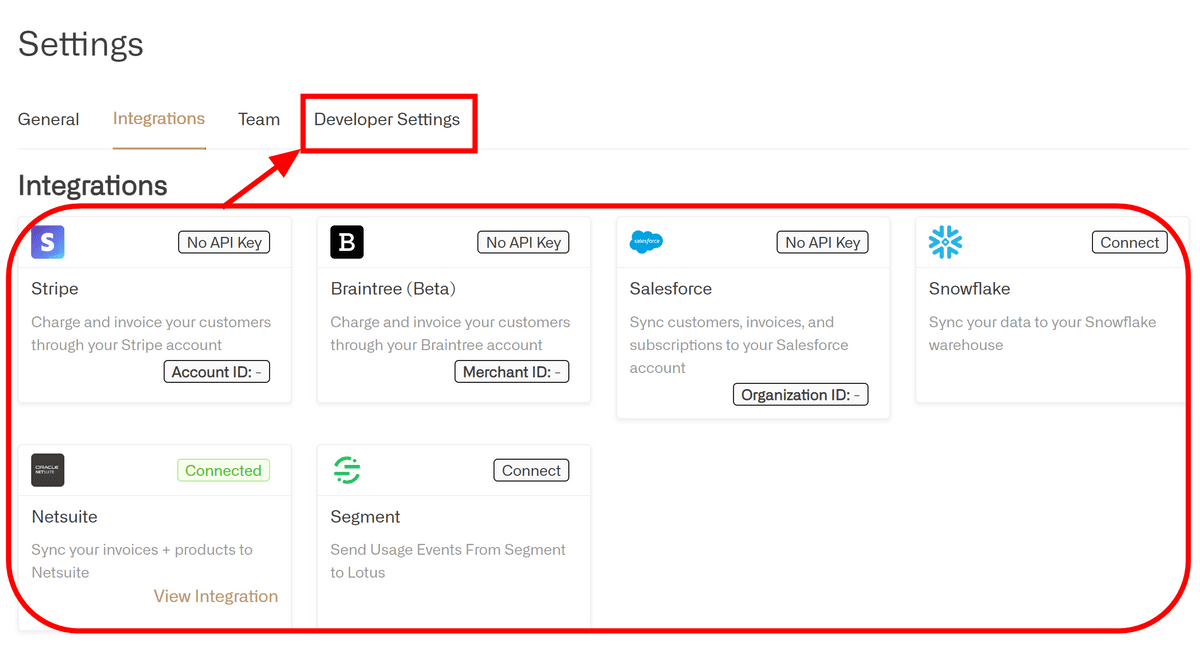
Can be connected with 'Stripe', 'Braintree', 'Salesforce', 'Snowflake', 'Netsuite', and 'Segment' as payment providers. If you do not use these payment providers, click 'Developer Settings' ...
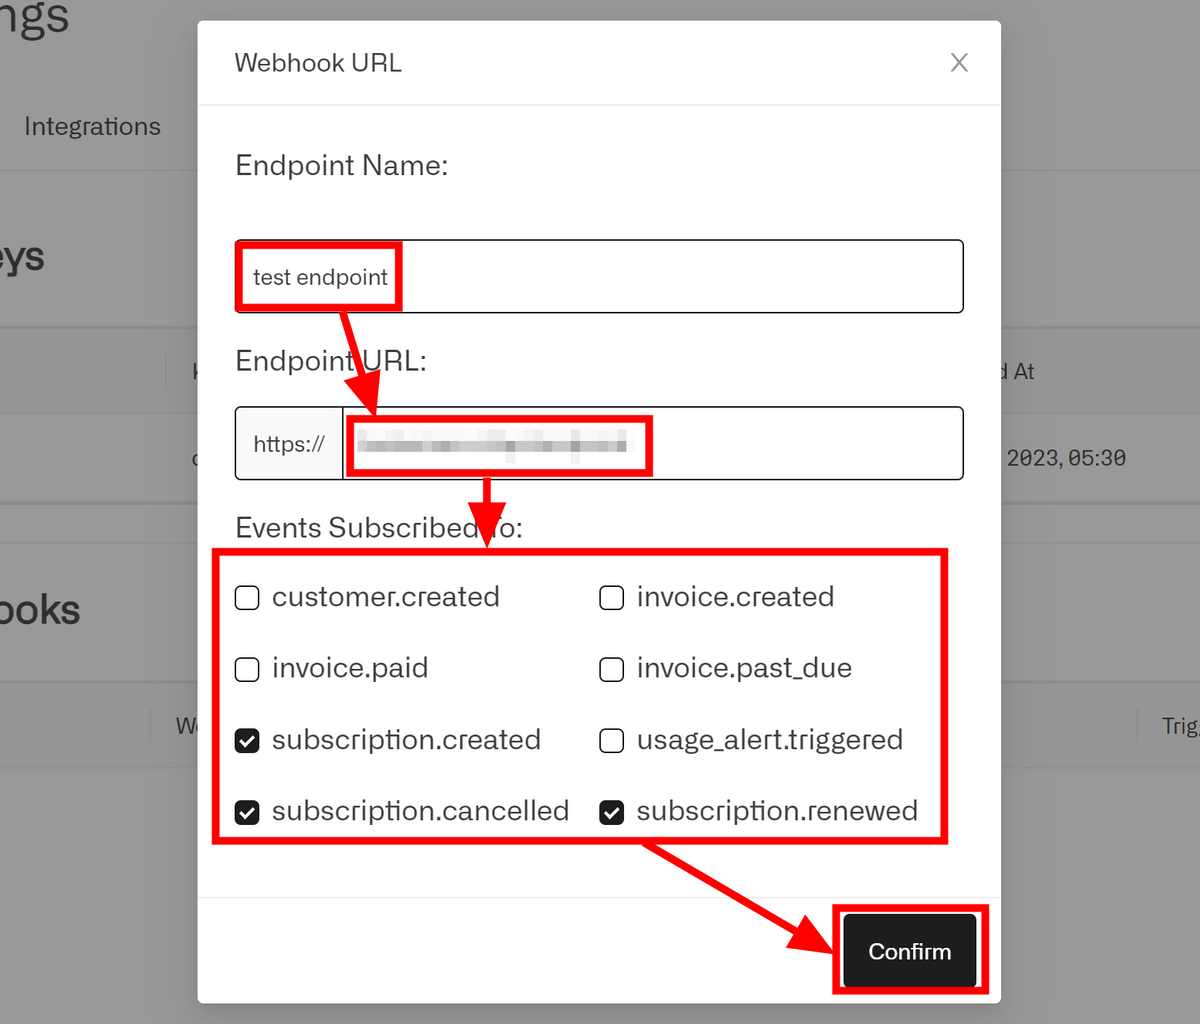
OK if you use Webhook. Click Add URL.

Set the name and URL of the Endpoint, select which event to receive notification and click 'Confirm'. If you receive a subscription-related notification, you can decide whether to provide or discontinue the service, and if you receive an invoice-related notification, you can know who to charge and what amount.
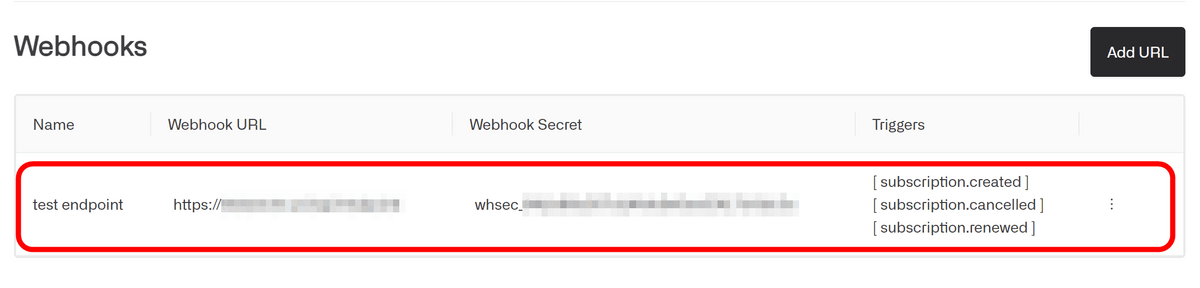
Webhook supports
There was a bug in the settings this time, so we weren't able to actually measure the billing amount, but Lotus has
Related Posts:


in Software, Web Service, Review, Web Application, Posted by log1d_ts