'llmfit' is a terminal tool that teaches you the appropriate AI model based on your system's memory, CPU, and GPU.

With generative AI constantly in the news these days, anyone with a reasonably powerful PC has likely been tempted at one time or another to try running a generative AI locally. However, unless you have a deep knowledge of AI models, it can be difficult to know which AI model will run smoothly in your environment. Even if you try to find advice online, it's unlikely you'll find anyone who can provide advice that takes into account the impact of different PC specs. ' llmfit ' is a dream tool that tells you which AI model will run smoothly based on the environment of your running PC.
GitHub - AlexsJones/llmfit: Hundreds of models & providers. One command to find what runs on your hardware. · GitHub
◆Installation
This time, we will install llmfit on Windows 11. Checking the official GitHub page shows how to use Scoop , so we will first install Scoop. Launch PowerShell in the Windows terminal and run the following command:
[code]
Set-ExecutionPolicy -ExecutionPolicy RemoteSigned -Scope CurrentUser
Invoke-RestMethod -Uri https://get.scoop.sh | Invoke-Expression
[/code]
Next, run the following command in PowerShell to begin the installation:
[code]
scoop install llmfit
[/code]
The installation is complete when the message 'llmfit (version number) was installed successfully!!' is displayed in the terminal.

◆Start
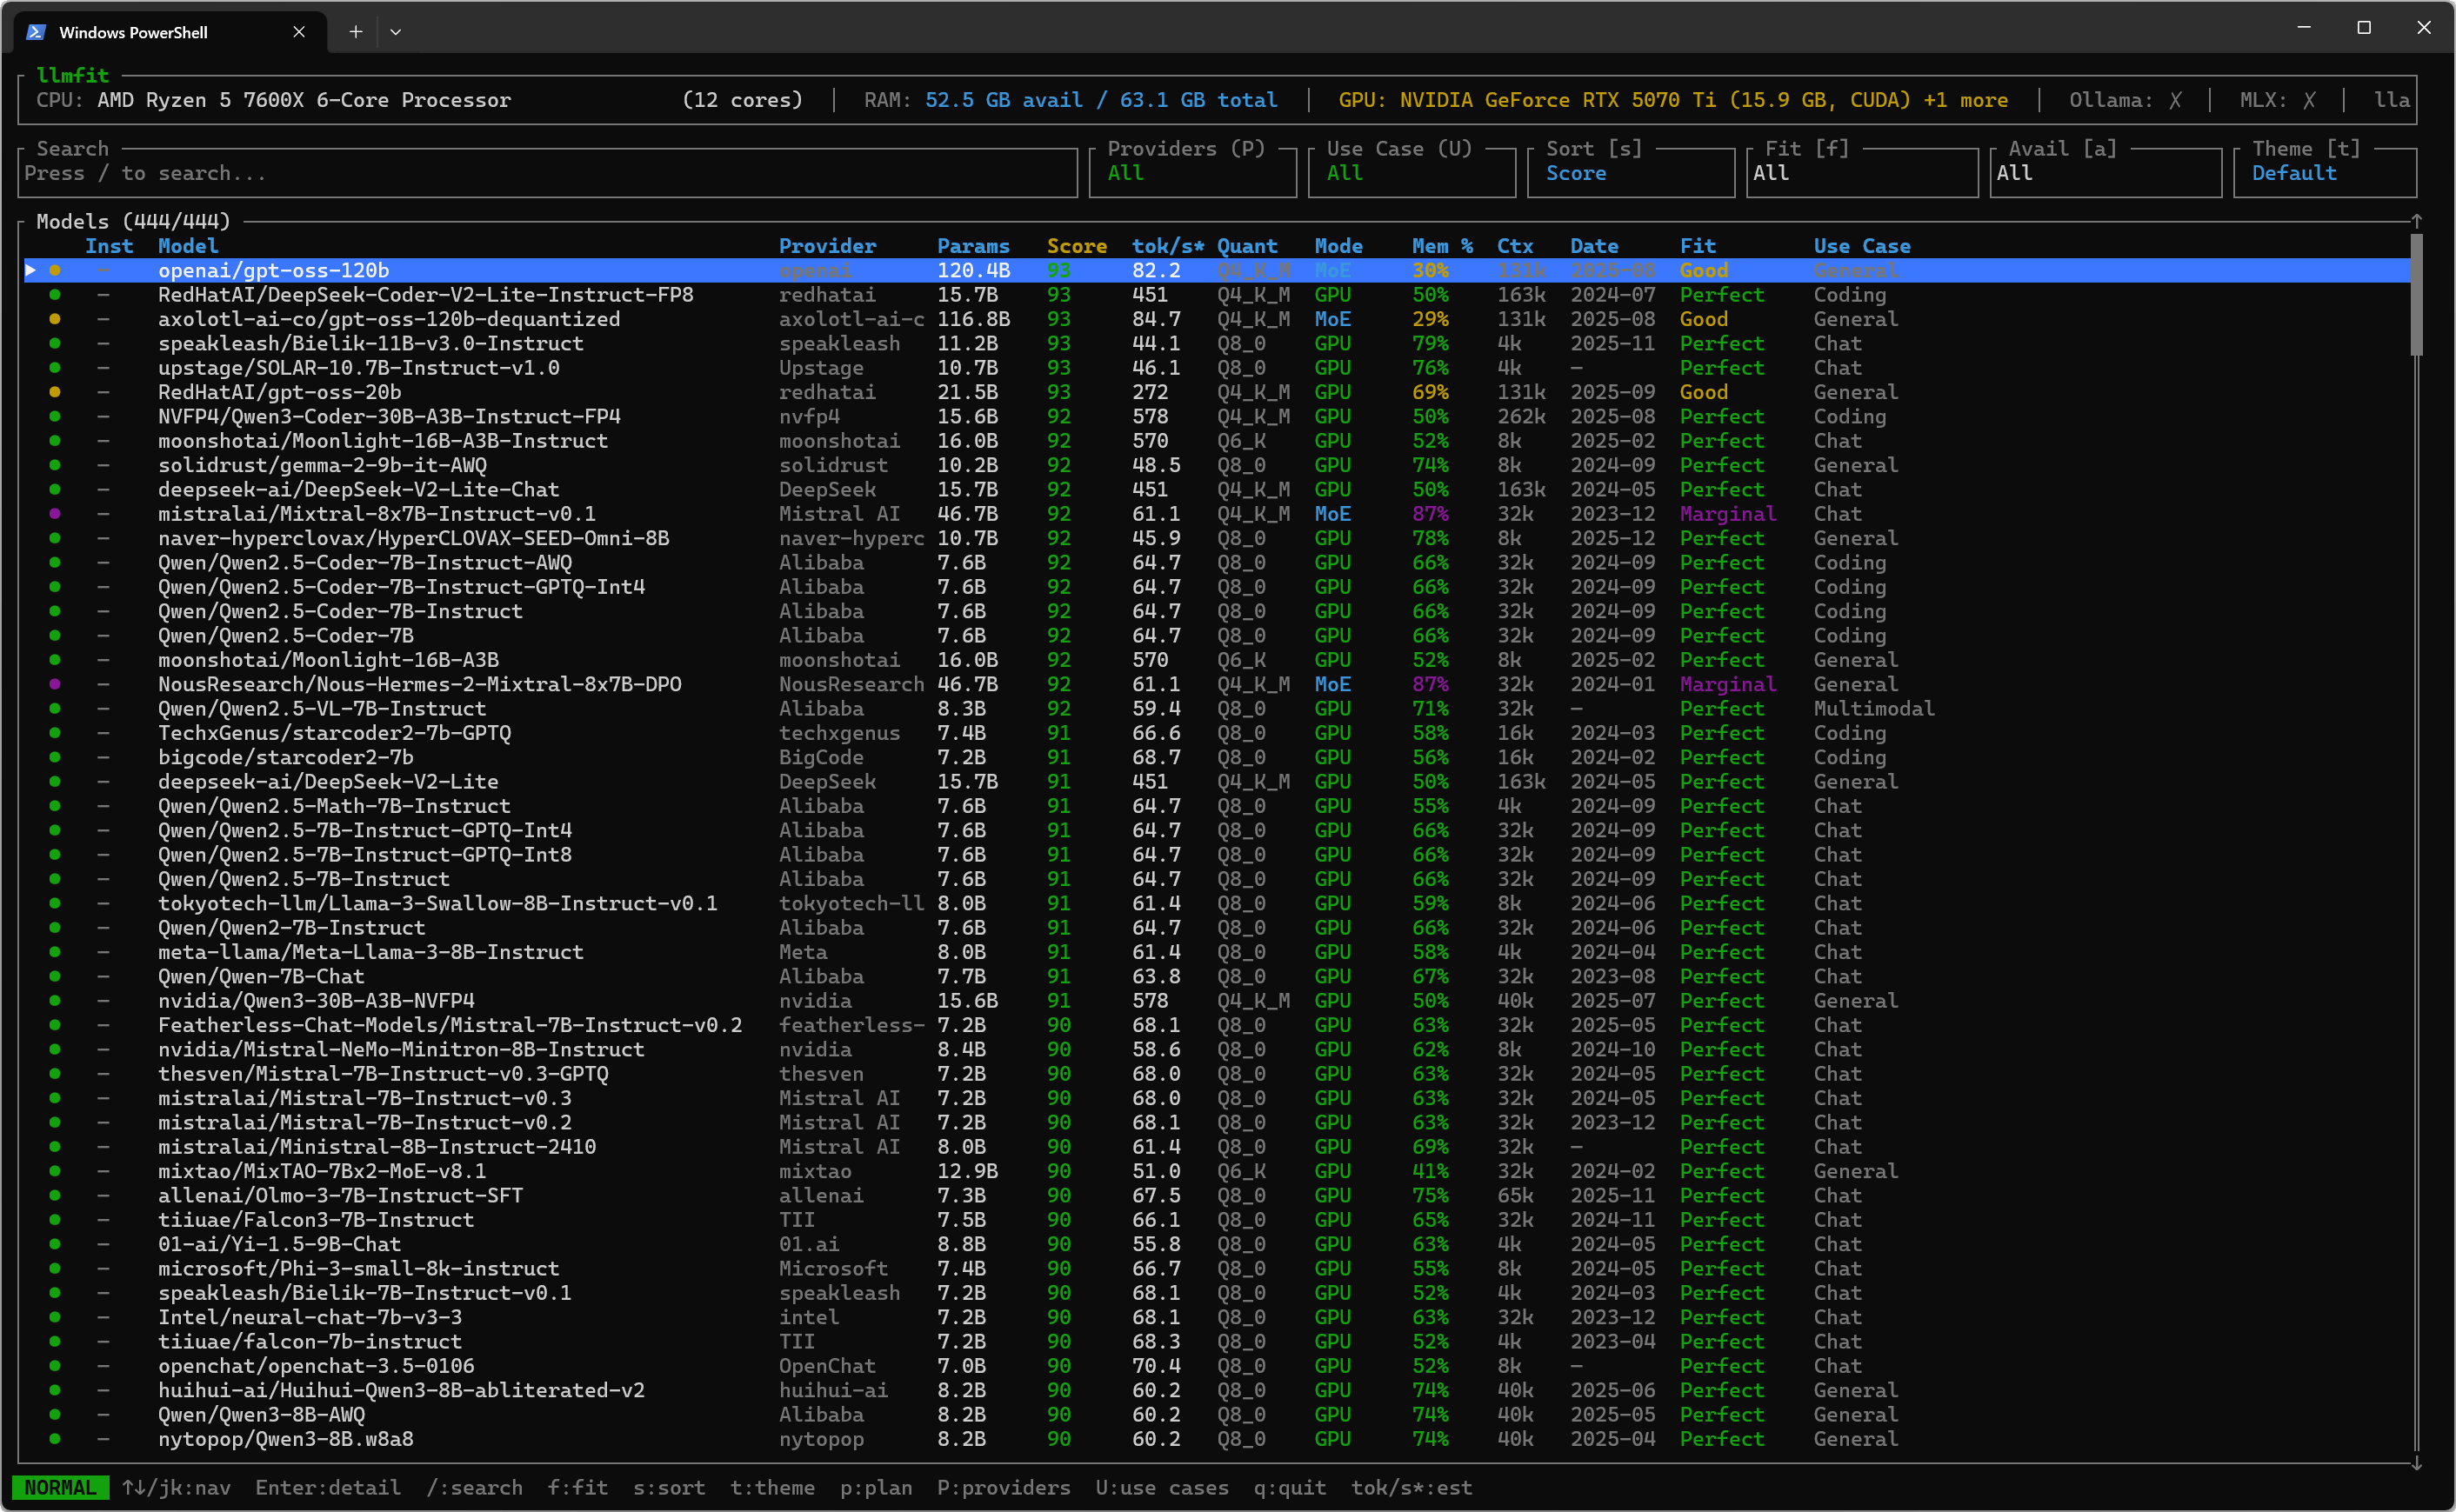
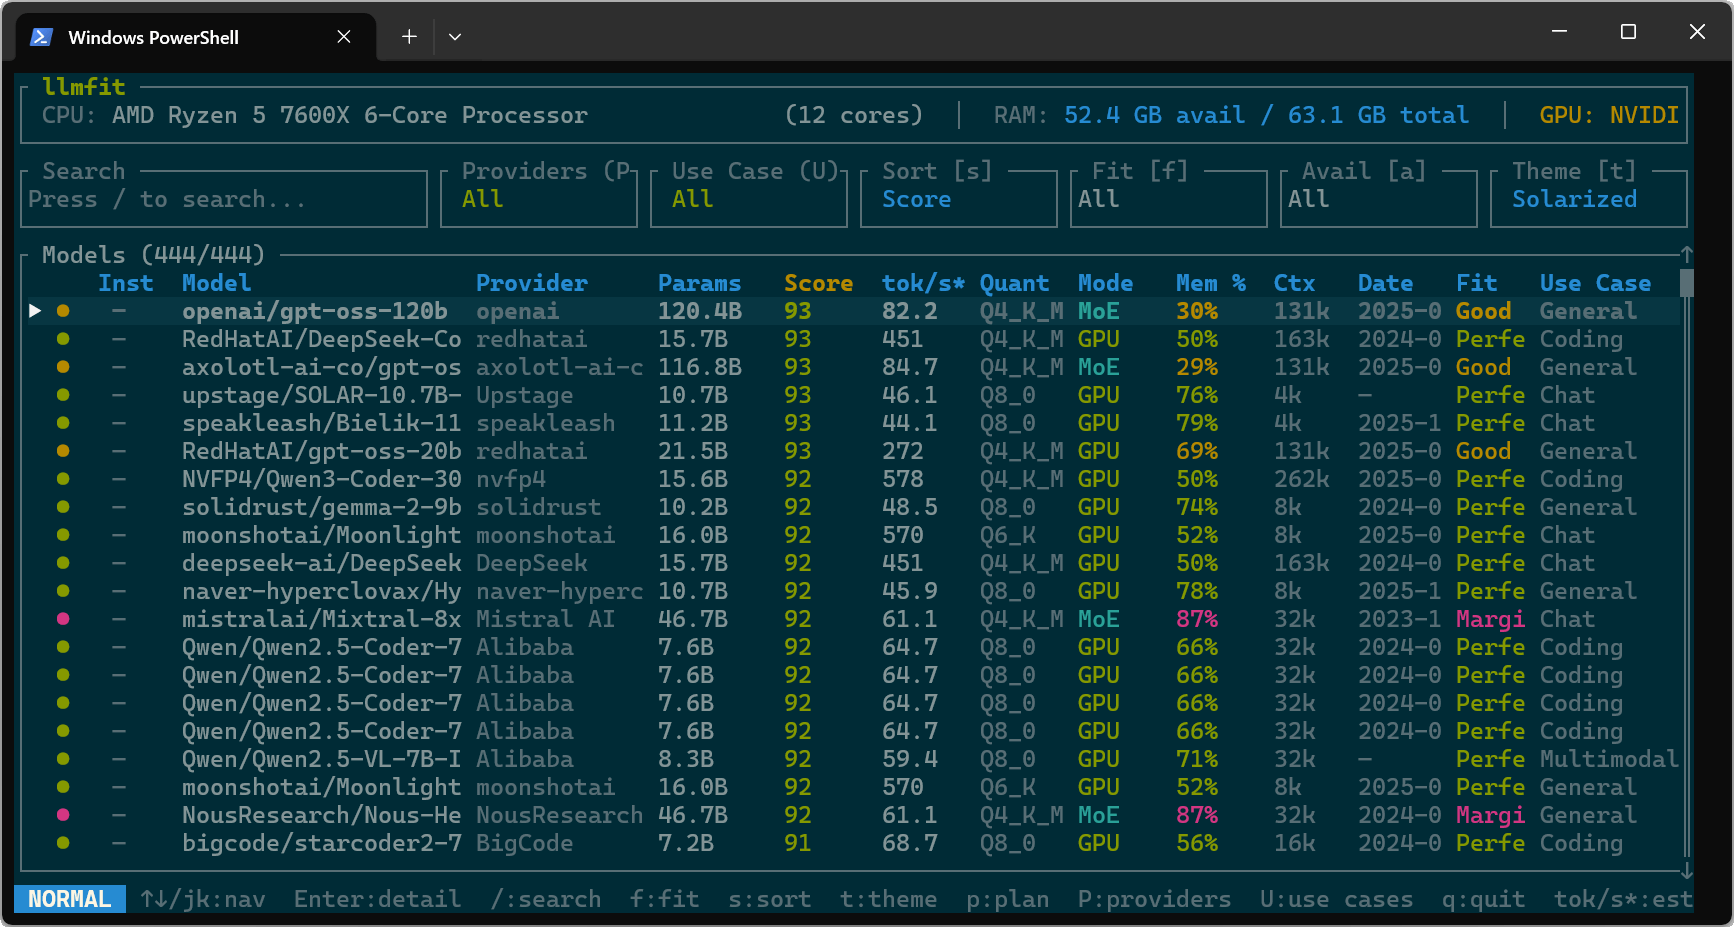
Enter 'llmfit' in PowerShell on the Windows terminal and press Enter to launch llmfit in TUI mode. Since it's a terminal tool, it's not a GUI, but it has a very easy-to-understand layout, including a list of AI models displayed in the center of the screen.
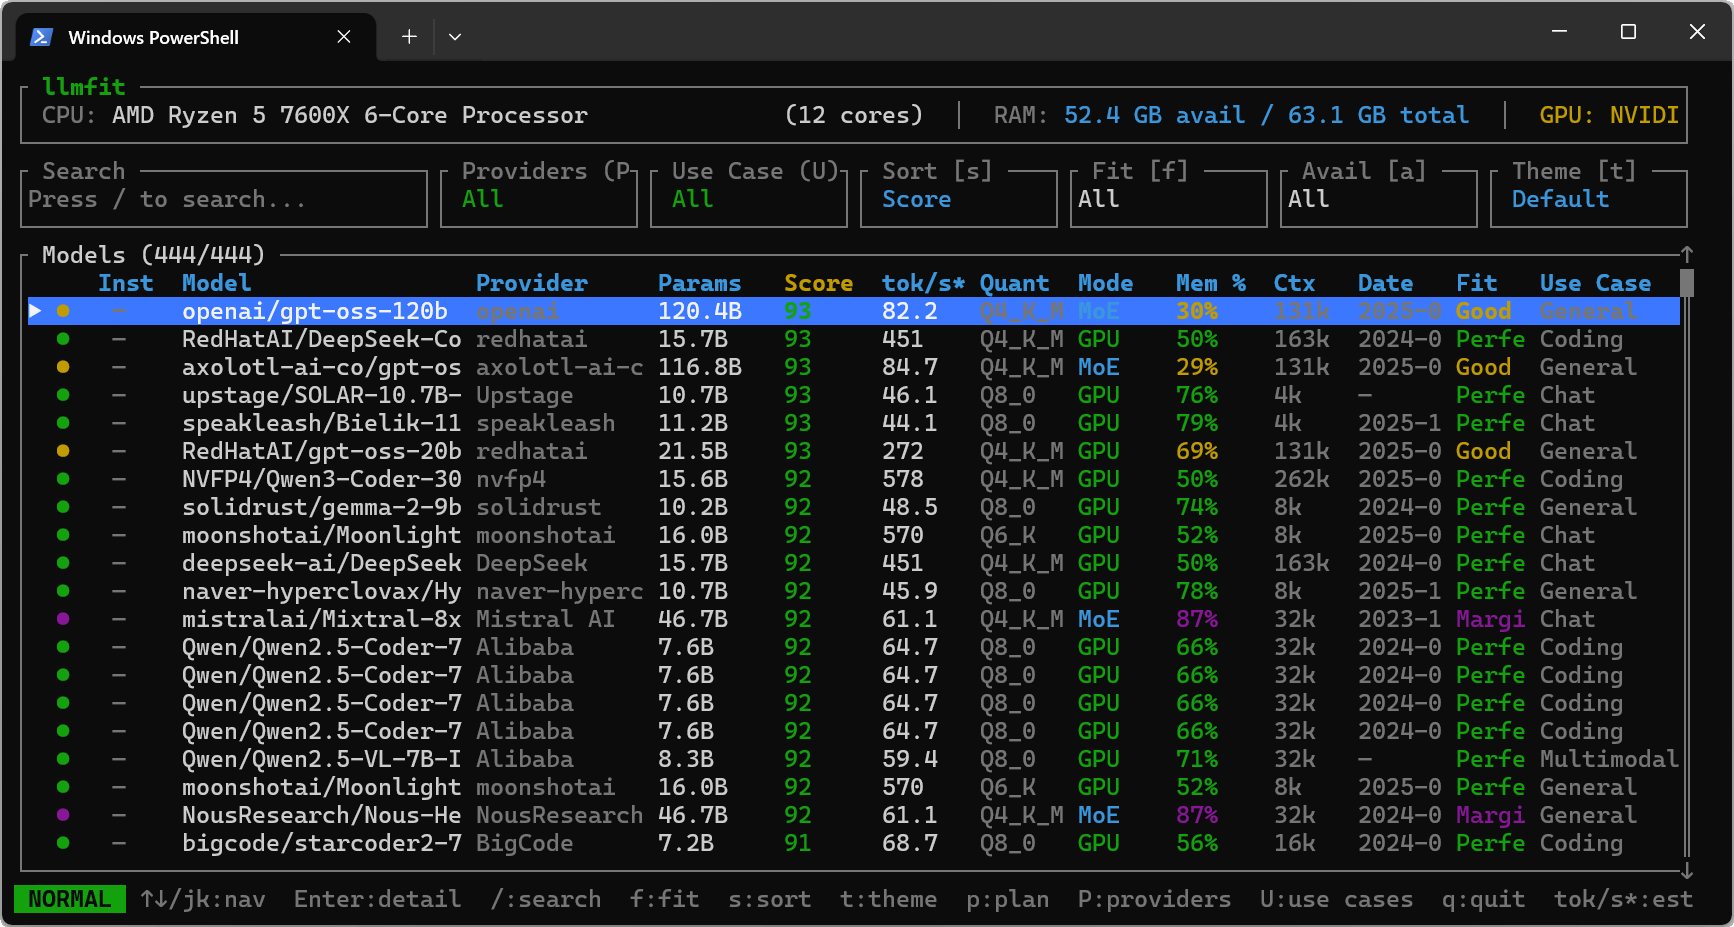
I enlarged the screen size of the Windows terminal. The layout remains the same even when the screen size is changed.
◆Operation
You can switch between the selected items in the list using the up and down cursor keys or the J/K keys, the same as in vim.
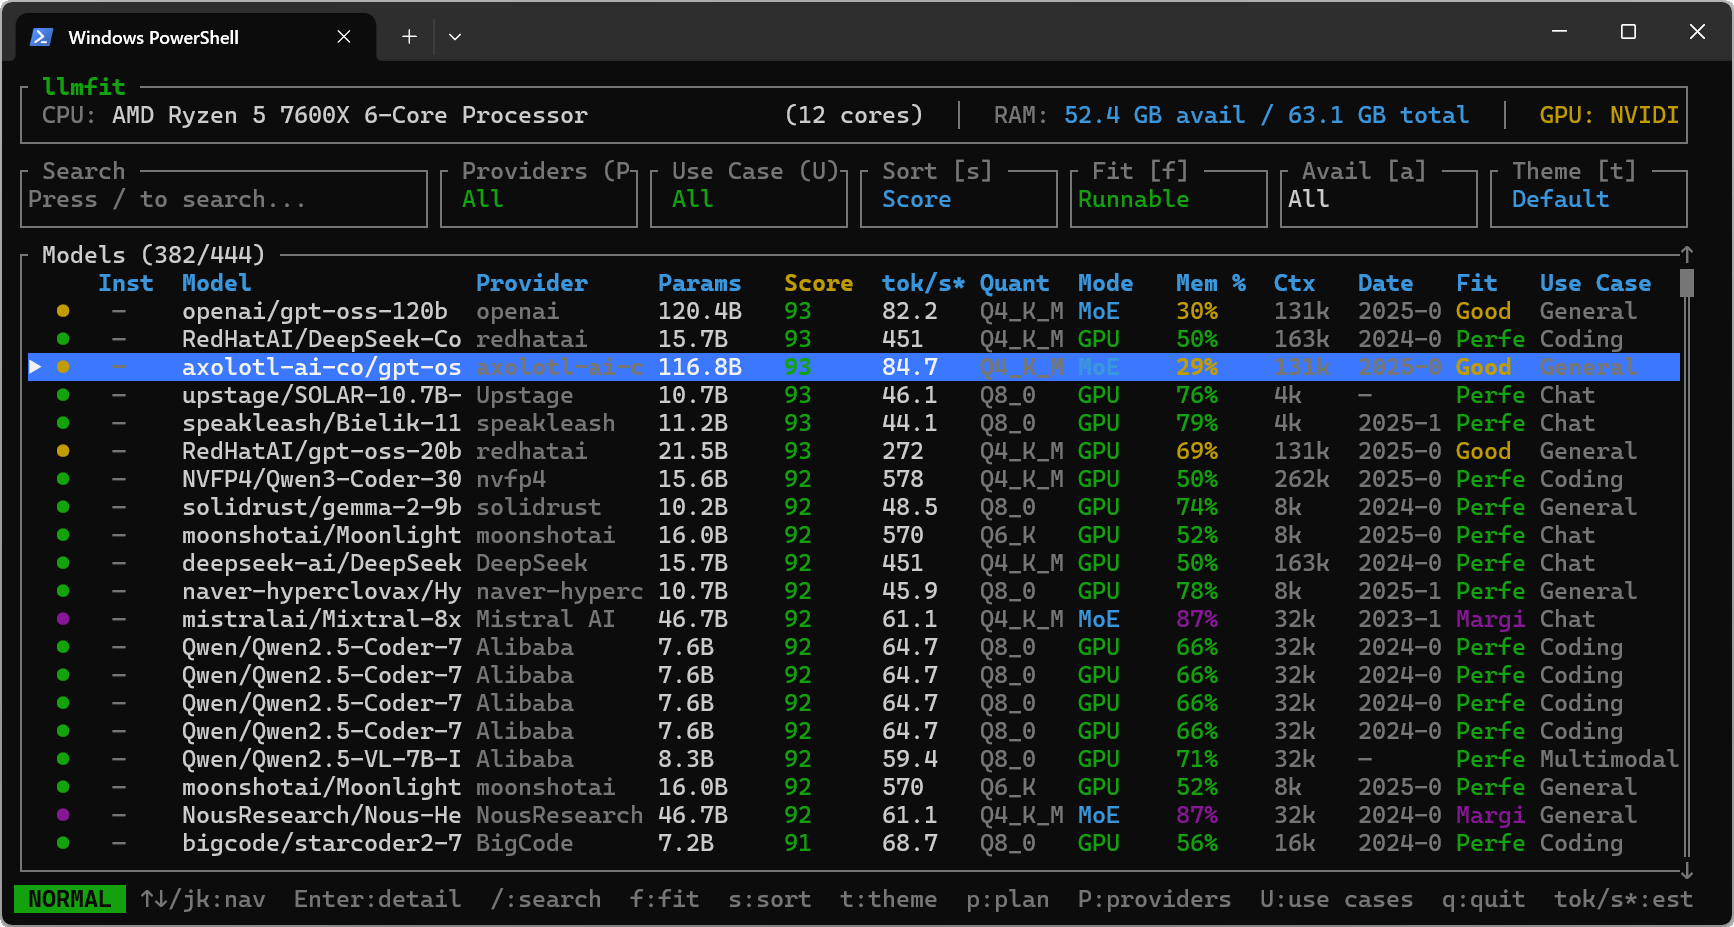
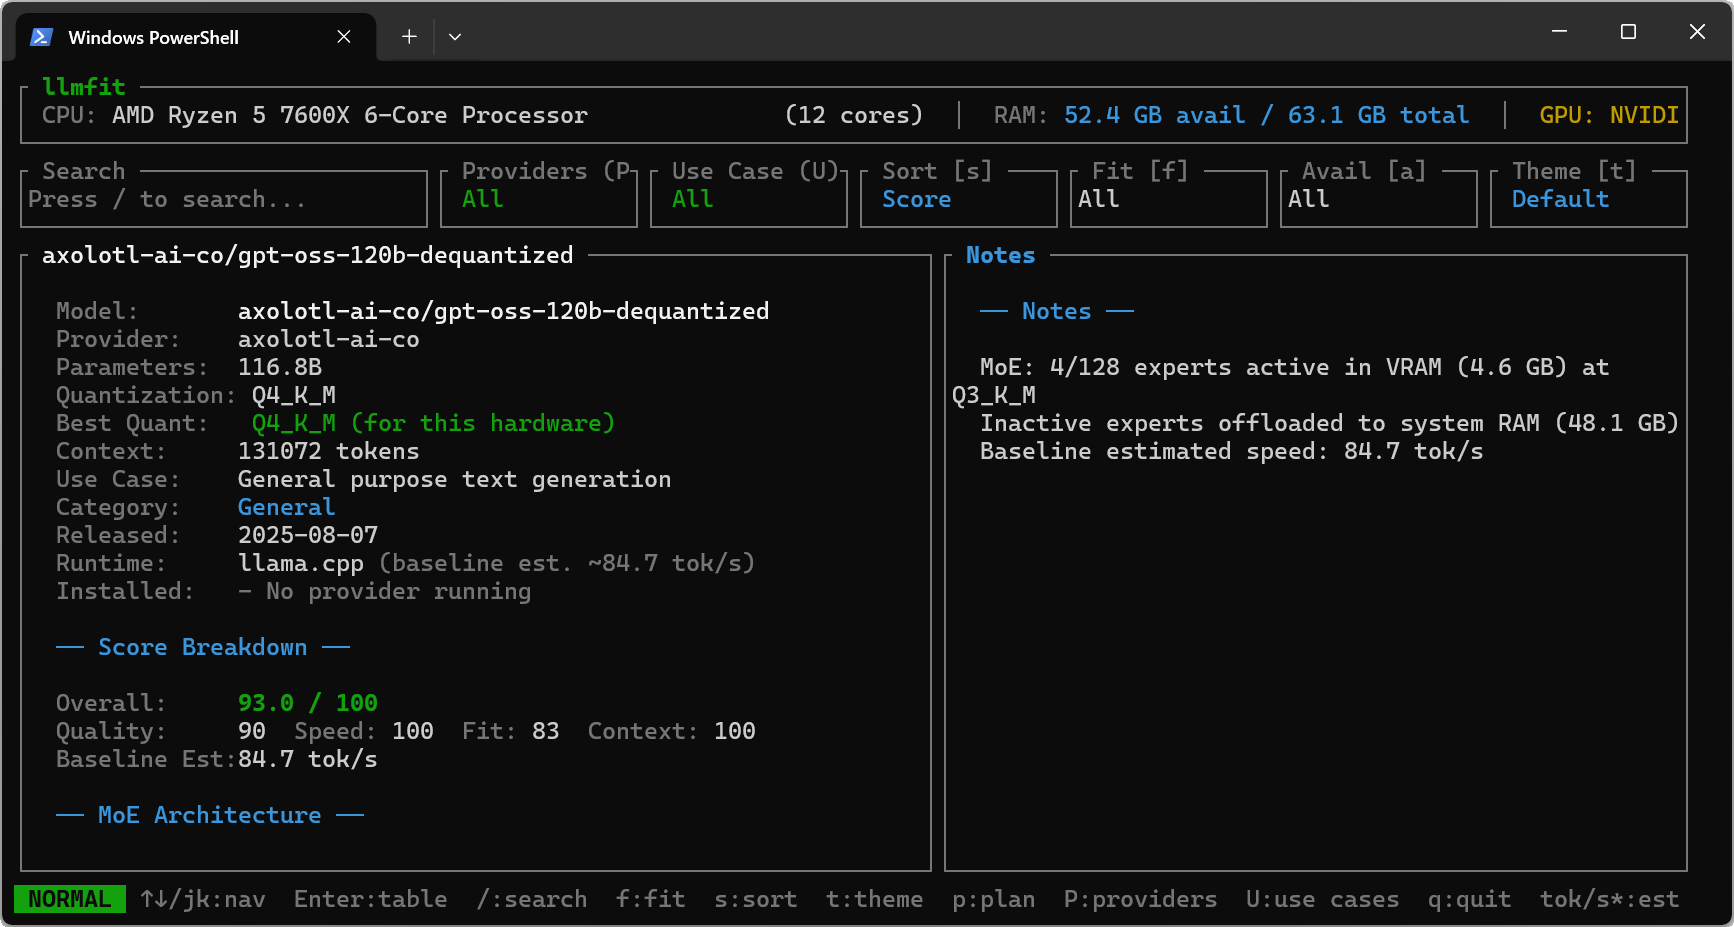
Pressing the Enter key will display the details screen for the selected item.
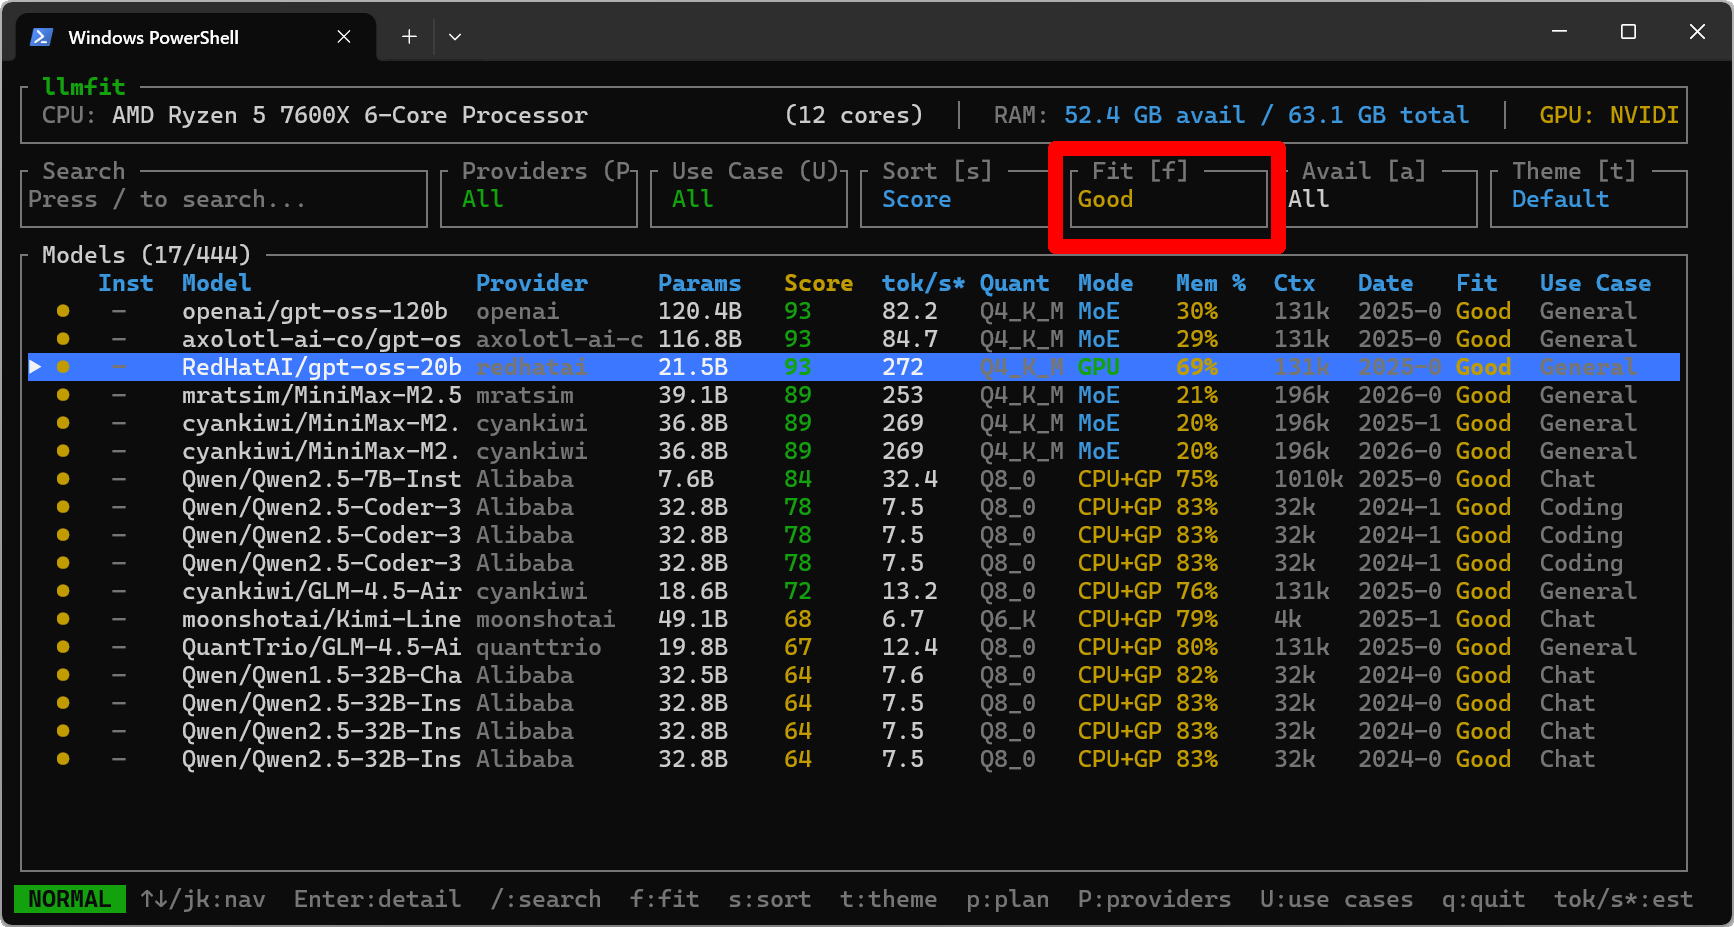
Pressing the F key cycles through the 'Fit' values, filtering the display by how well the AI model performs on your machine.
・All : Show all
・Runnable : Show only those that run on the machine (show Perfect to Marginal)
Perfect : Shows items that work perfectly on your machine
Good : Shows items that work well on your machine
Marginal : Shows what works on your machine
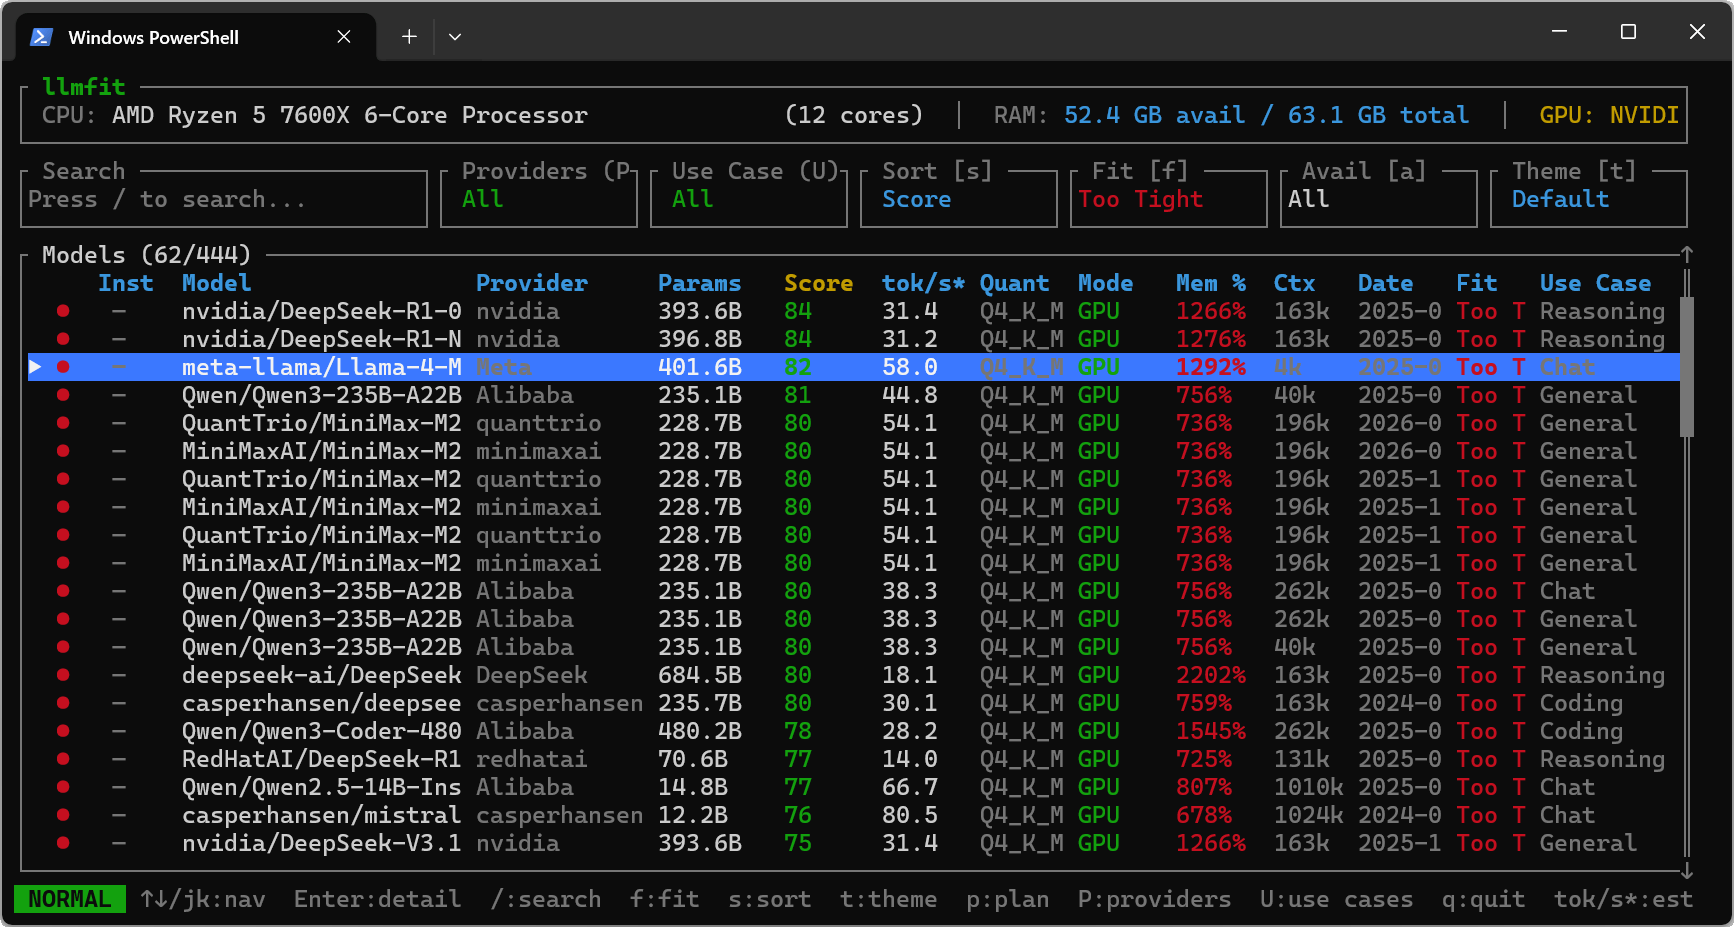
・Too Tight : Displays items that are too tight to run on the machine.
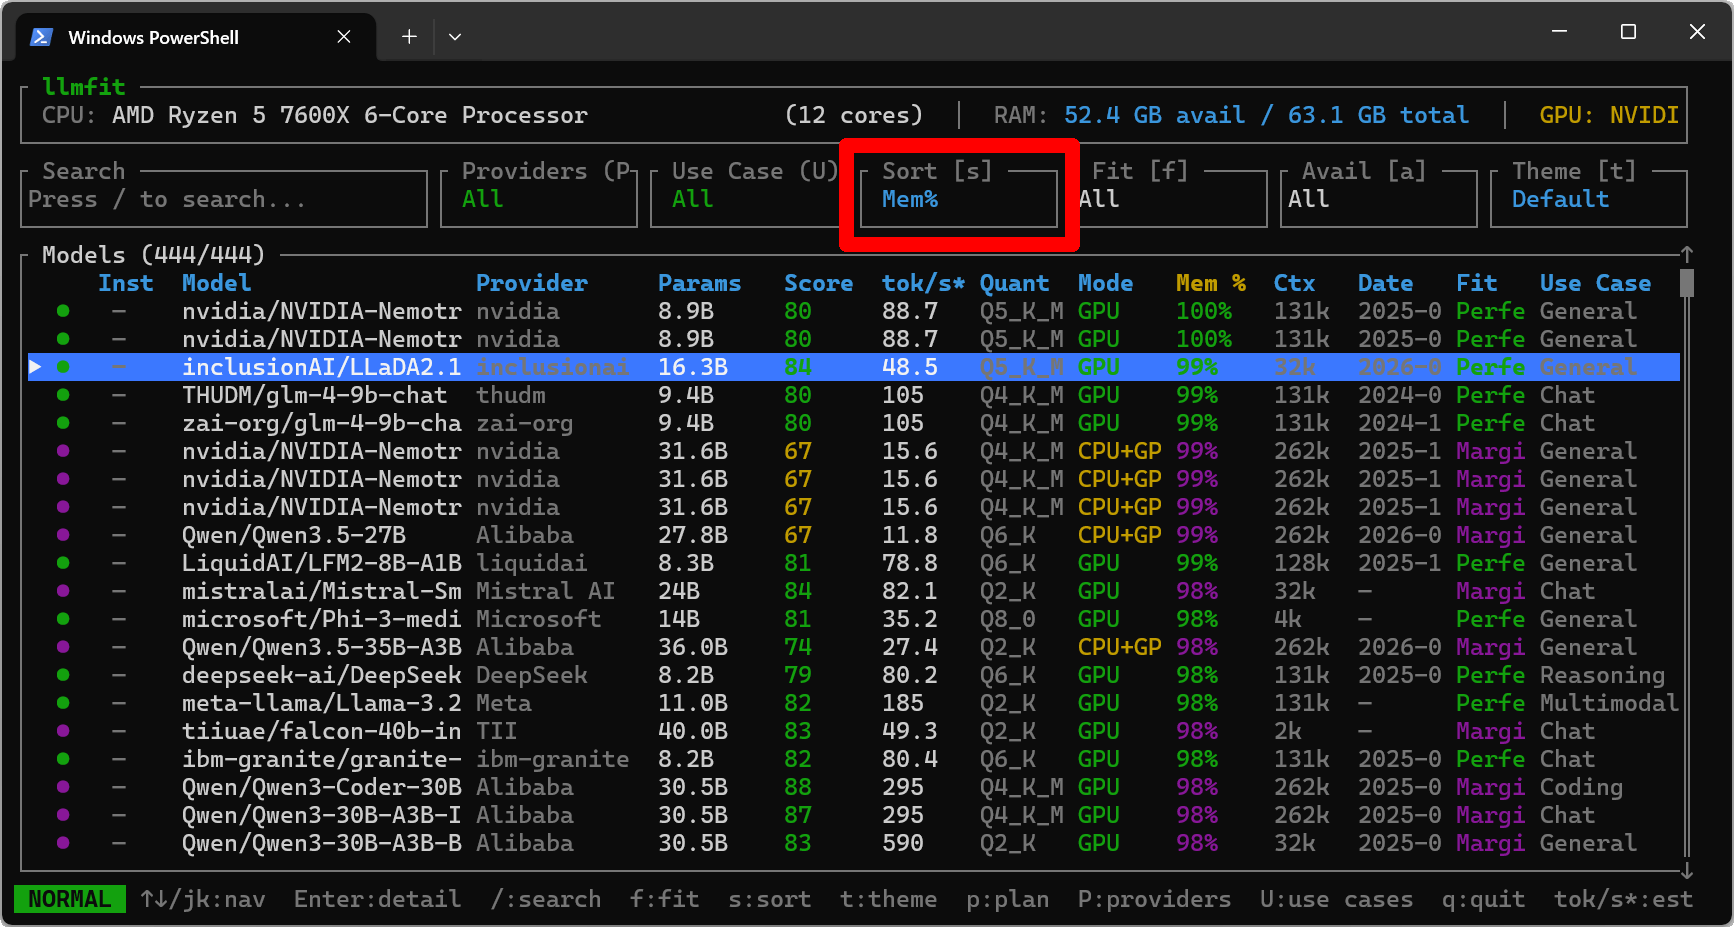
Pressing the S key cycles through the 'Sort' values, allowing you to specify the criteria for sorting the list of AI models.
・Score : Calculated score
・tok/s : number of tokens per second
・Params : Number of parameters
・Mem% : Memory consumption
・Ctx (Context Window) : Context window size
・Date : Release date
・Use (Use Case) : Use of the AI model
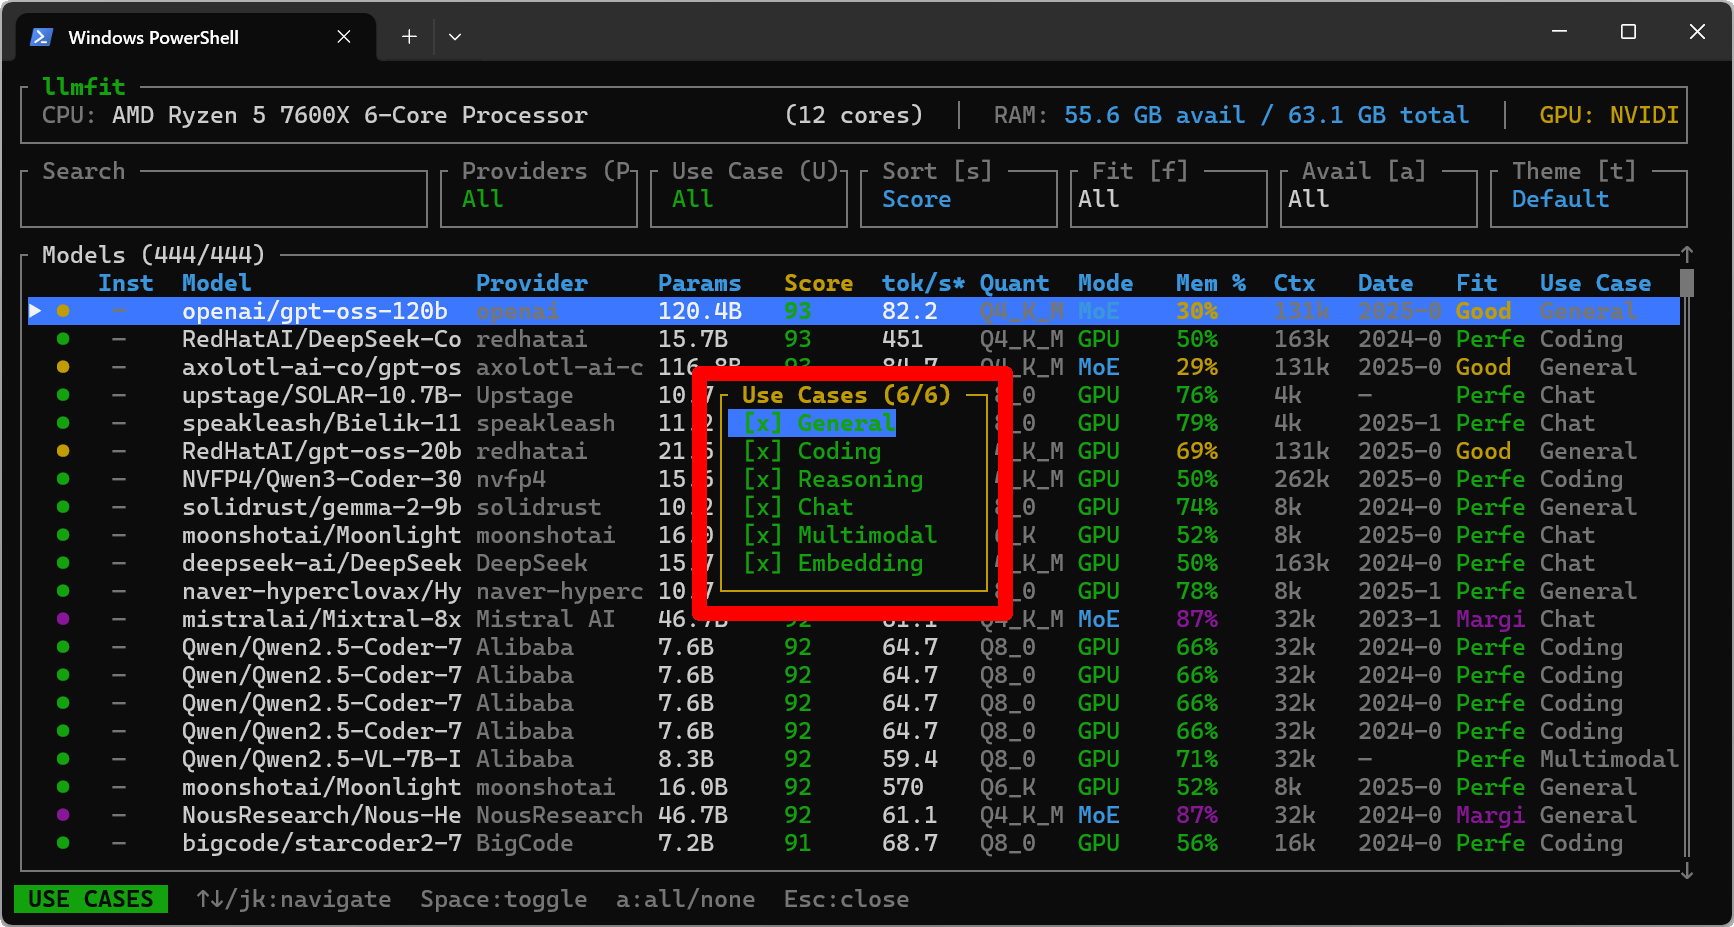
The 'uses of AI models' include the following:
・Chat : For chatting
・Coding : For coding
・Embedding : For
・General : General purpose
・Multimodal : For multimodal use
・Reasoning : for inference models
You can also limit the 'AI model usage' displayed by pressing the 'U' key and manipulating the popup that appears.
◆Plan Mode
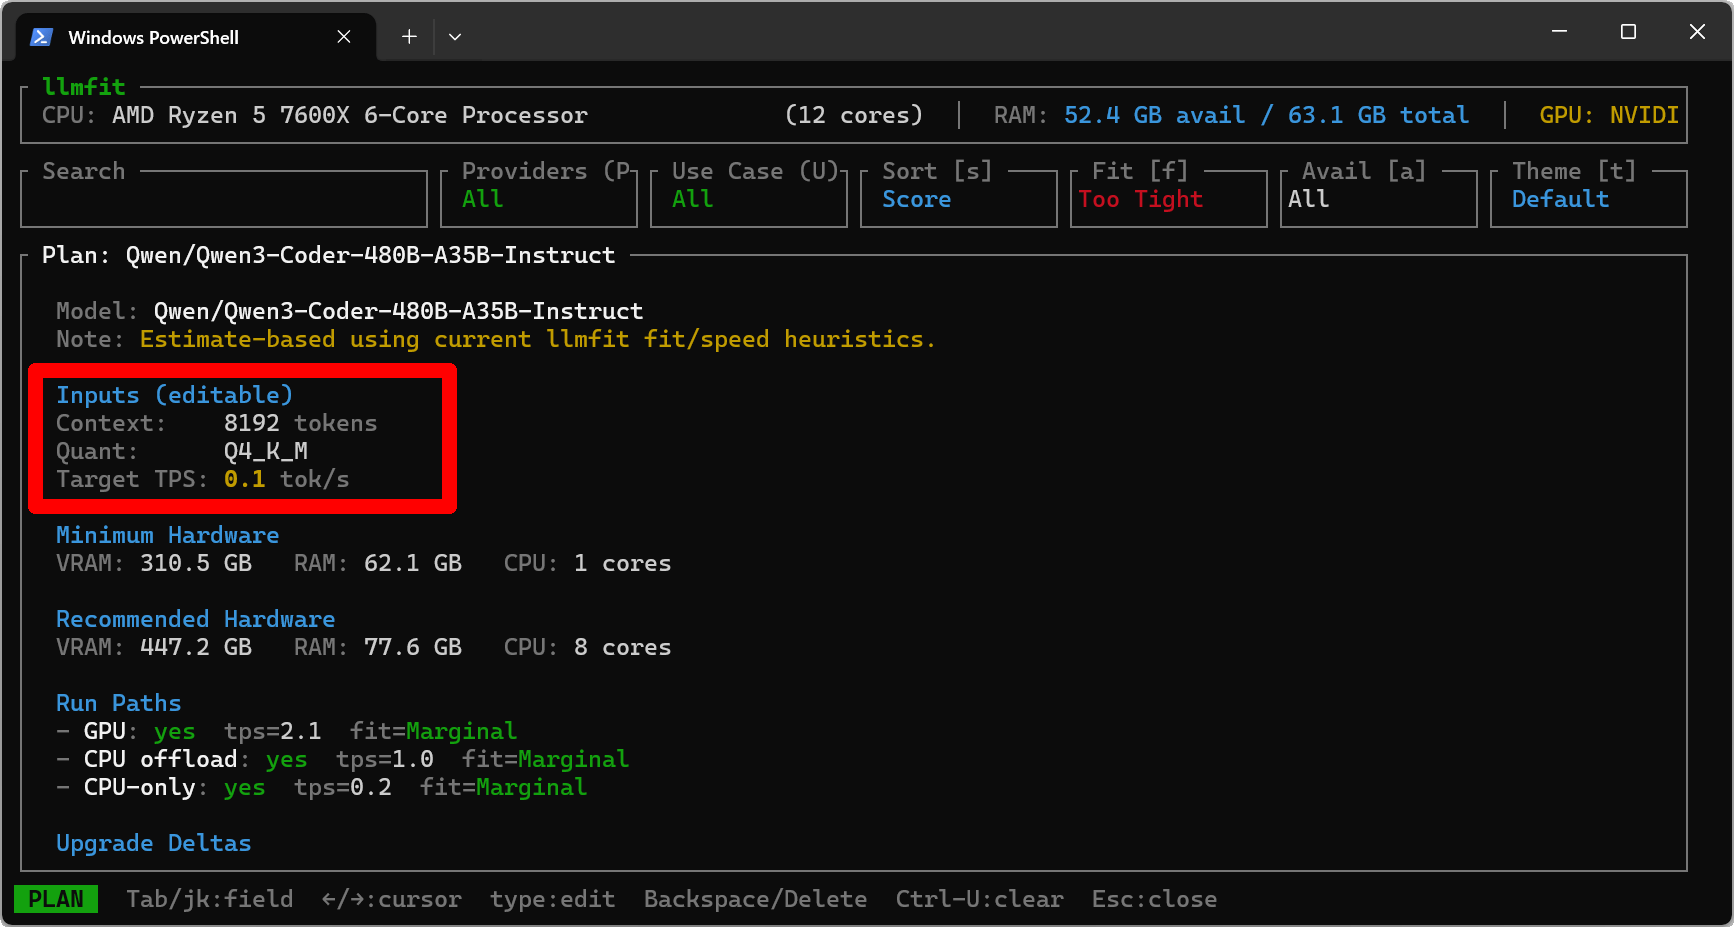
While the normal mode is an approach that asks 'To what extent can this AI model currently be run on this machine?', 'Plan Mode' presents information from the perspective of 'How can this AI model be run on this machine?' To switch to Plan Mode, select the target AI model and press the 'p' key. For this example, select an AI model with a 'Fit' value of 'Too Tight.'
・Minimum Hardware : The minimum amount of VRAM, RAM, and CPU cores required to run the game.
・Recommended Hardware : Recommended VRAM, RAM, and number of CPU cores required for operation
・Run Paths : Possible execution paths (GPU, CPU offload, CPU only)
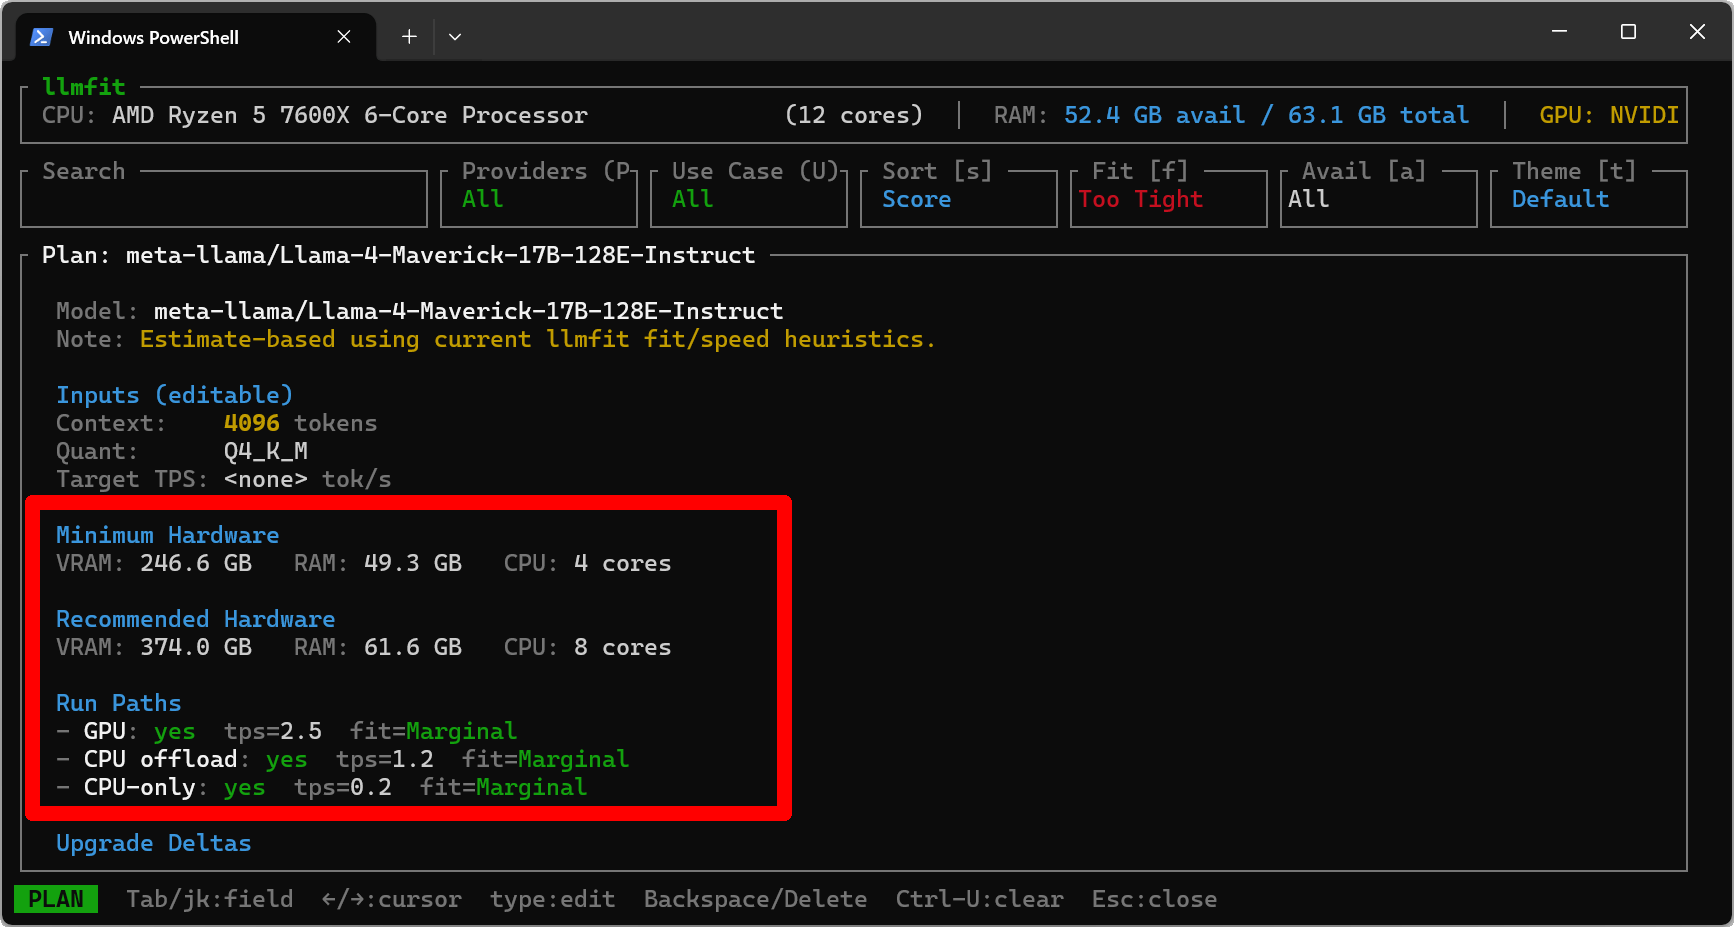
In addition, the 'Inputs (editable)' items are editable, and you can switch between the items to be edited using the Tab key or J/K keys.
・Context : Context window size
・Quant : Quantization format
・Target TPS : Target tokens/second
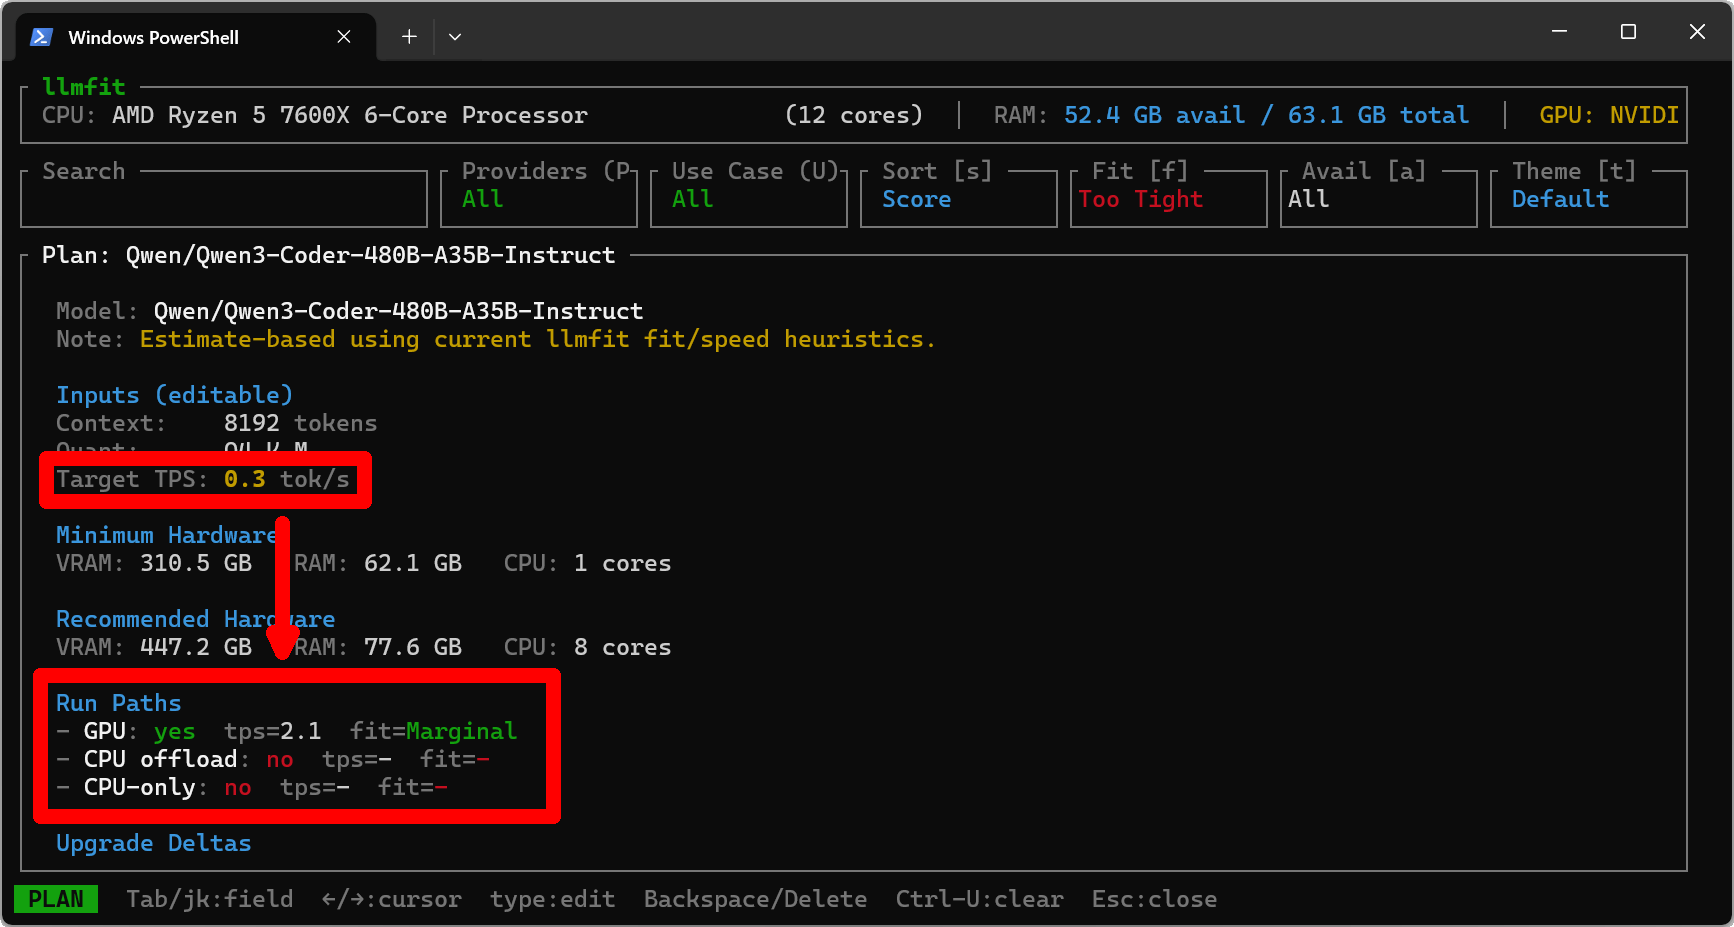
As an experiment, I increased the 'Target TPS' value, and the number of 'feasible execution paths' gradually decreased.
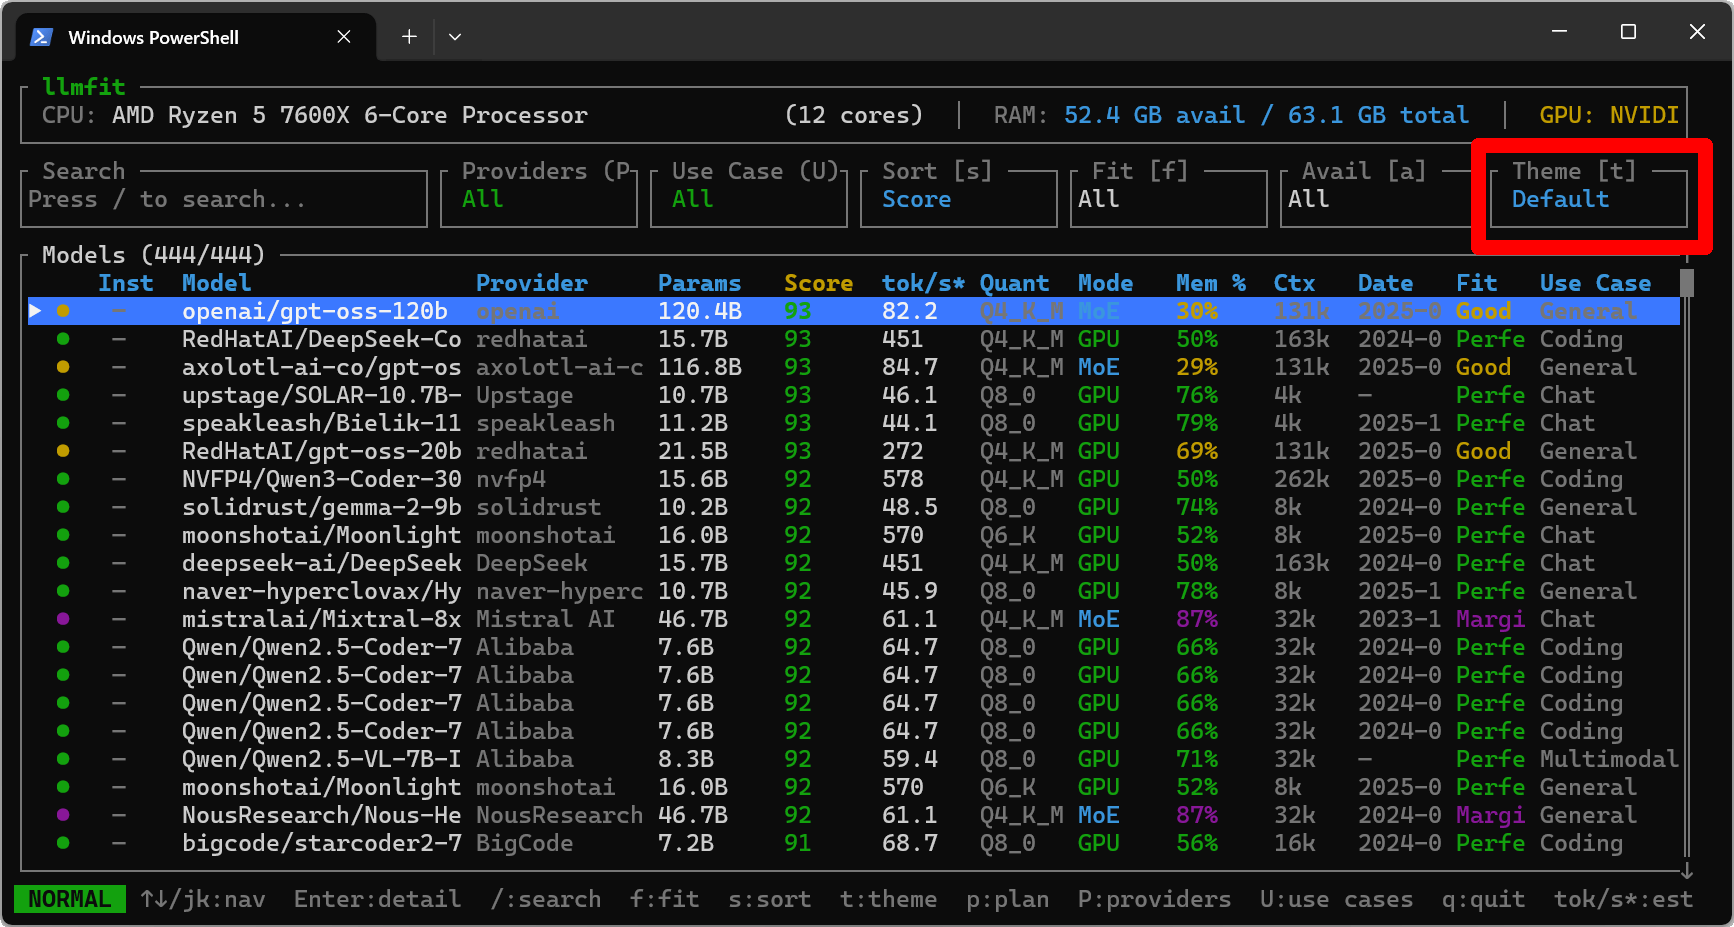
◆Theme switching
There are six 'themes' available, which are the color schemes for the UI and text, and you can switch between them by pressing the T key. The screen below shows the default theme.
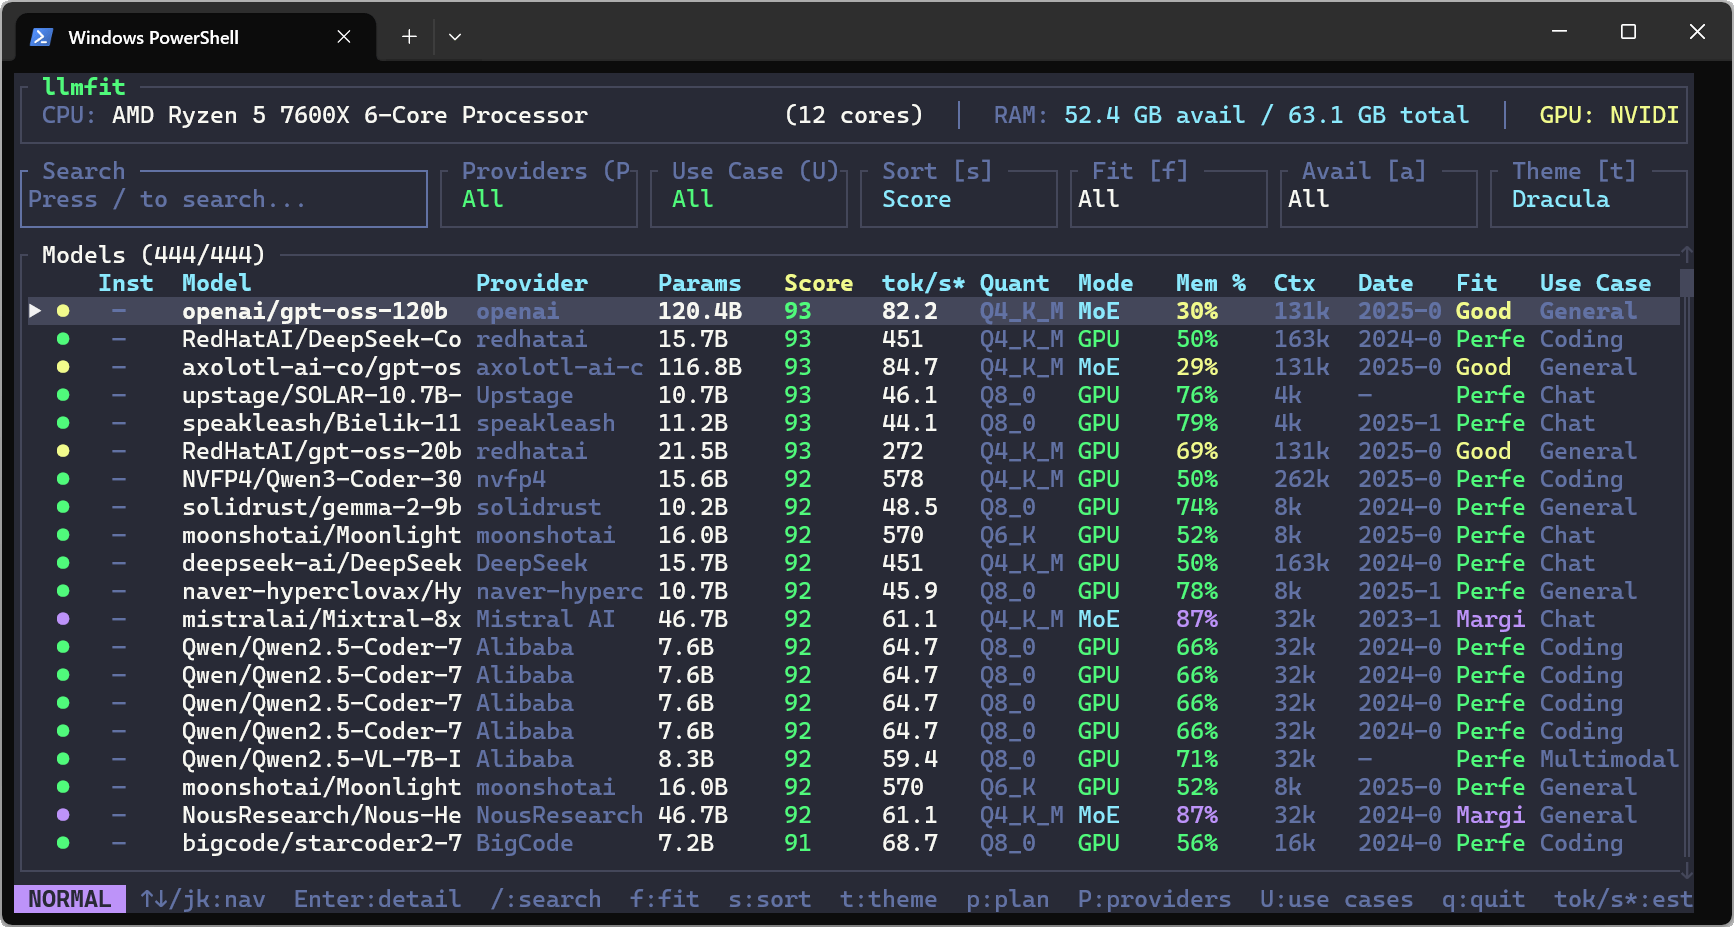
Dracula features a pastel deep purple background.
Solarized is a very popular and well-known color scheme.
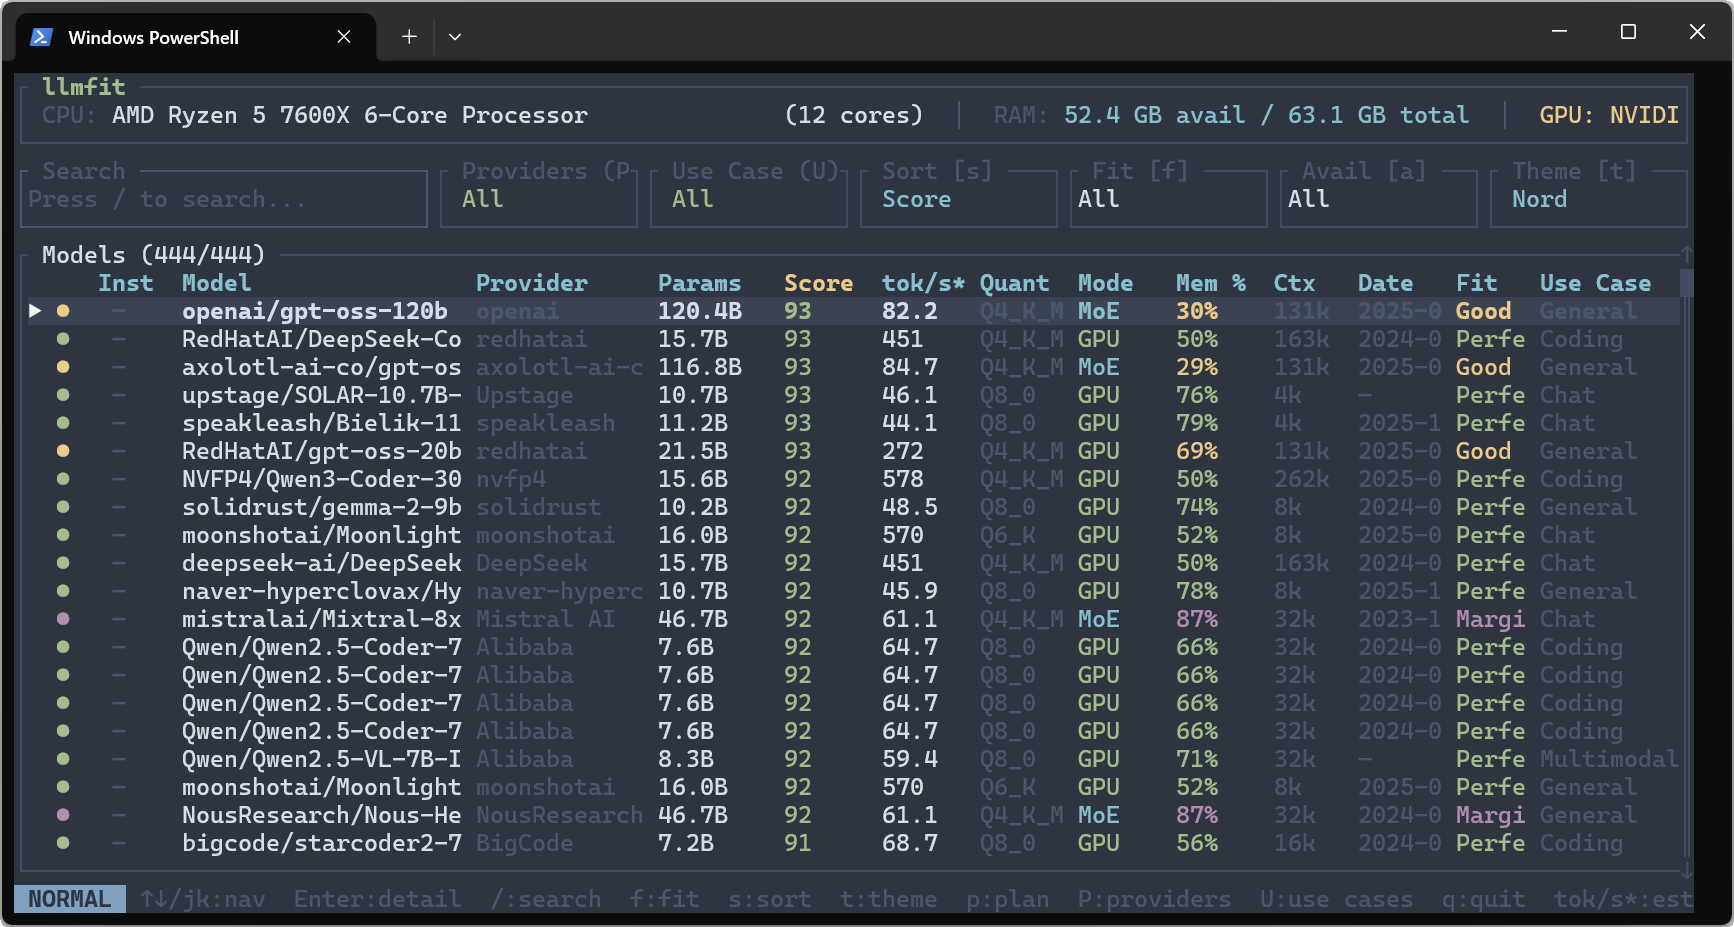
Nord is a cool blue-gray based tone reminiscent of the Arctic.
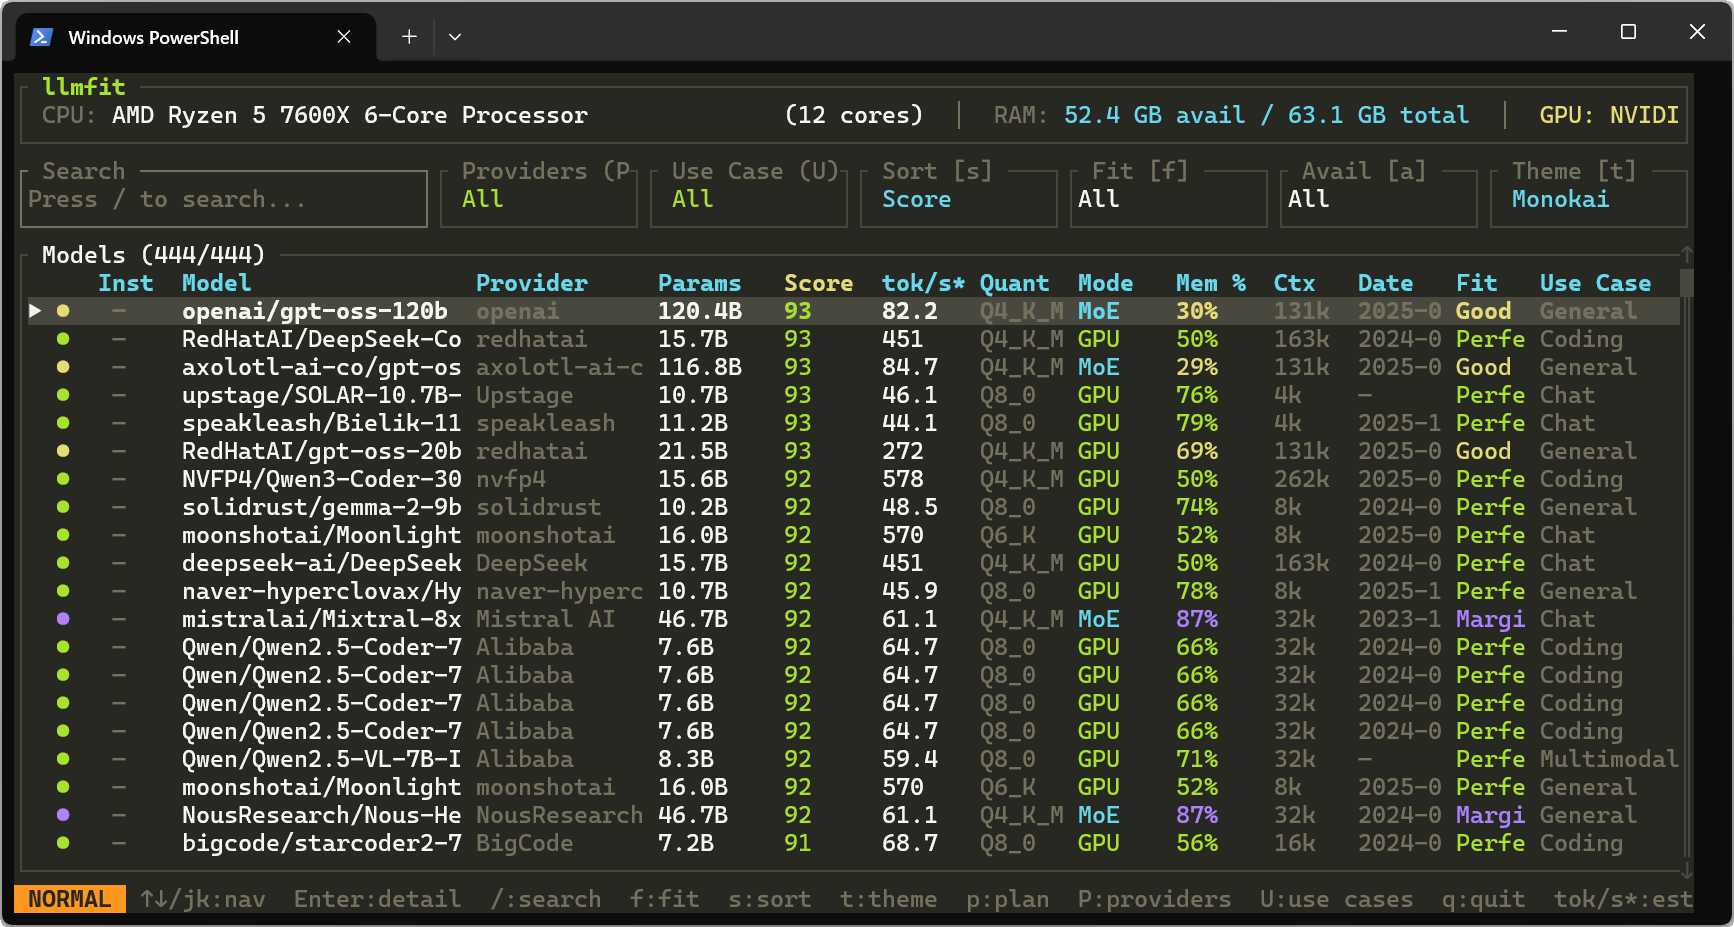
Monokai is close to the default color scheme but has a warmer feel to it.
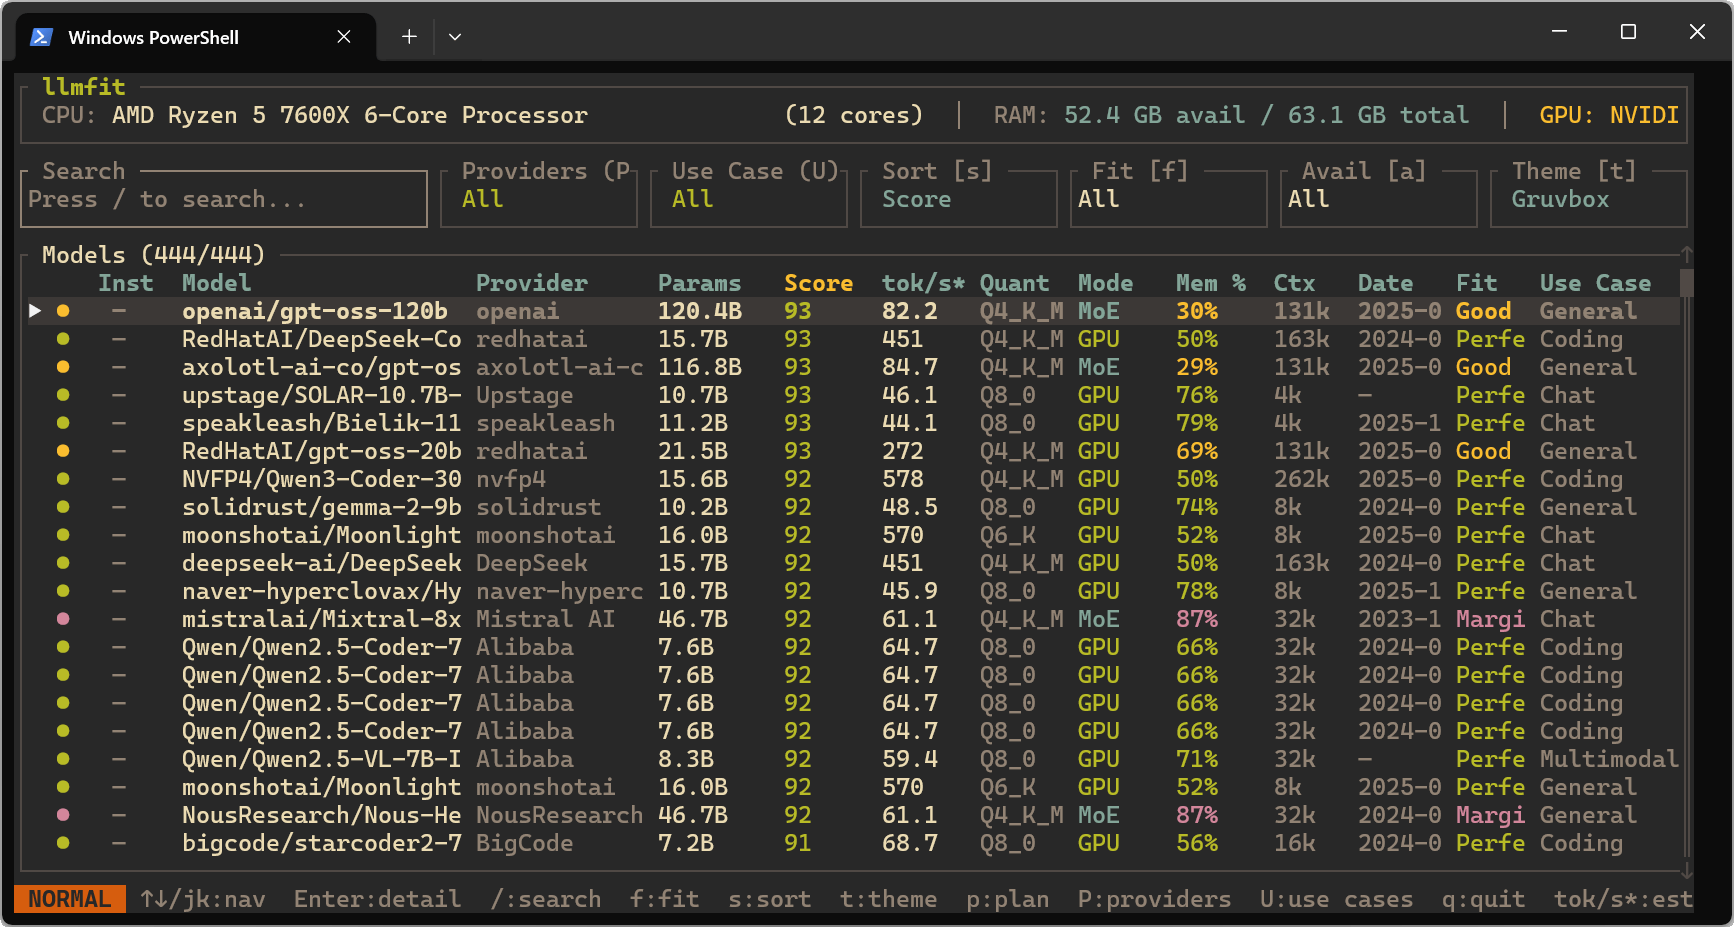
Gruvbox also has a retro color scheme with warm earth tones.
◆CLI mode
Unlike TUI mode, CLI mode outputs a list to the terminal and completes the execution.
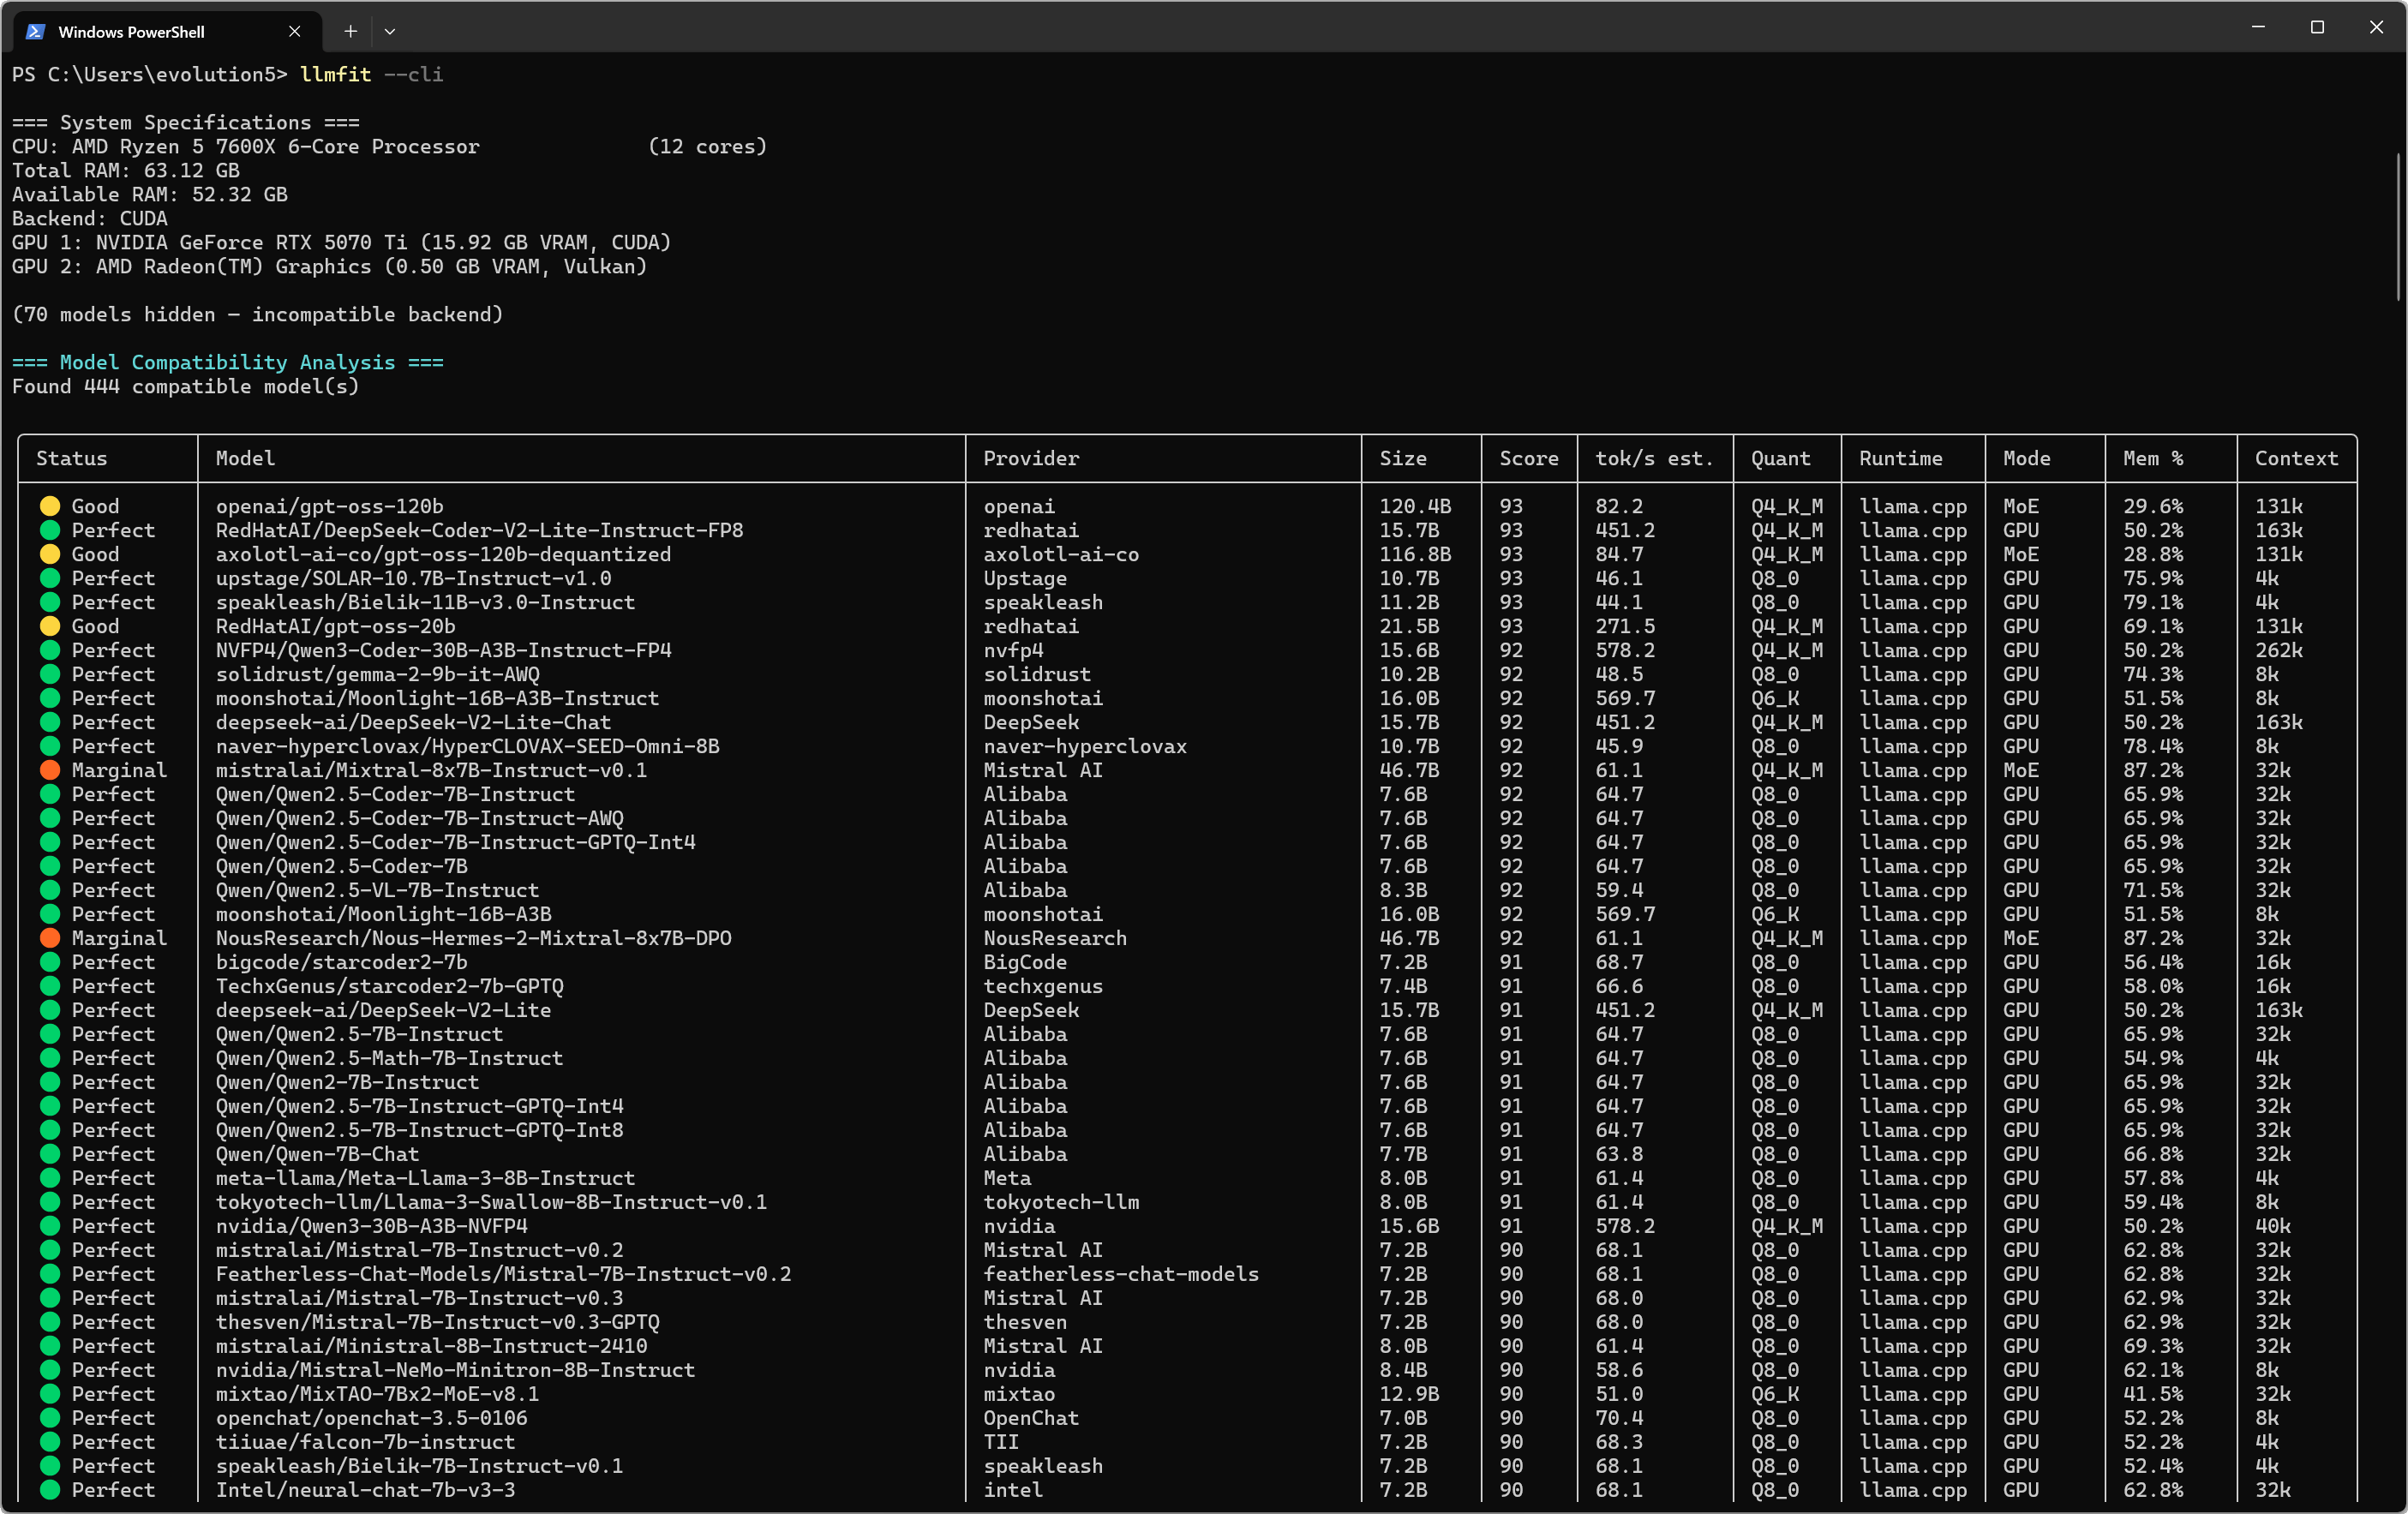
Instead of switching the display by keystrokes in TUI mode, in CLI mode you can switch the output content by passing various parameters.
[code]
# Table of all models ranked by fit
llmfit --cli
# Only perfectly fitting models, top 5
llmfit fit --perfect -n 5
# Show detected system specs
llmfit system
# List all models in the database
llmfit list
# Search by name, provider, or size
llmfit search 'llama 8b'
# Detailed view of a single model
llmfit info 'Mistral-7B'
# Top 5 recommendations (JSON, for agent/script consumption)
llmfit recommend --json --limit 5
# Recommendations filtered by use case
llmfit recommend --json --use-case coding --limit 3
# Plan required hardware for a specific model configuration
llmfit plan 'Qwen/Qwen3-4B-MLX-4bit' --context 8192
llmfit plan 'Qwen/Qwen3-4B-MLX-4bit' --context 8192 --quant mlx-4bit
llmfit plan 'Qwen/Qwen3-4B-MLX-4bit' --context 8192 --target-tps 25 --json
# Run as a node-level REST API (for cluster schedulers / aggregators)
llmfit serve --host 0.0.0.0 --port 8787
[/code]
Summary
It turns out that llmfit is an excellent tool that helps solve various problems faced when implementing AI models. It requires almost no effort to install, so if you are planning to install an AI model on your PC at home or work, we recommend you give it a try.
Related Posts: