I built a portable step sequencer synthesizer for my daughter's 3rd birthday.
A father gave his daughter a portable step sequencer synthesizer that he built himself for her third birthday, and it has become a hot topic on the social news site Hacker News.
I Built a Synth for My Daughter - bitsnpieces.dev
For his daughter's first birthday, Alastair Roberts received a Montessori activity board filled with switches and LEDs. As he watched his daughter having fun turning the knobs and flipping the switches on the activity board, Roberts realized it resembled a synthesizer control panel, and his imagination took a leap: 'What if we could make a music board?'
Although Roberts had no experience in building hardware, he had some knowledge of the Arduino Inventors Kit, so he decided to create a basic MIDI controller on a breadboard based on Arduino . He easily completed the part where he converted the potentiometer input into MIDI messages using the Arduino MIDI library , and then he could 'play' the breadboard by simply transferring the MIDI messages to his Mac and having Logic Pro recognize the device.
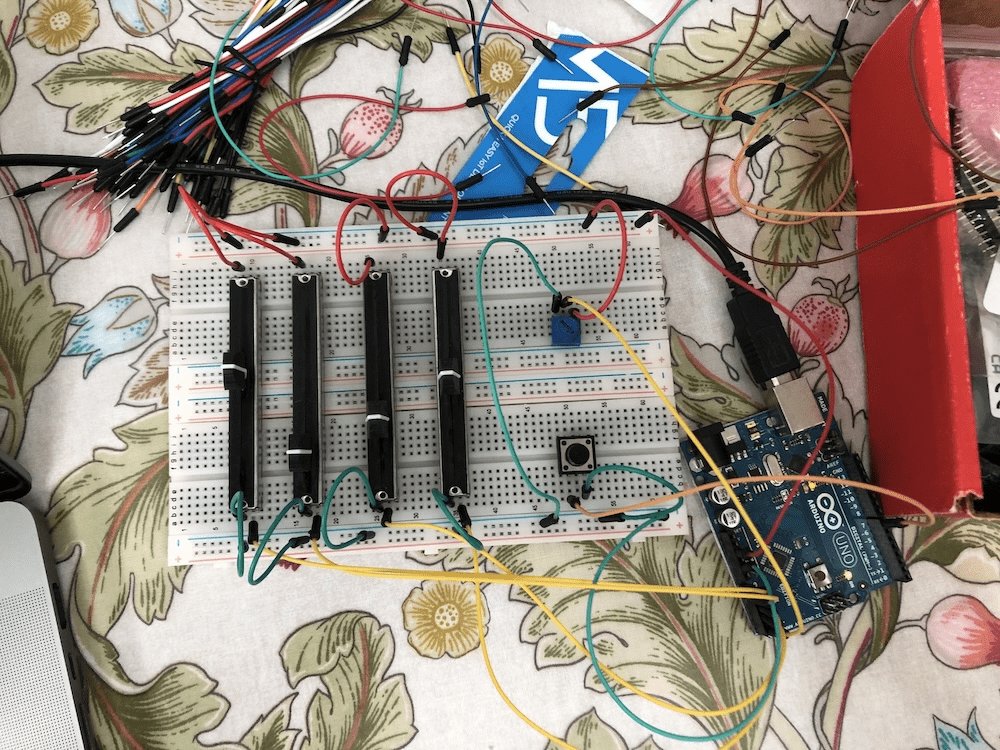
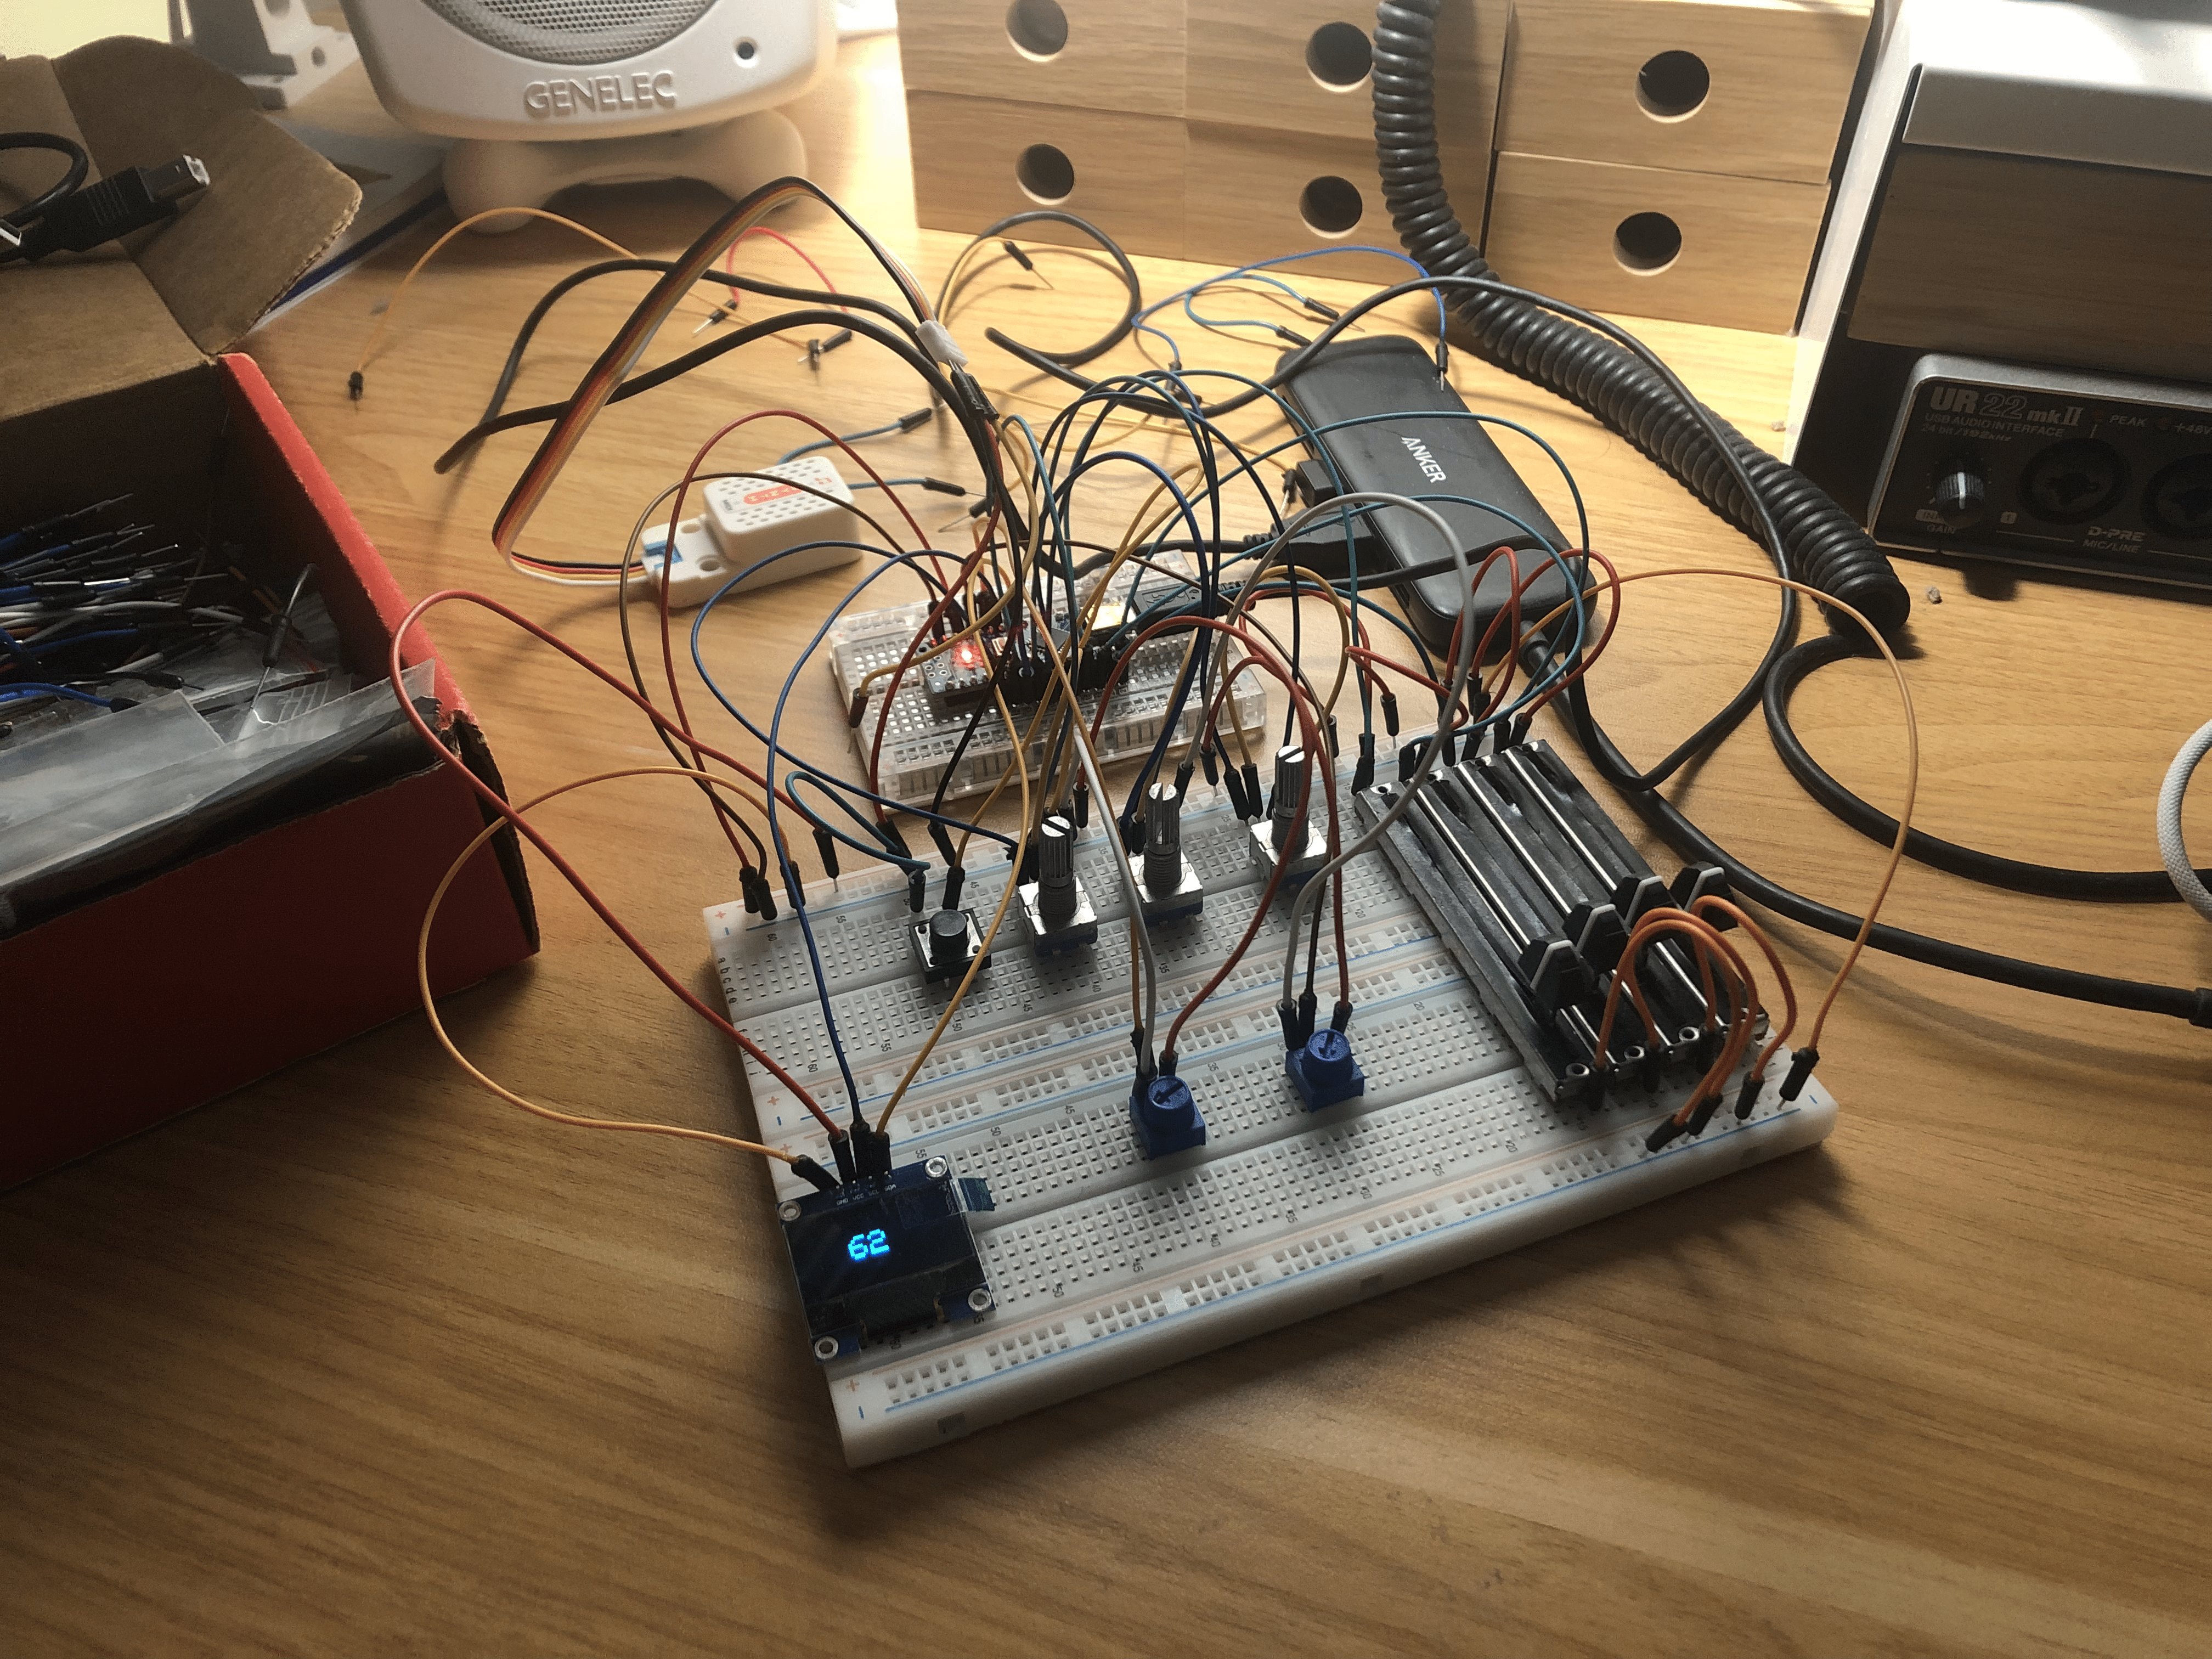
The next step was to transfer the audio synthesis circuitry from Logic to the breadboard. Being able to use a pre-made synthesizer module significantly reduced the development time. He also added an OLED display to provide visual feedback and display characters that his daughter would enjoy. However, the RAM capacity was too small to buffer full-frame video, and despite updating the screen in small patches, he was unable to solve the lag problem during fast-paced performances.
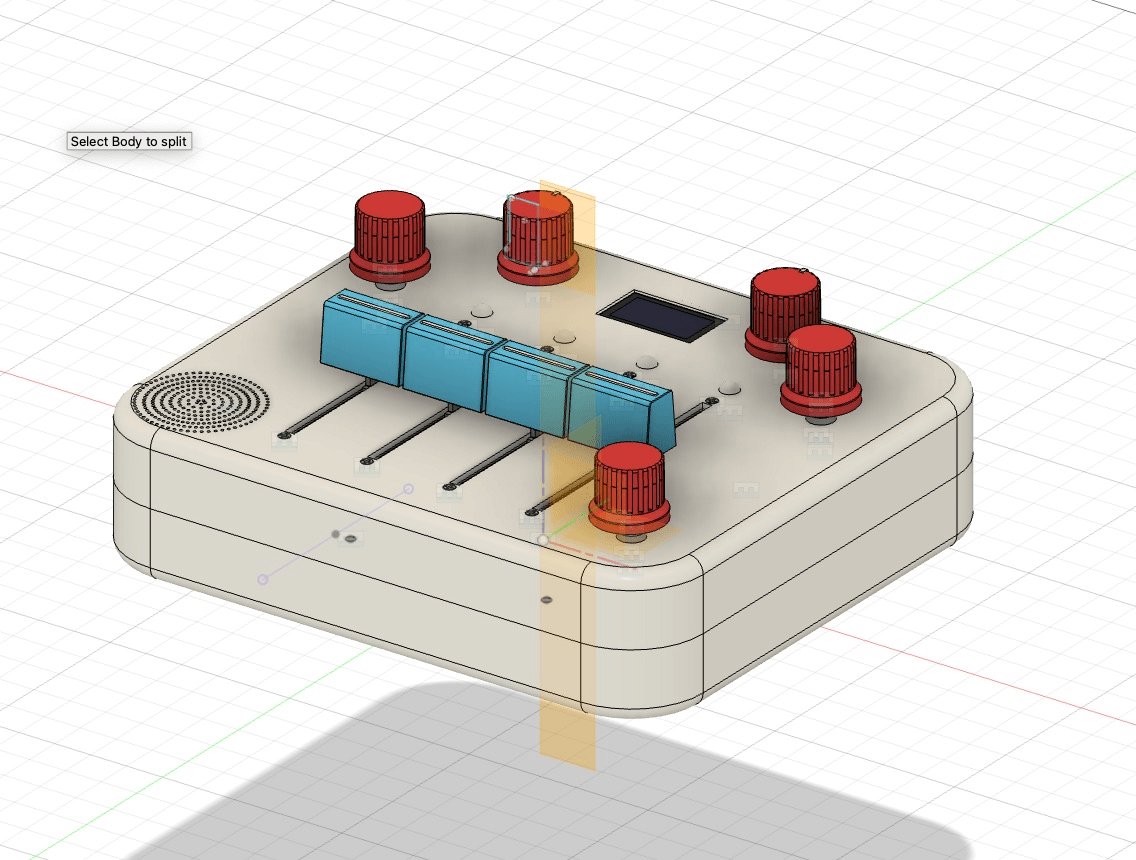
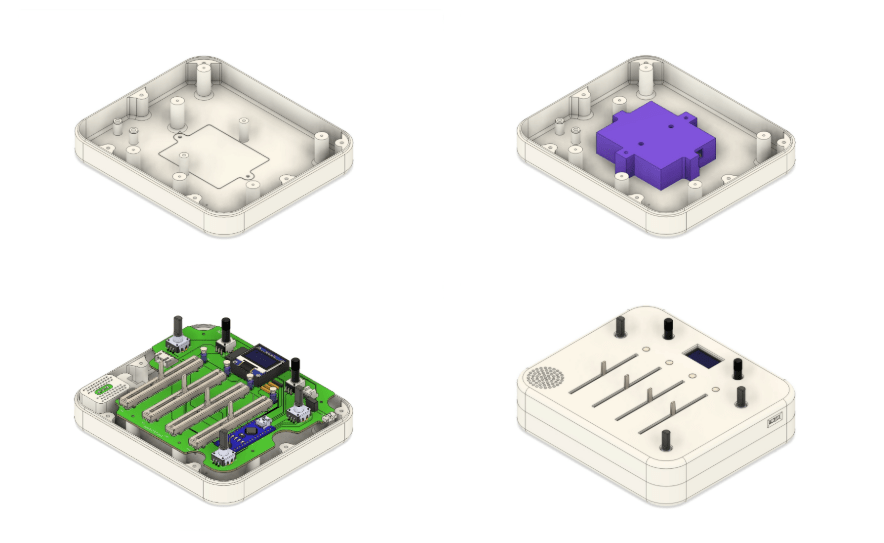
Once the breadboard was wired, the next problem was the enclosure. Since there were no commercially available cases of the right size, Roberts decided to create his own. After learning the basics of CAD, he designed it using
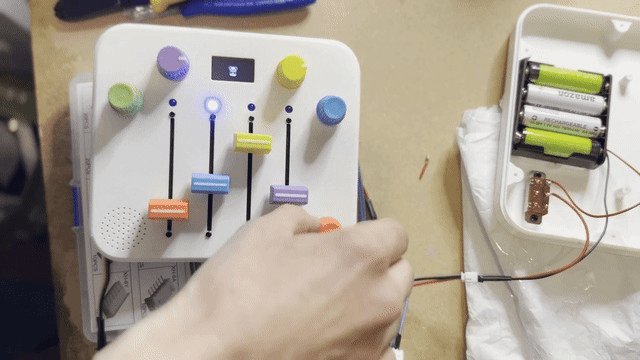
Once the case was complete, they first soldered the wiring to a breadboard and then assembled it into the case. They had some trouble with the soldered parts breaking when they tried to close the case because they had packed in too many wires, but Roberts was satisfied when he showed his daughter how much fun she had had with it.
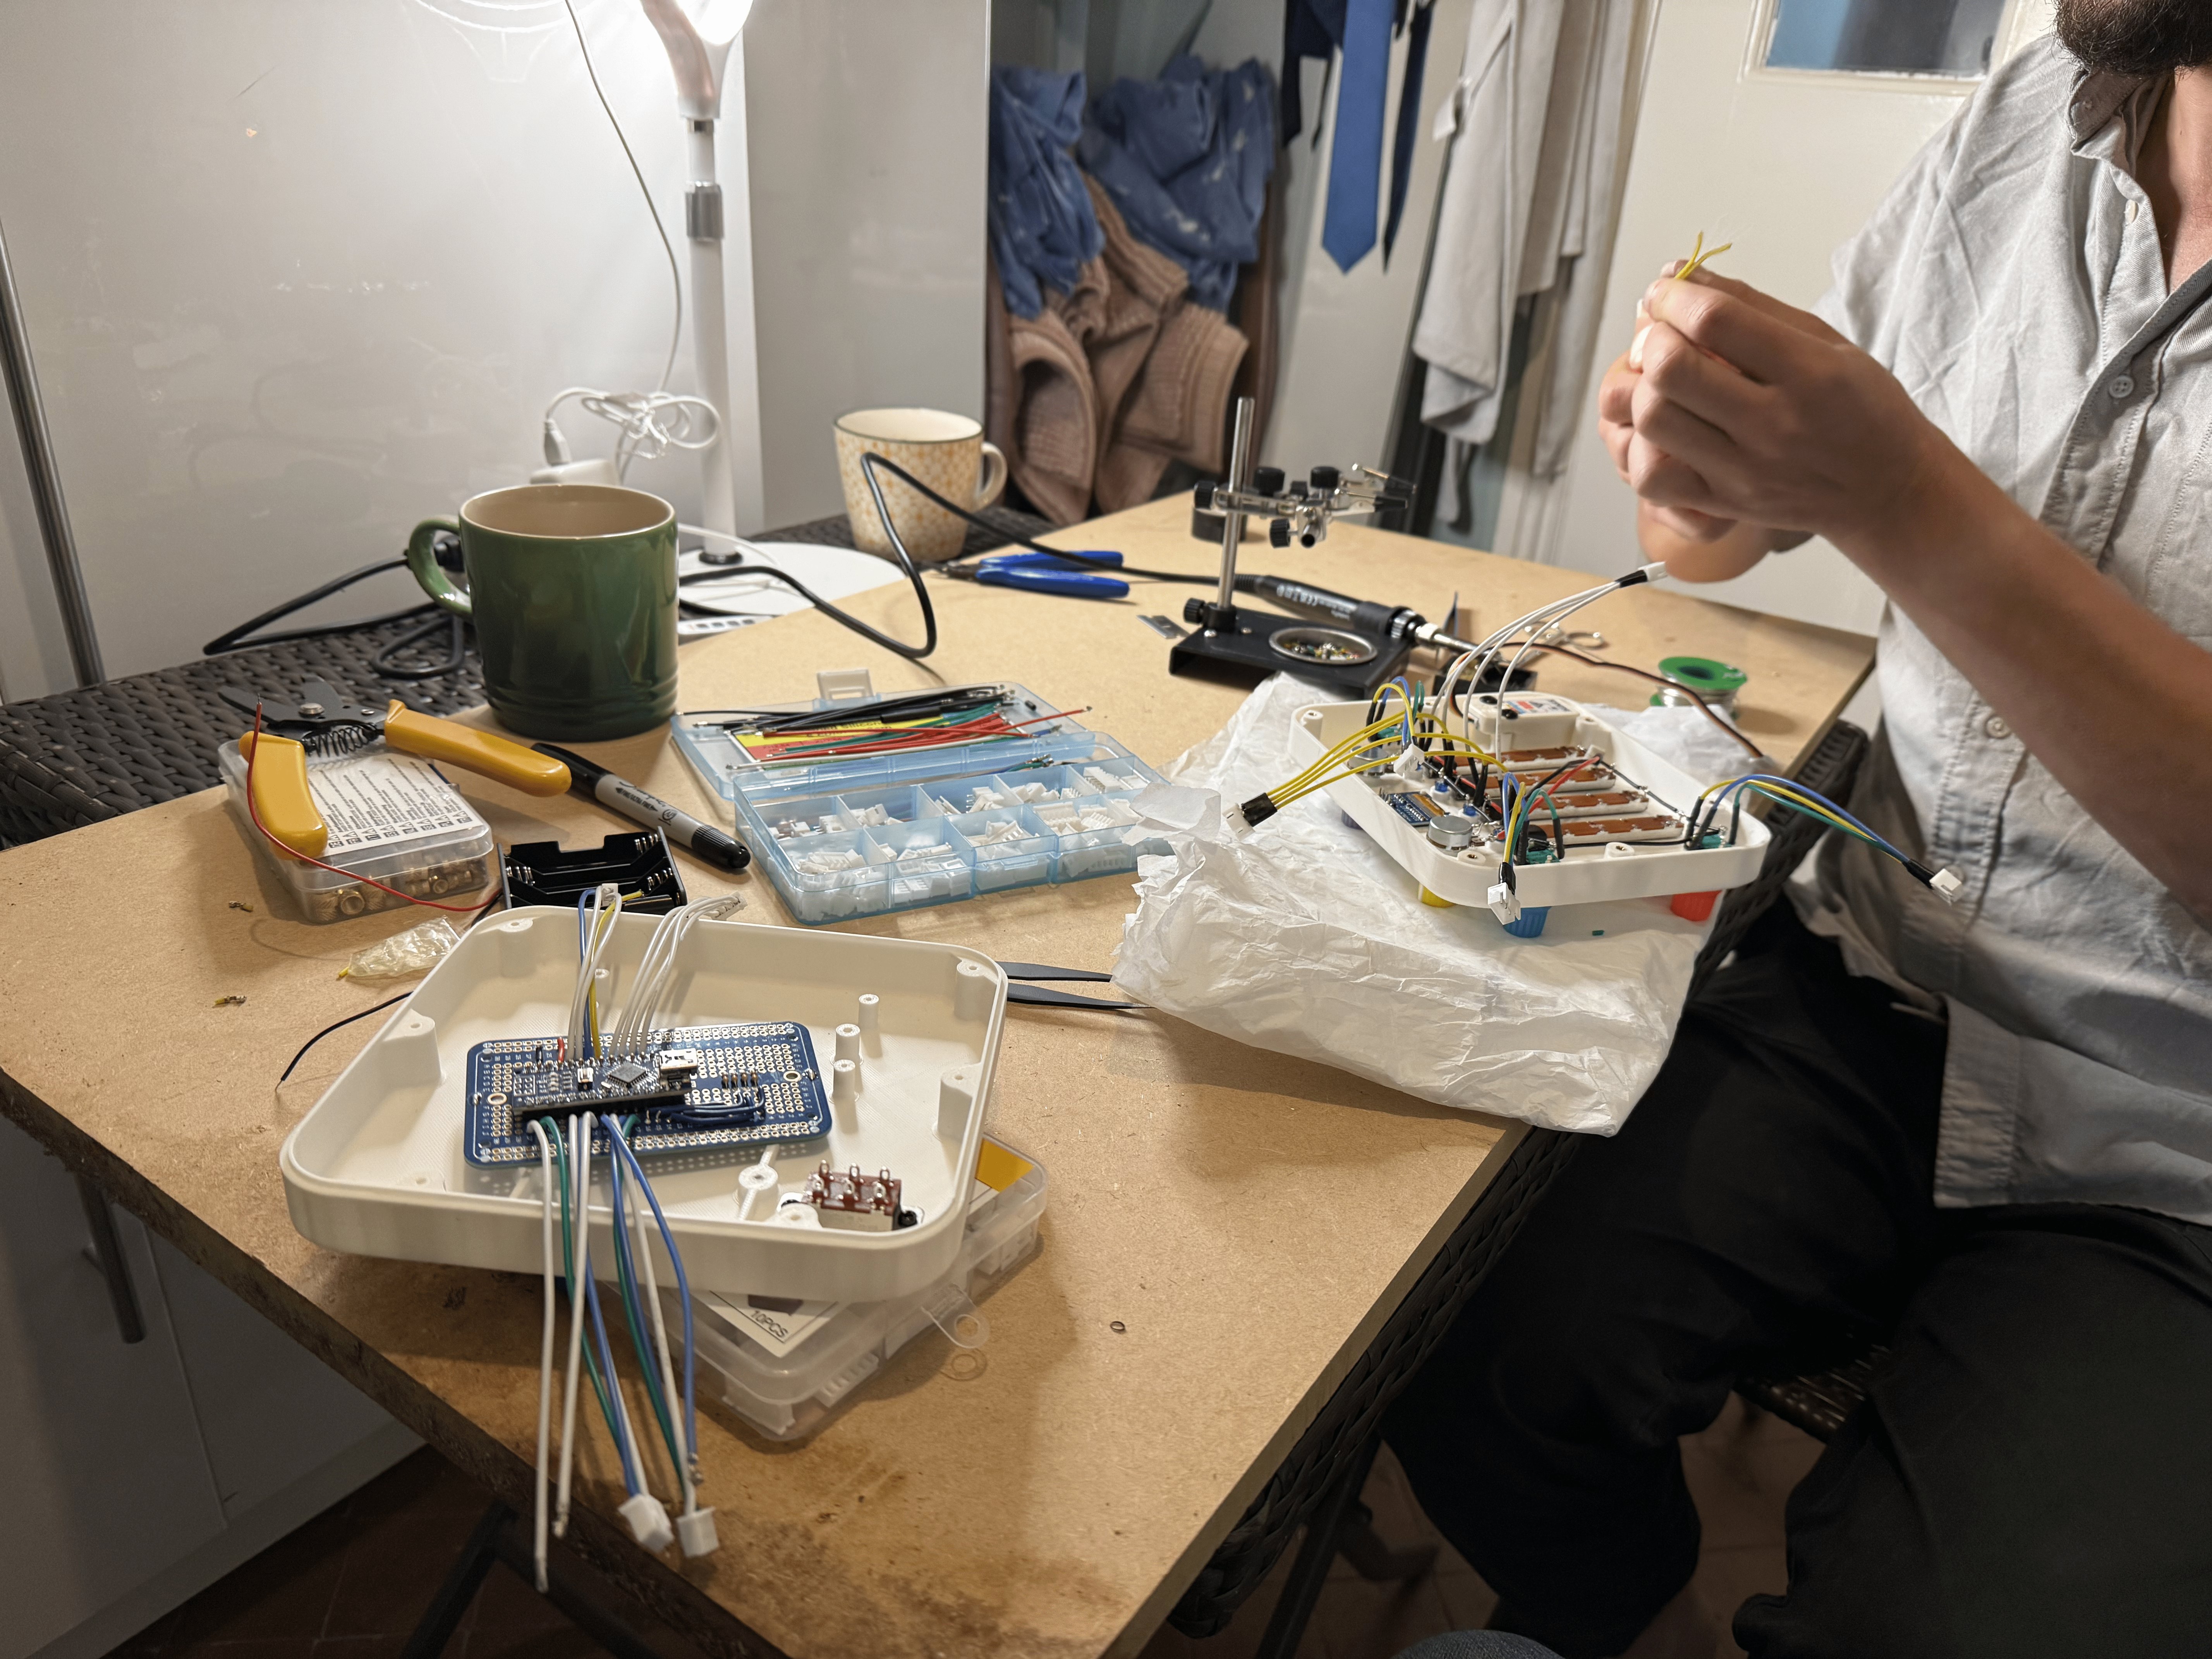
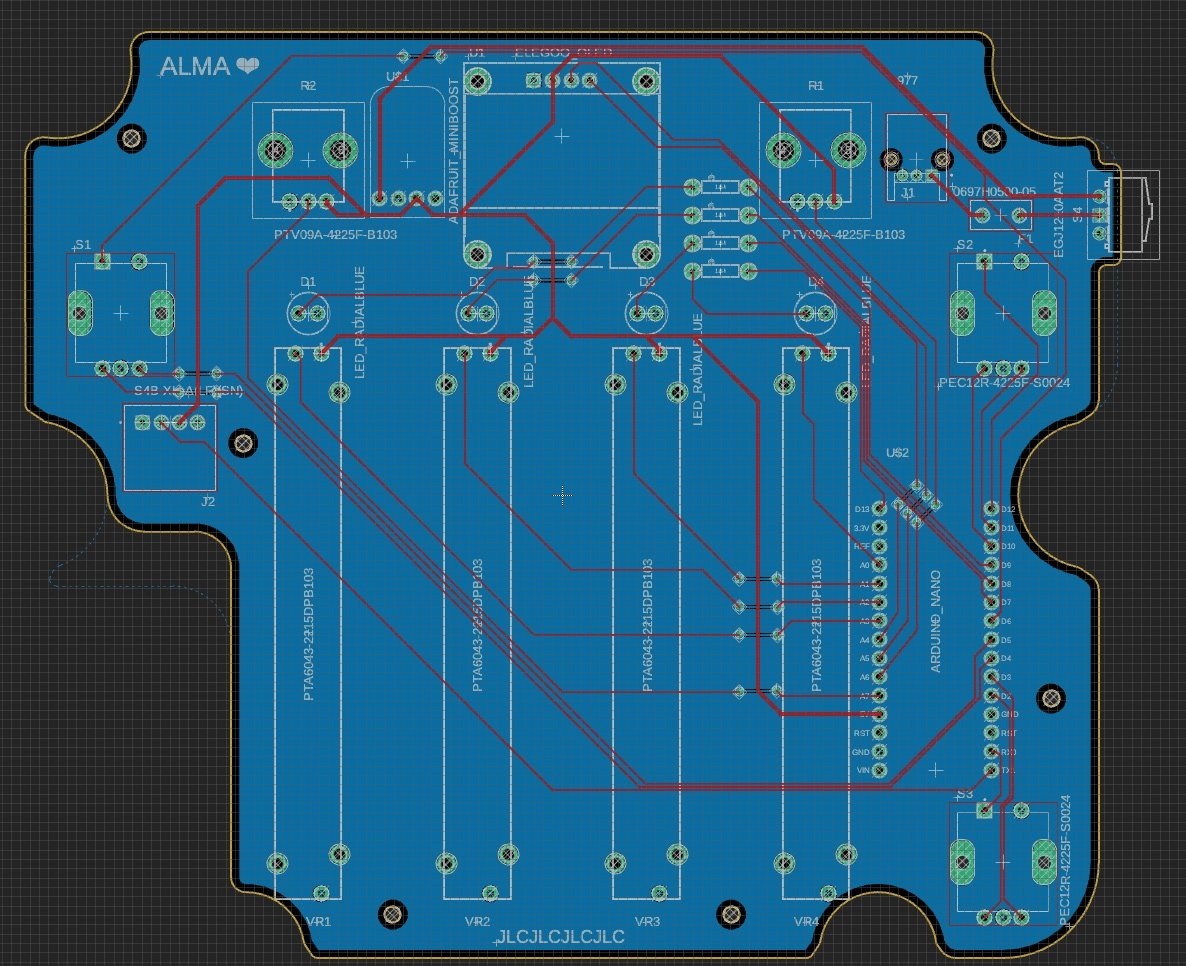
My daughter broke it while using it, and I also wanted to give some as gifts to friends, so I needed to make it more sturdy and easier to assemble. So I decided to switch from a breadboard to a printed circuit board . Again, this was something I had no experience with, so I started by gathering information on YouTube, but I eventually used Fusion 360 to design the printed circuit board as well, and was able to wire the circuit on a two-layer board.
After uploading the completed design file to

Finally, we improved the housing to better hold the printed circuit board, added a small and neat battery compartment, and added a bezel to adjust the height of the OLED, and the design was complete.
Here is the finished product.

'It's been a week since he gave the completed synthesizer to his daughter, and she's been treasuring it alongside her other toys and playing with it without getting bored. Roberts is pleased that he's achieved his first goal: to create something deep enough that his daughter can continue to enjoy it even as she grows older. He also said that he plans to continue making improvements and even consider commercializing the product.'
Related Posts:


in Hardware, Posted by log1c_sh