How to run a car computer on a desk using parts from a wrecked Tesla Model 3
Tesla vehicles are equipped with computers that control various infotainment systems and enable autonomous driving.
Running Tesla Model 3's Computer on My Desk Using Parts From Crashed Cars - bugs.xdavidhu.me
https://bugs.xdavidhu.me/tesla/2026/03/23/running-tesla-model-3s-computer-on-my-desk-using-parts-from-crashed-cars/
Tesla has a bug bounty program for researchers who find vulnerabilities in its vehicles. Schutz decided to buy parts for a Tesla Model 3 on eBay and try to run the Tesla's computer and touchscreen on his desk in order to find vulnerabilities in Tesla cars.
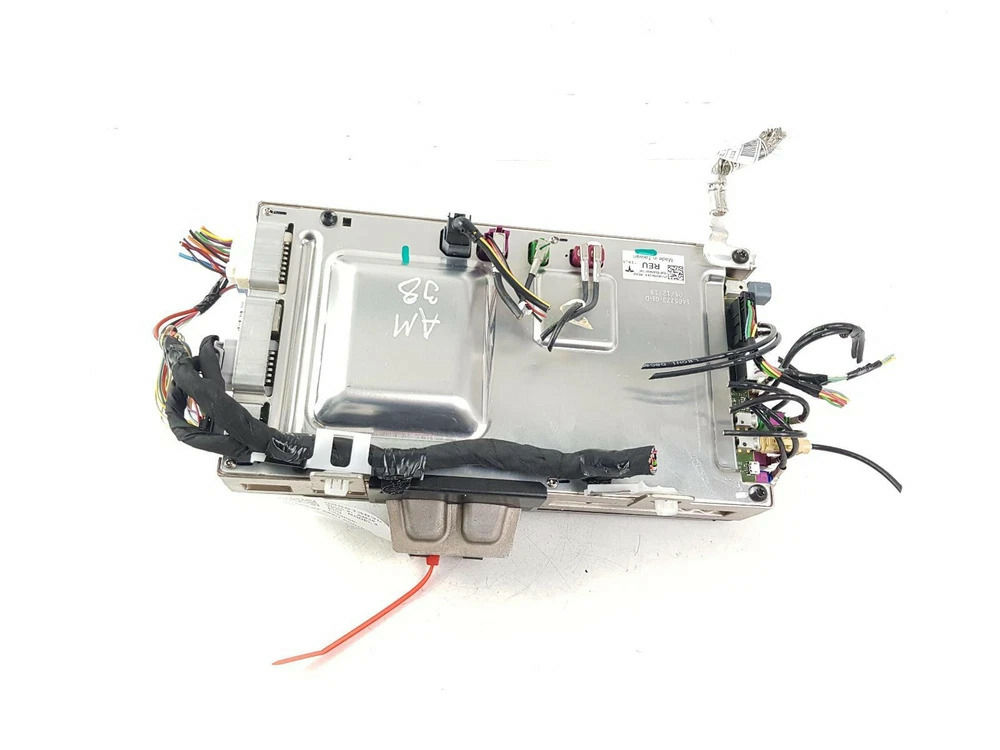
The Tesla's onboard computer consists of two components stacked on top of each other: a Media Control Unit (MCU) and an Autopilot Computer (AP). It is located behind the glove compartment in front of the passenger seat. The computer is about the size of an iPad, about the thickness of a 500-page book, and is housed in a water-cooled metal case.
When Mr. Schutz searched on eBay, he found a considerable number of Tesla Model 3 MCUs being sold in the $200-$300 price range (approximately 32,000-48,000 yen). Many of these sellers were businesses that took in wrecked cars, dismantled them, and sold the parts individually.
To power up the car's computer, in addition to the MCU, he needed a DC power supply capable of providing 12V, a touchscreen module taken from a disassembled Model 3, and cables to connect them. Schutz purchased a variable DC power supply (0-30V) from Amazon and a touchscreen module for $175 (approximately 28,000 yen) from eBay. However, the problem was the cable connecting the MCU and the screen; most vendors apparently cut the cable a few centimeters from the connector before selling it.
Schutz consulted the 'electrical reference' for the wiring of all Tesla models on Tesla's service website and learned that the Model 3 uses a 6-pin cable and a special connector (Rosenberger 99K10D-1D5A5-D). Since these cables were difficult for the average person to purchase, Schutz decided to substitute them with a similar cable called 'LVDS,' which is used for video transmission in BMWs.
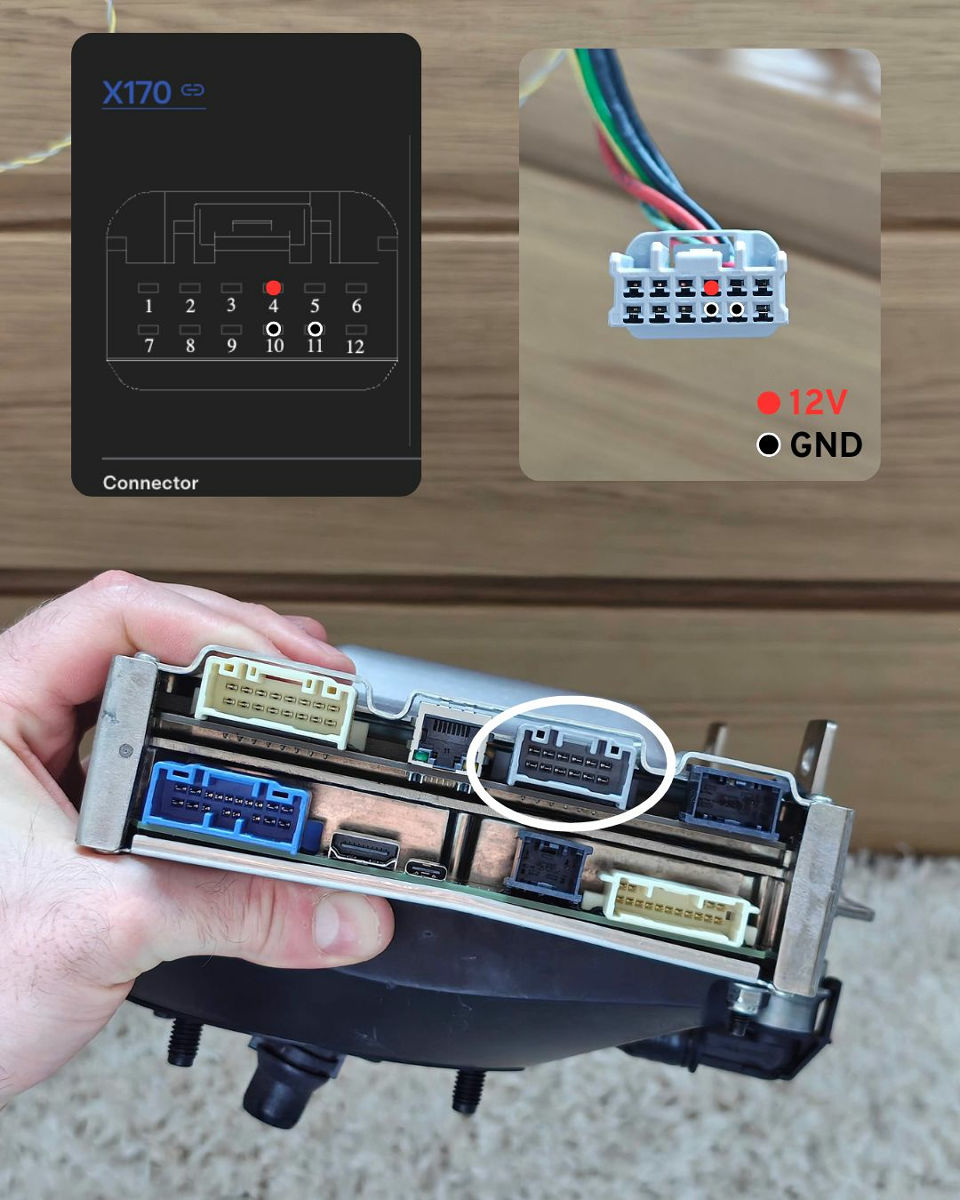
Since the MCU arrived first, Schutz used online photos as a reference to strip the wiring from the included cables and attach the power clips in the correct positions. He then saw the red LED light up and the computer boot up.
Afterward, Schutz connected an Ethernet cable to the port next to the power connector and to his laptop, and waited for the screen and cables to arrive while manually assigning an IP address since there was no
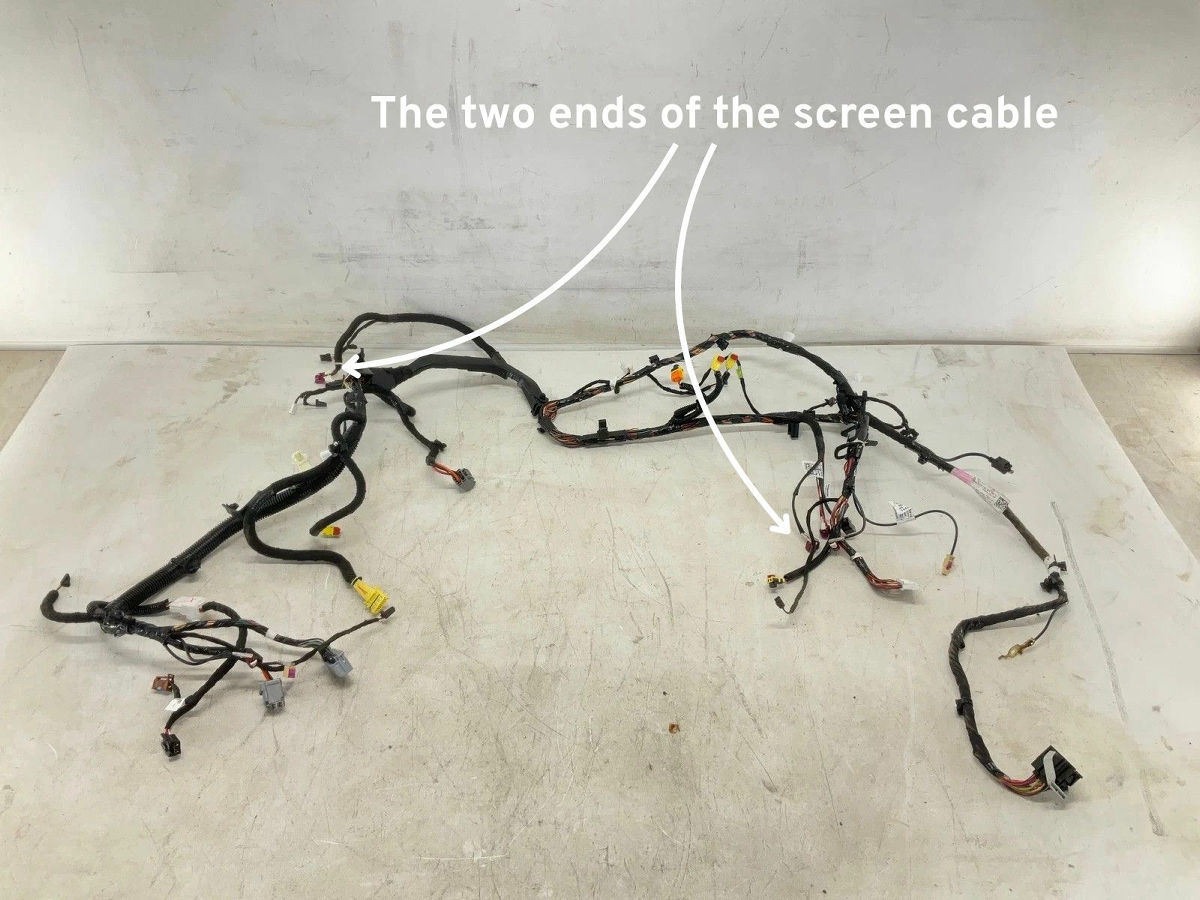
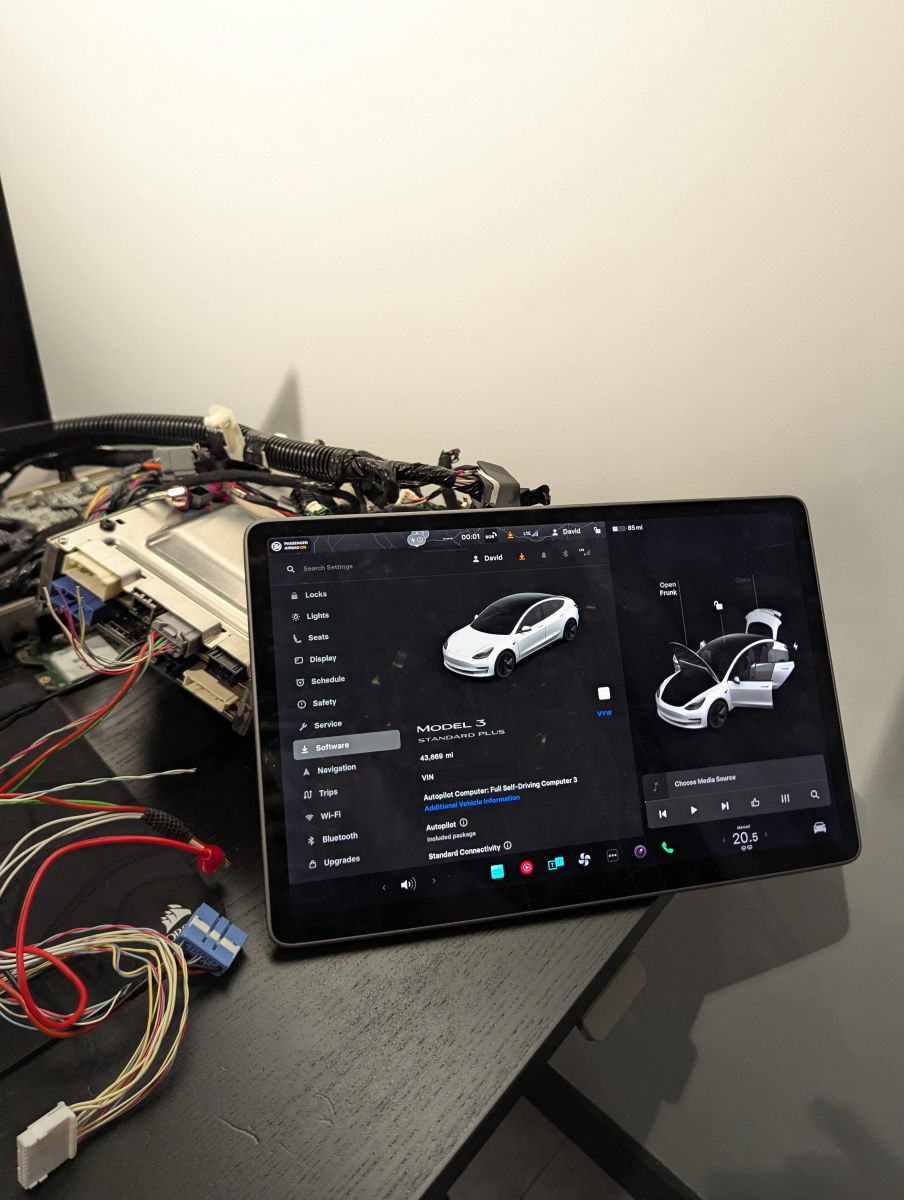
Ultimately, Schutz decided to purchase a complete wiring harness for the dashboard. Upon receiving the harness, he discovered that Tesla vehicles don't use individual cables, but rather harnesses that bundle multiple cables together. In other words, the individual cables Schutz was looking for weren't even manufactured; they were all integrated into the harness. Below is a photo of the actual harness.
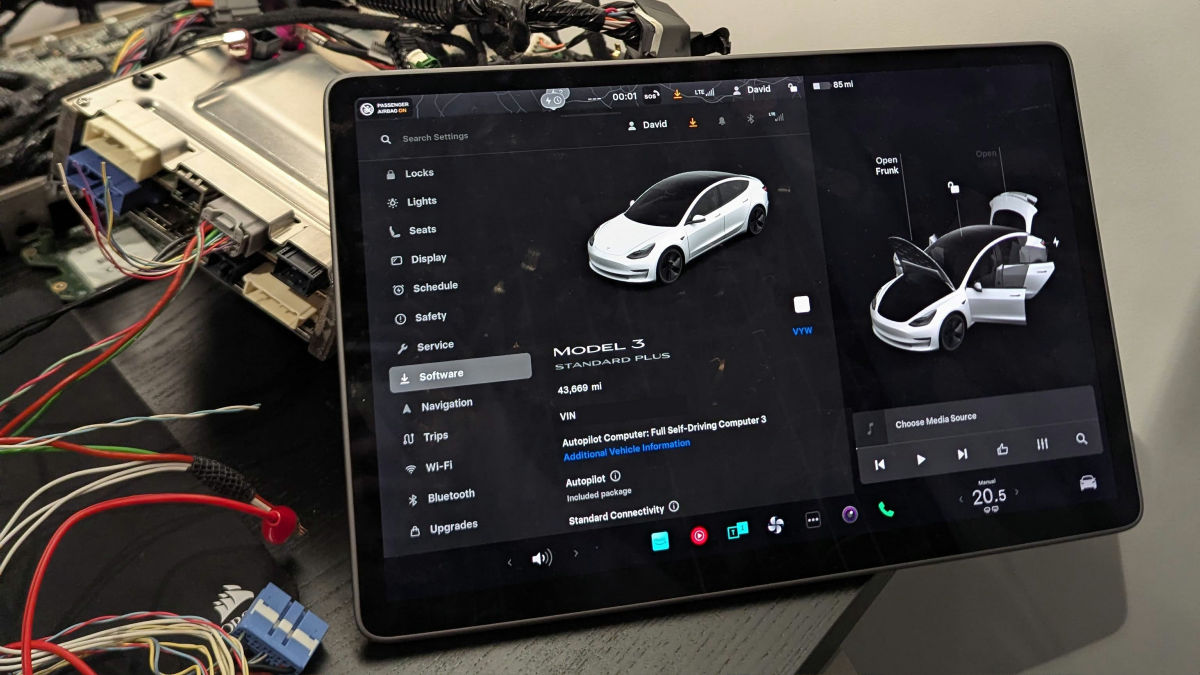
The wiring harness was quite bulky, but it allowed Schutz to successfully run Tesla's in-car computer on his desk. Schutz said he plans to go on to manipulate the user interface, interact with the publicly available network interface, explore the CAN bus, and possibly attempt to extract the firmware.
Related Posts: