I took a lot of photos and videos while walking around Nara and Kyoto with the Xperia 10 VII.
I took
Xperia 10 VII | Xperia | Sony
https://www.sony.jp/xperia/products/xperia10m7/
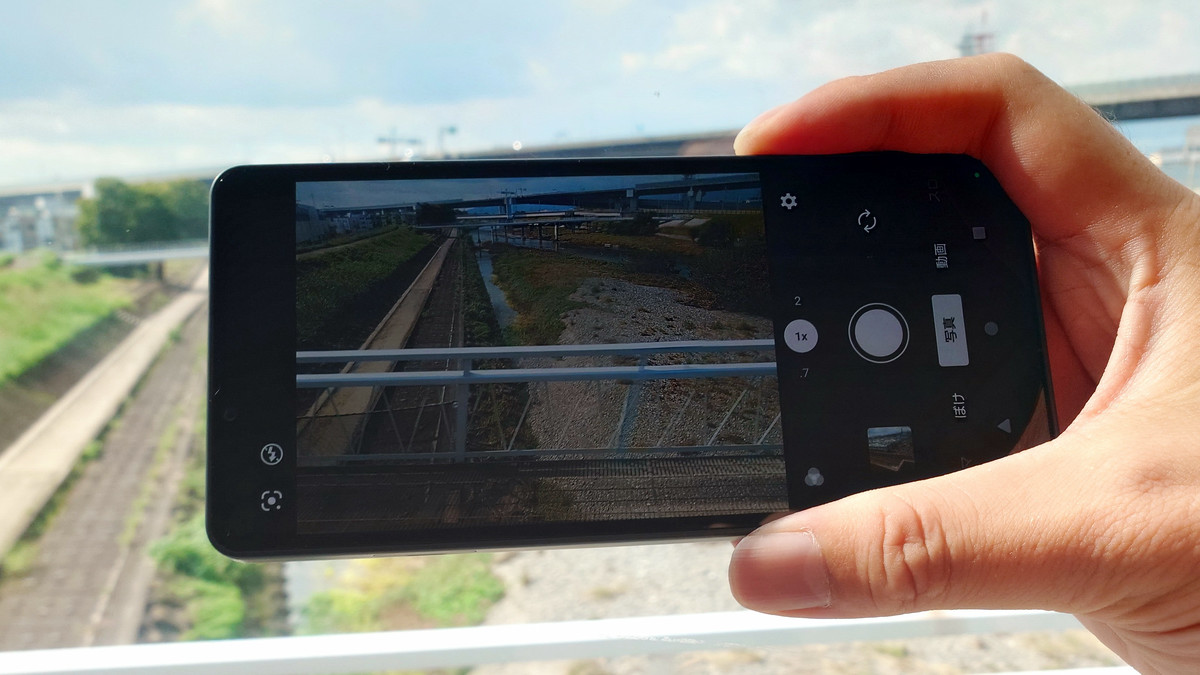
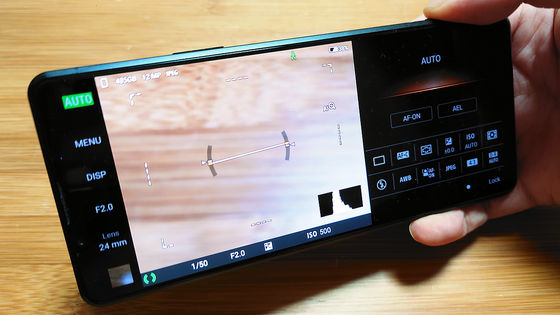
The default camera app UI looks like this:

The menu allows you to set skin beautification effects, turn the hand shutter on and off, etc. One of the features is the 'Long press shutter button setting' at the bottom.
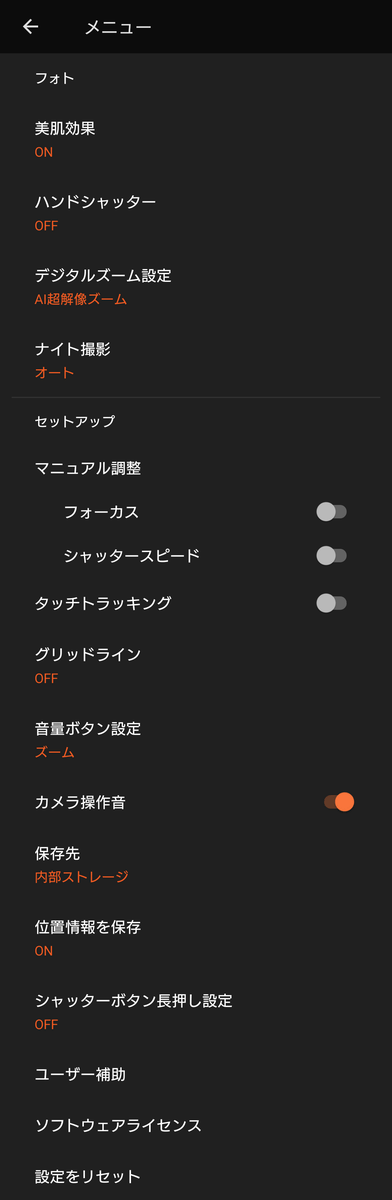
If you change this setting, you will be able to start recording video or switch between photo and video recording by pressing and holding the shutter button while the camera app is running.
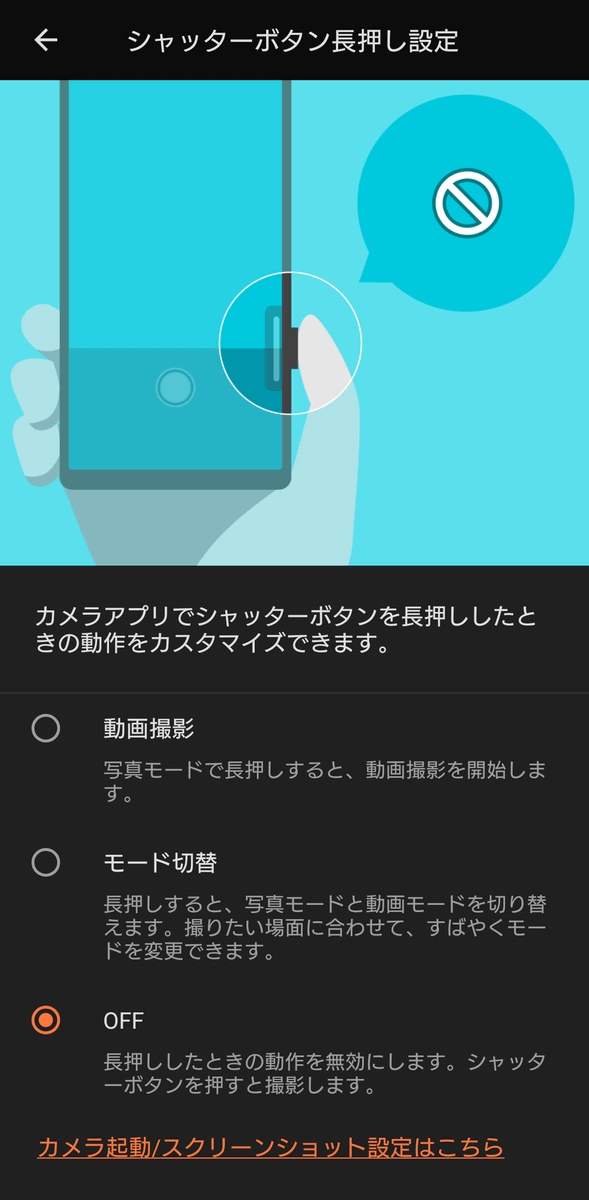
You can also set the shutter button behavior when the camera app is not running. The settings are to turn on or off 'taking a screenshot' when pressed briefly, and 'launching the camera app' when pressed and held. Combinations such as 'taking a screenshot when the camera app is not running with a long press' are not possible.
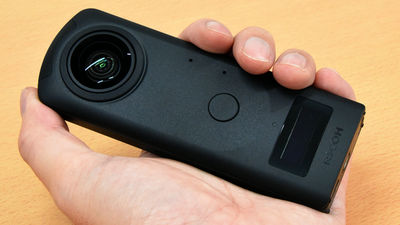
The shutter button is located slightly below the right side of the body.
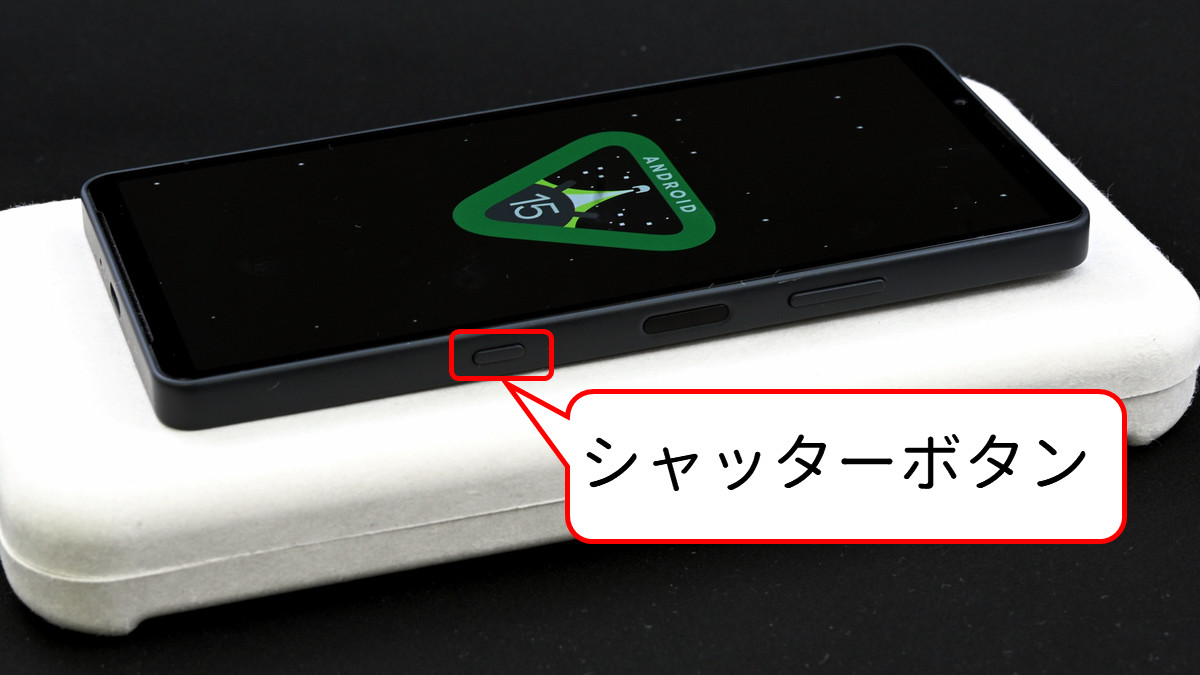
This makes it very stable when holding the camera horizontally with one hand. Also, with the shortcut settings mentioned above, you can quickly take photos by simply taking the Xperia 10 VII out of your pocket or bag, holding down the shutter button, and holding it up, and the camera app will be running when you take the photo.
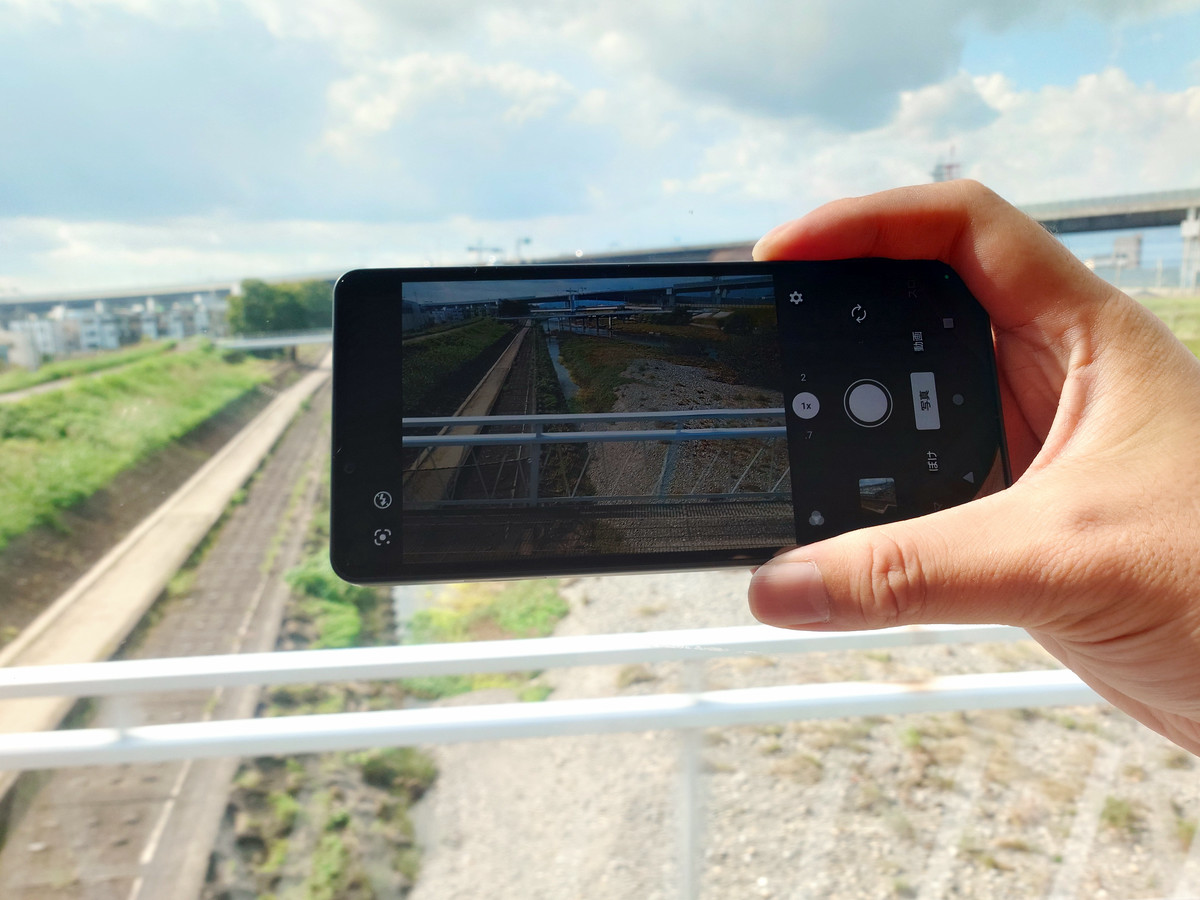
Below are photos and videos actually taken with the Xperia 10 VII camera. Unless otherwise noted, the photos were taken with the 24mm/48mm wide-angle camera, with the settings left at default. Clicking on the photos will open the full-size file (4000px x 3000px, 1MB-7MB per image).
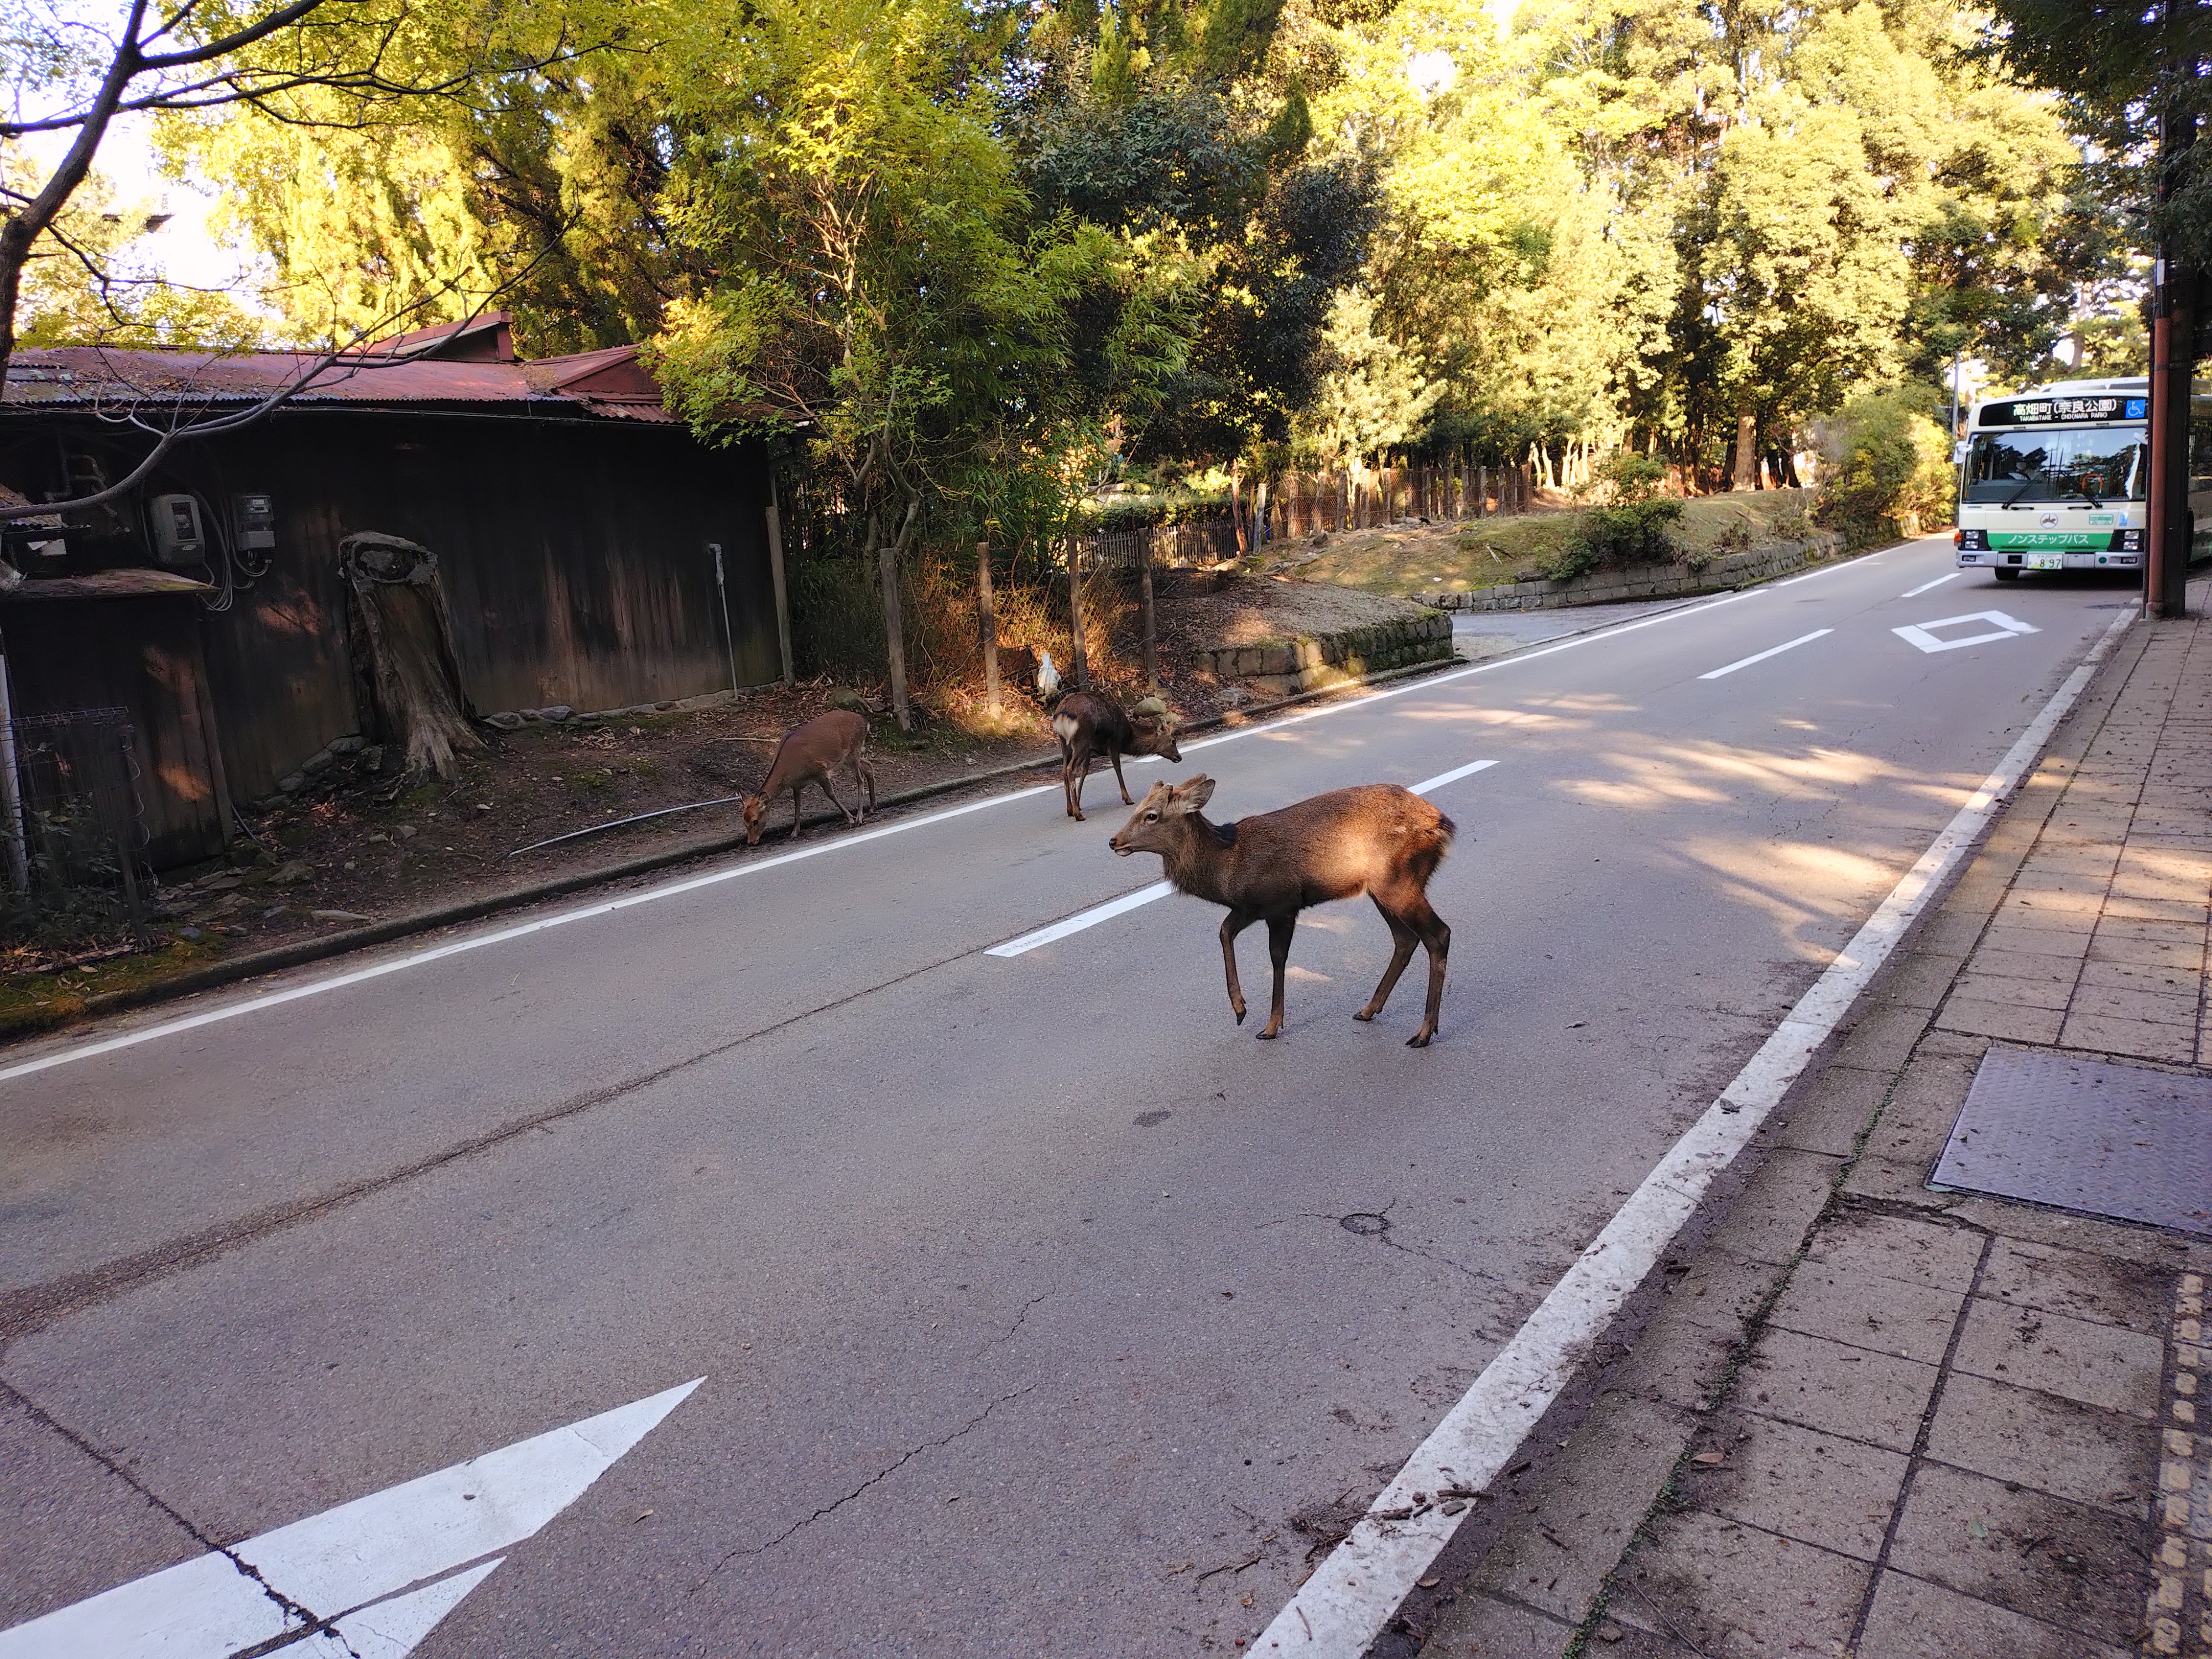
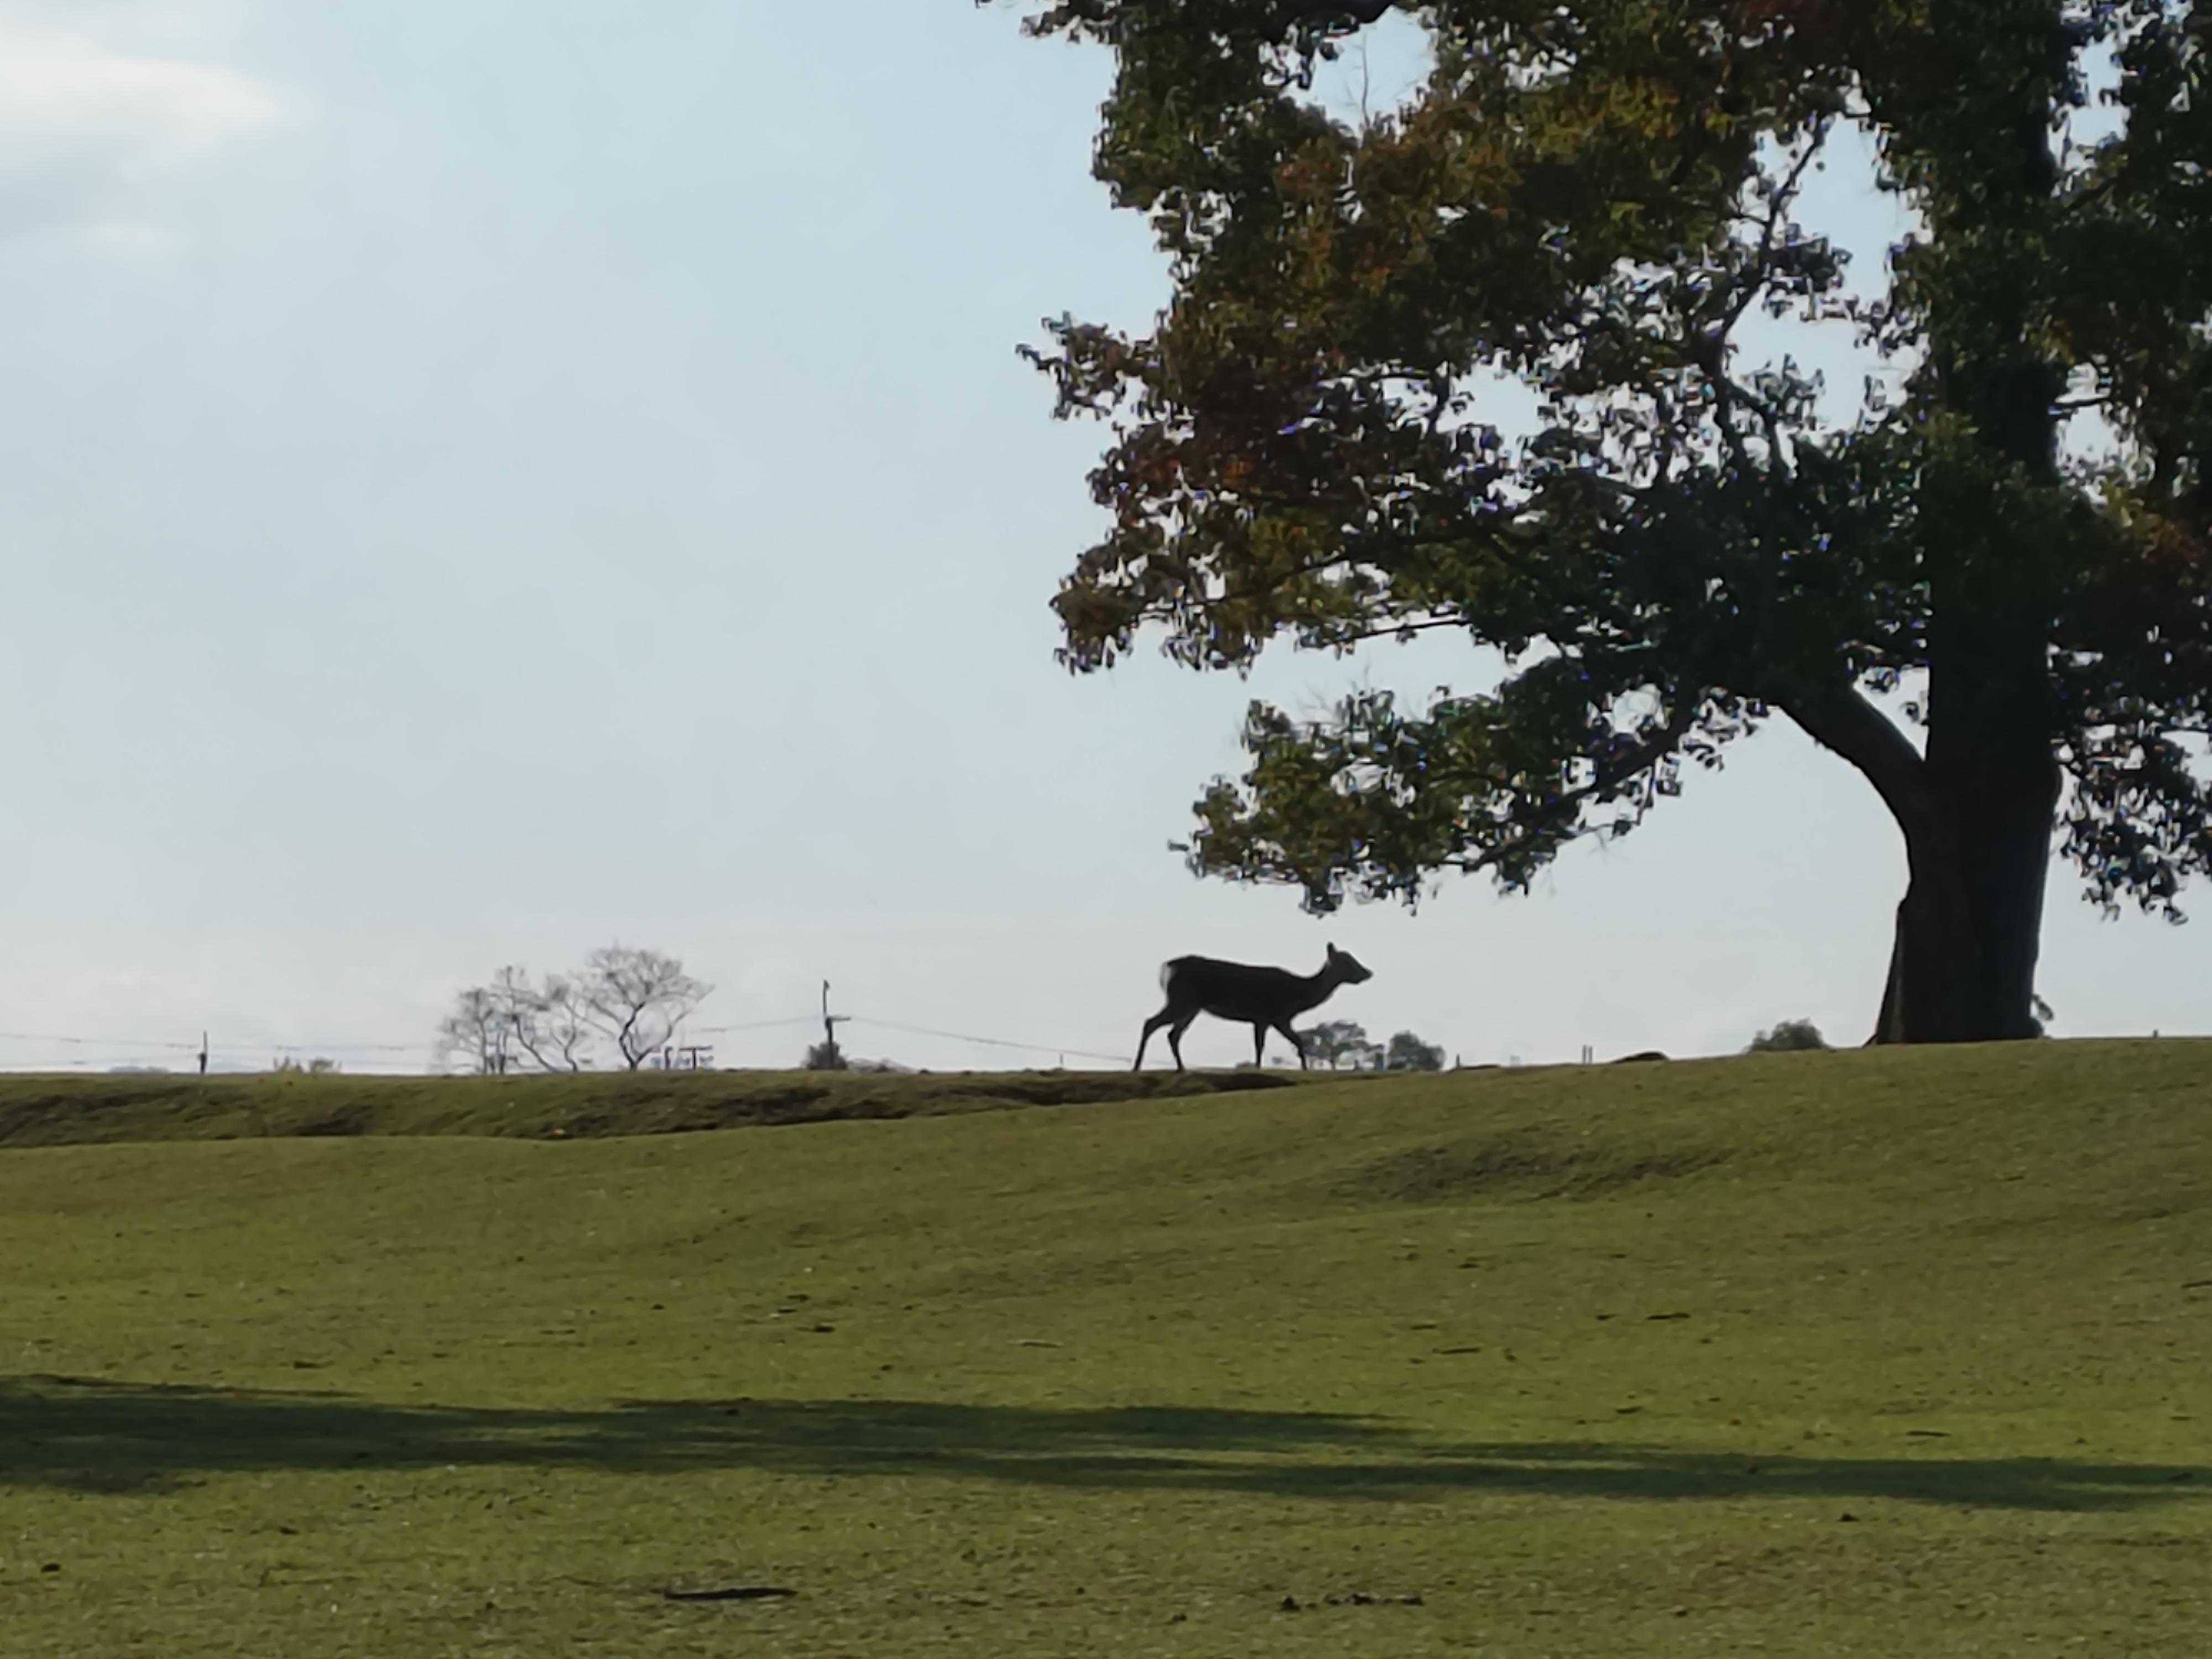
I arrived in Nara, which has been much talked about for a while. First of all, I spotted a deer boldly crossing the road.
A sunny day in
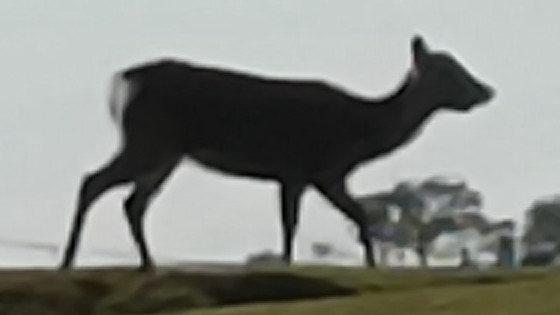
Using the maximum telephoto lens, I photographed a silhouette of a deer.
If you cut out only the silhouette at full size, it looks like this. It seems to capture the silhouette of a deer without antlers perfectly, but the tree behind it looks a bit oddly shaped.
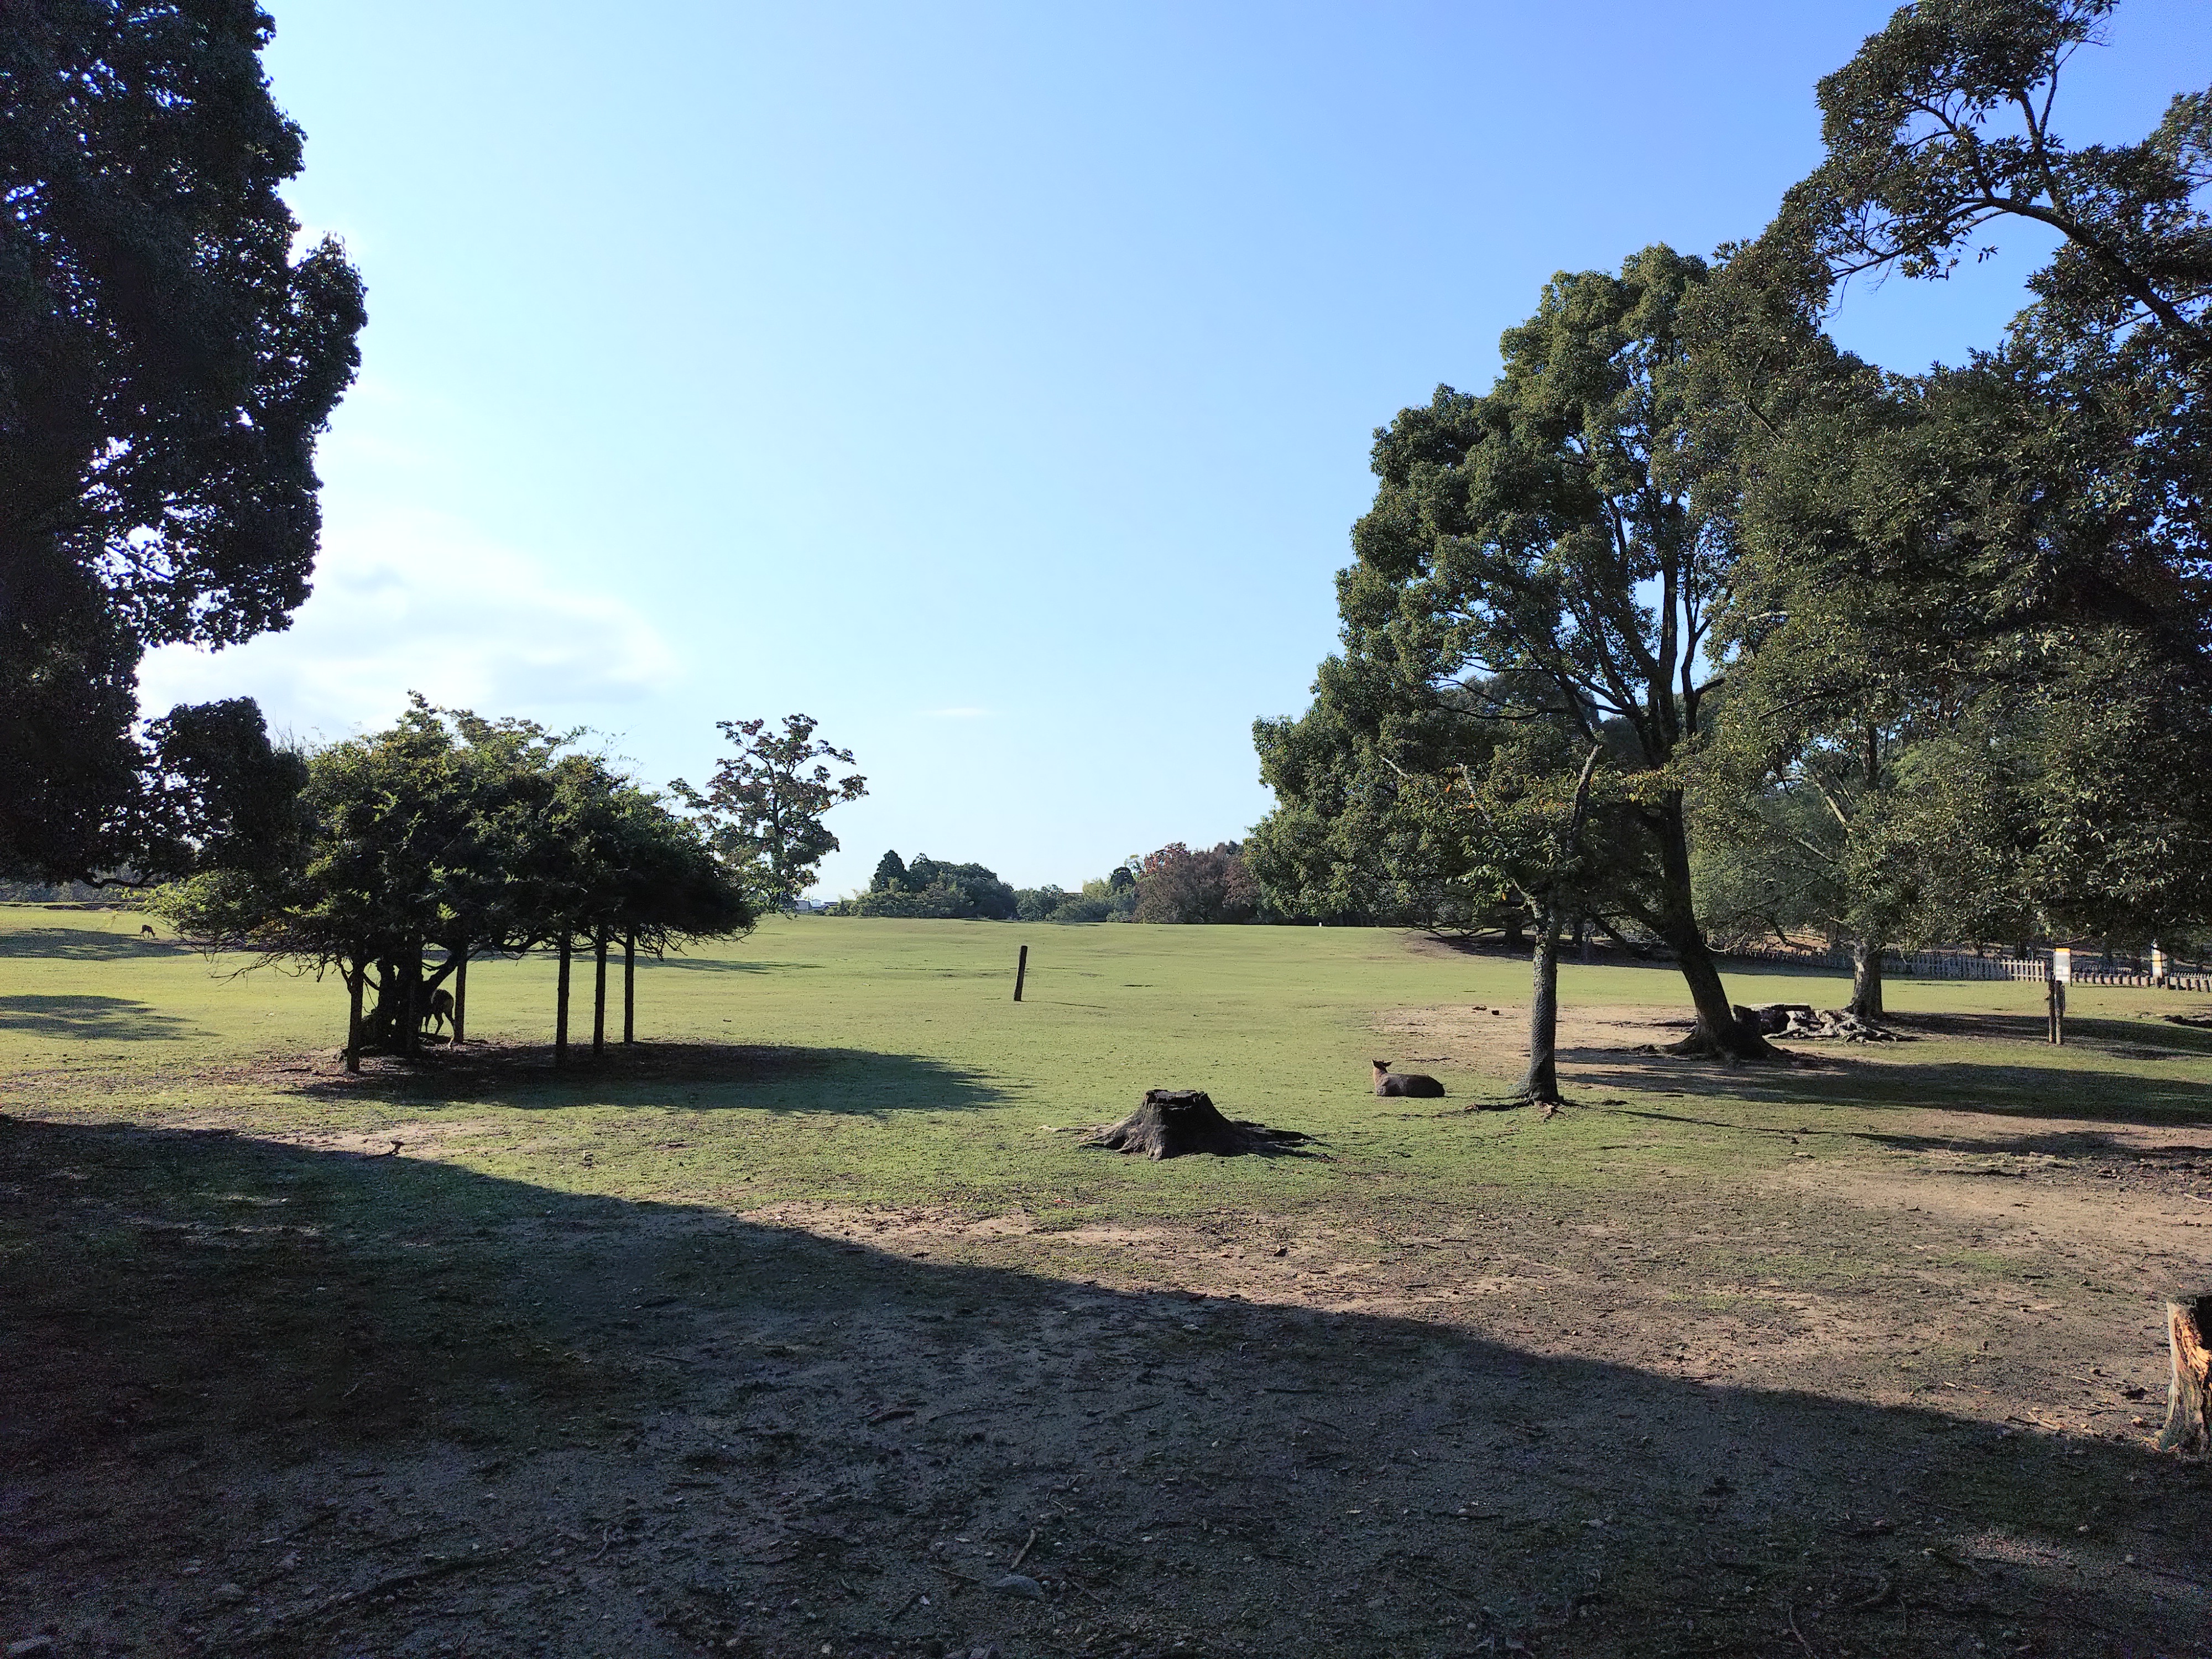
The panoramic photo taken at Tobihino looks like this.

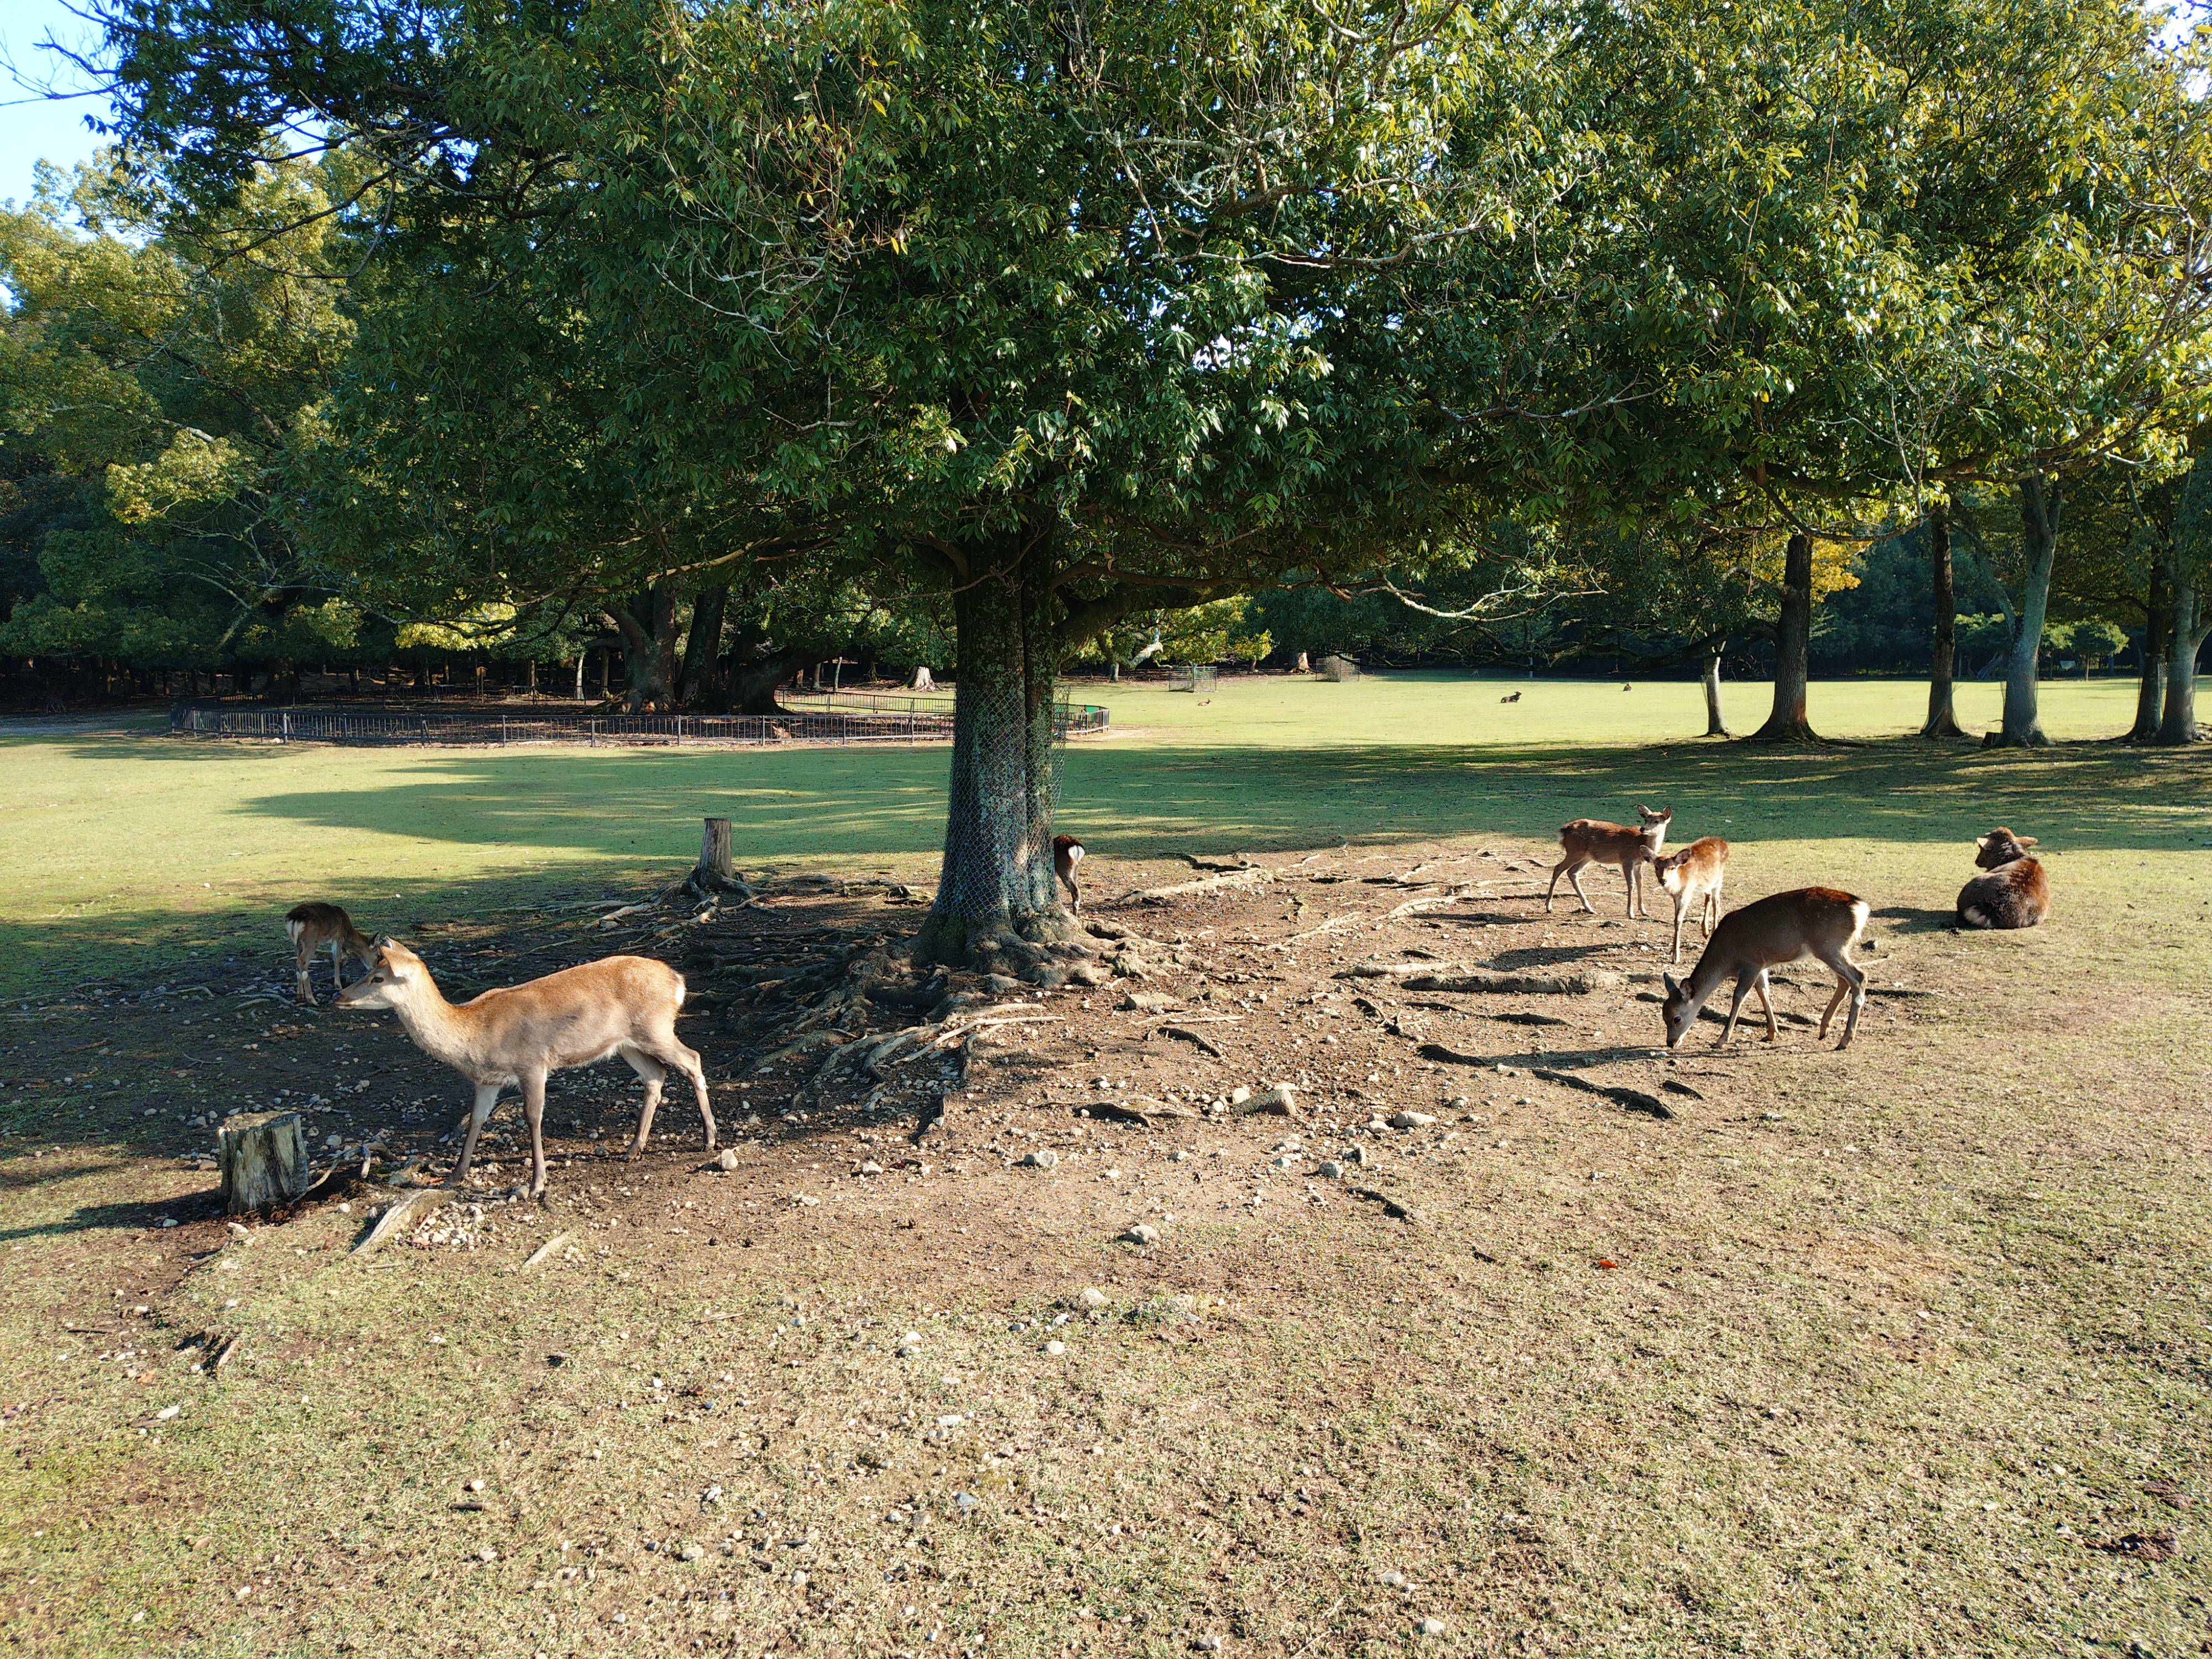
Deer gathered around a tree.
I filmed a sitting deer in a video. As I changed the focus point while filming, the white balance was adjusted accordingly, resulting in subtle changes in the color of the grass.
Moving to another location, we came across another herd of deer near Araki Pond Park.
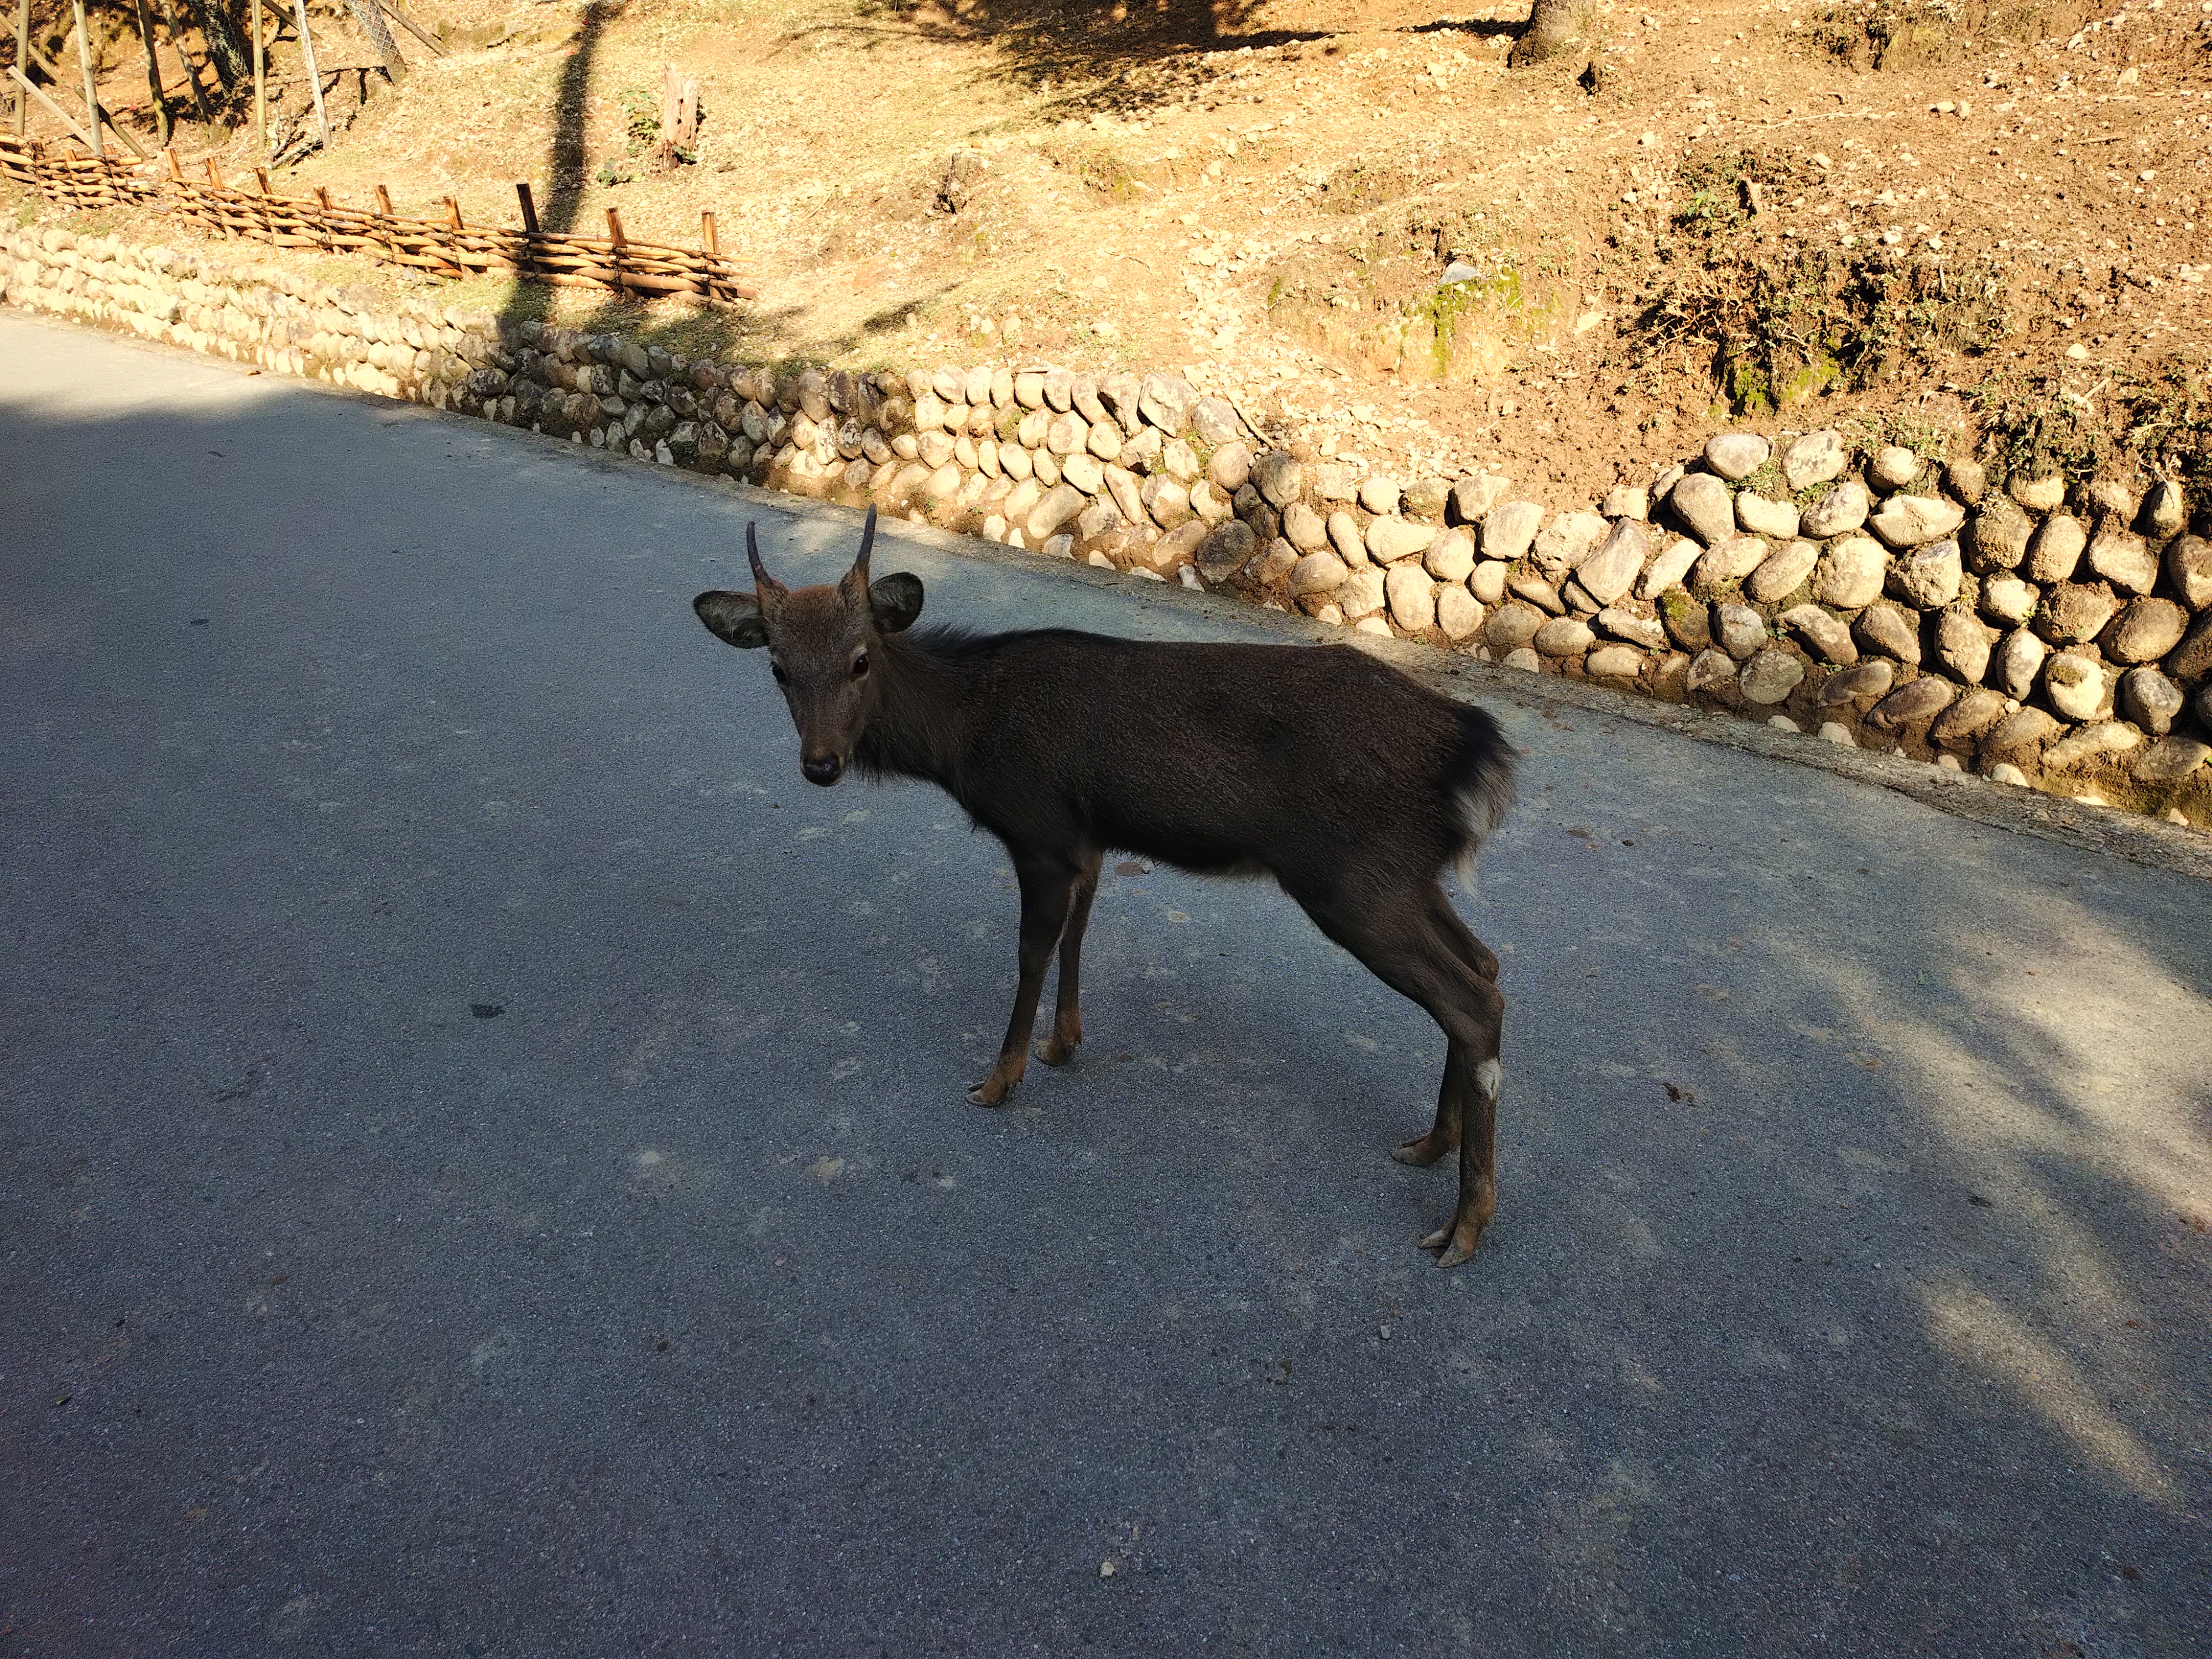
A deer came close to me.
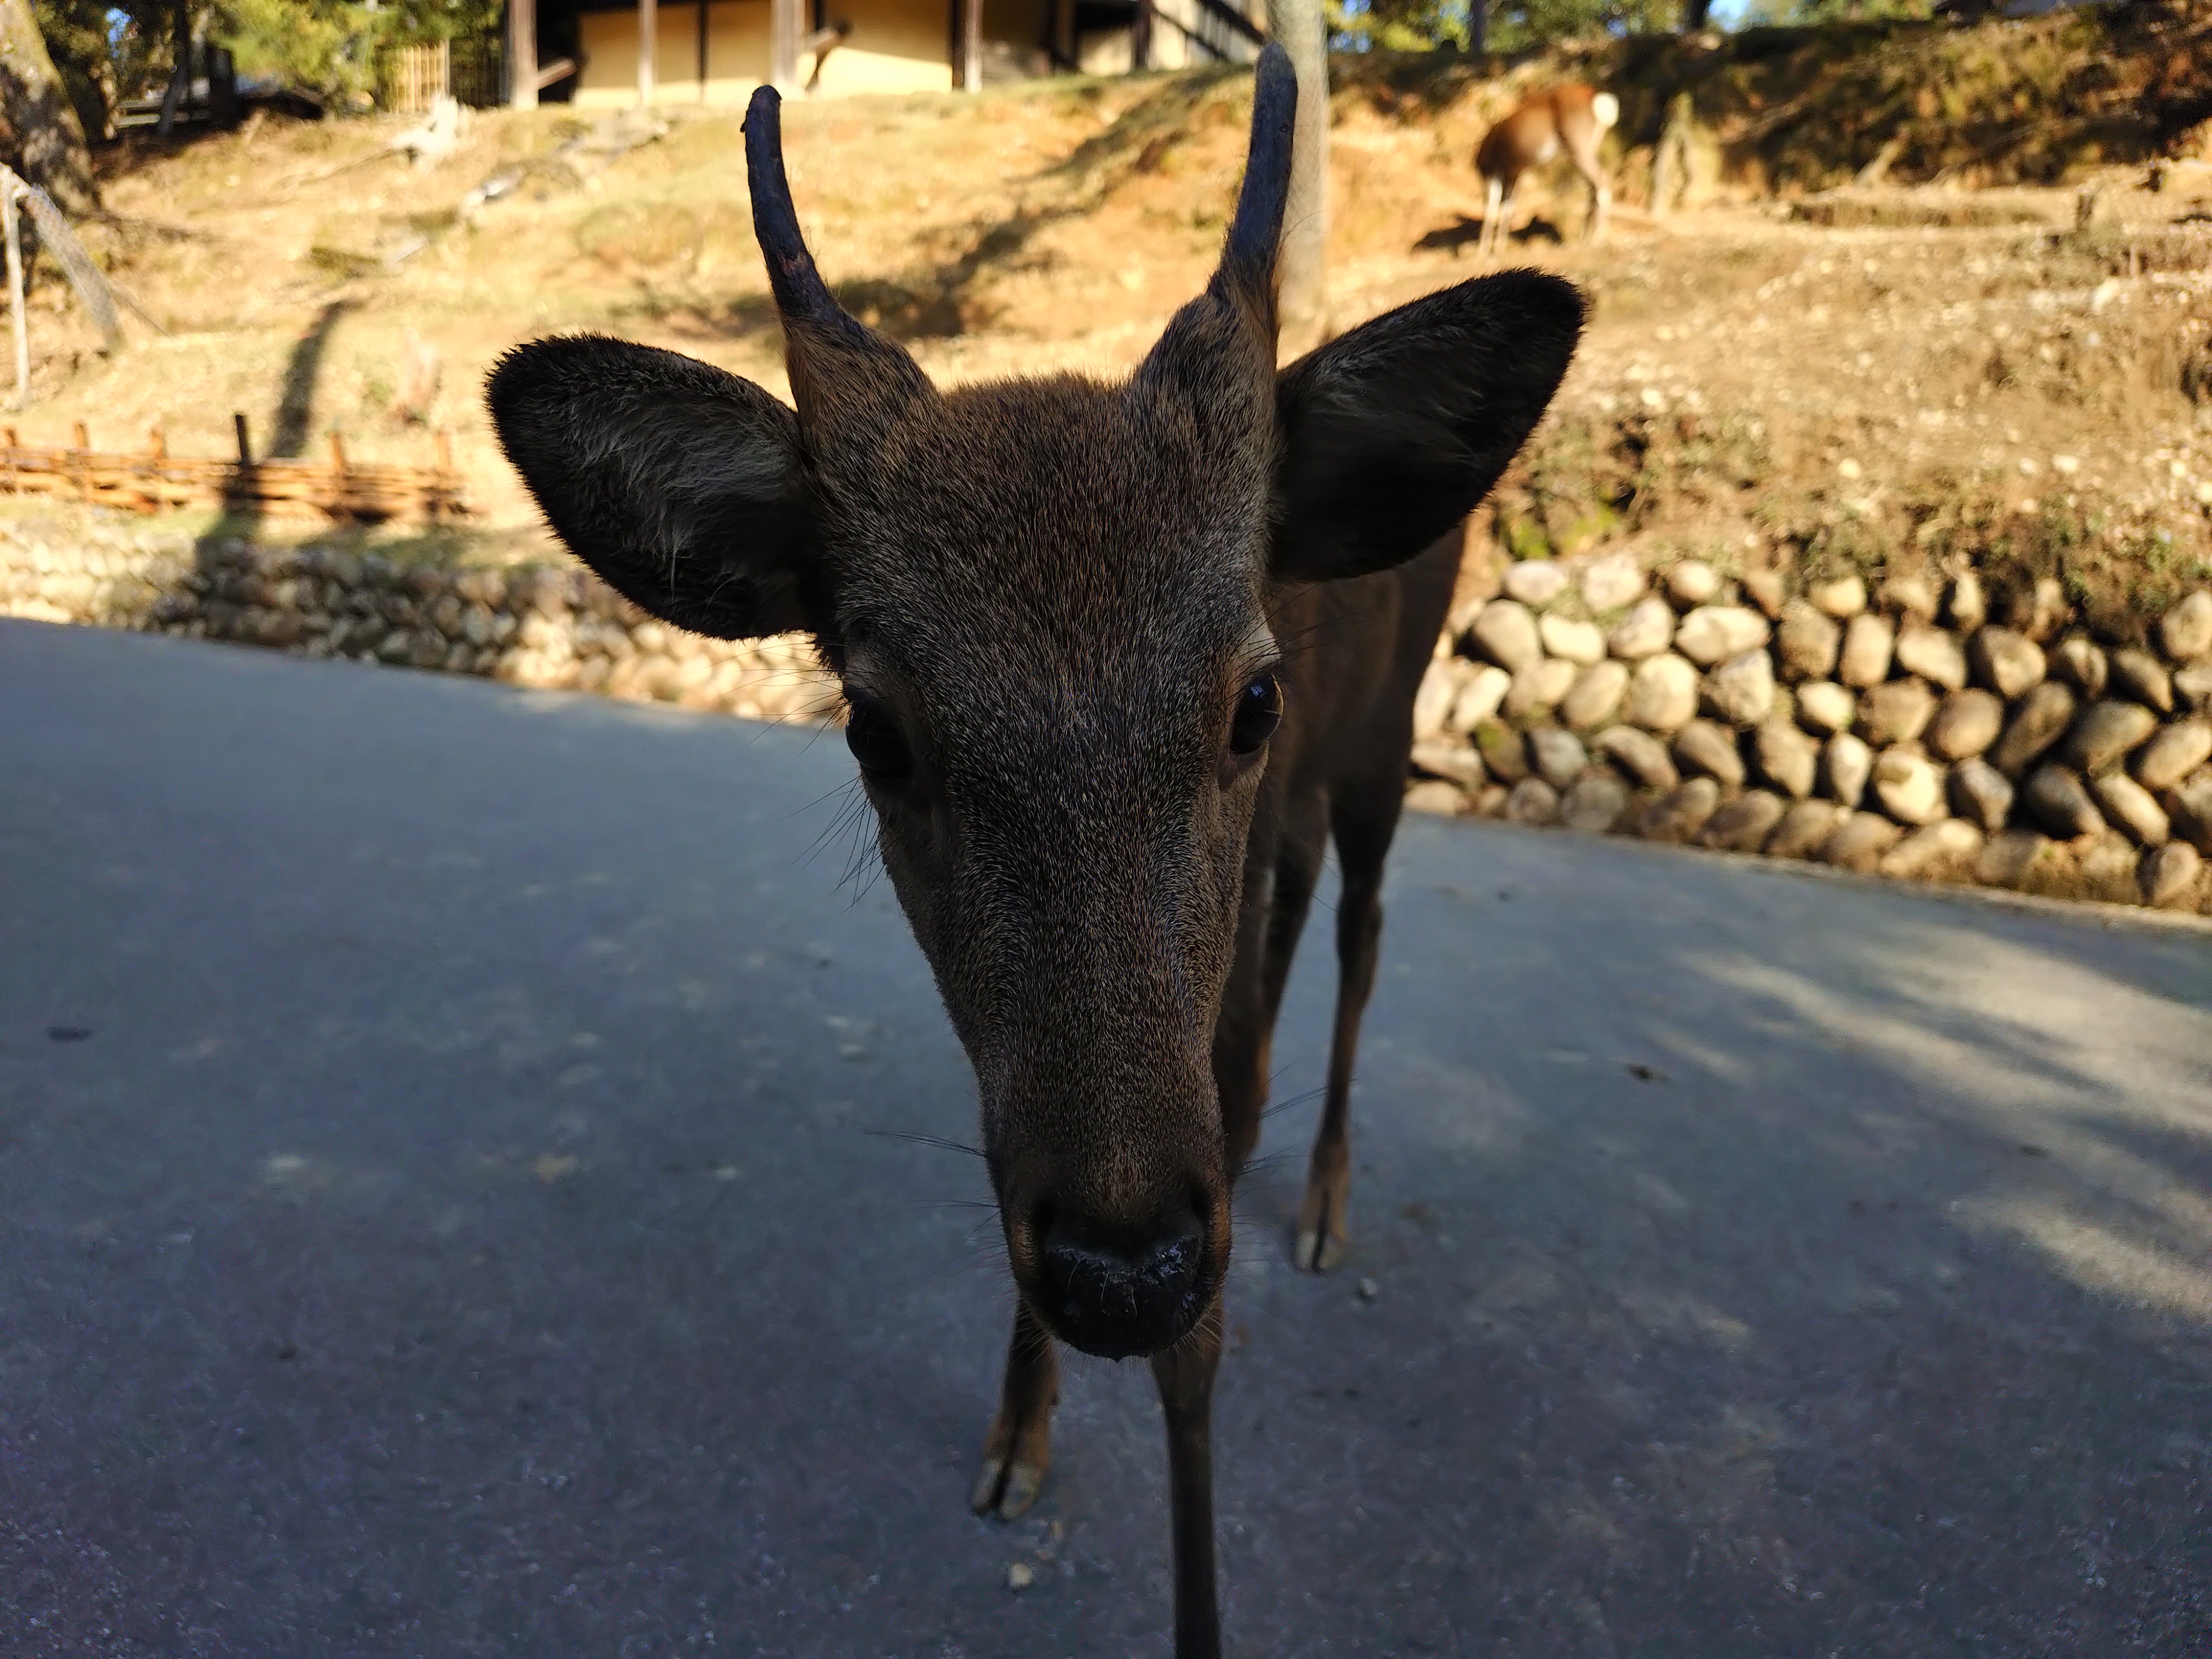
This photo was taken as close as possible, with the tip of the nose in focus.
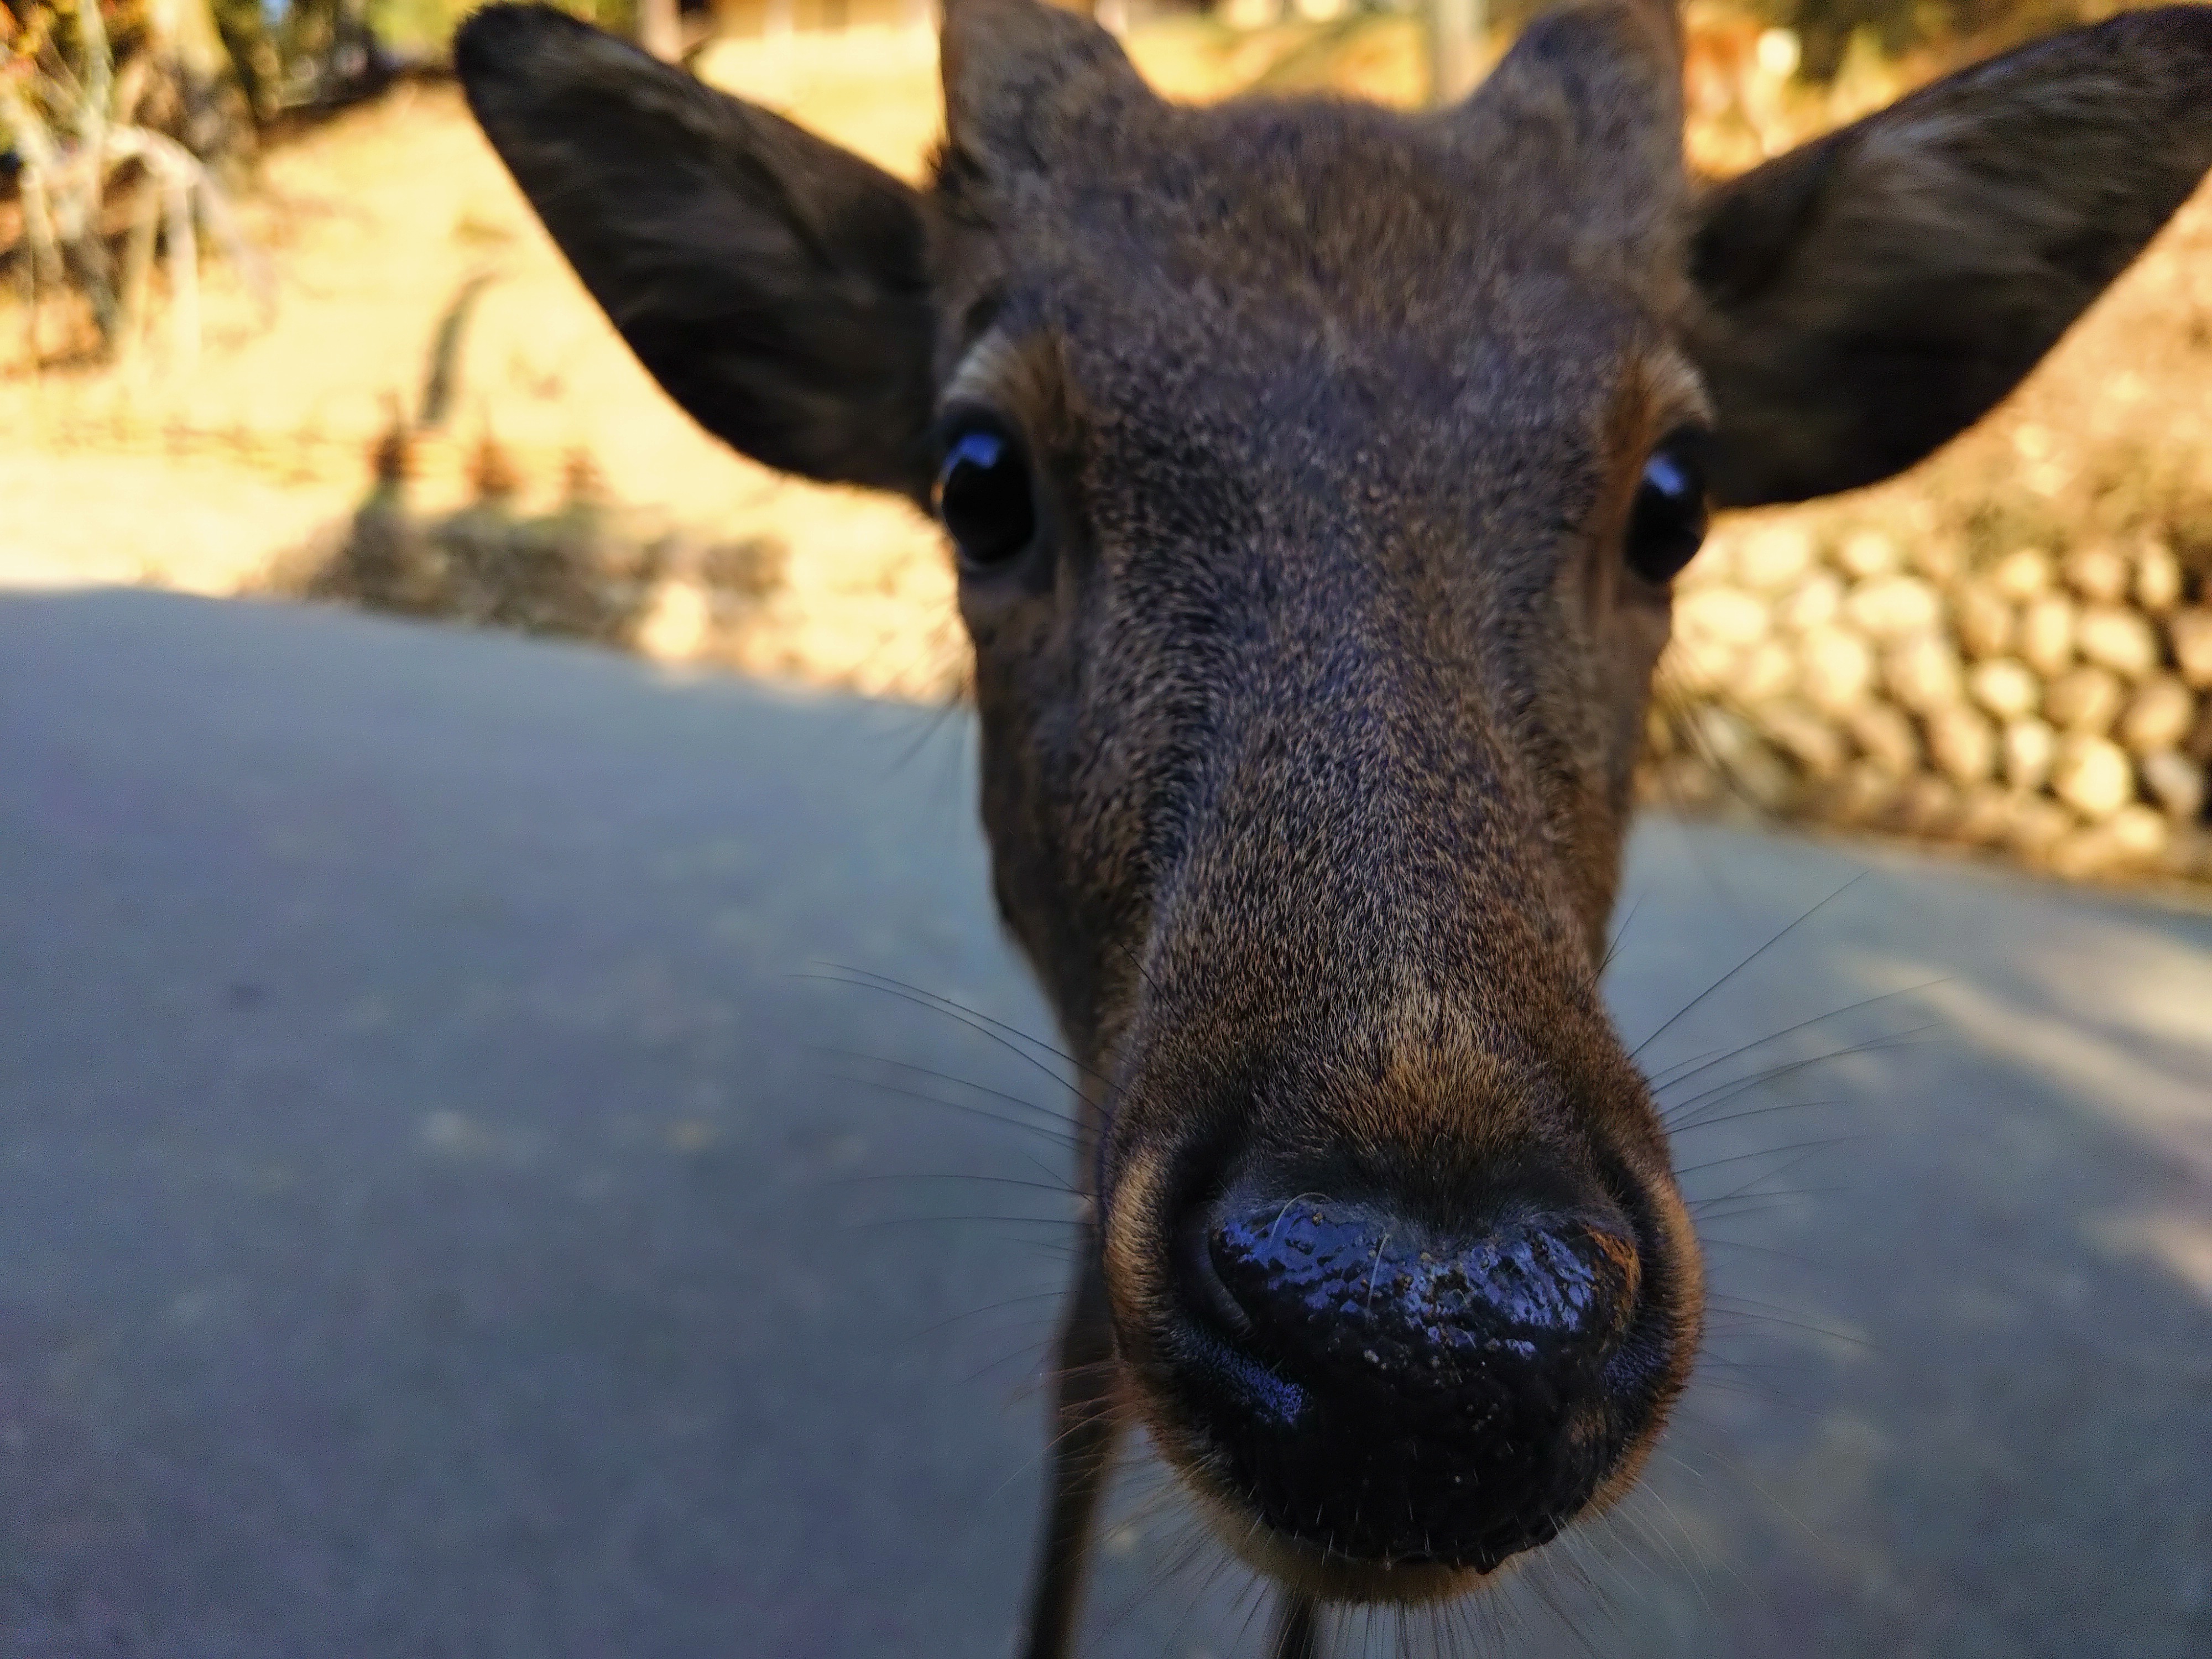
If you crop out the area around the tip of the nose, you can see that even the tips of the hair are captured in detail.

Here's a video taken at the same location:
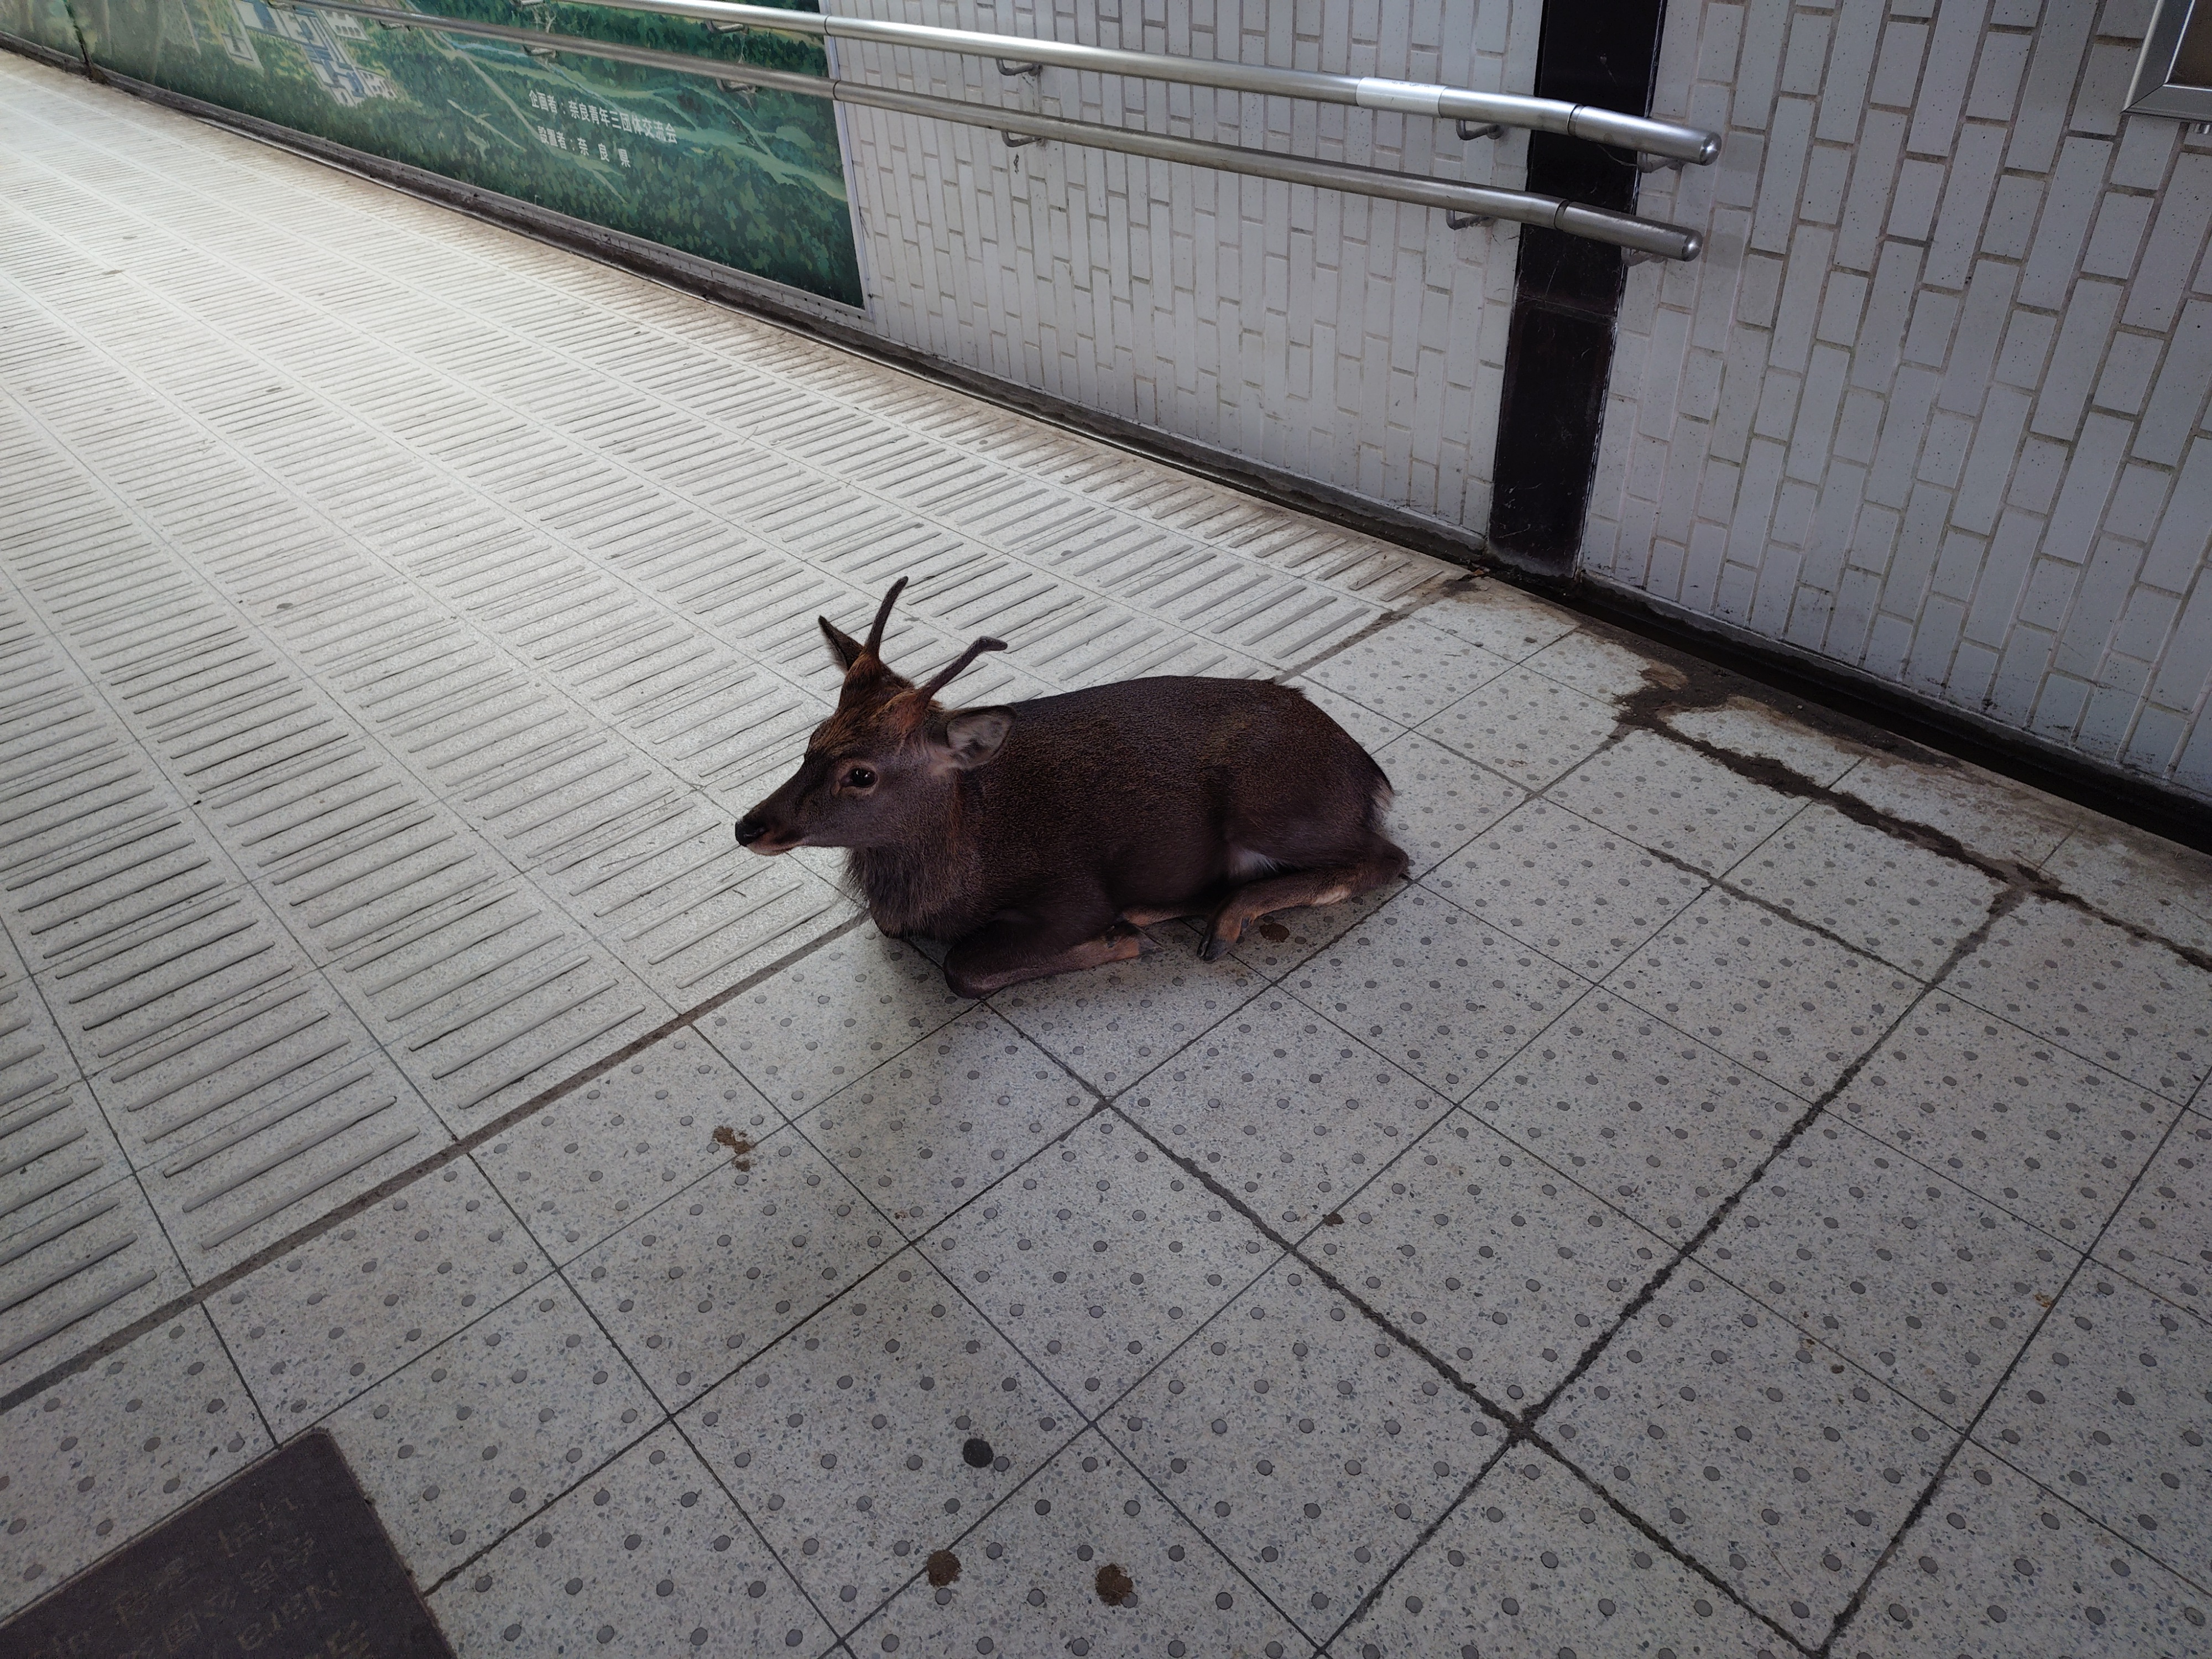
There was also a deer sitting in the underground passage.
We returned to Kintetsu Nara Station. In front of the station is a statue of Gyoki Bodhisattva facing the Great Buddha Hall of Todaiji Temple, which is a popular meeting spot.

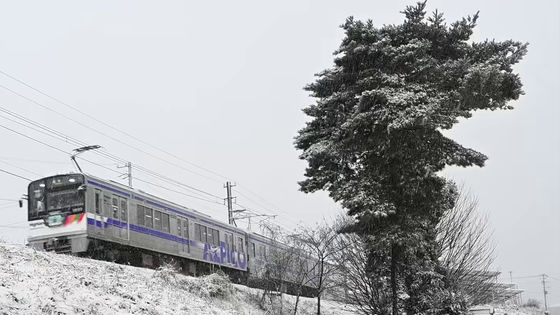
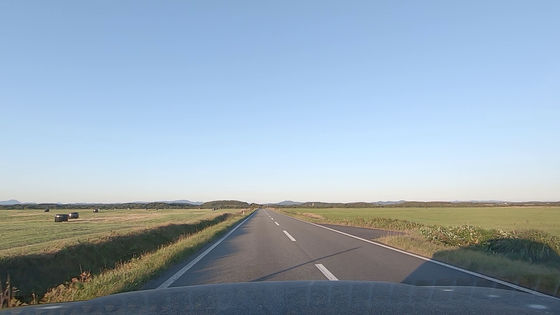
To head to Kyoto, I changed trains at Yamato-Saidaiji Station. Due to the shutter speed, the destination of the rapid express train, 'Kobe Sannomiya,' has been blurred.
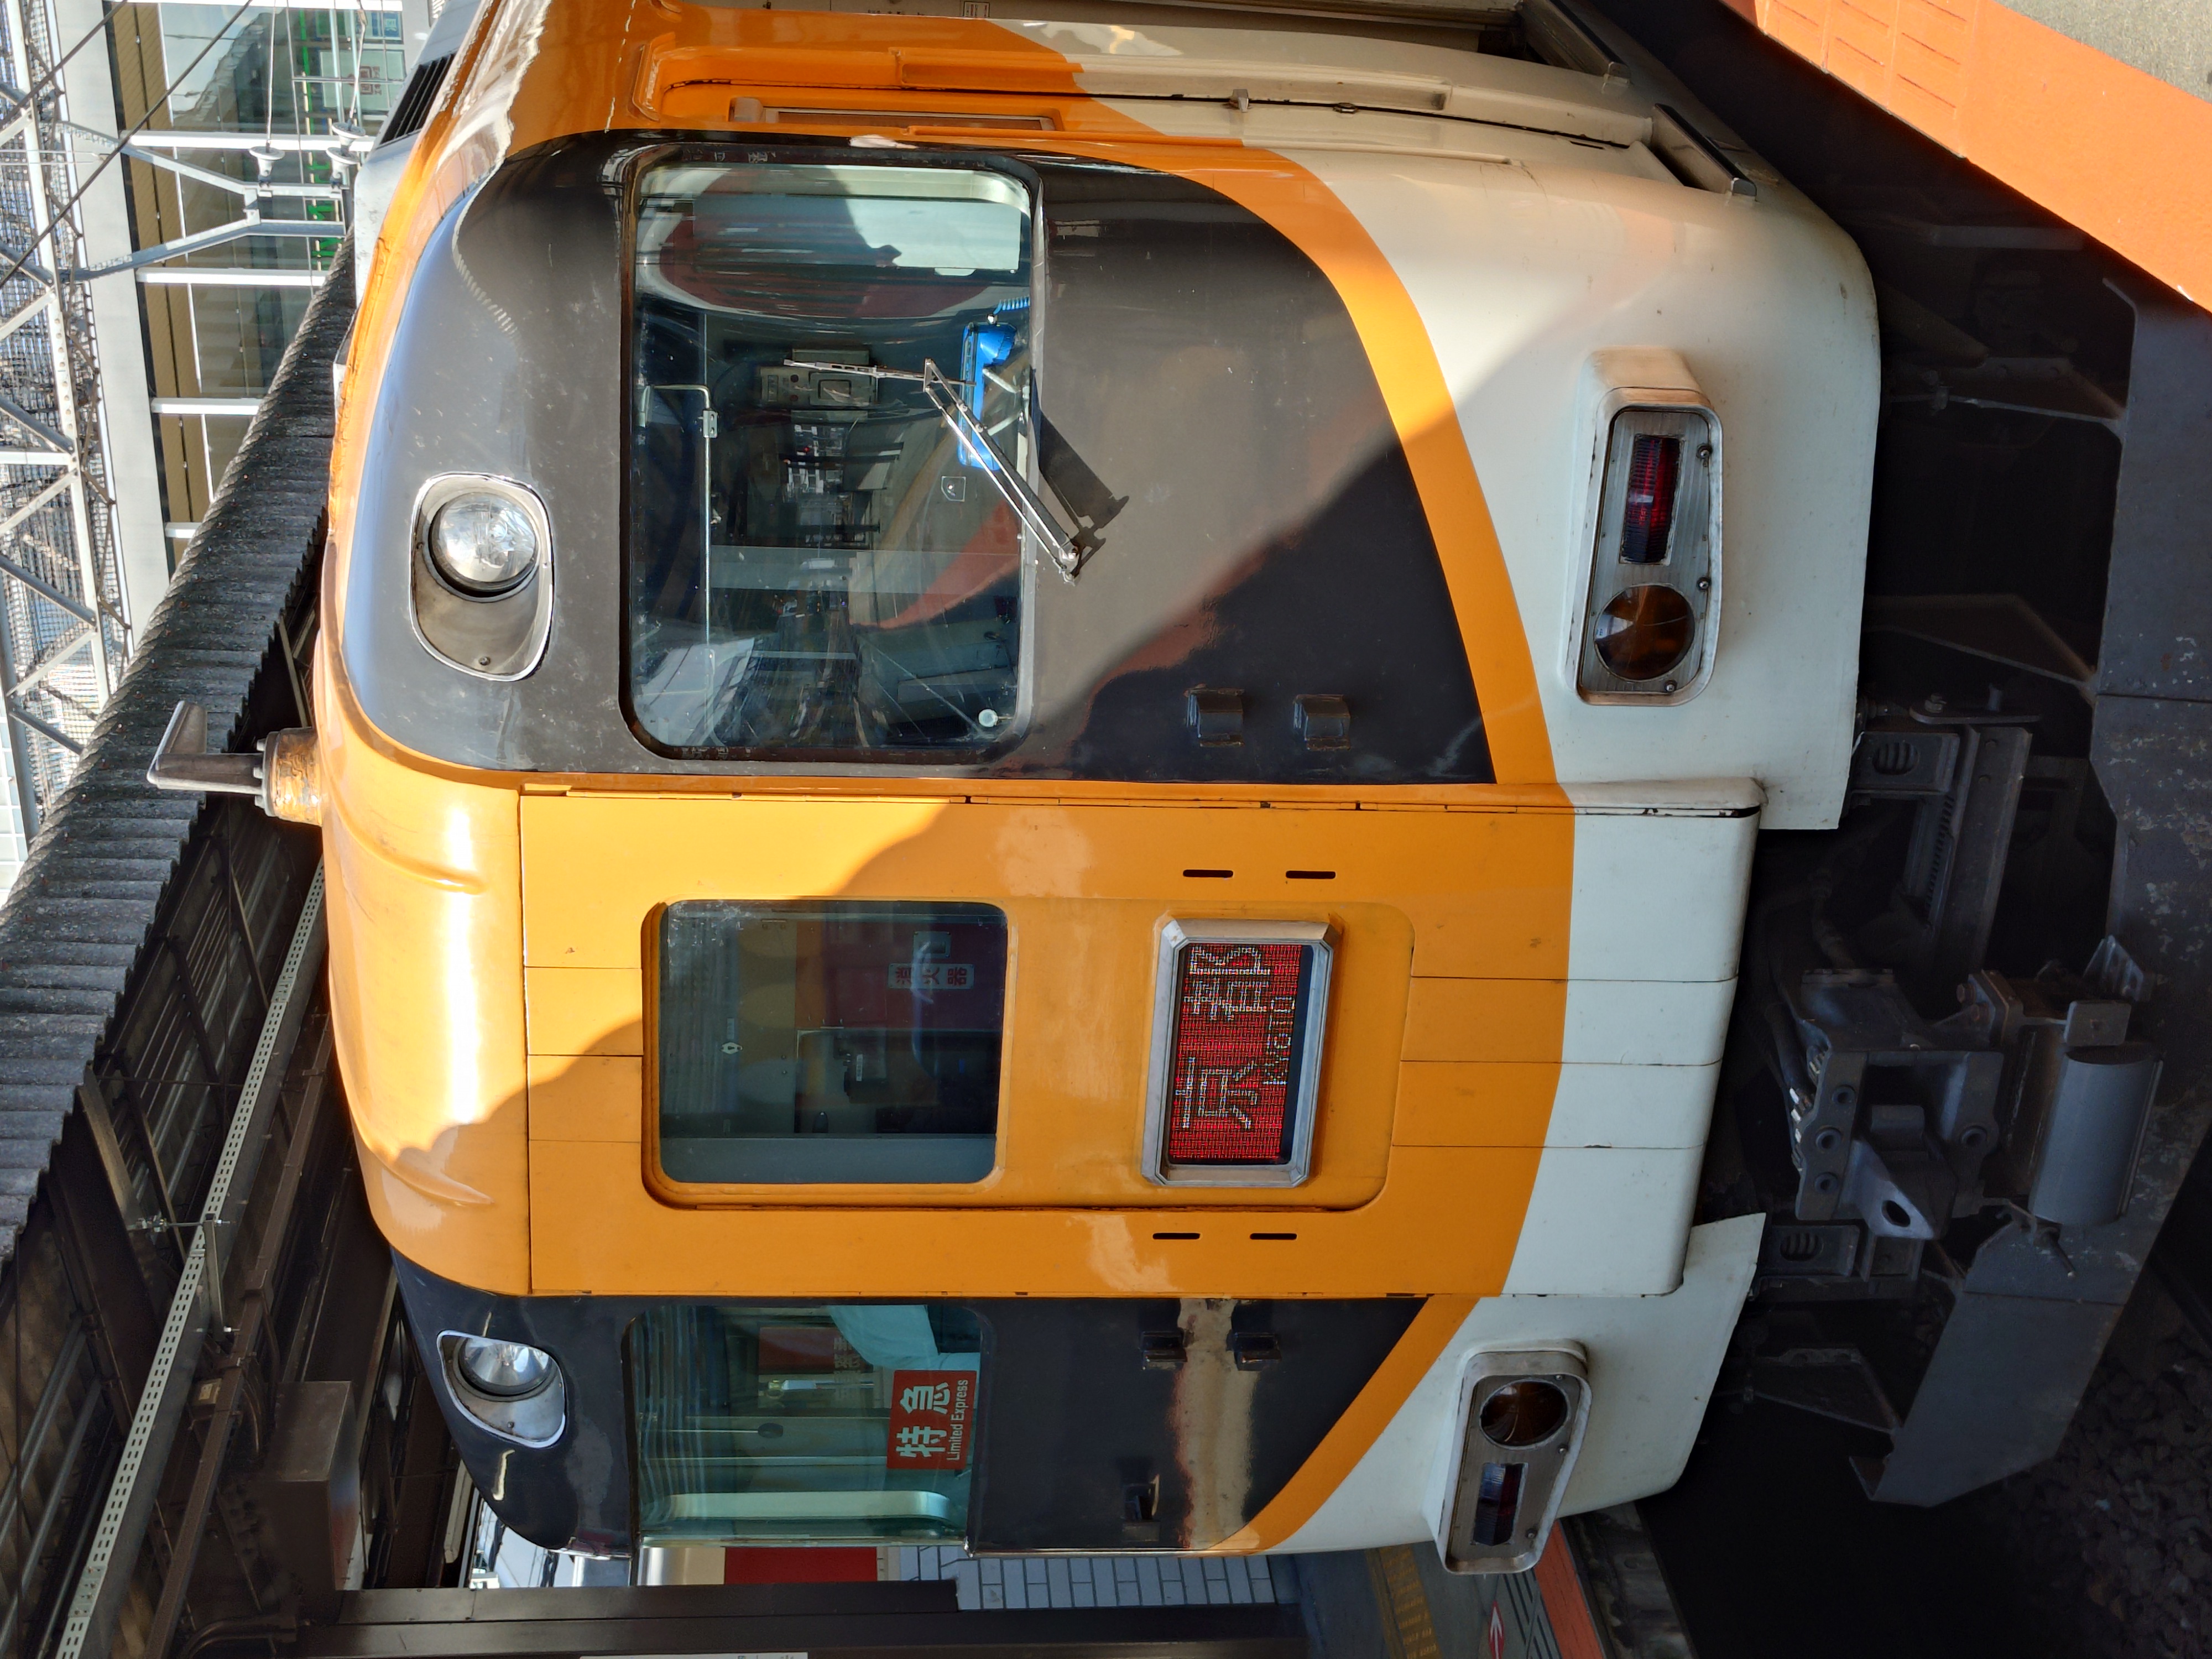
I was able to take a photo of the express train's destination display, 'Kyoto.'
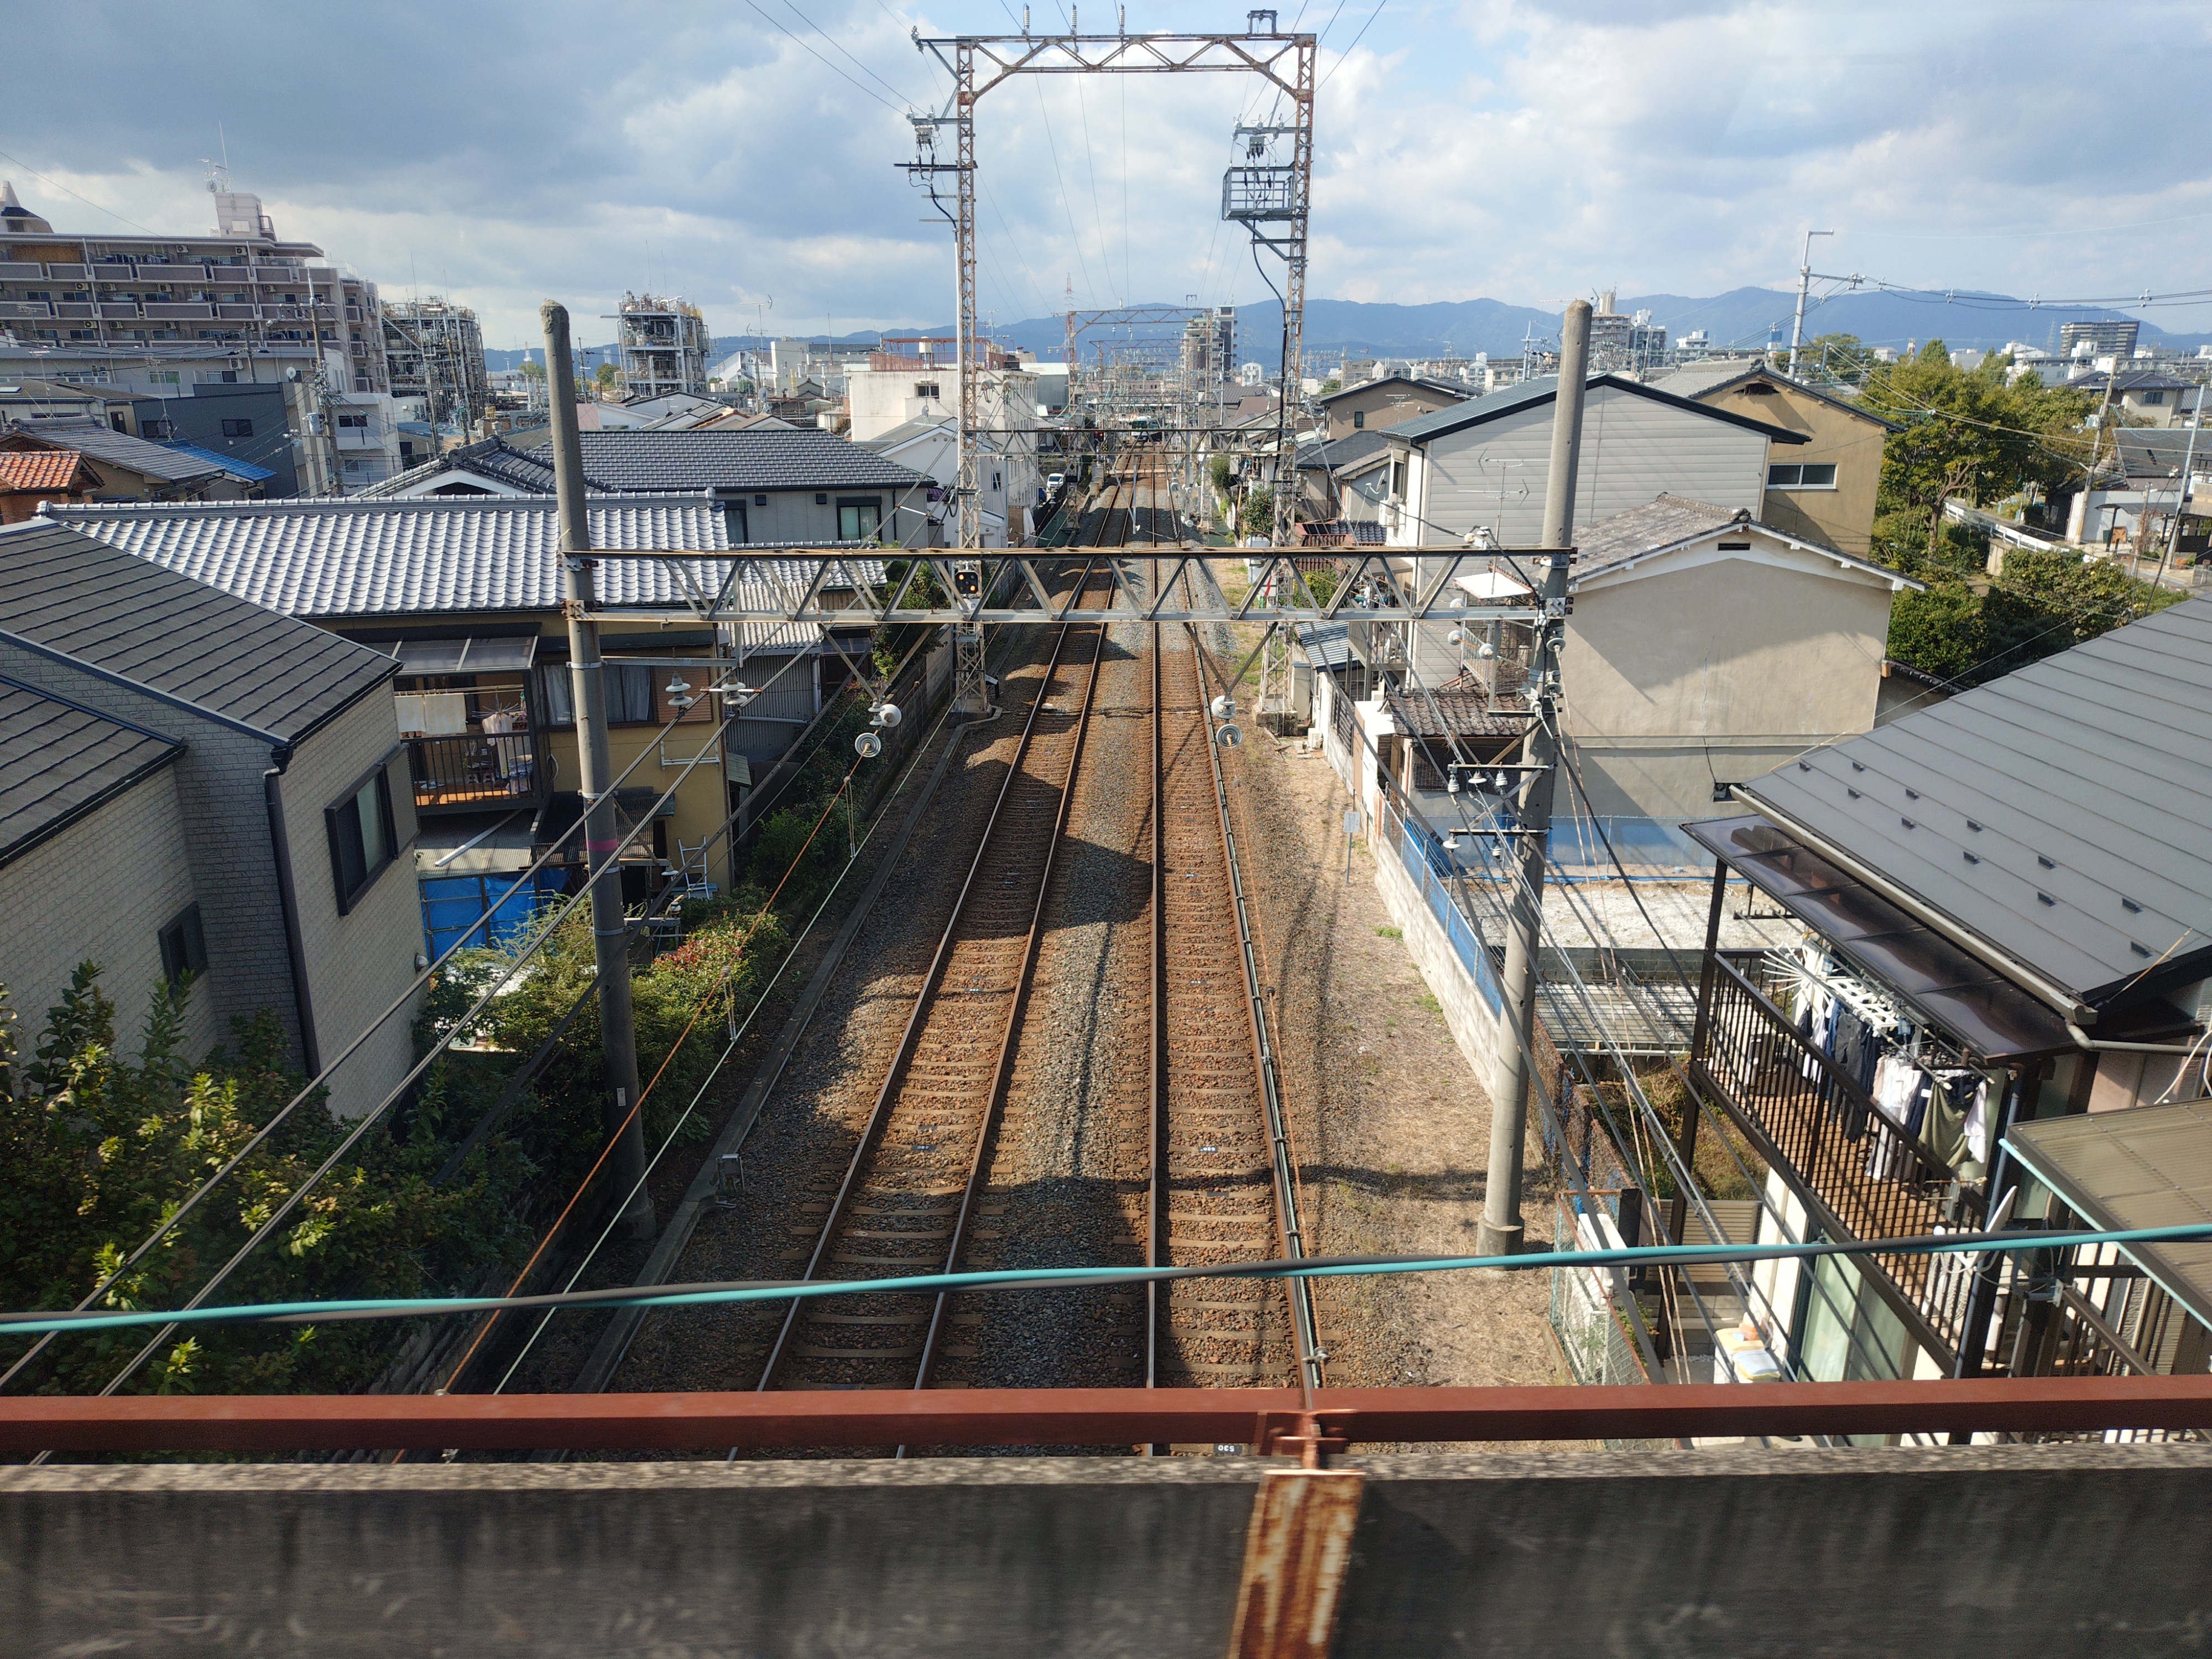
On the way to Kyoto on the Kintetsu Kyoto Line, you will cross over the Keihan Uji Line.
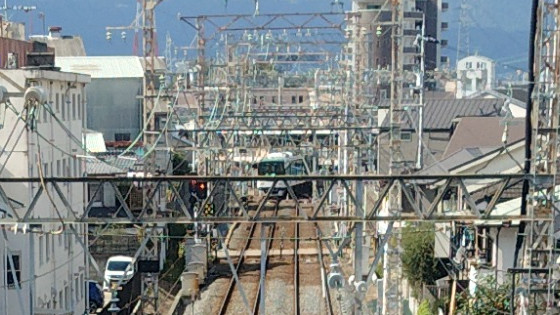
This is a life-size cutout of the Keihan train that was reflected in the distance as it was entering Nakashojima Station. Even if I were to look at the actual scenery with my own eyes, I wouldn't even notice the Keihan train for a moment, so I thought it was a good shot.
Just past Takeda Station, there is the Kyoto Municipal Subway depot, with many carriages lined up.

National Route 1 and the five-story pagoda of Toji Temple.

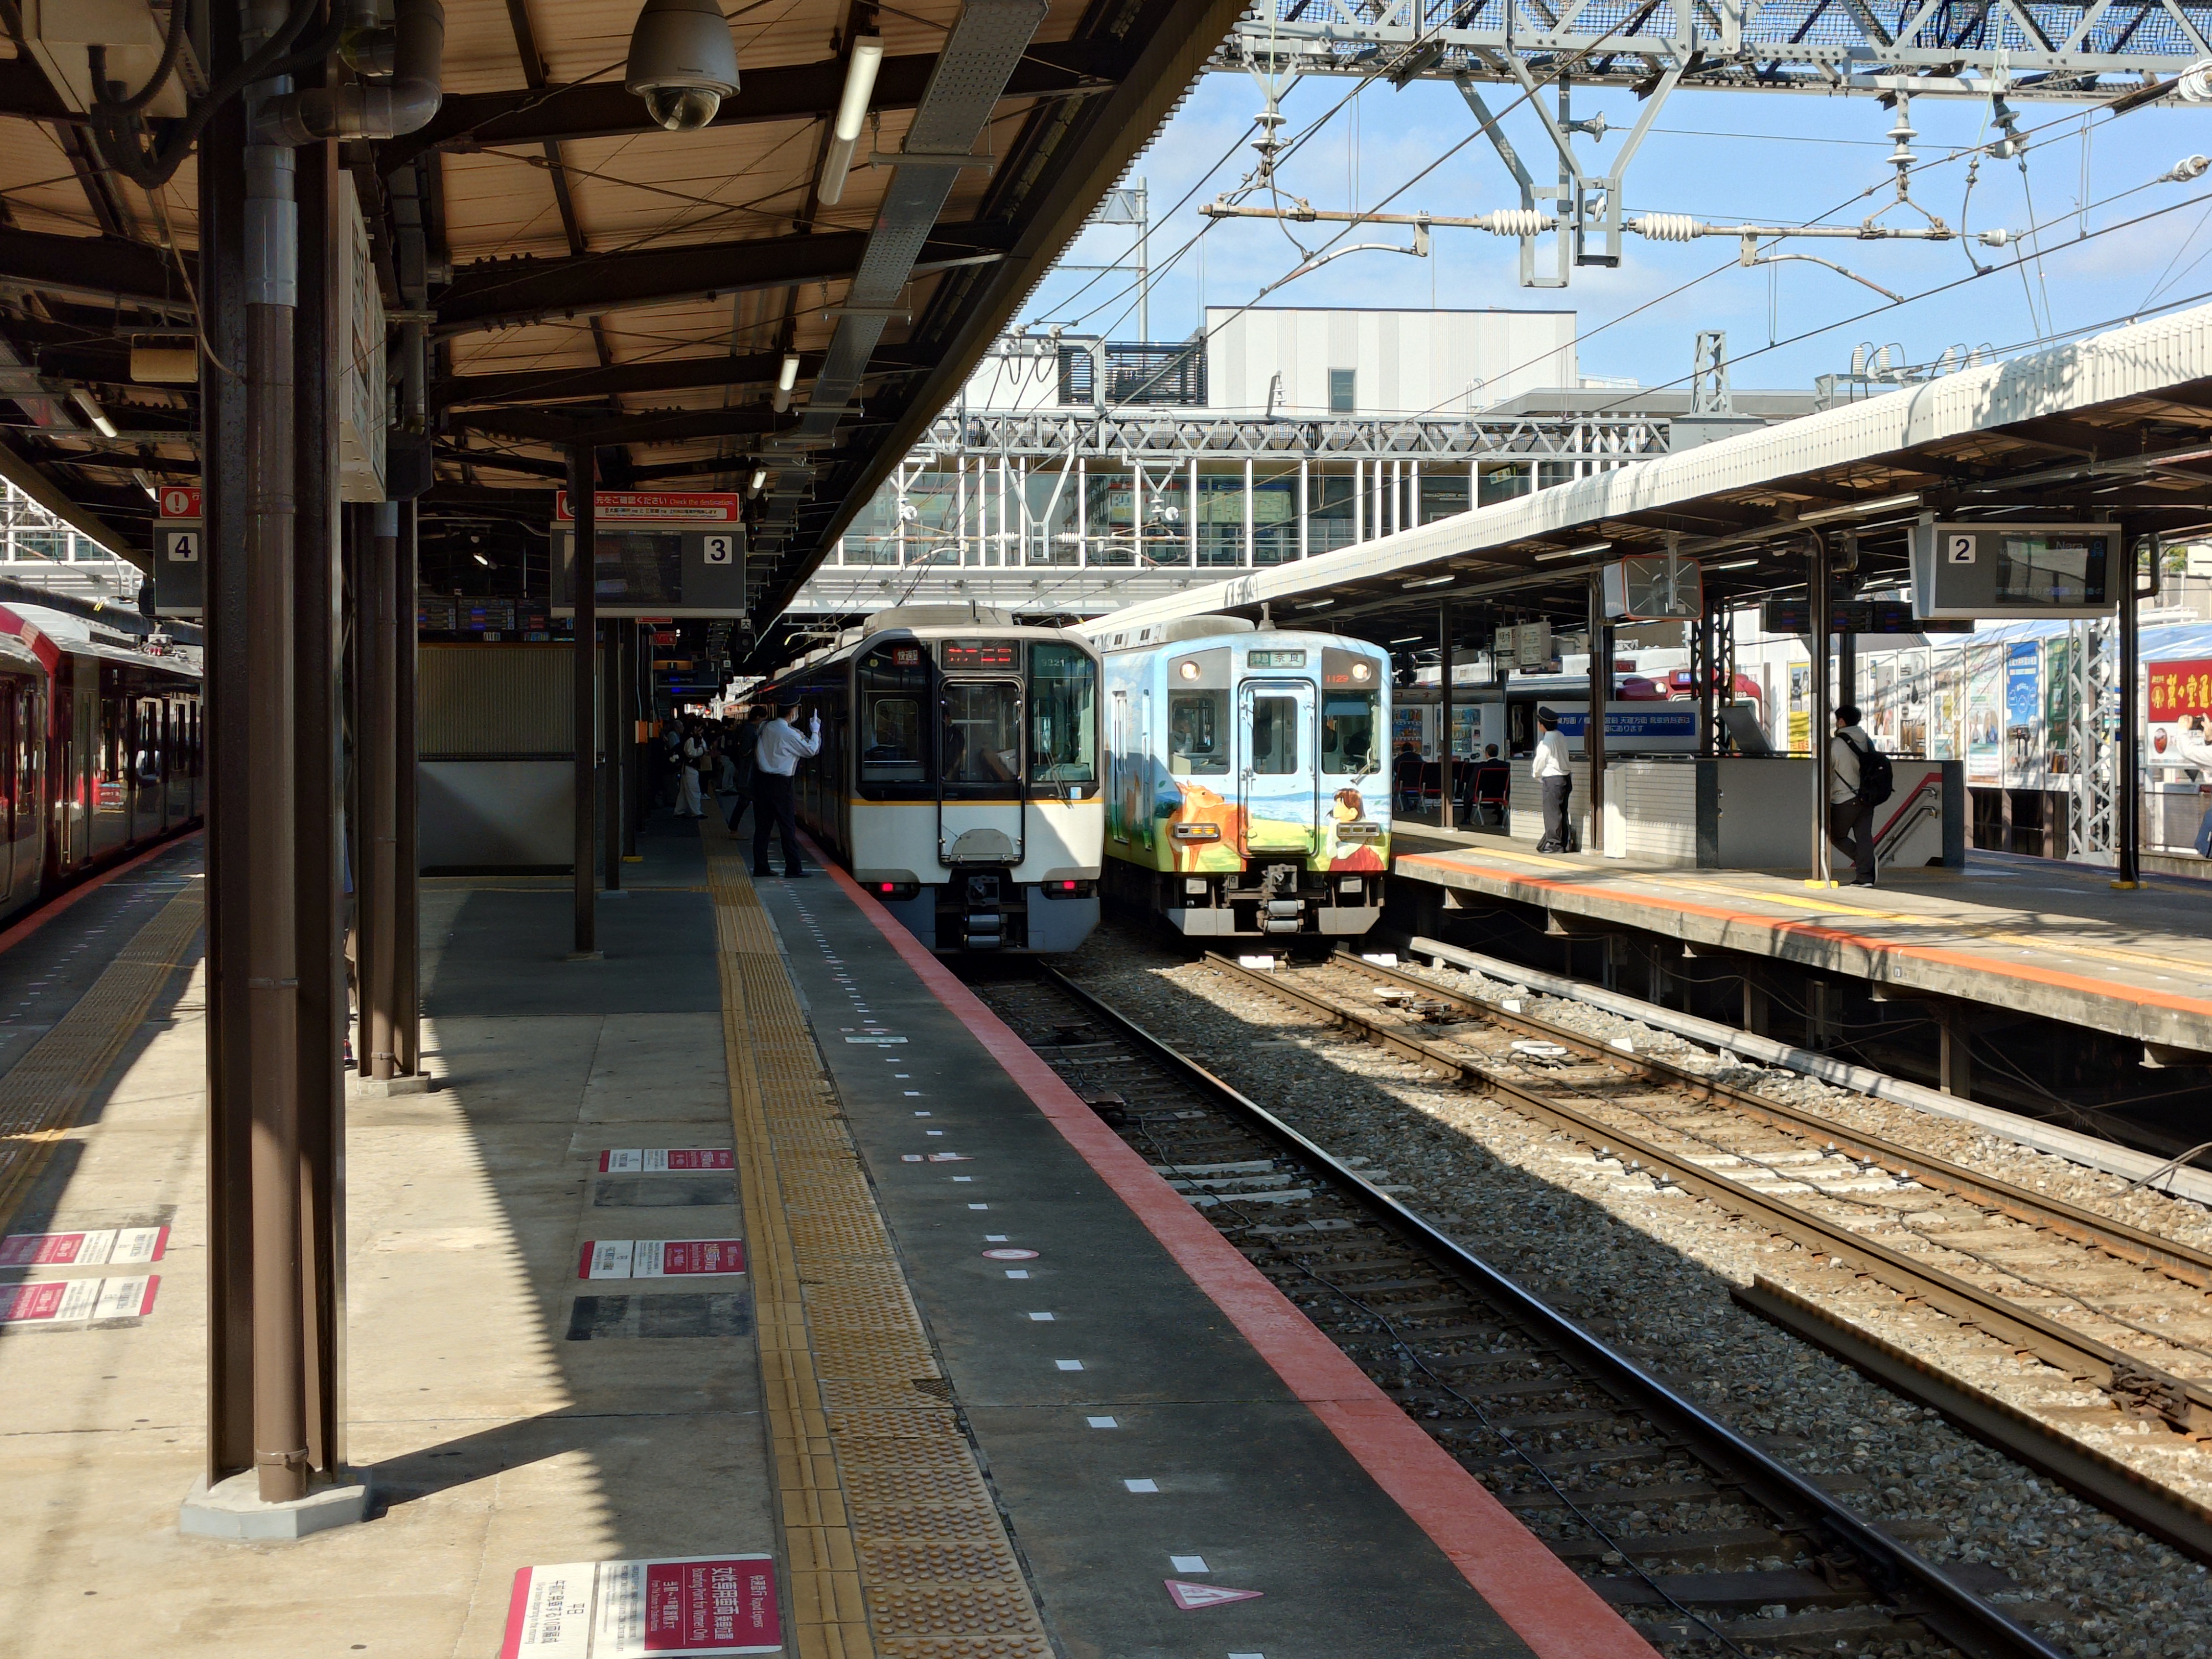
We have arrived at Kintetsu Kyoto Station.
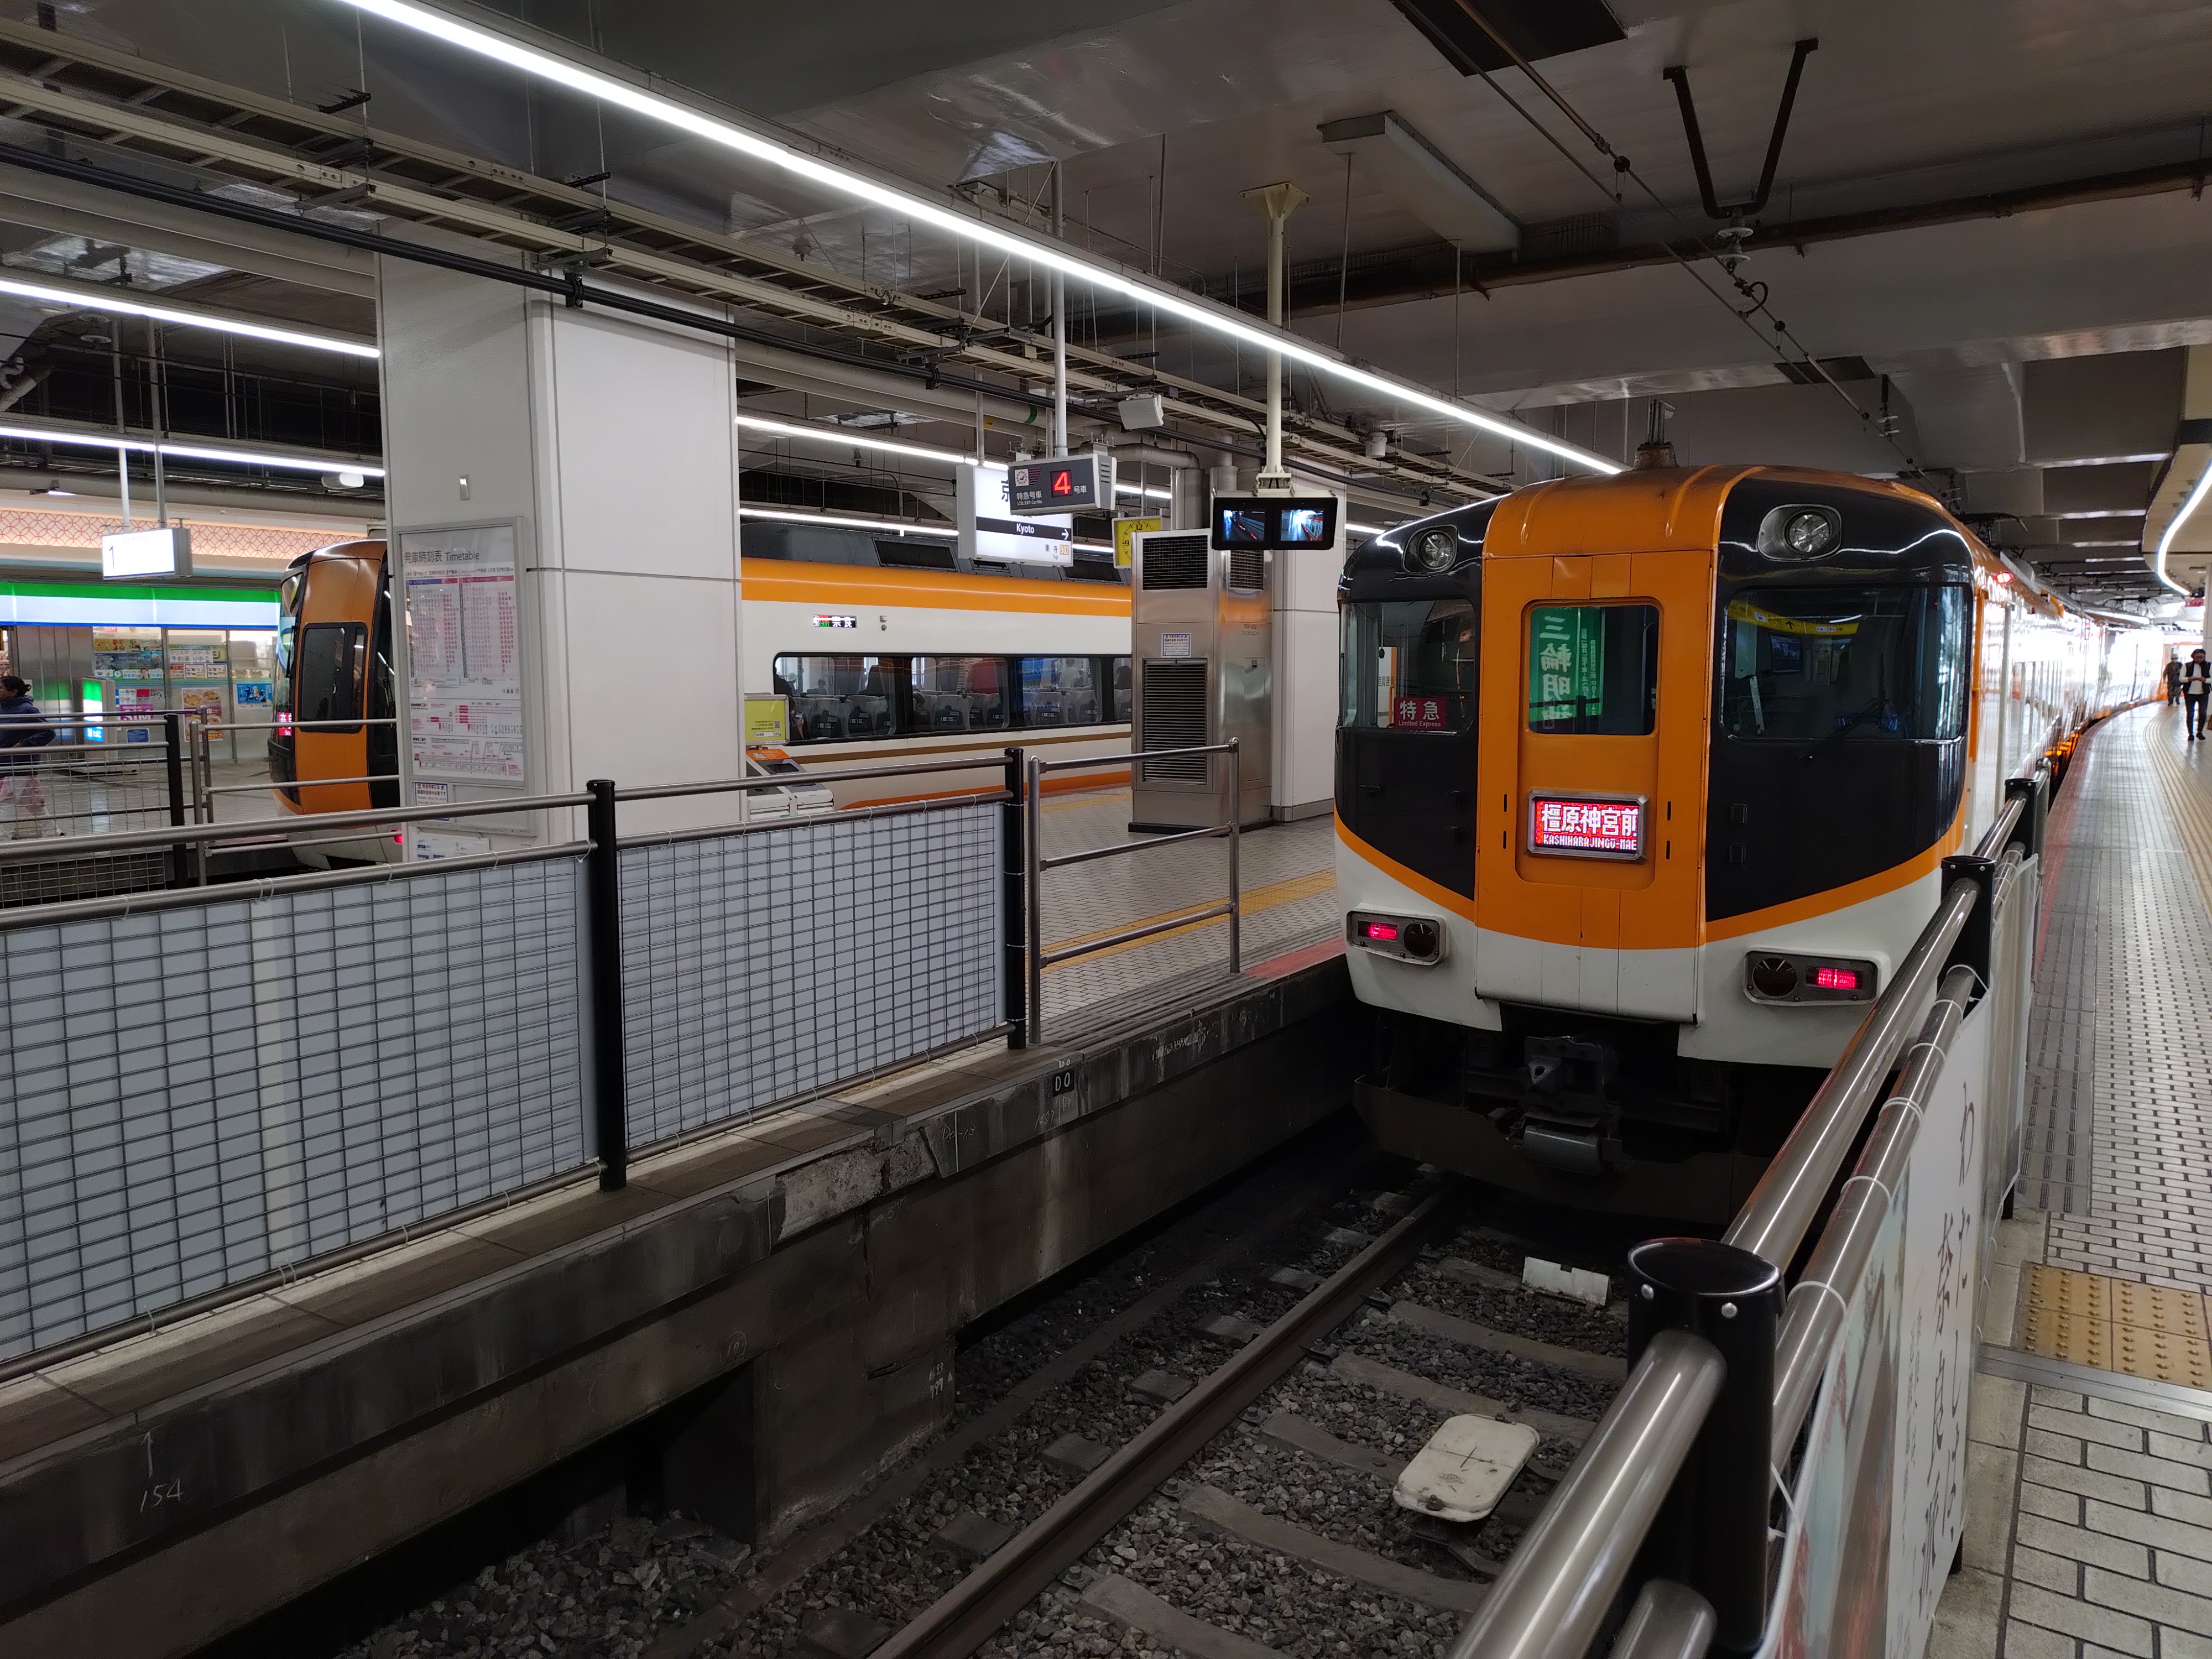
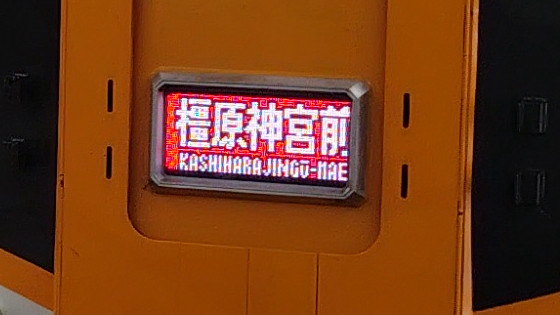
The destination display was cropped at full size. 'Kashihara Jingu-mae' has quite a lot of text, but it was captured clearly.
I found panels of Ichimonji Norimune and Kasu Kiyomitsu.
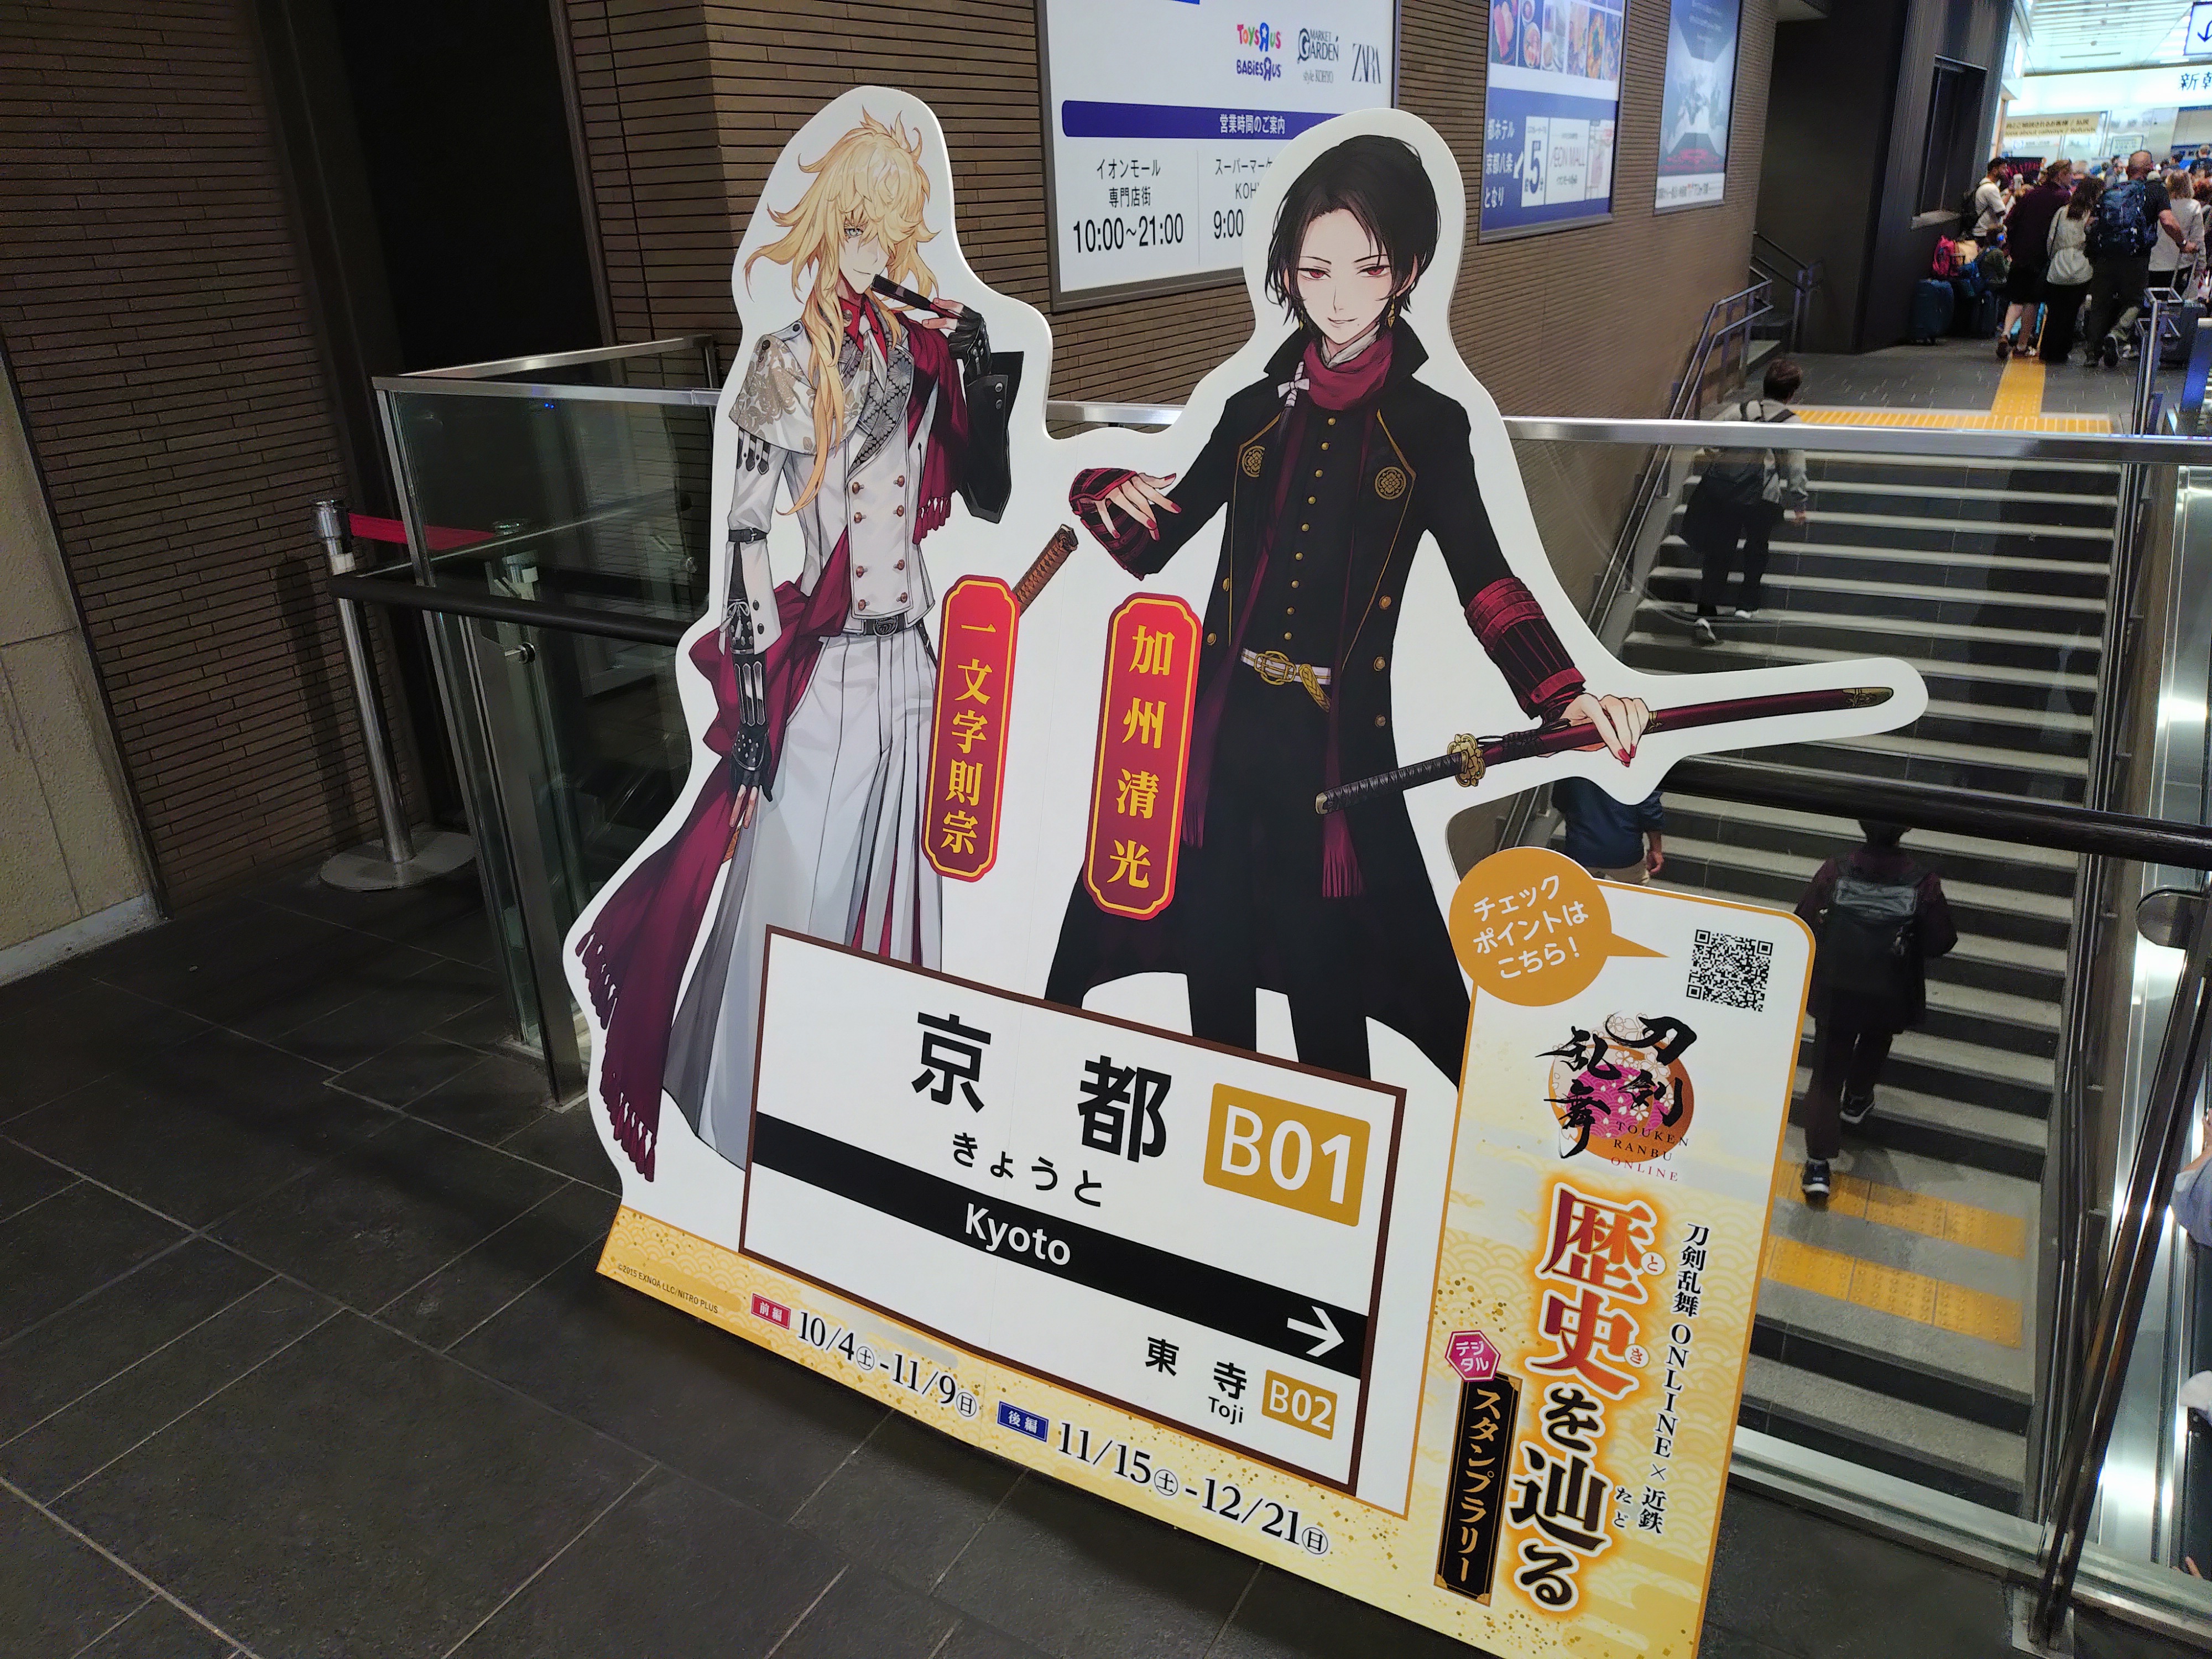
I cut out Kasu Kiyomitsu's face at life size. I saw him on my way to the ticket gate and stopped to take a picture, but I was able to capture it without any camera shake.

I went directly from Kintetsu Kyoto Station to JR Kyoto Station. This photo was taken with a wide-angle lens.
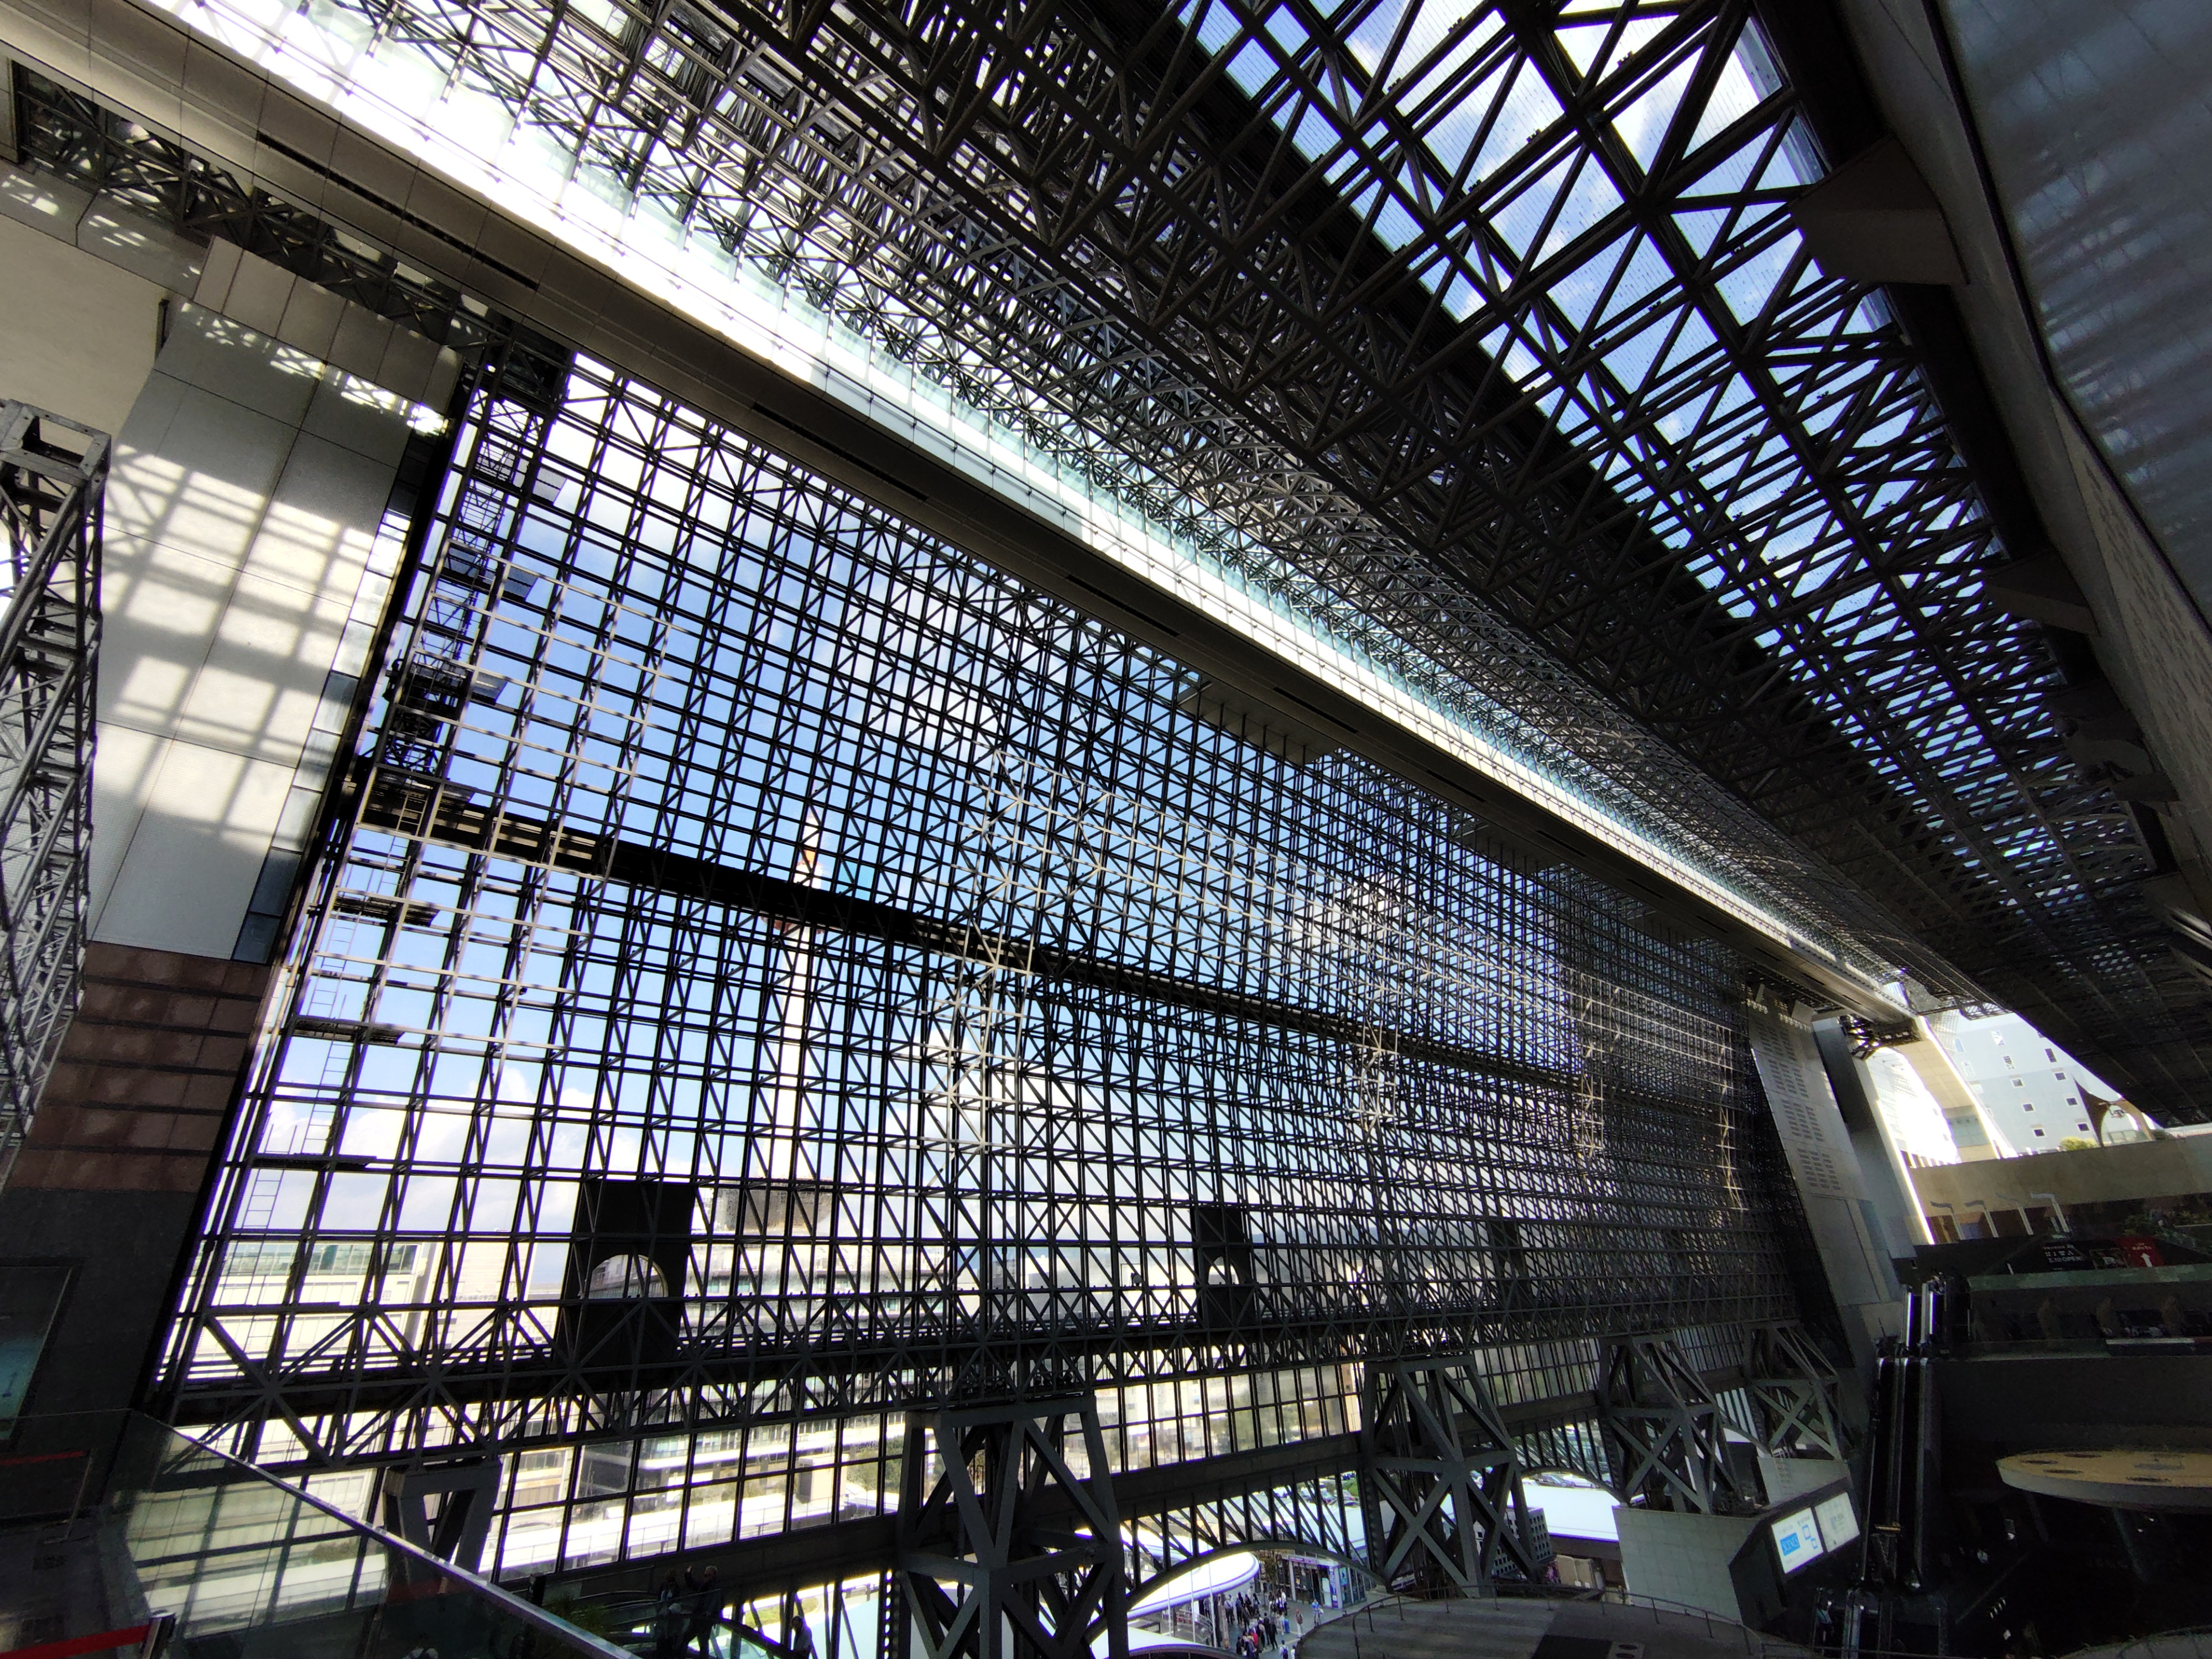
You can faintly see Kyoto Tower.
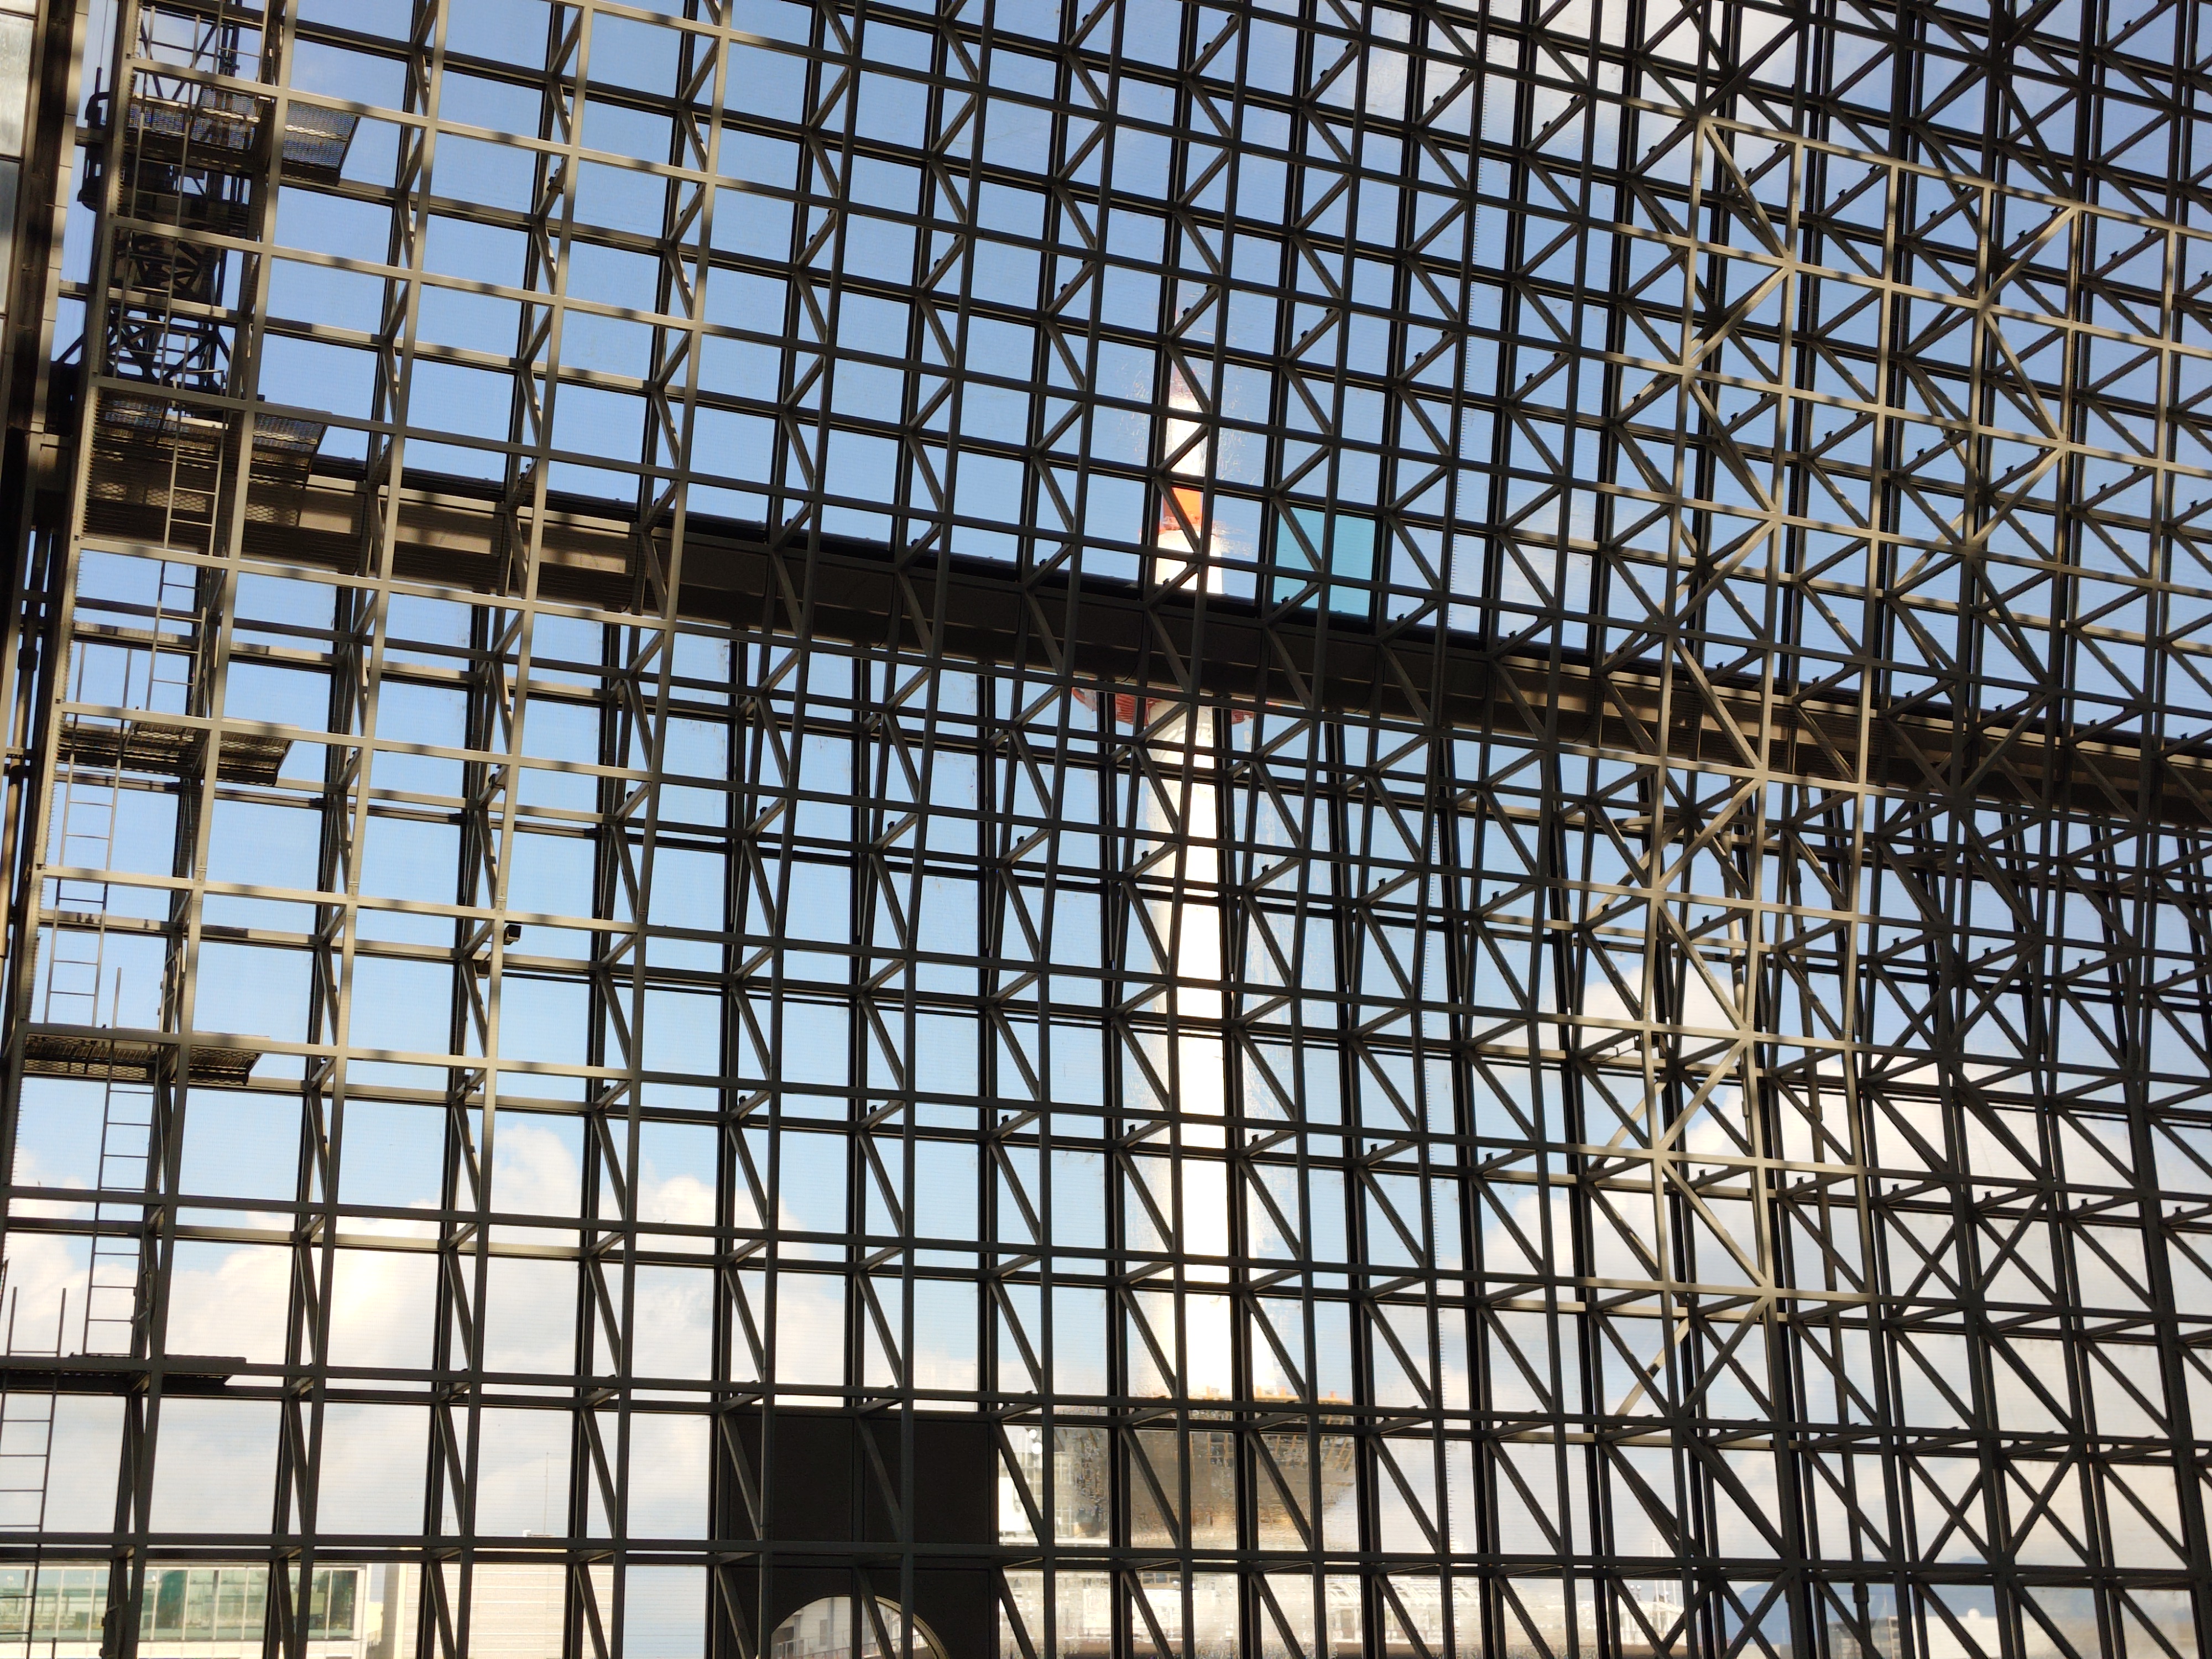
The outside of Kyoto Station looked like this. Kyoto Tower was reflected in the glass.
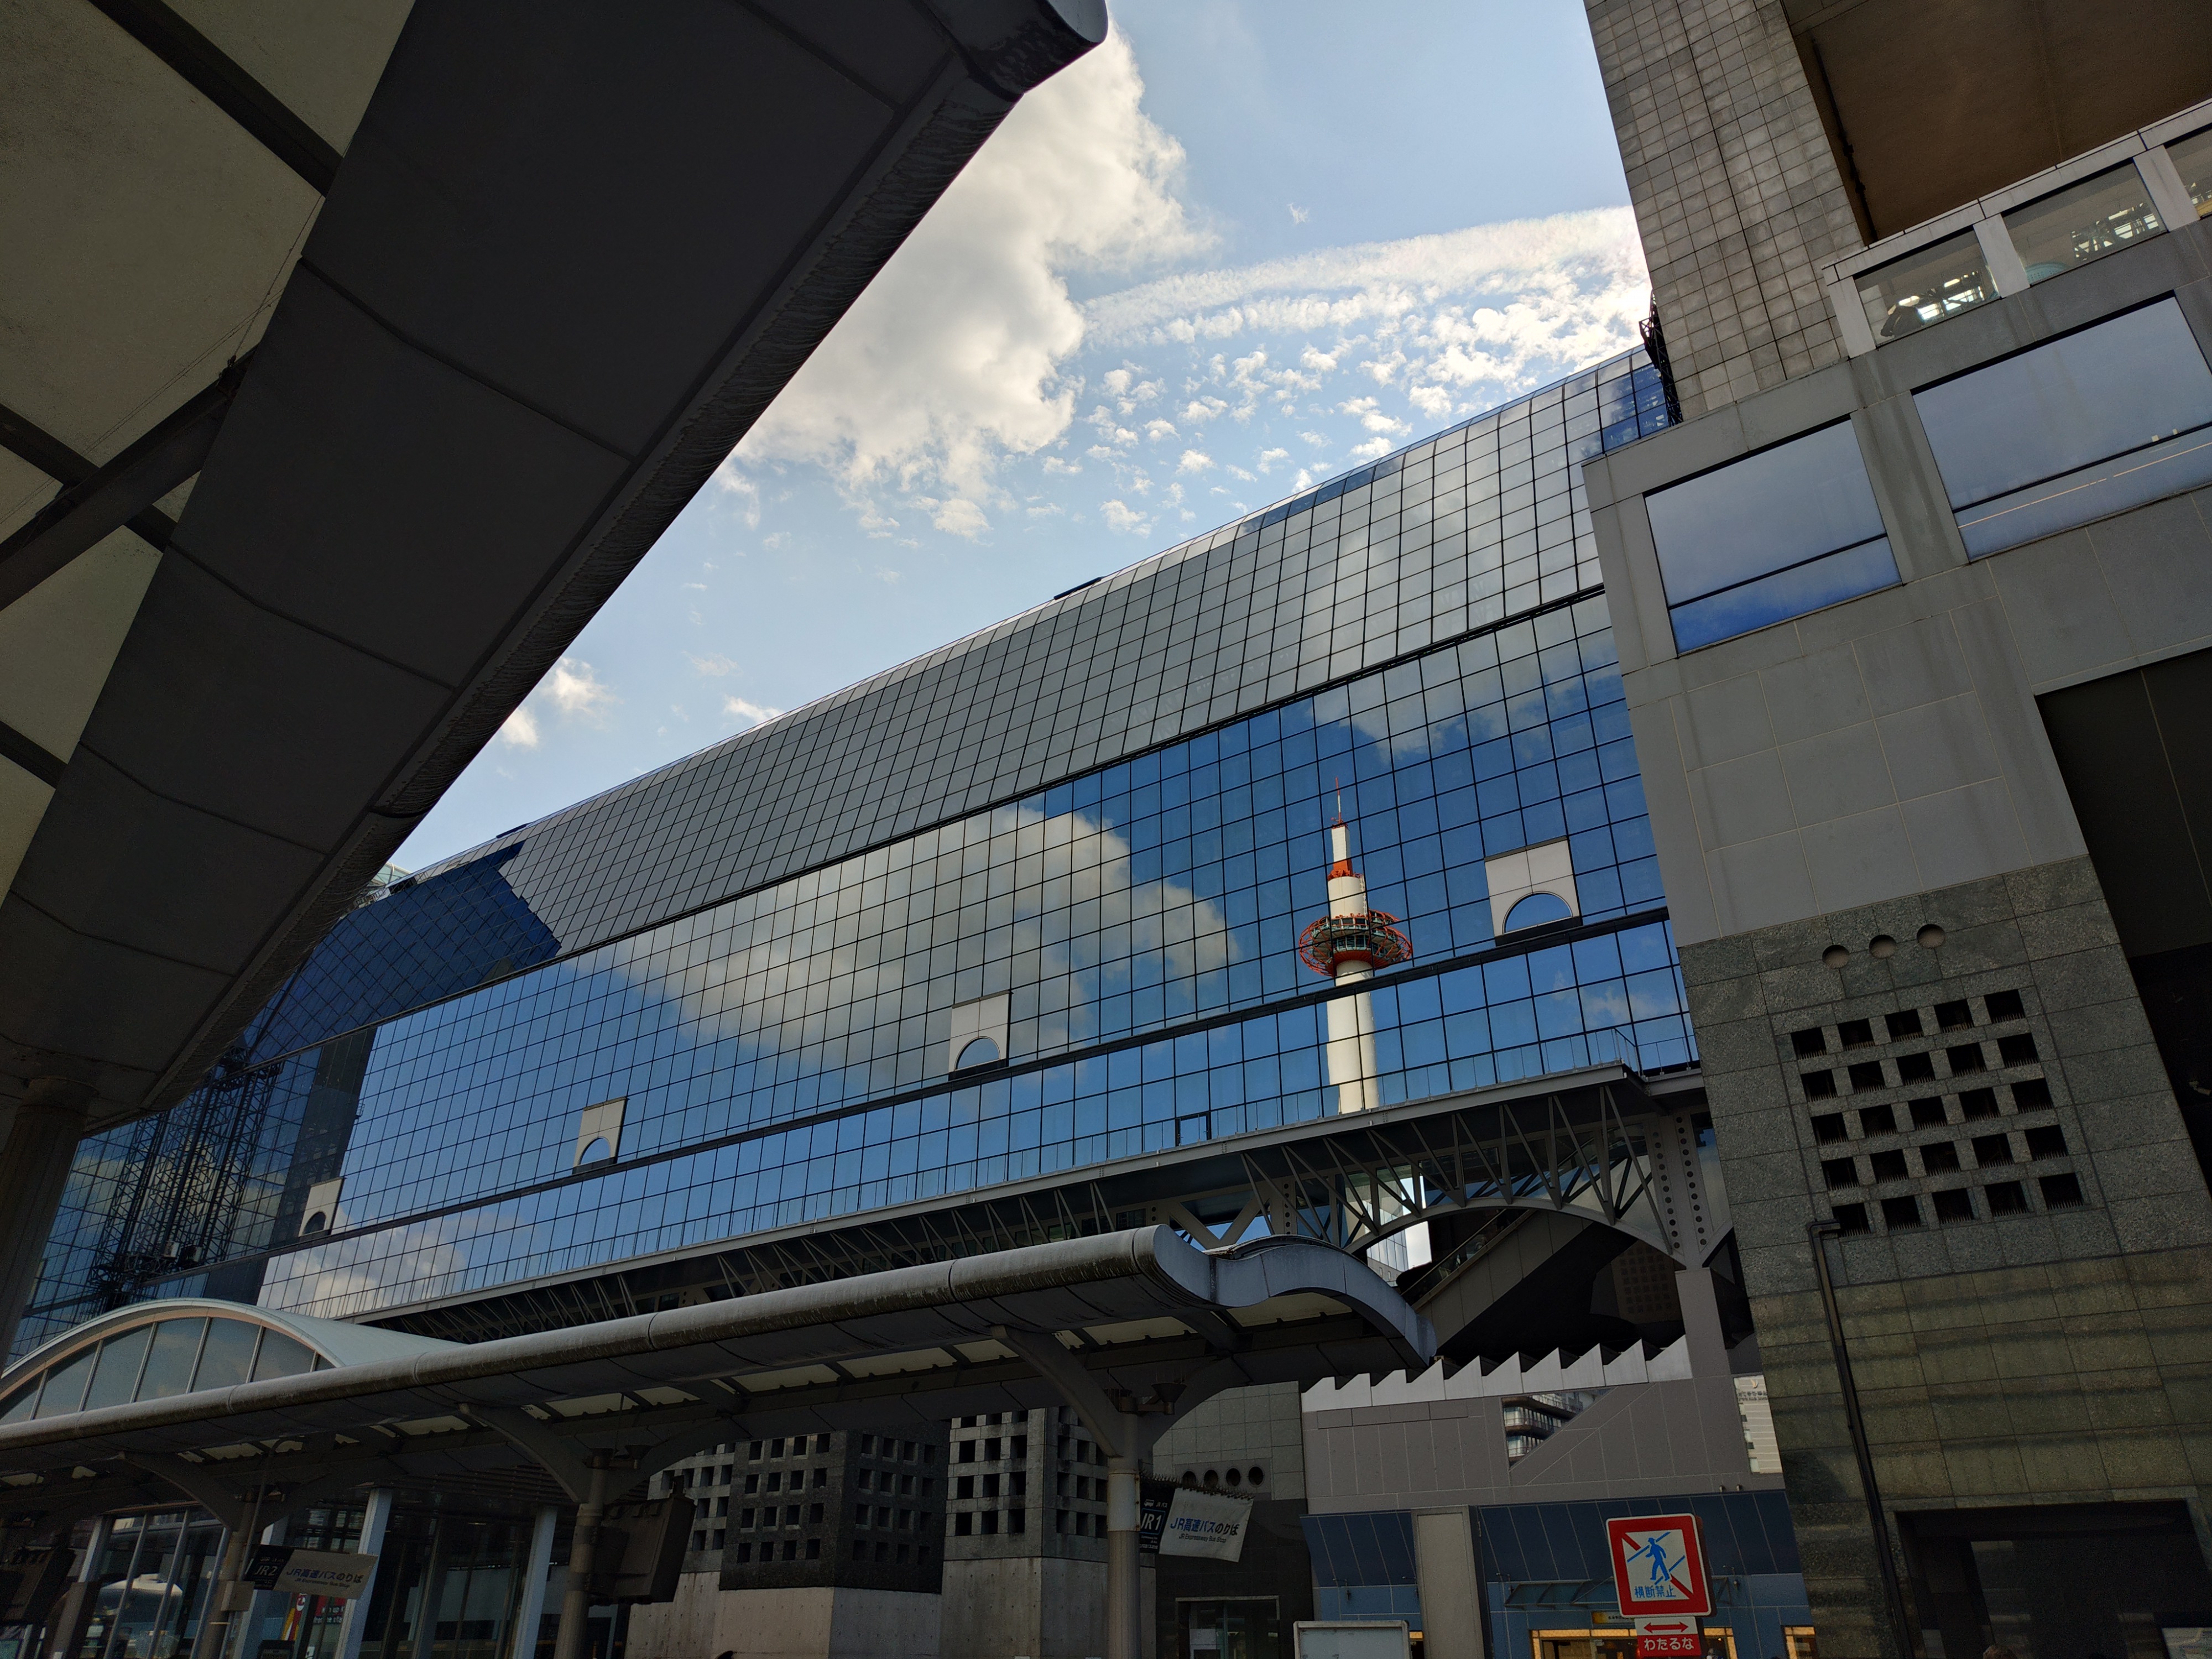
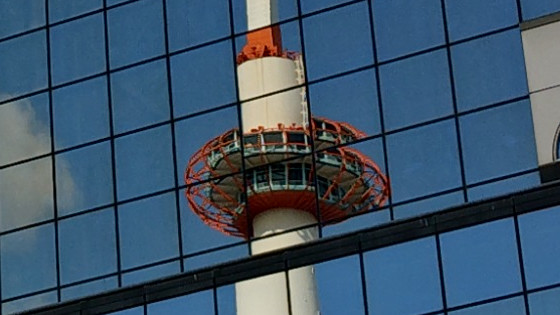
The tower part was cut out at the same size. The misalignment of the tower's shape is not due to an error in the AI correction, but to the reflection angle.
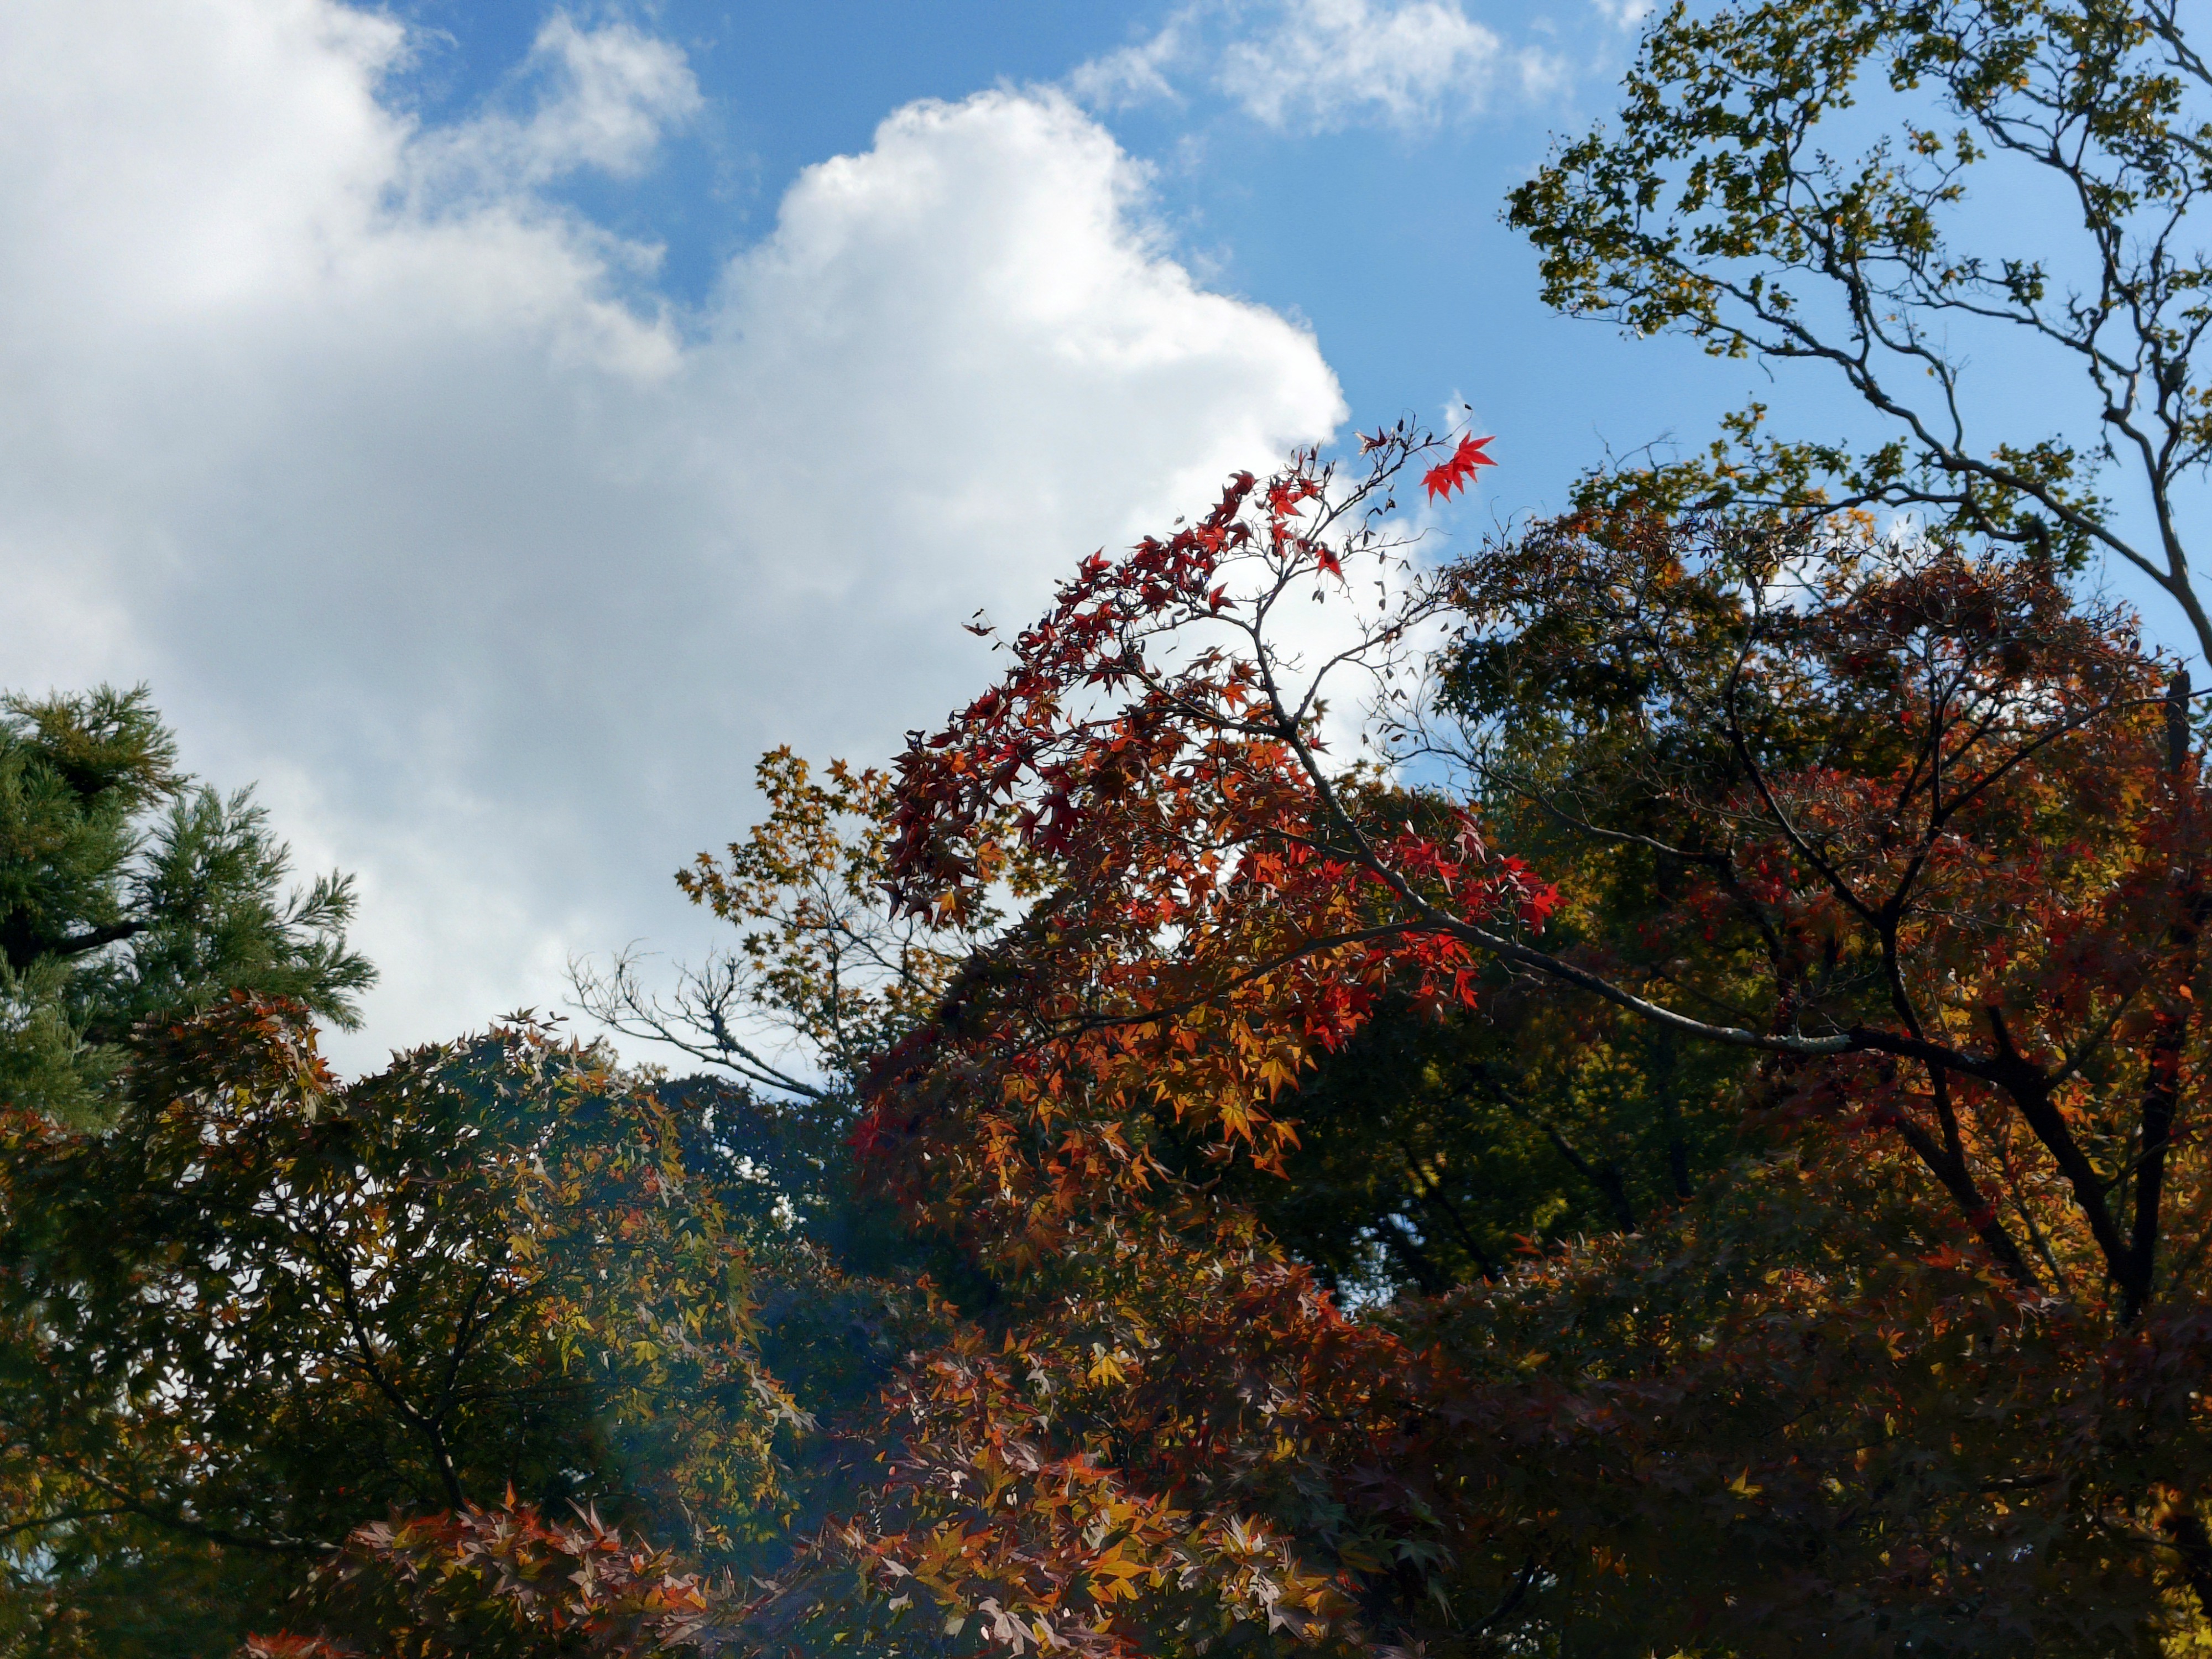
The leaves on the trees were changing color.
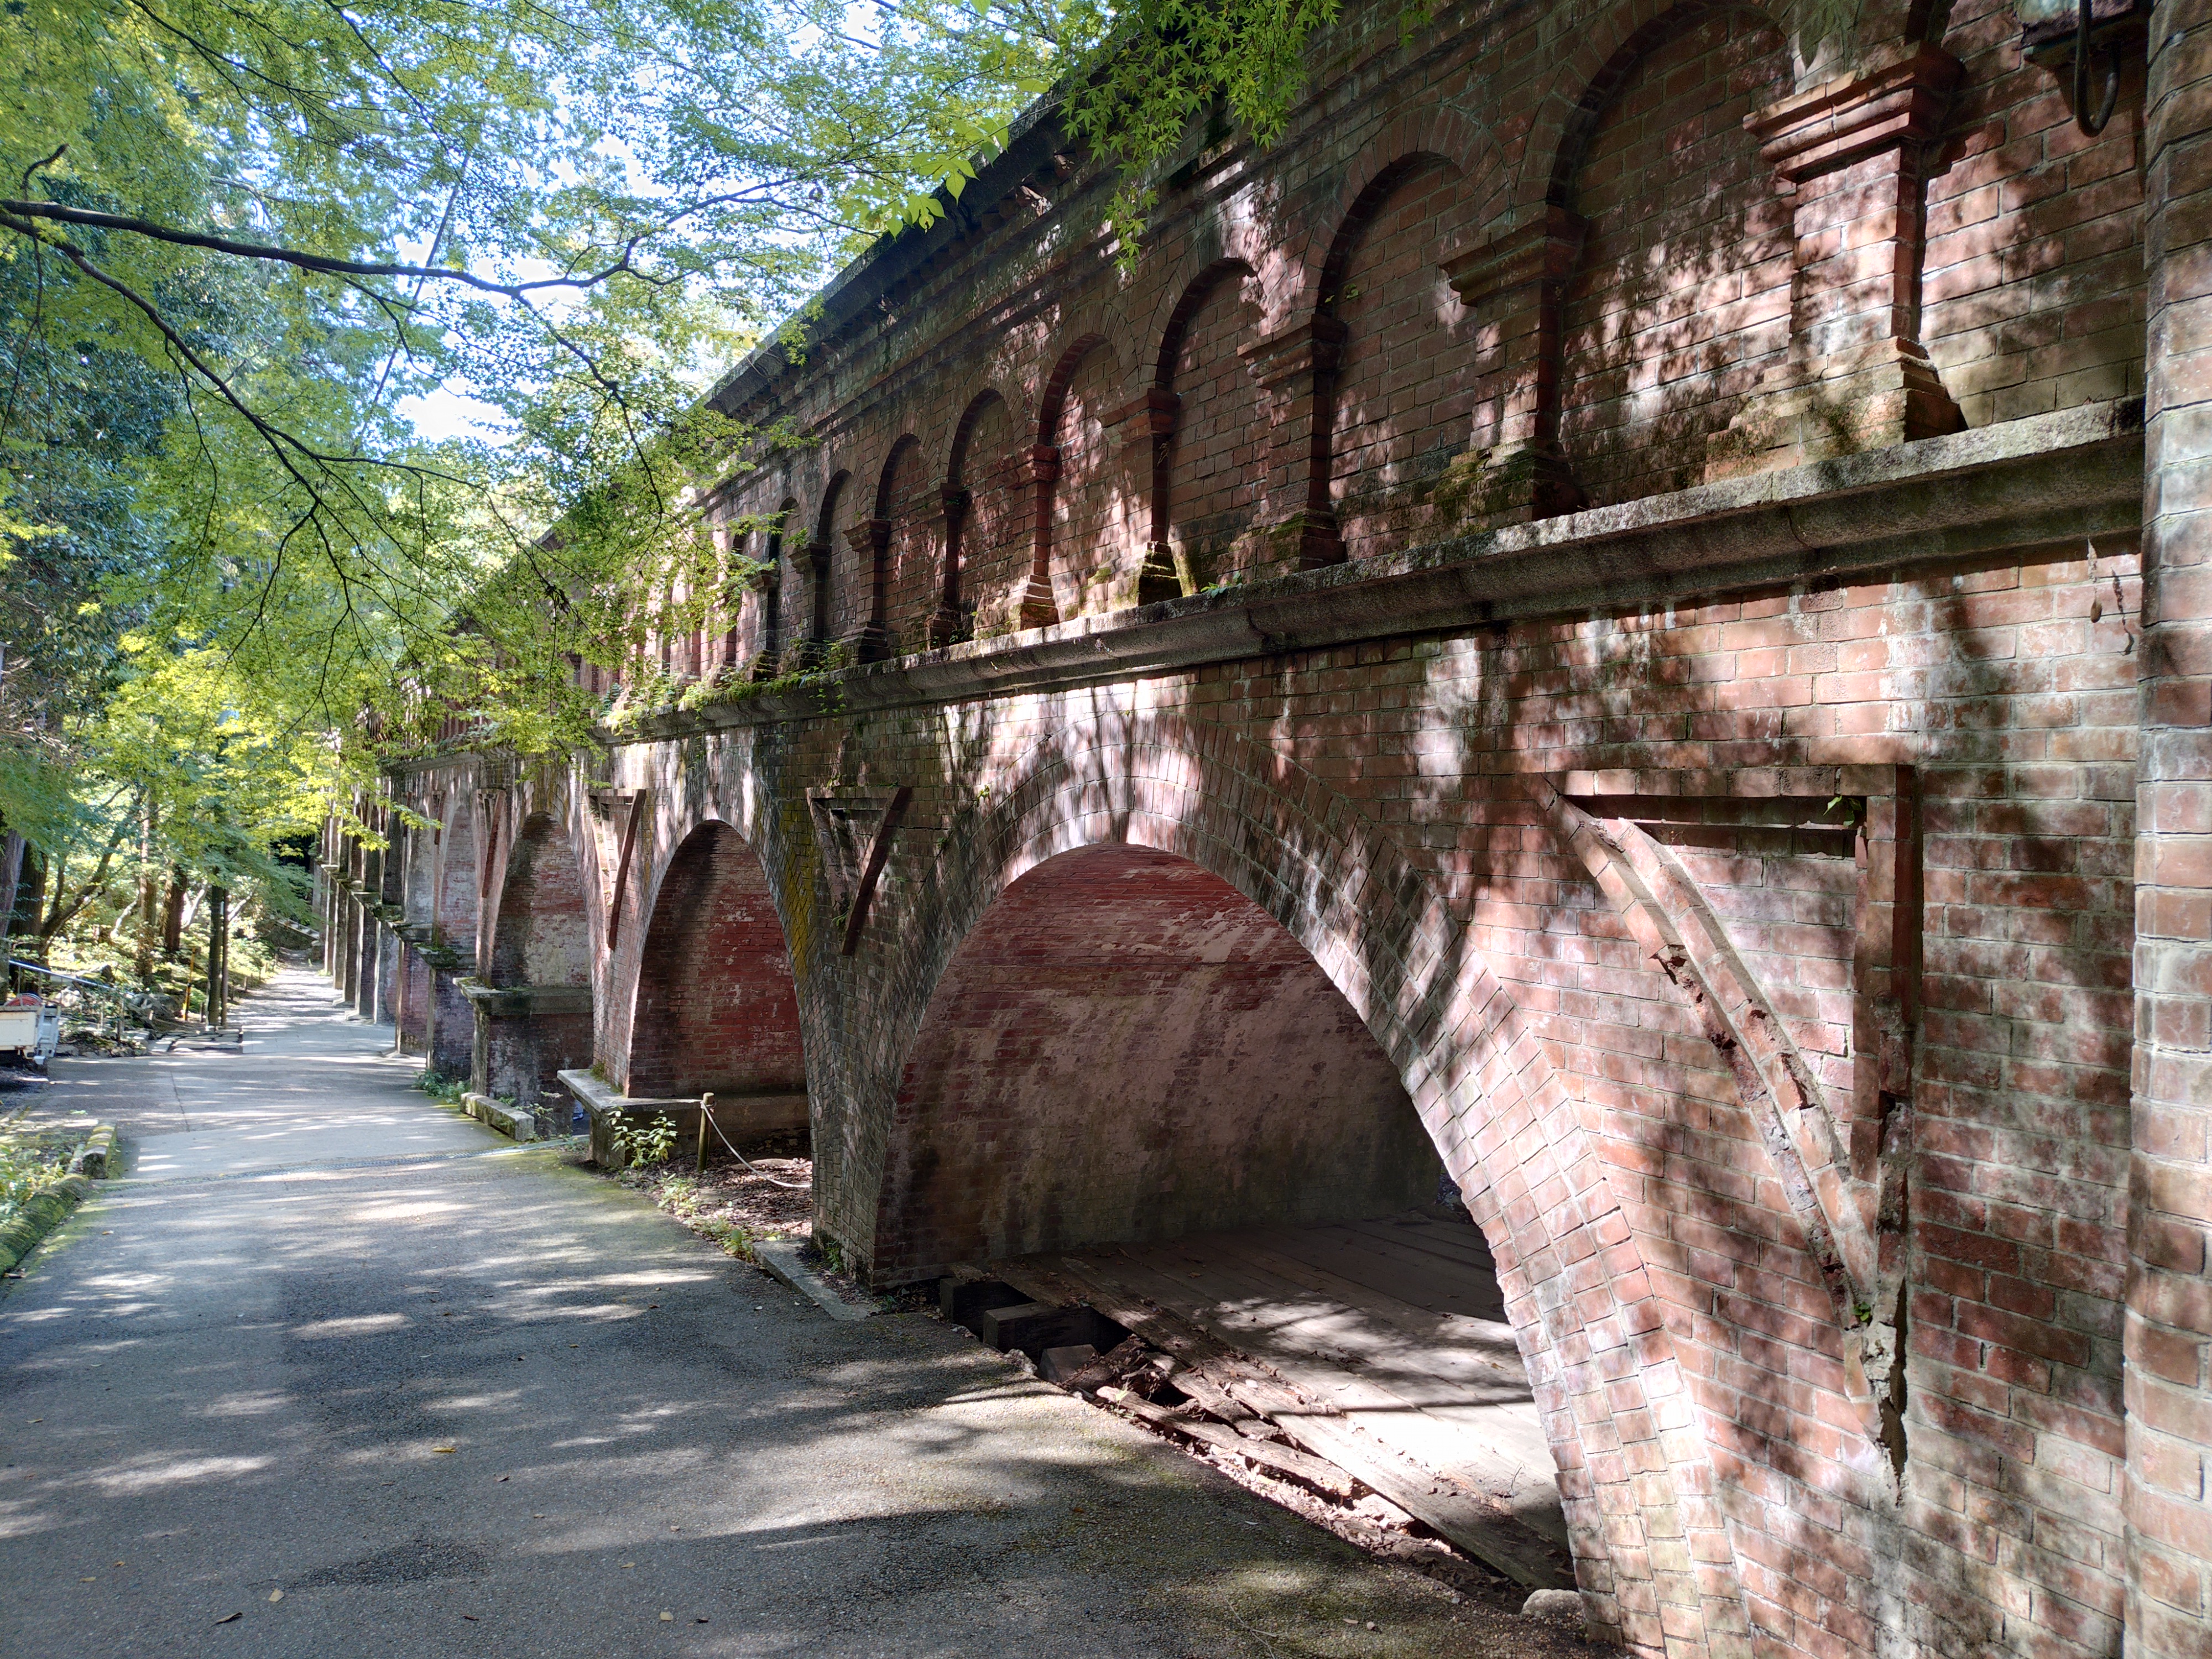
We arrived at Nanzenji Temple Suirokaku, a popular tourist spot that often appears in TV dramas.
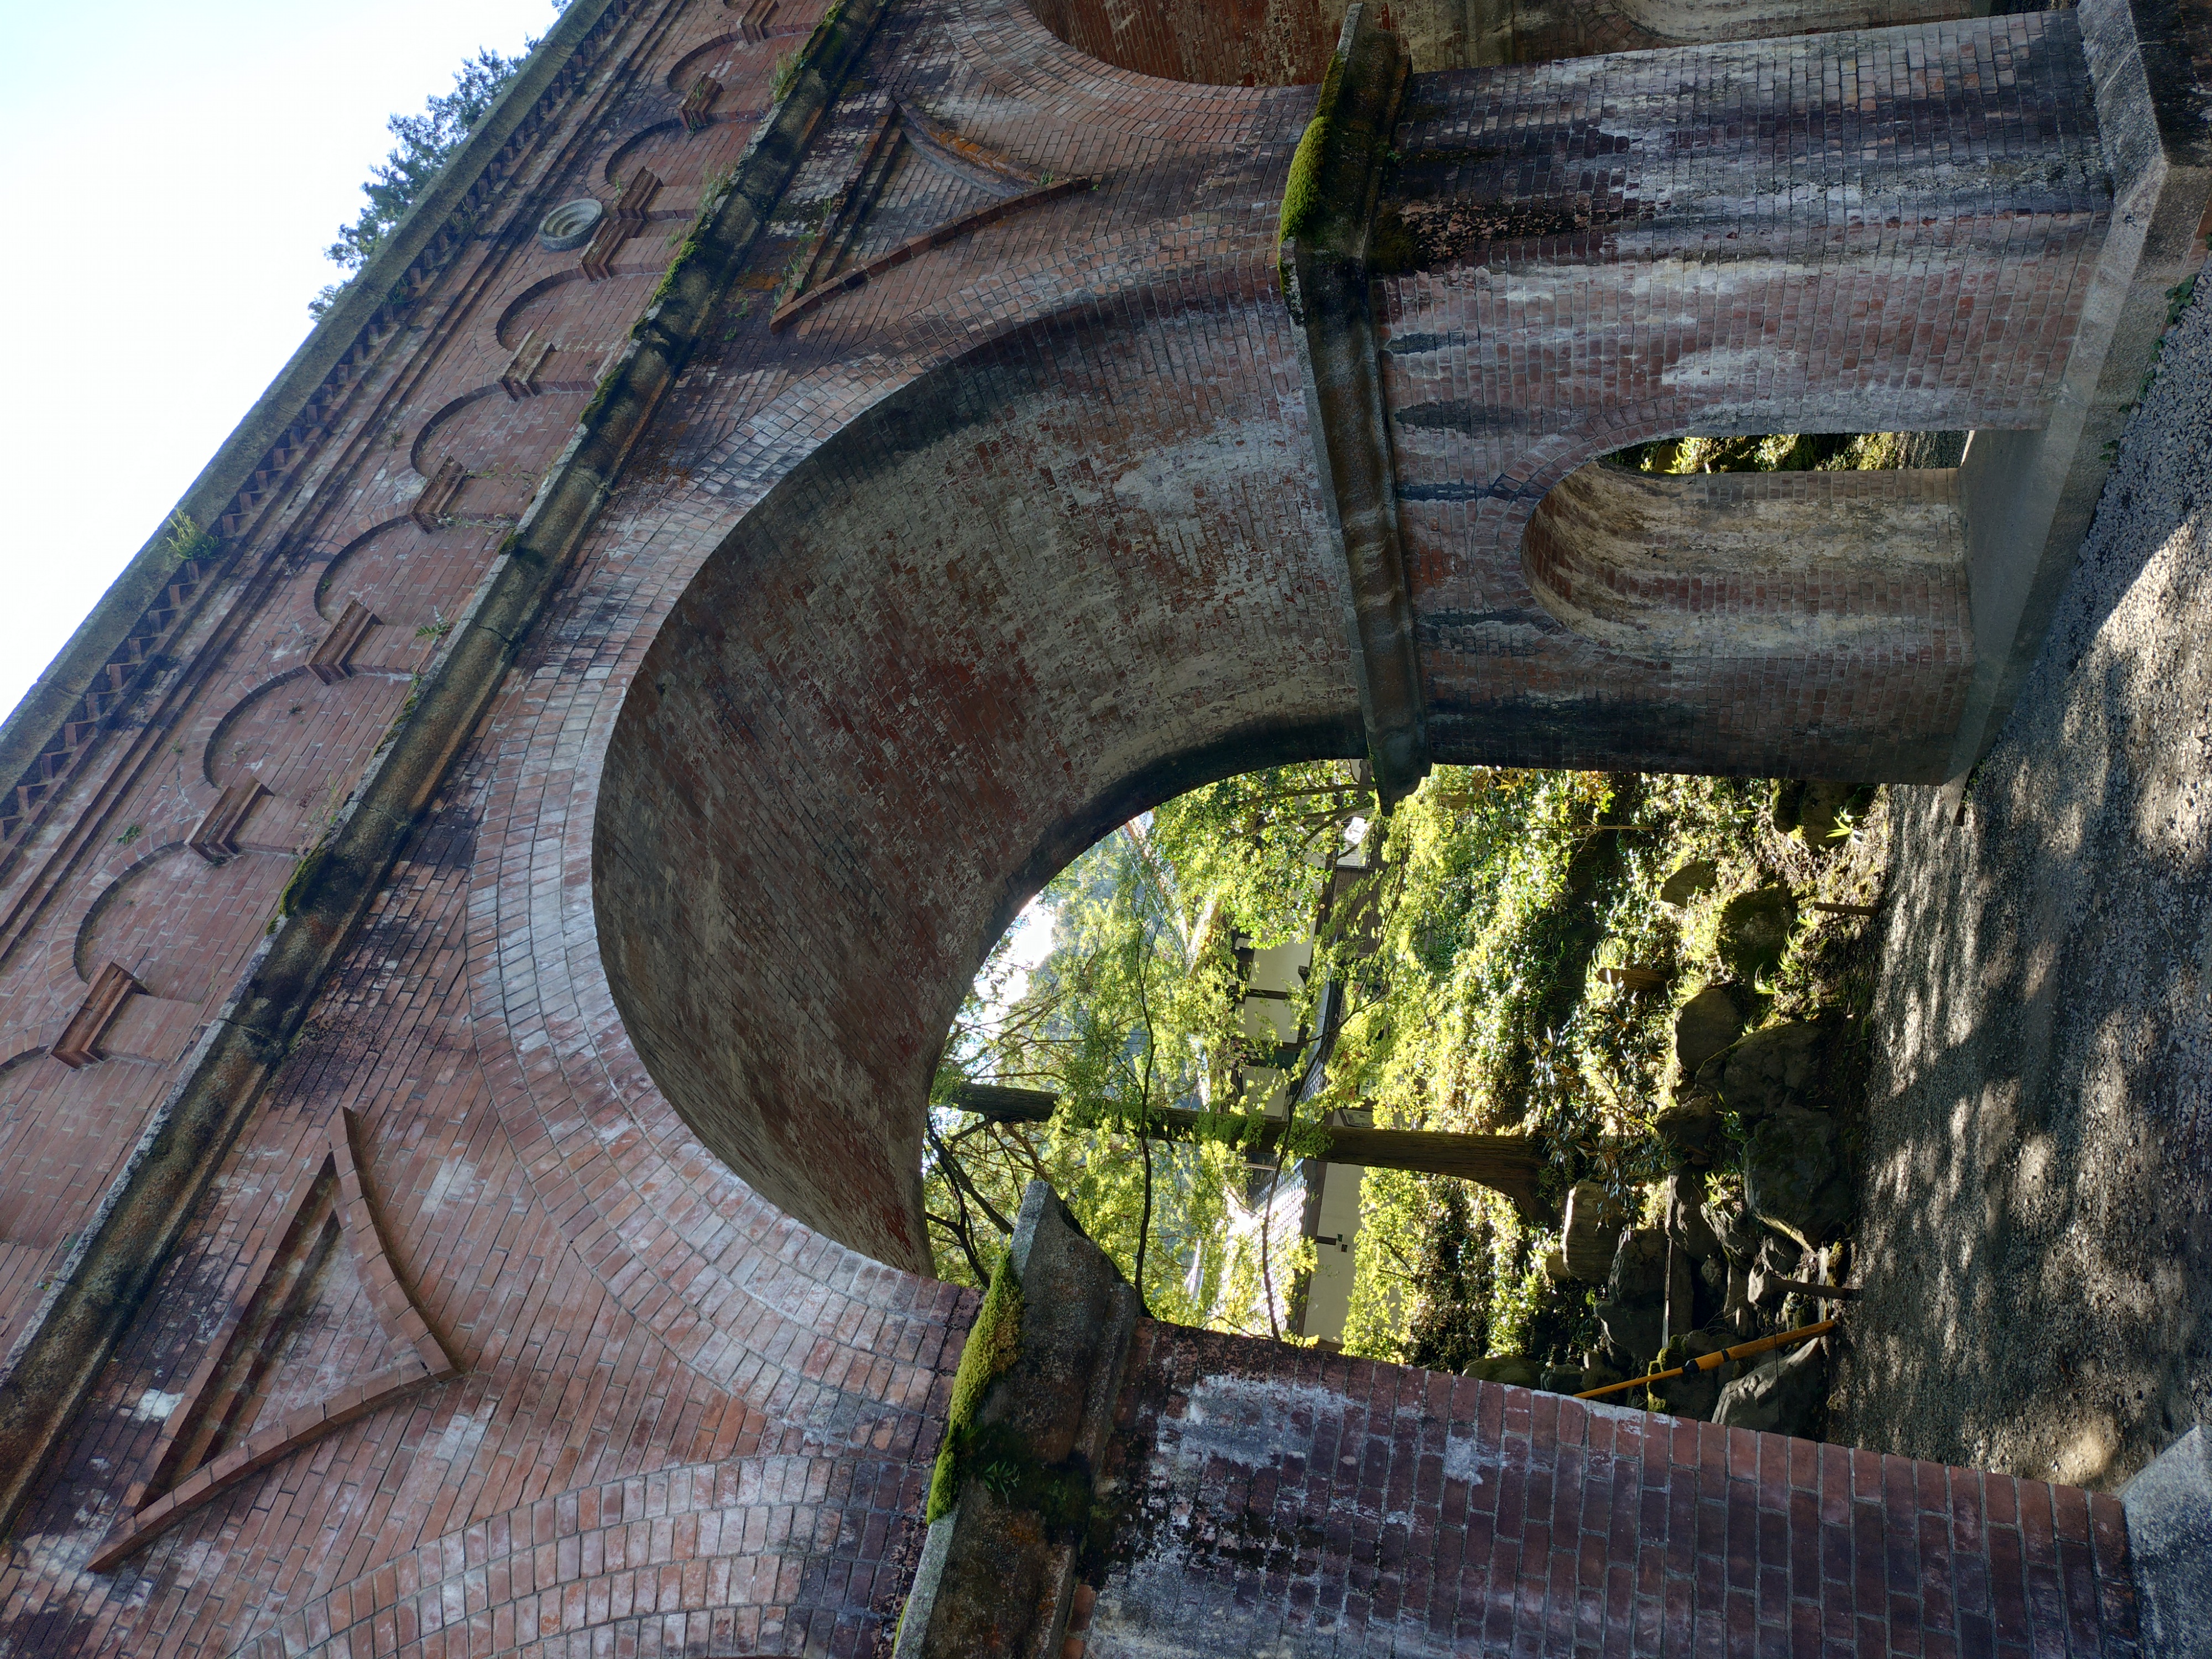
The contrast is also clear and crisp.
I took some videos while walking along the canal from Nanzenji Temple.
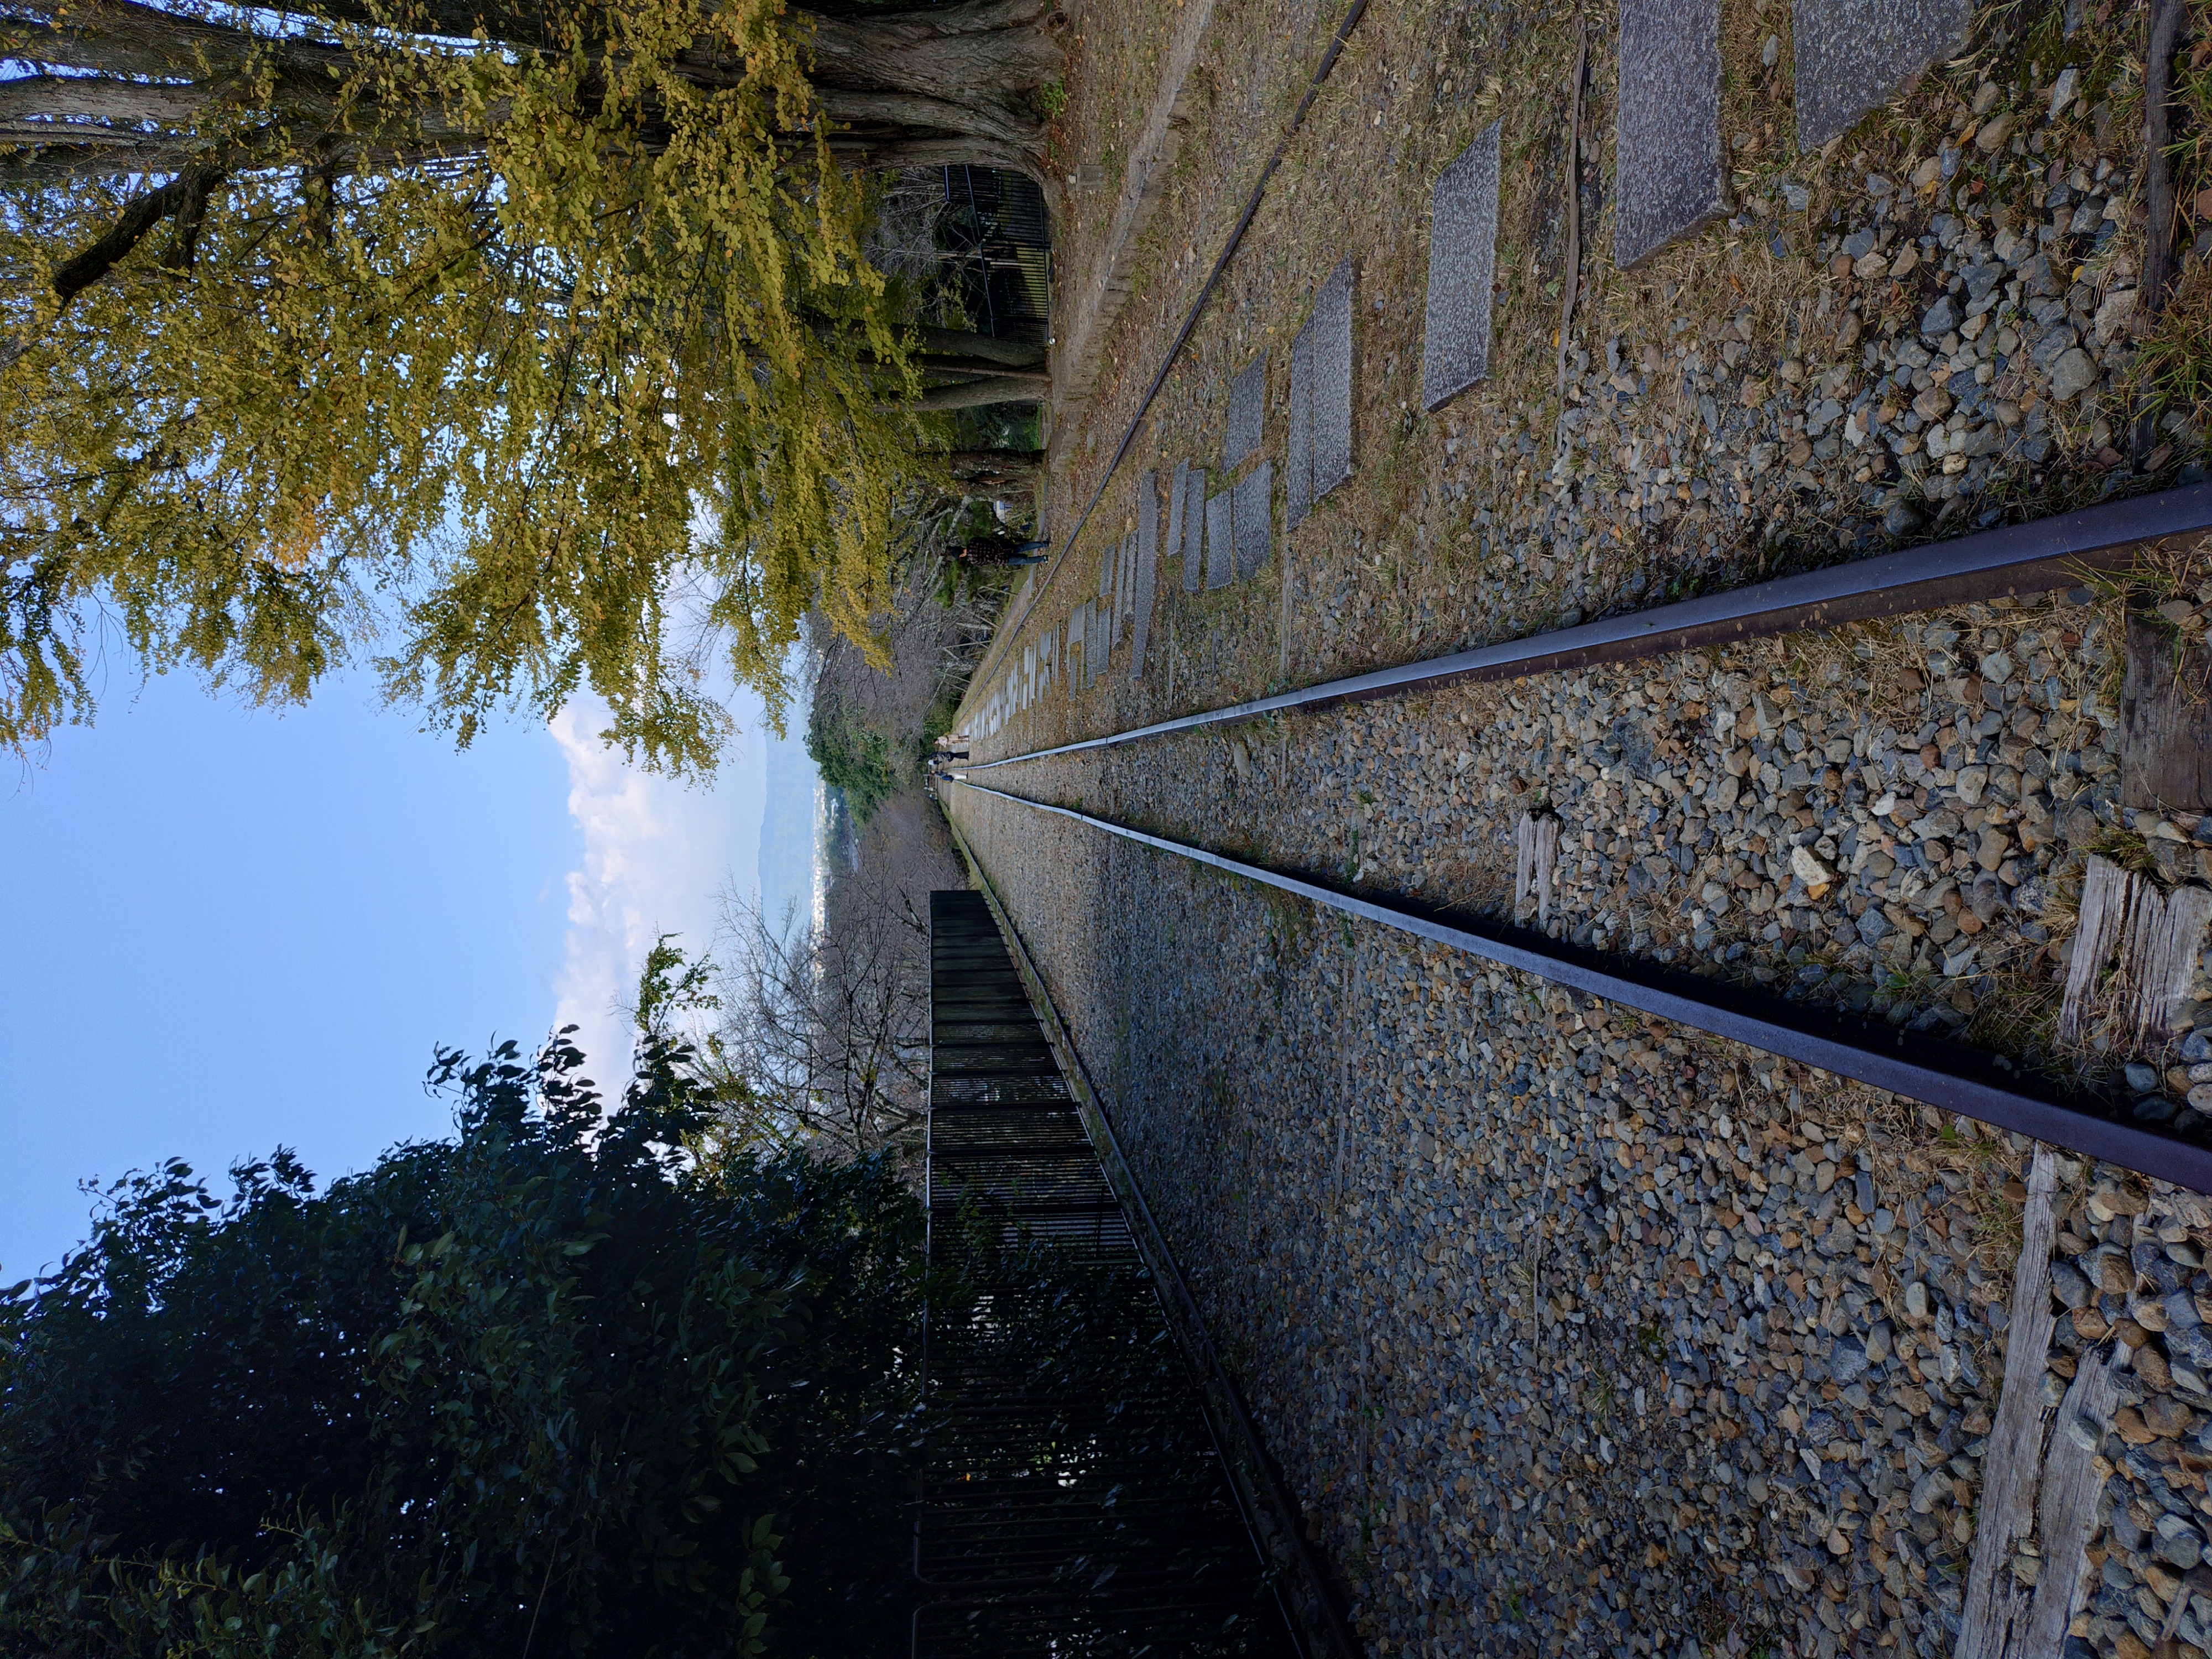
I walked to the remains of the Keage incline. As I got further away, I could see the outlines of the rails and crushed stone becoming increasingly blurred.
In the park next to the incline, I tried filming the flowing water in slow motion.
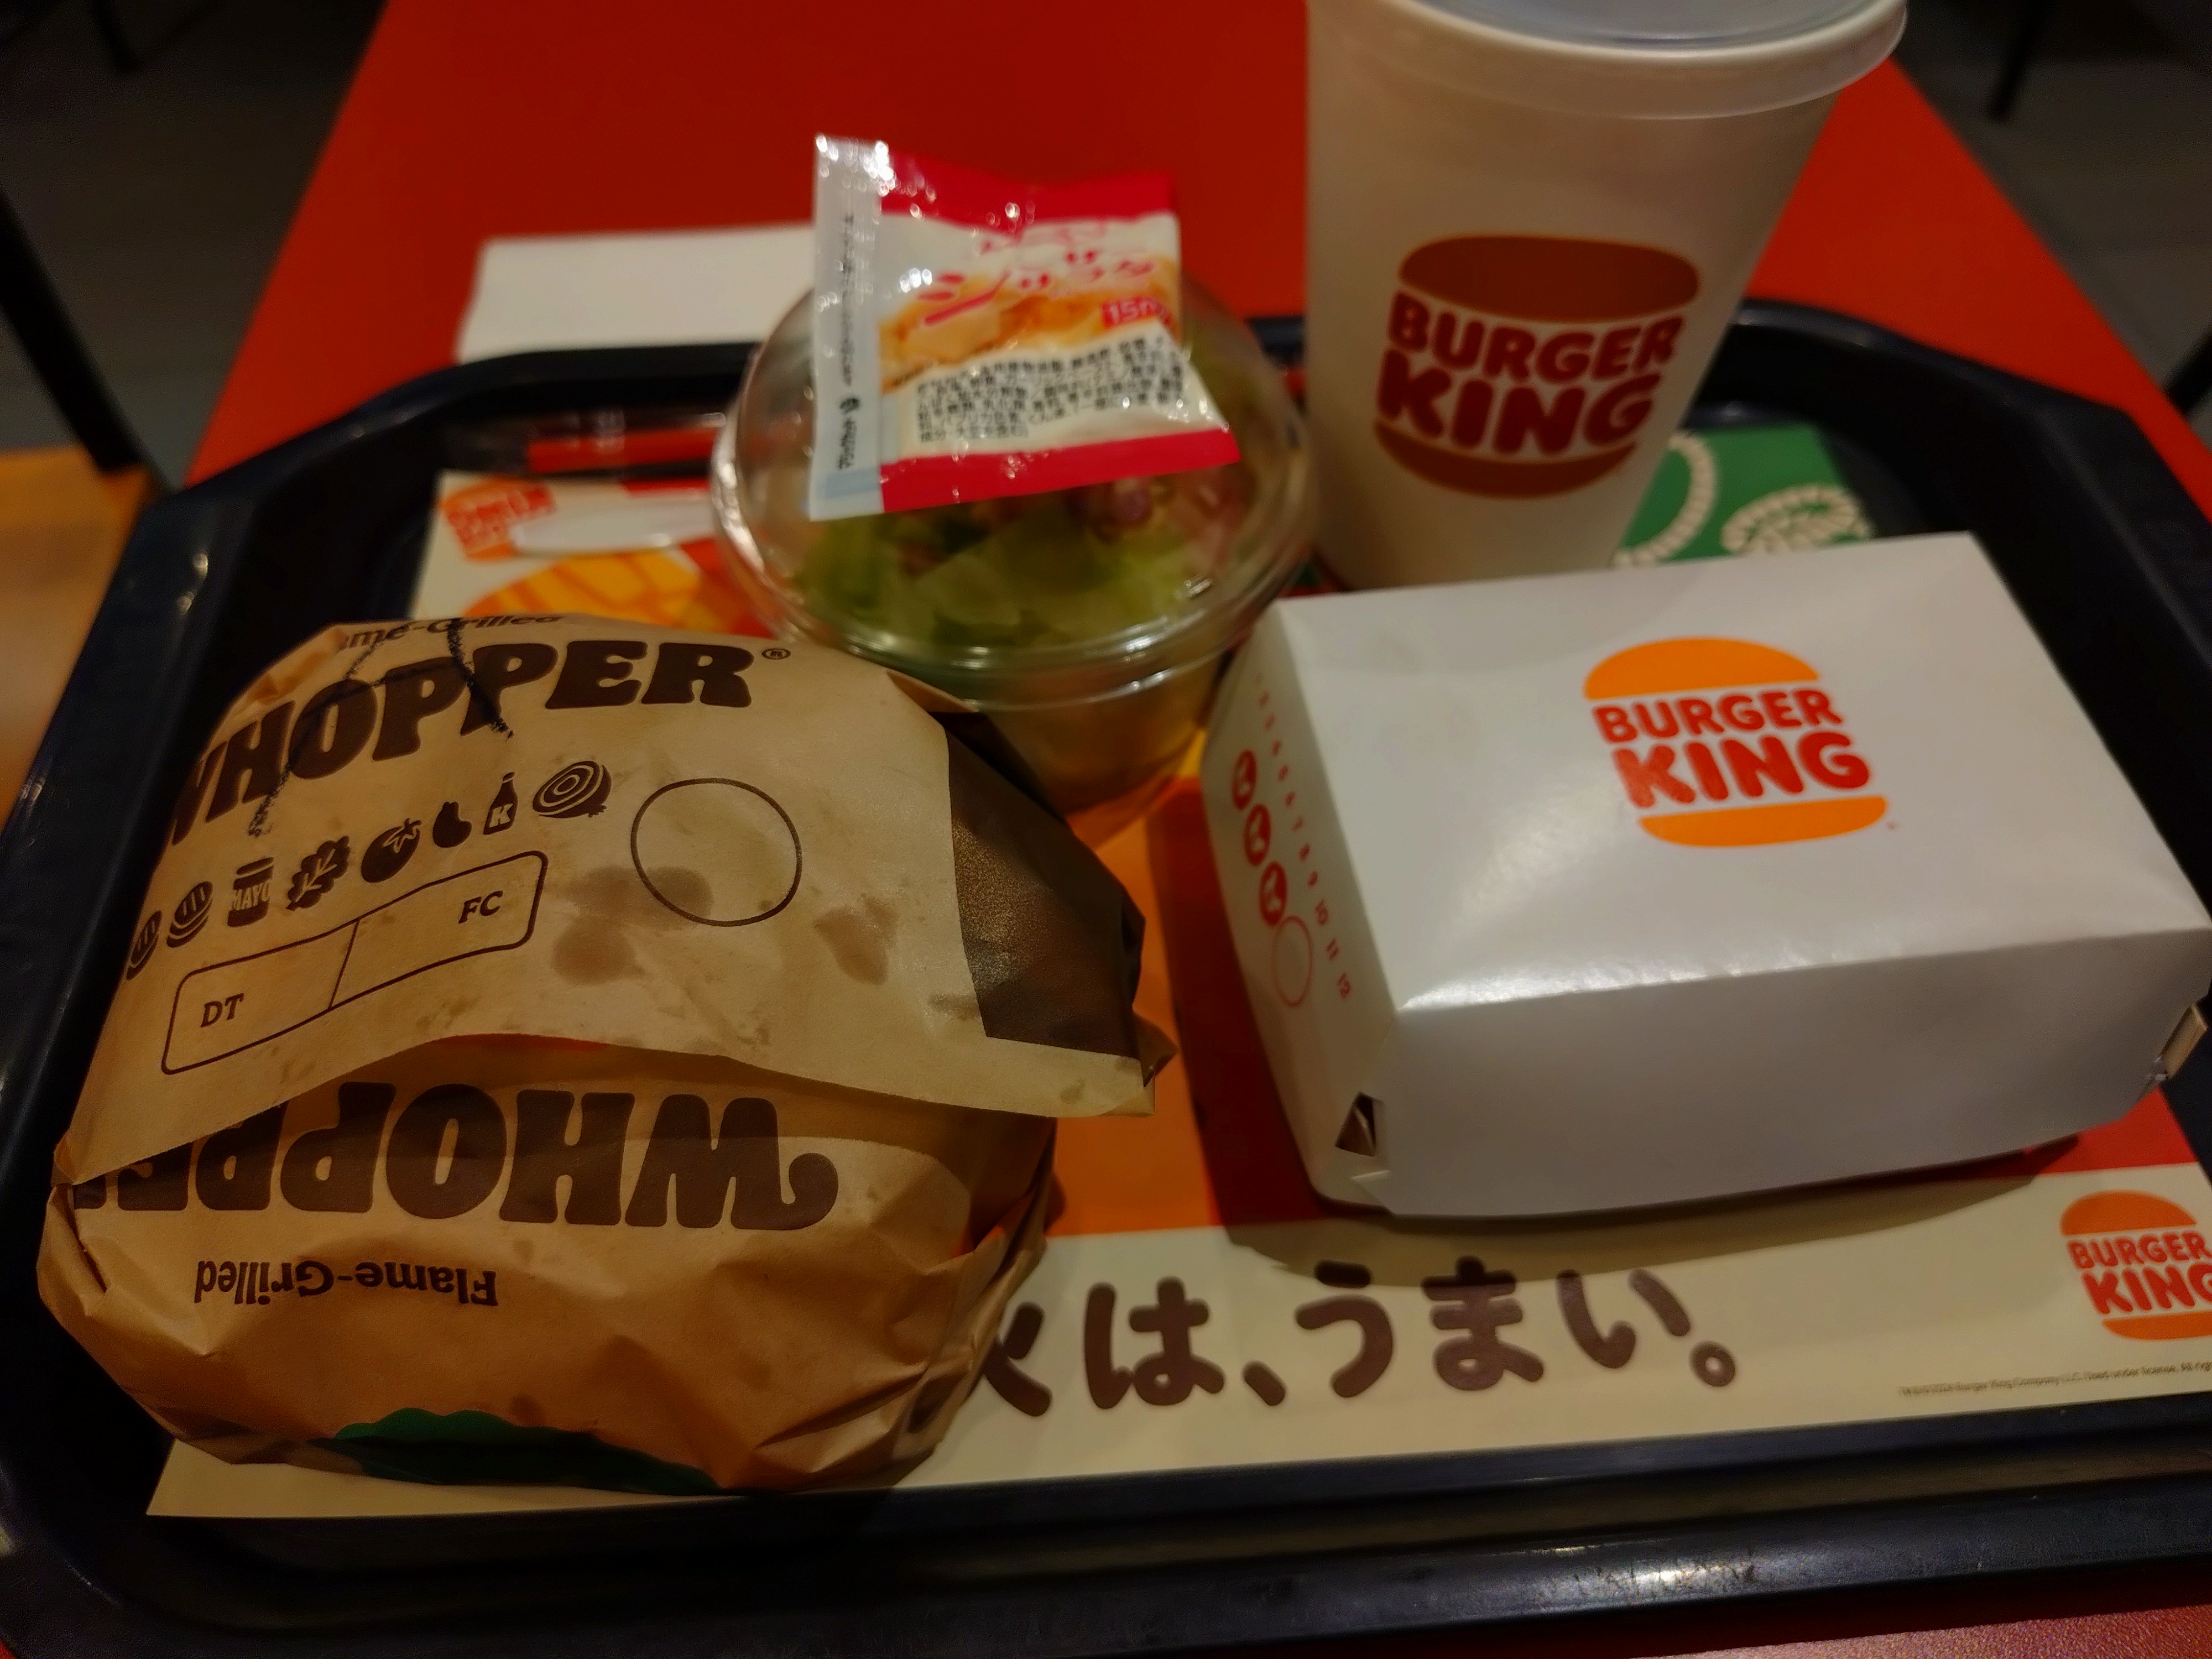
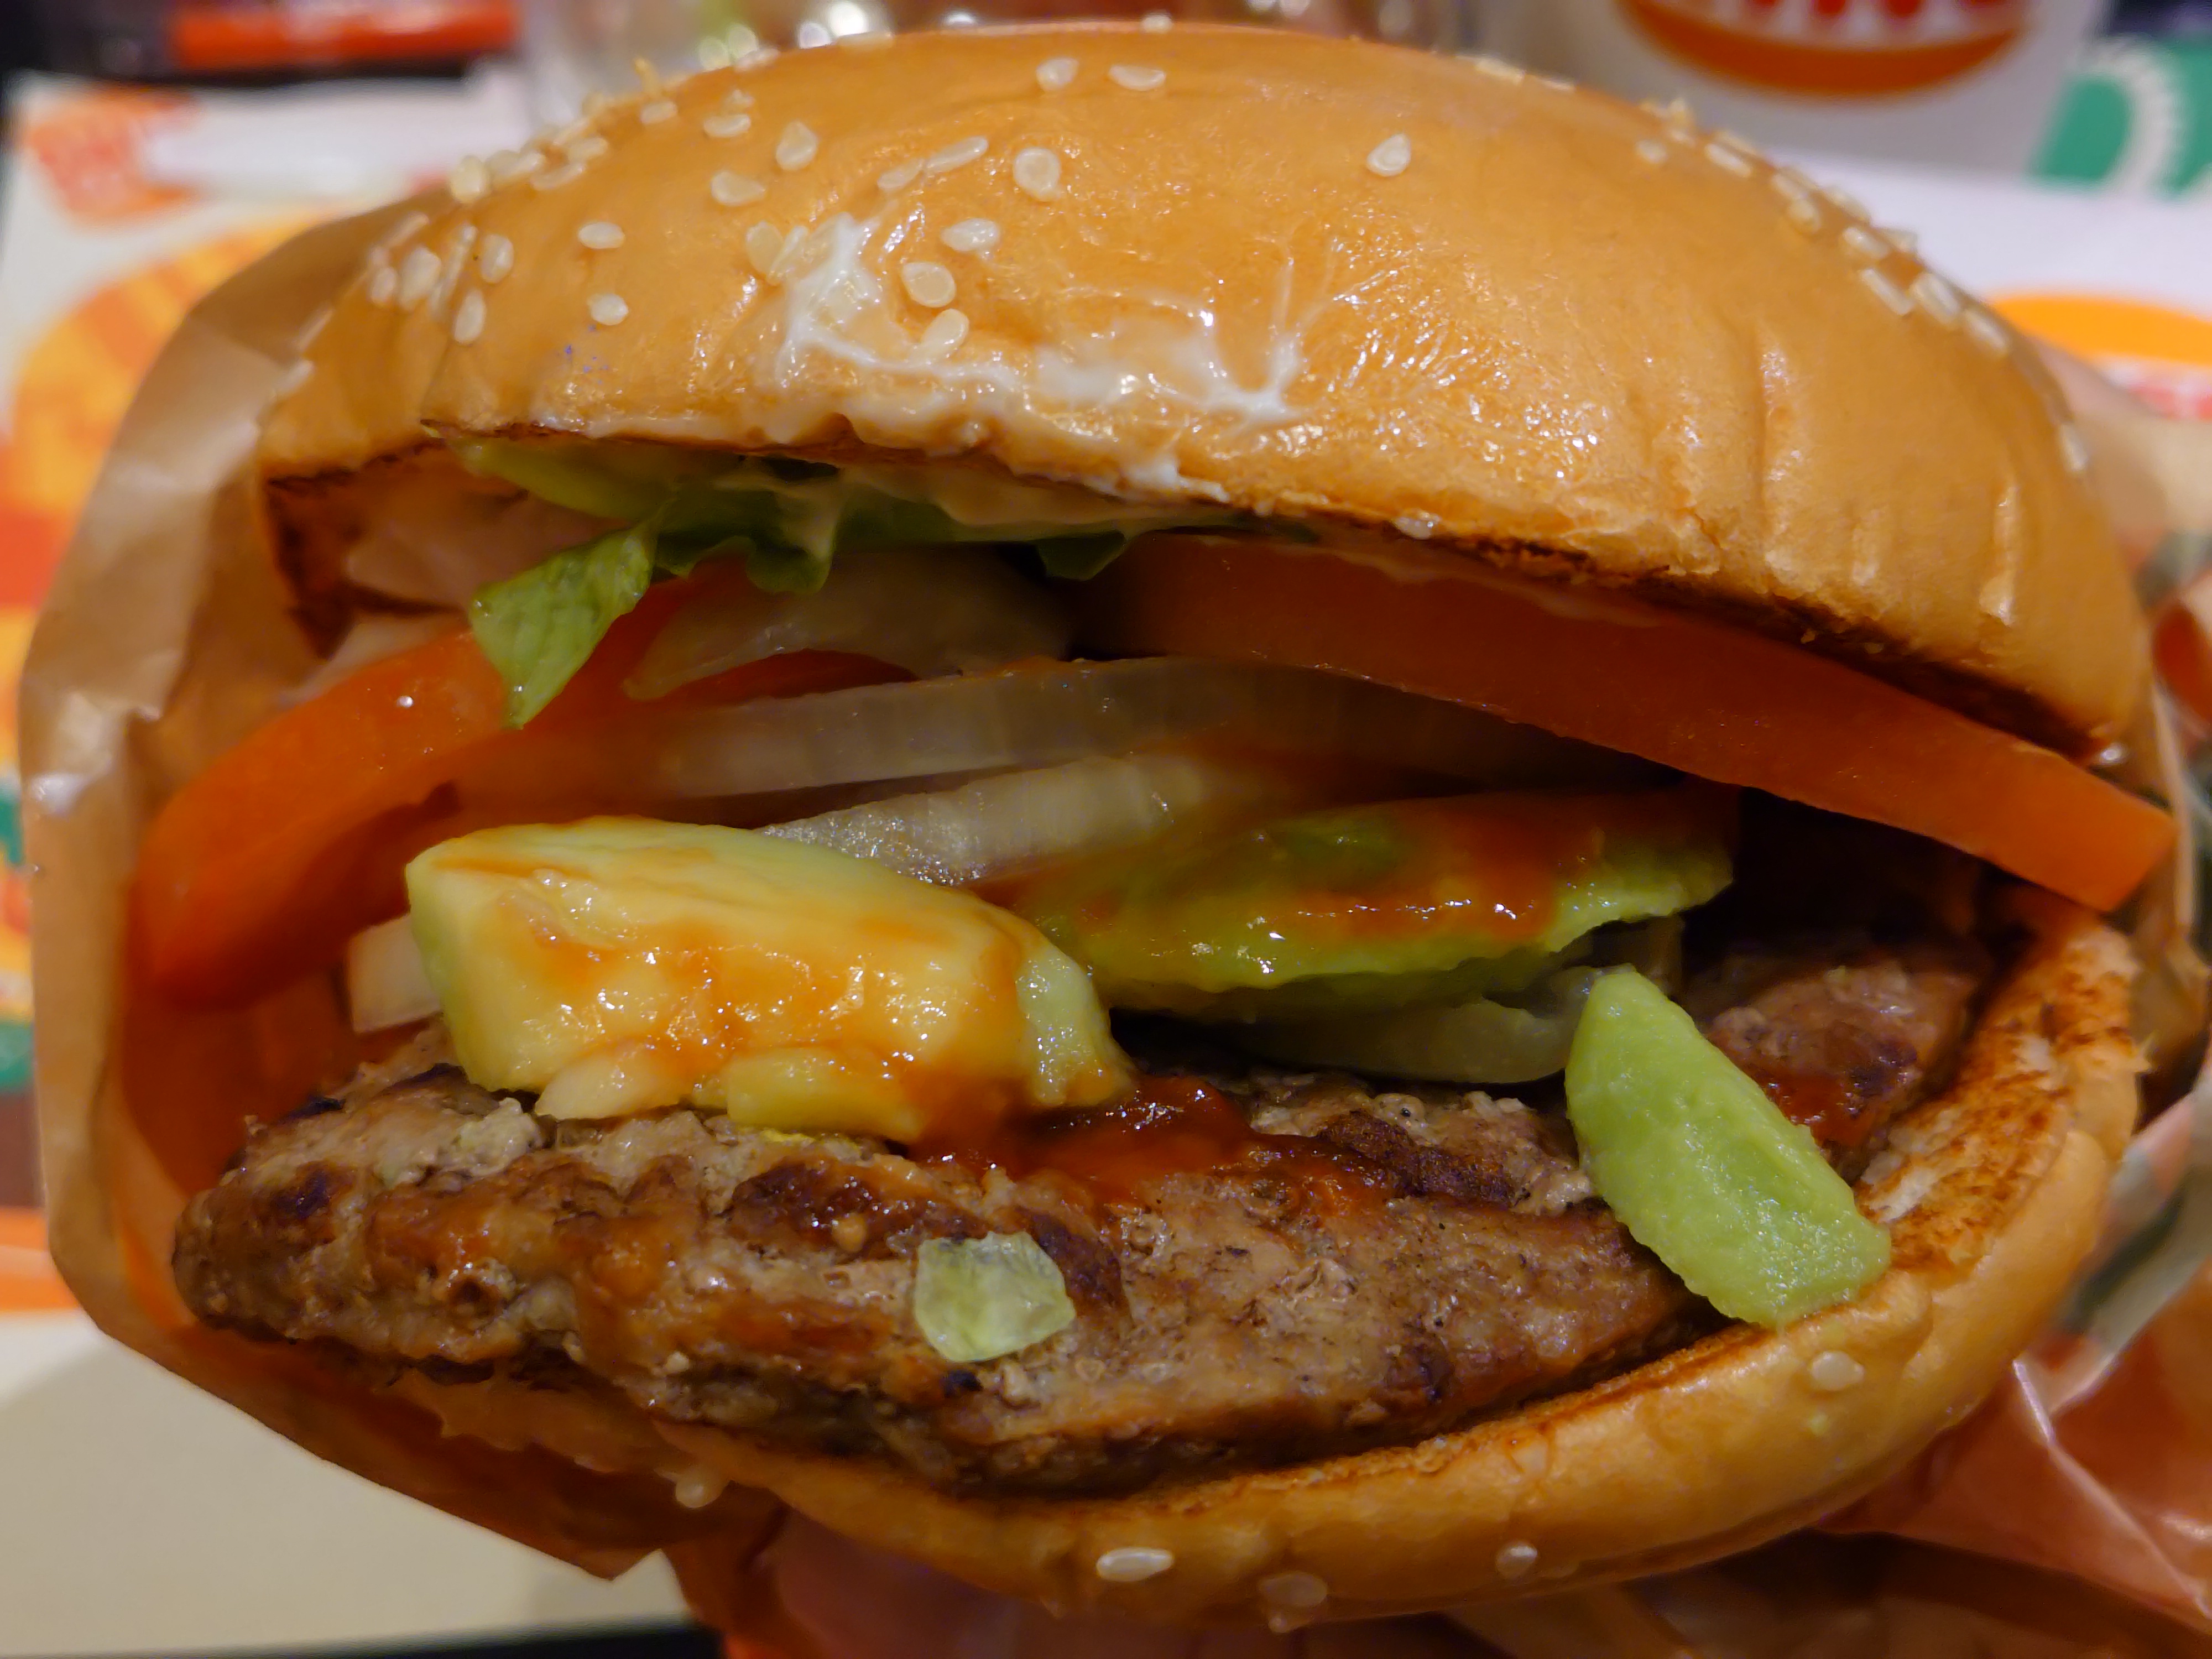
We took the subway back to the city center and had lunch at Burger King. The photo looks darker than it actually looked.
I held up the Avocado Whopper for a photo. It was brighter, but the color still seemed too red.
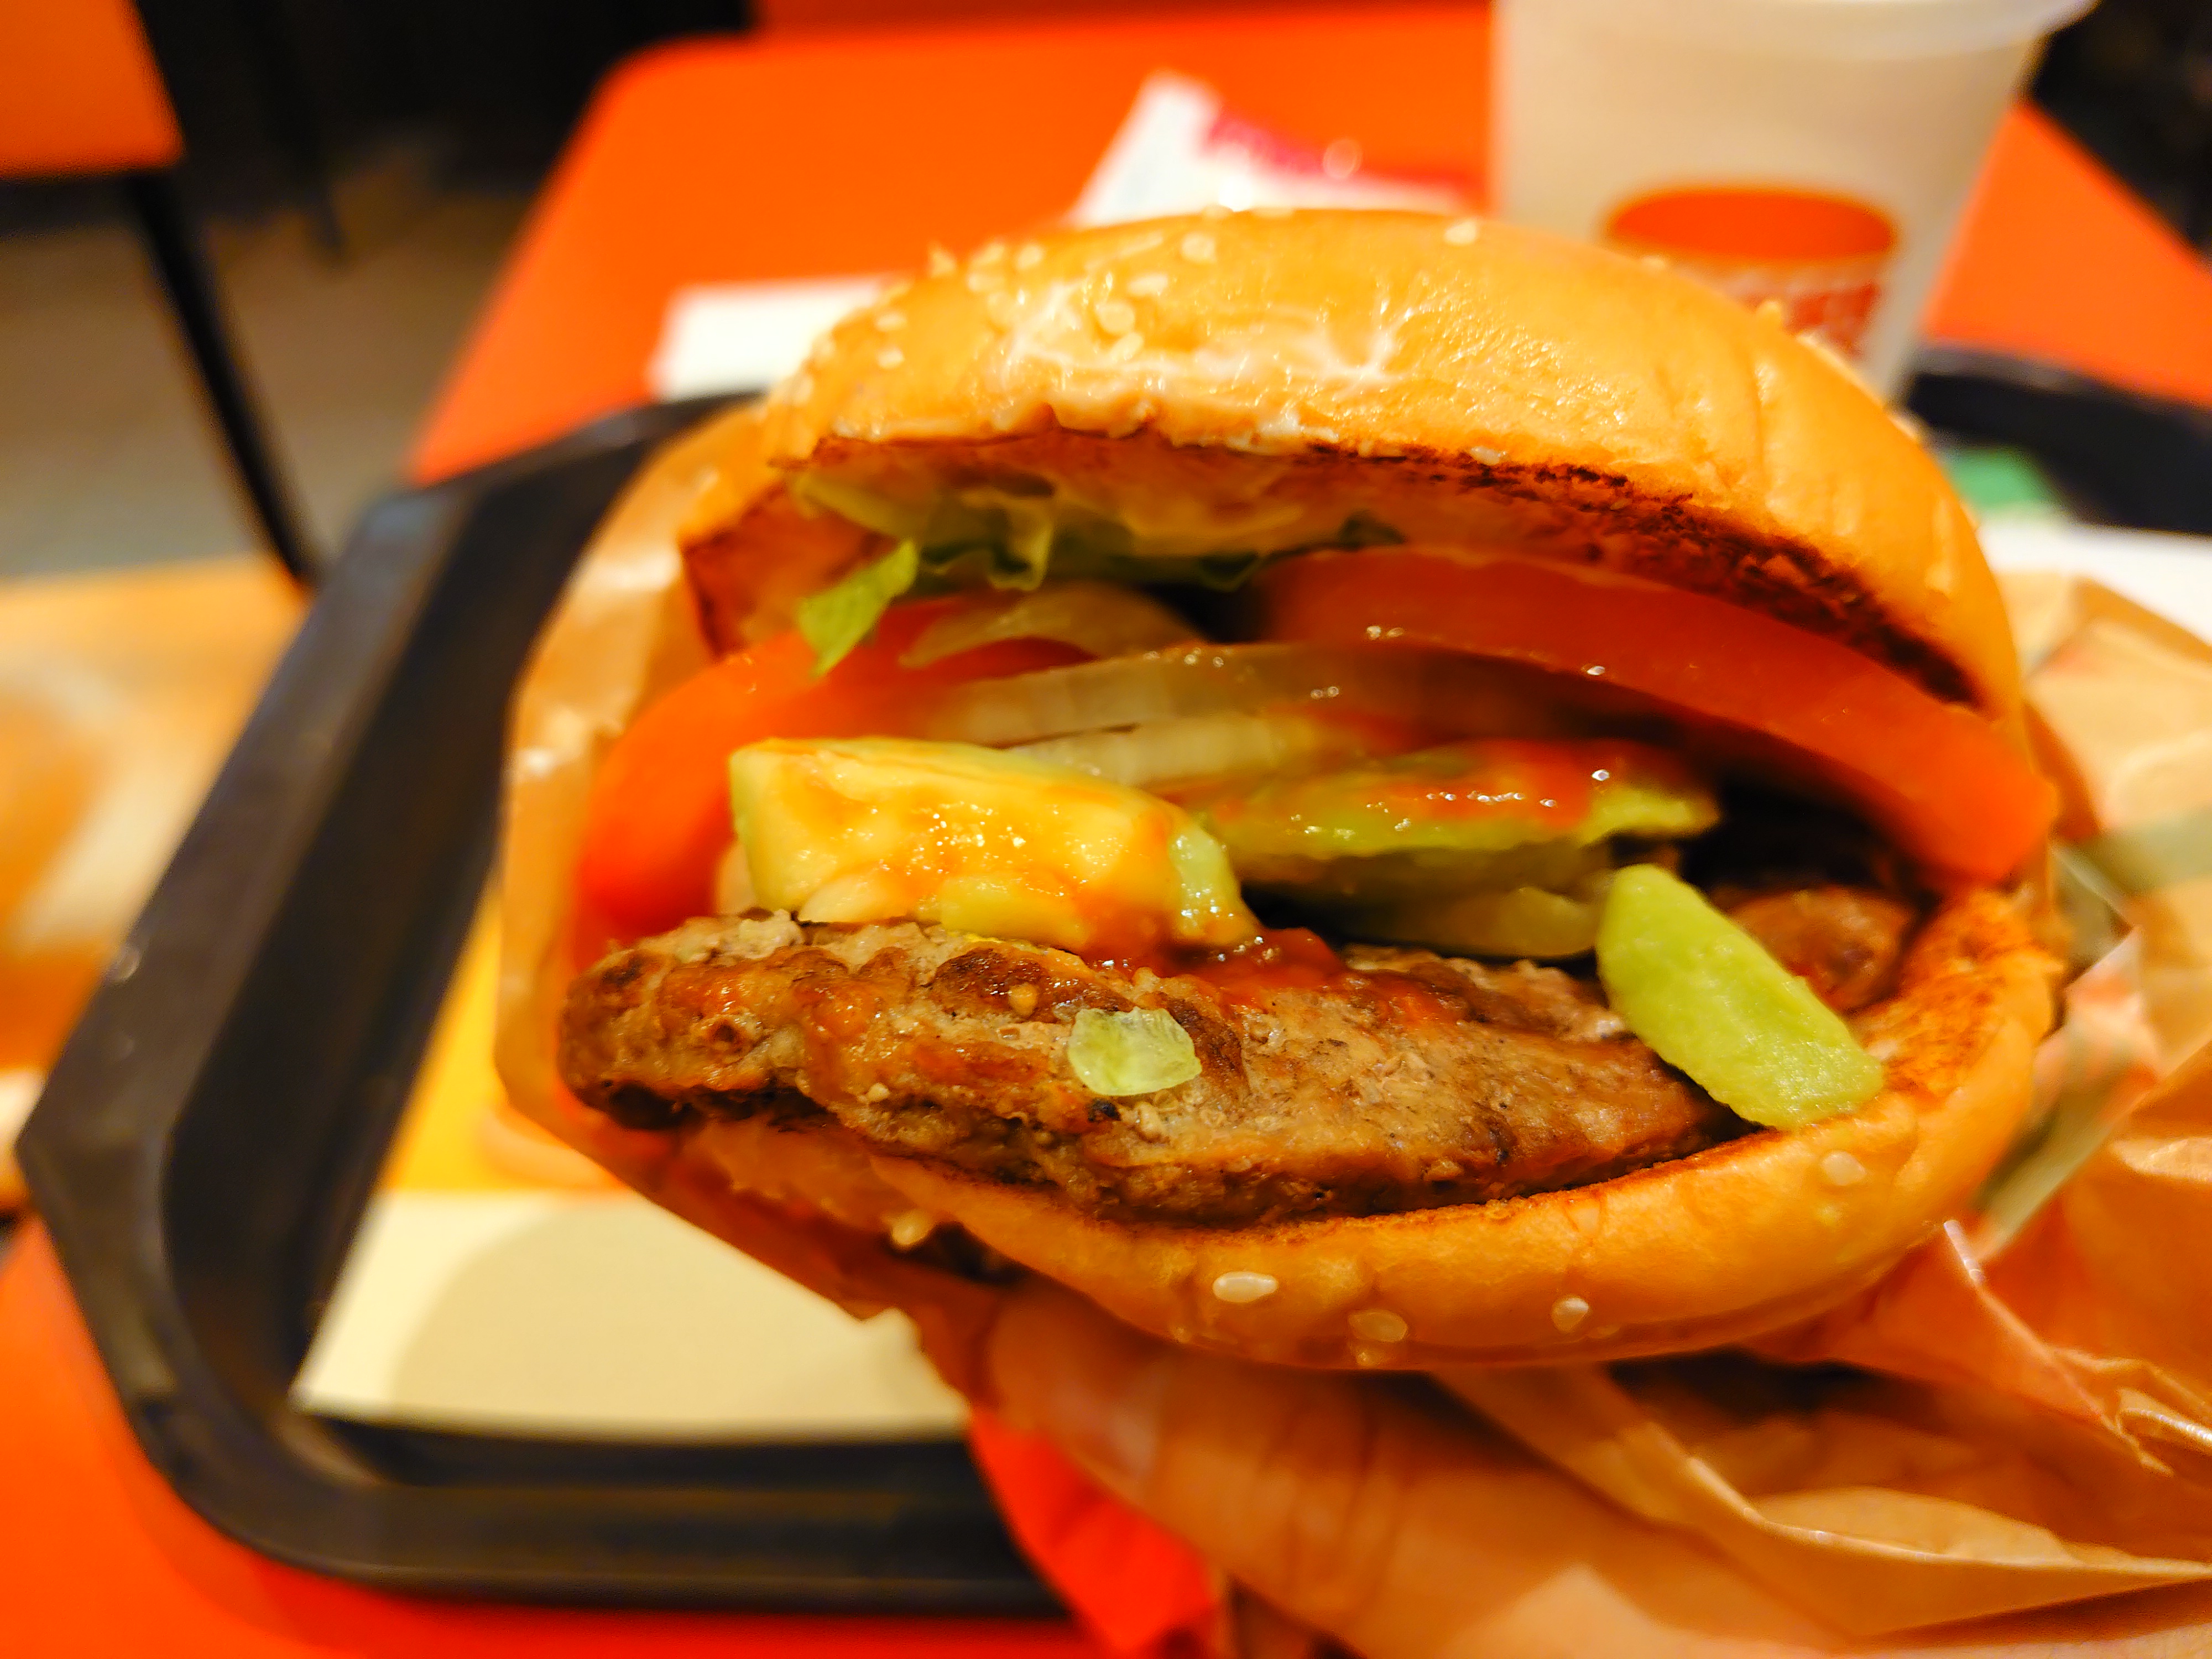
Adjusting the focus position also changed the color correction, resulting in a much more natural look.
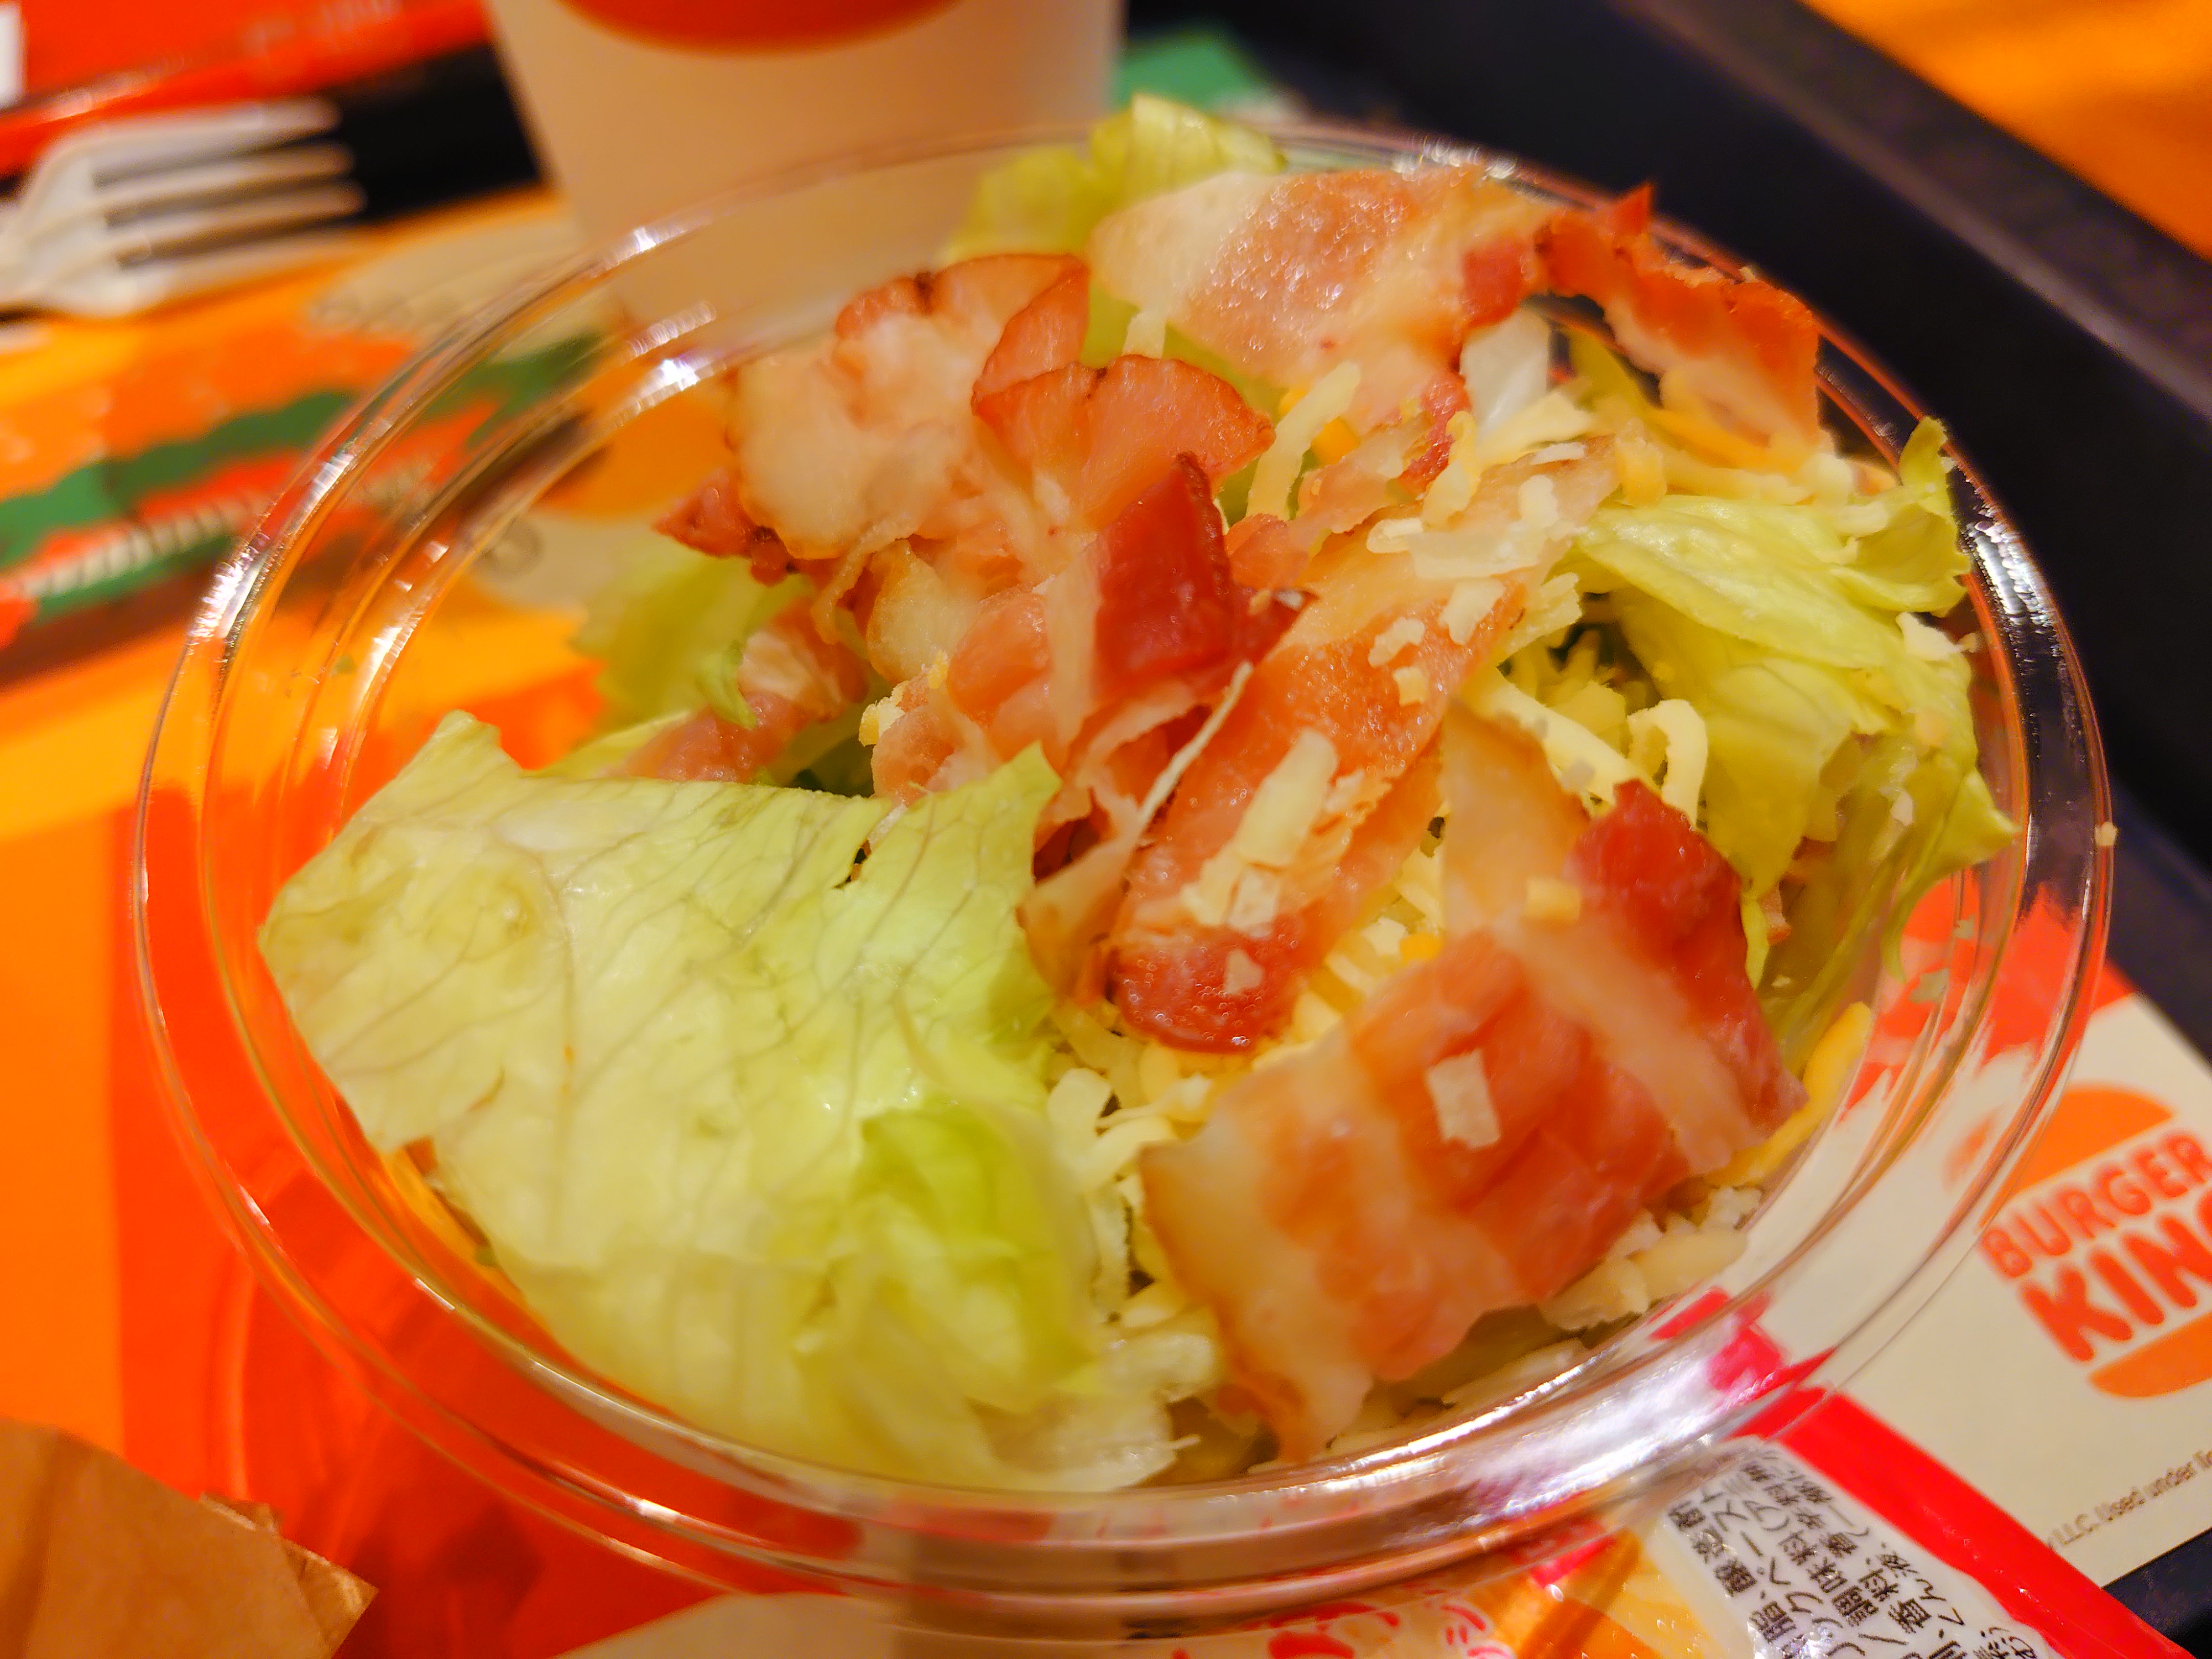
The salad looks quite red.
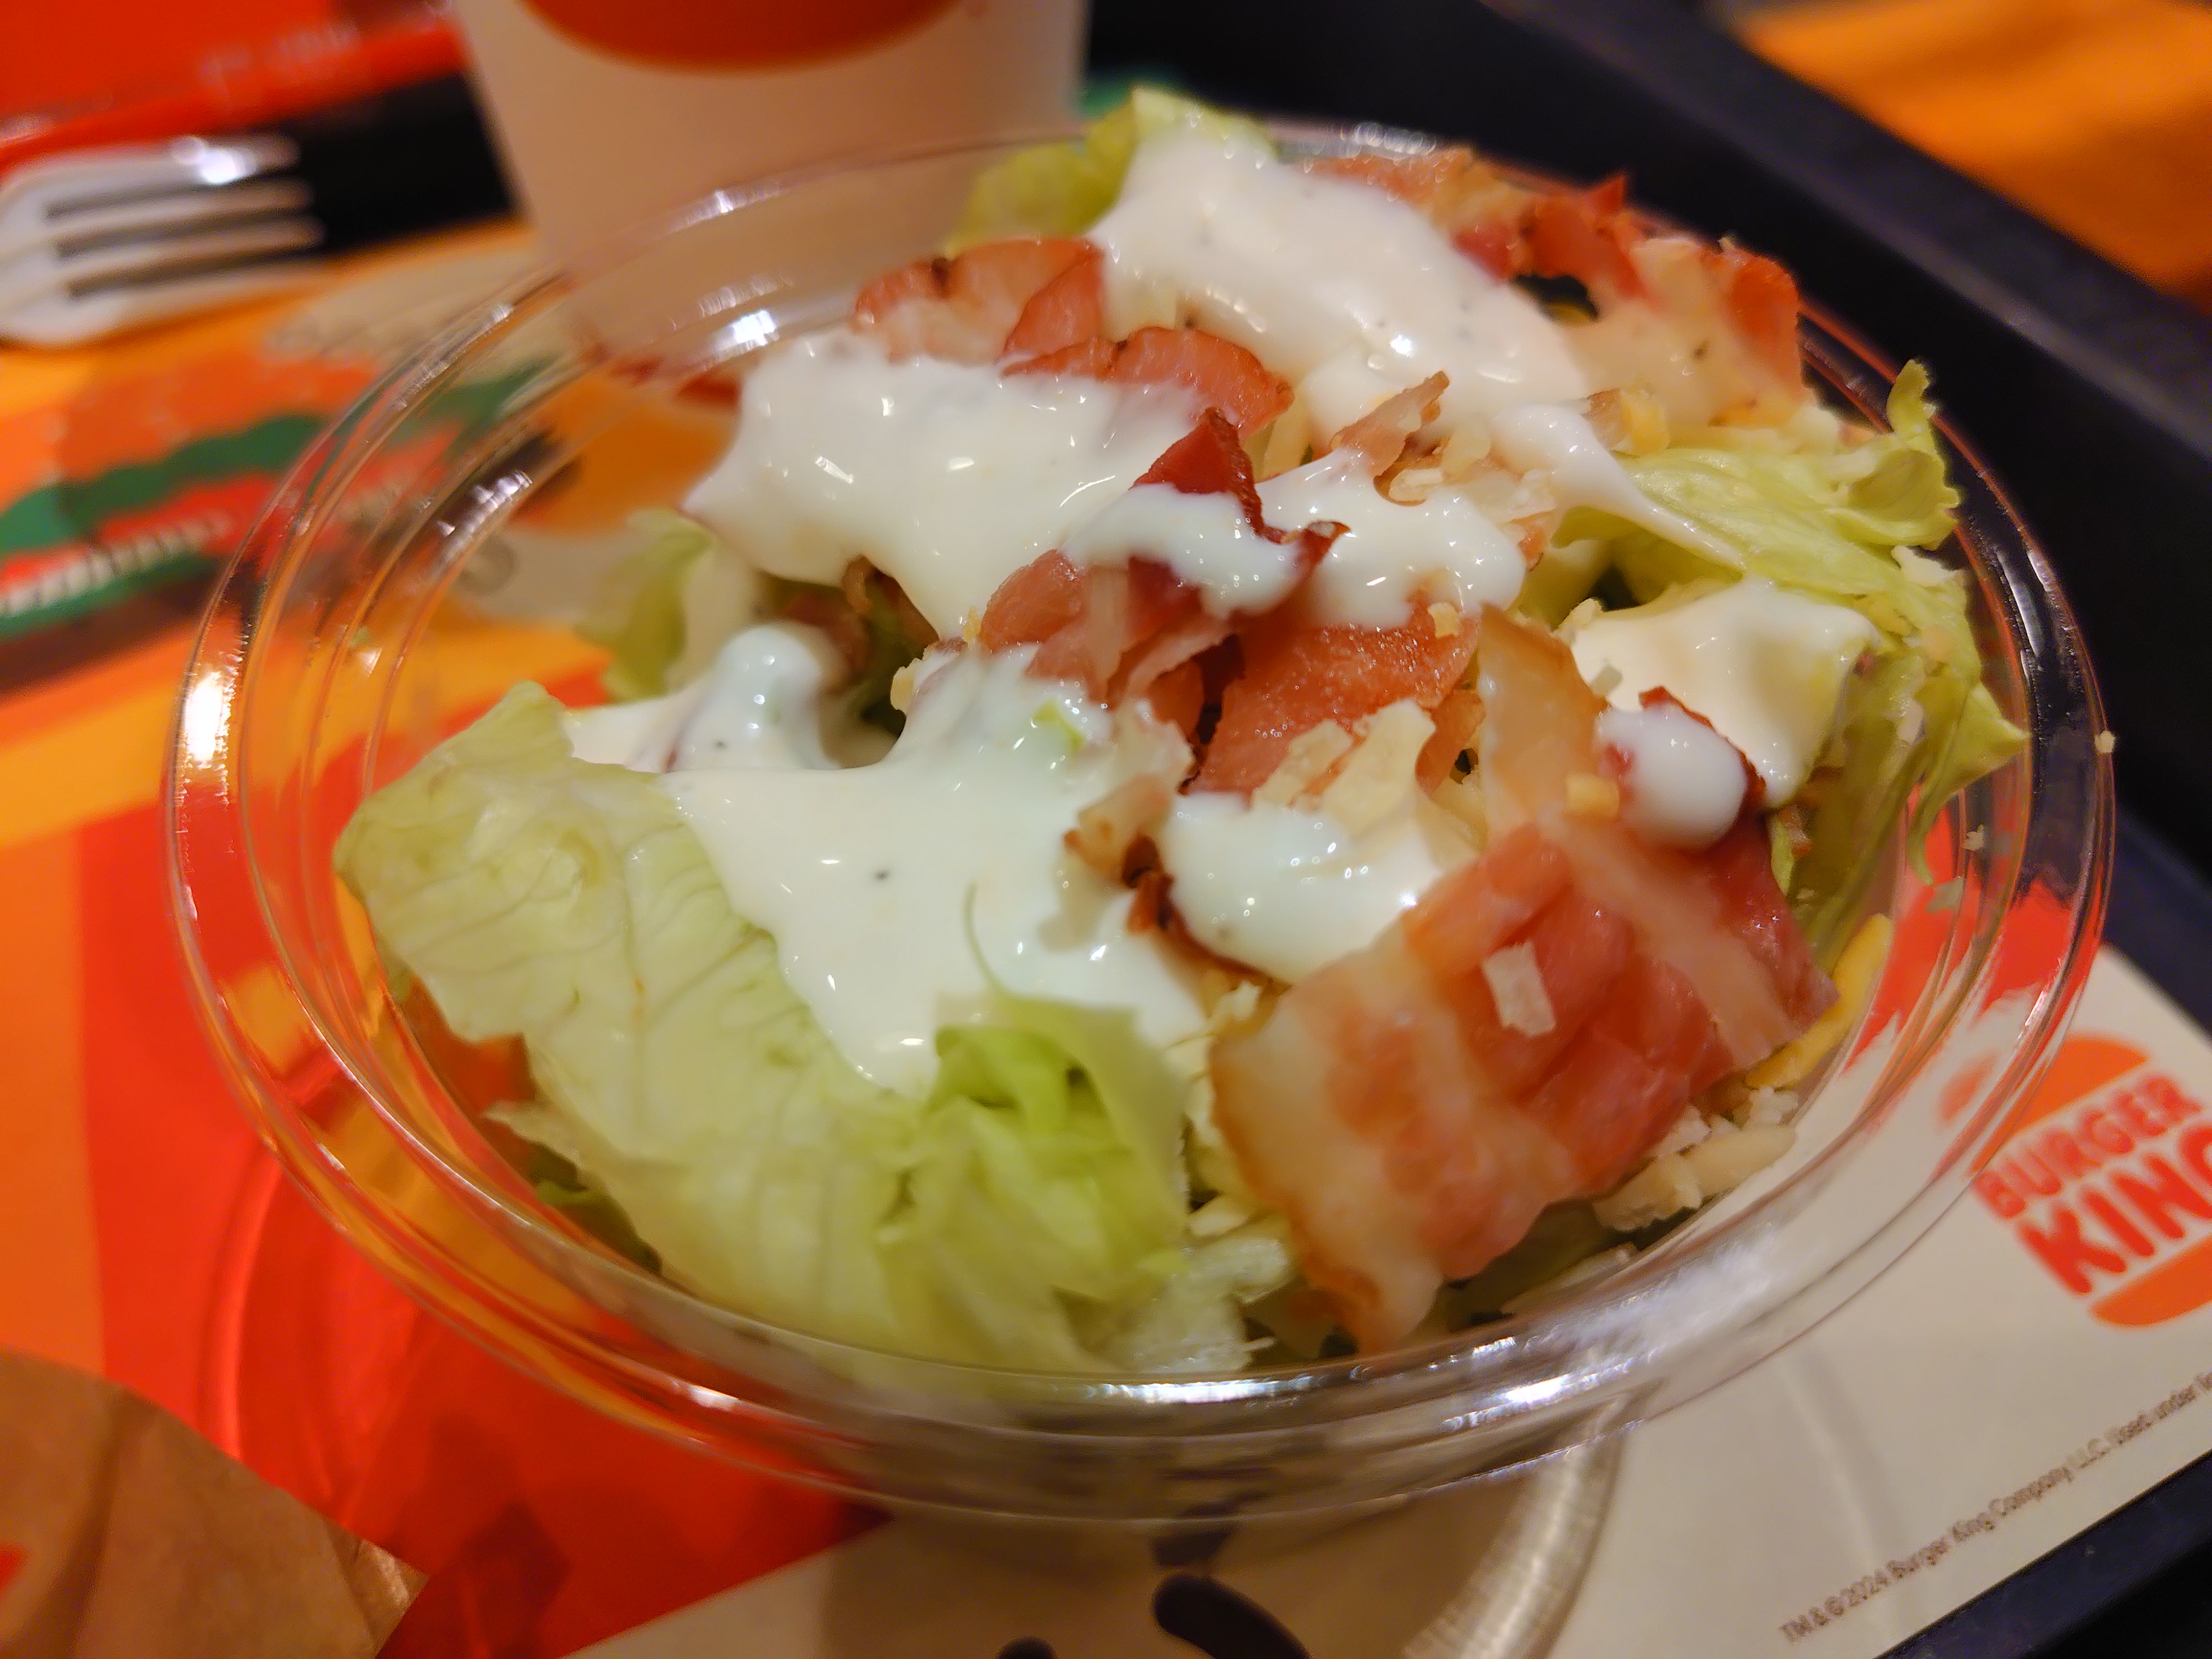
After applying the dressing, the white balance was adjusted to a moderate level, and the colors came closer to what I saw with my eyes.
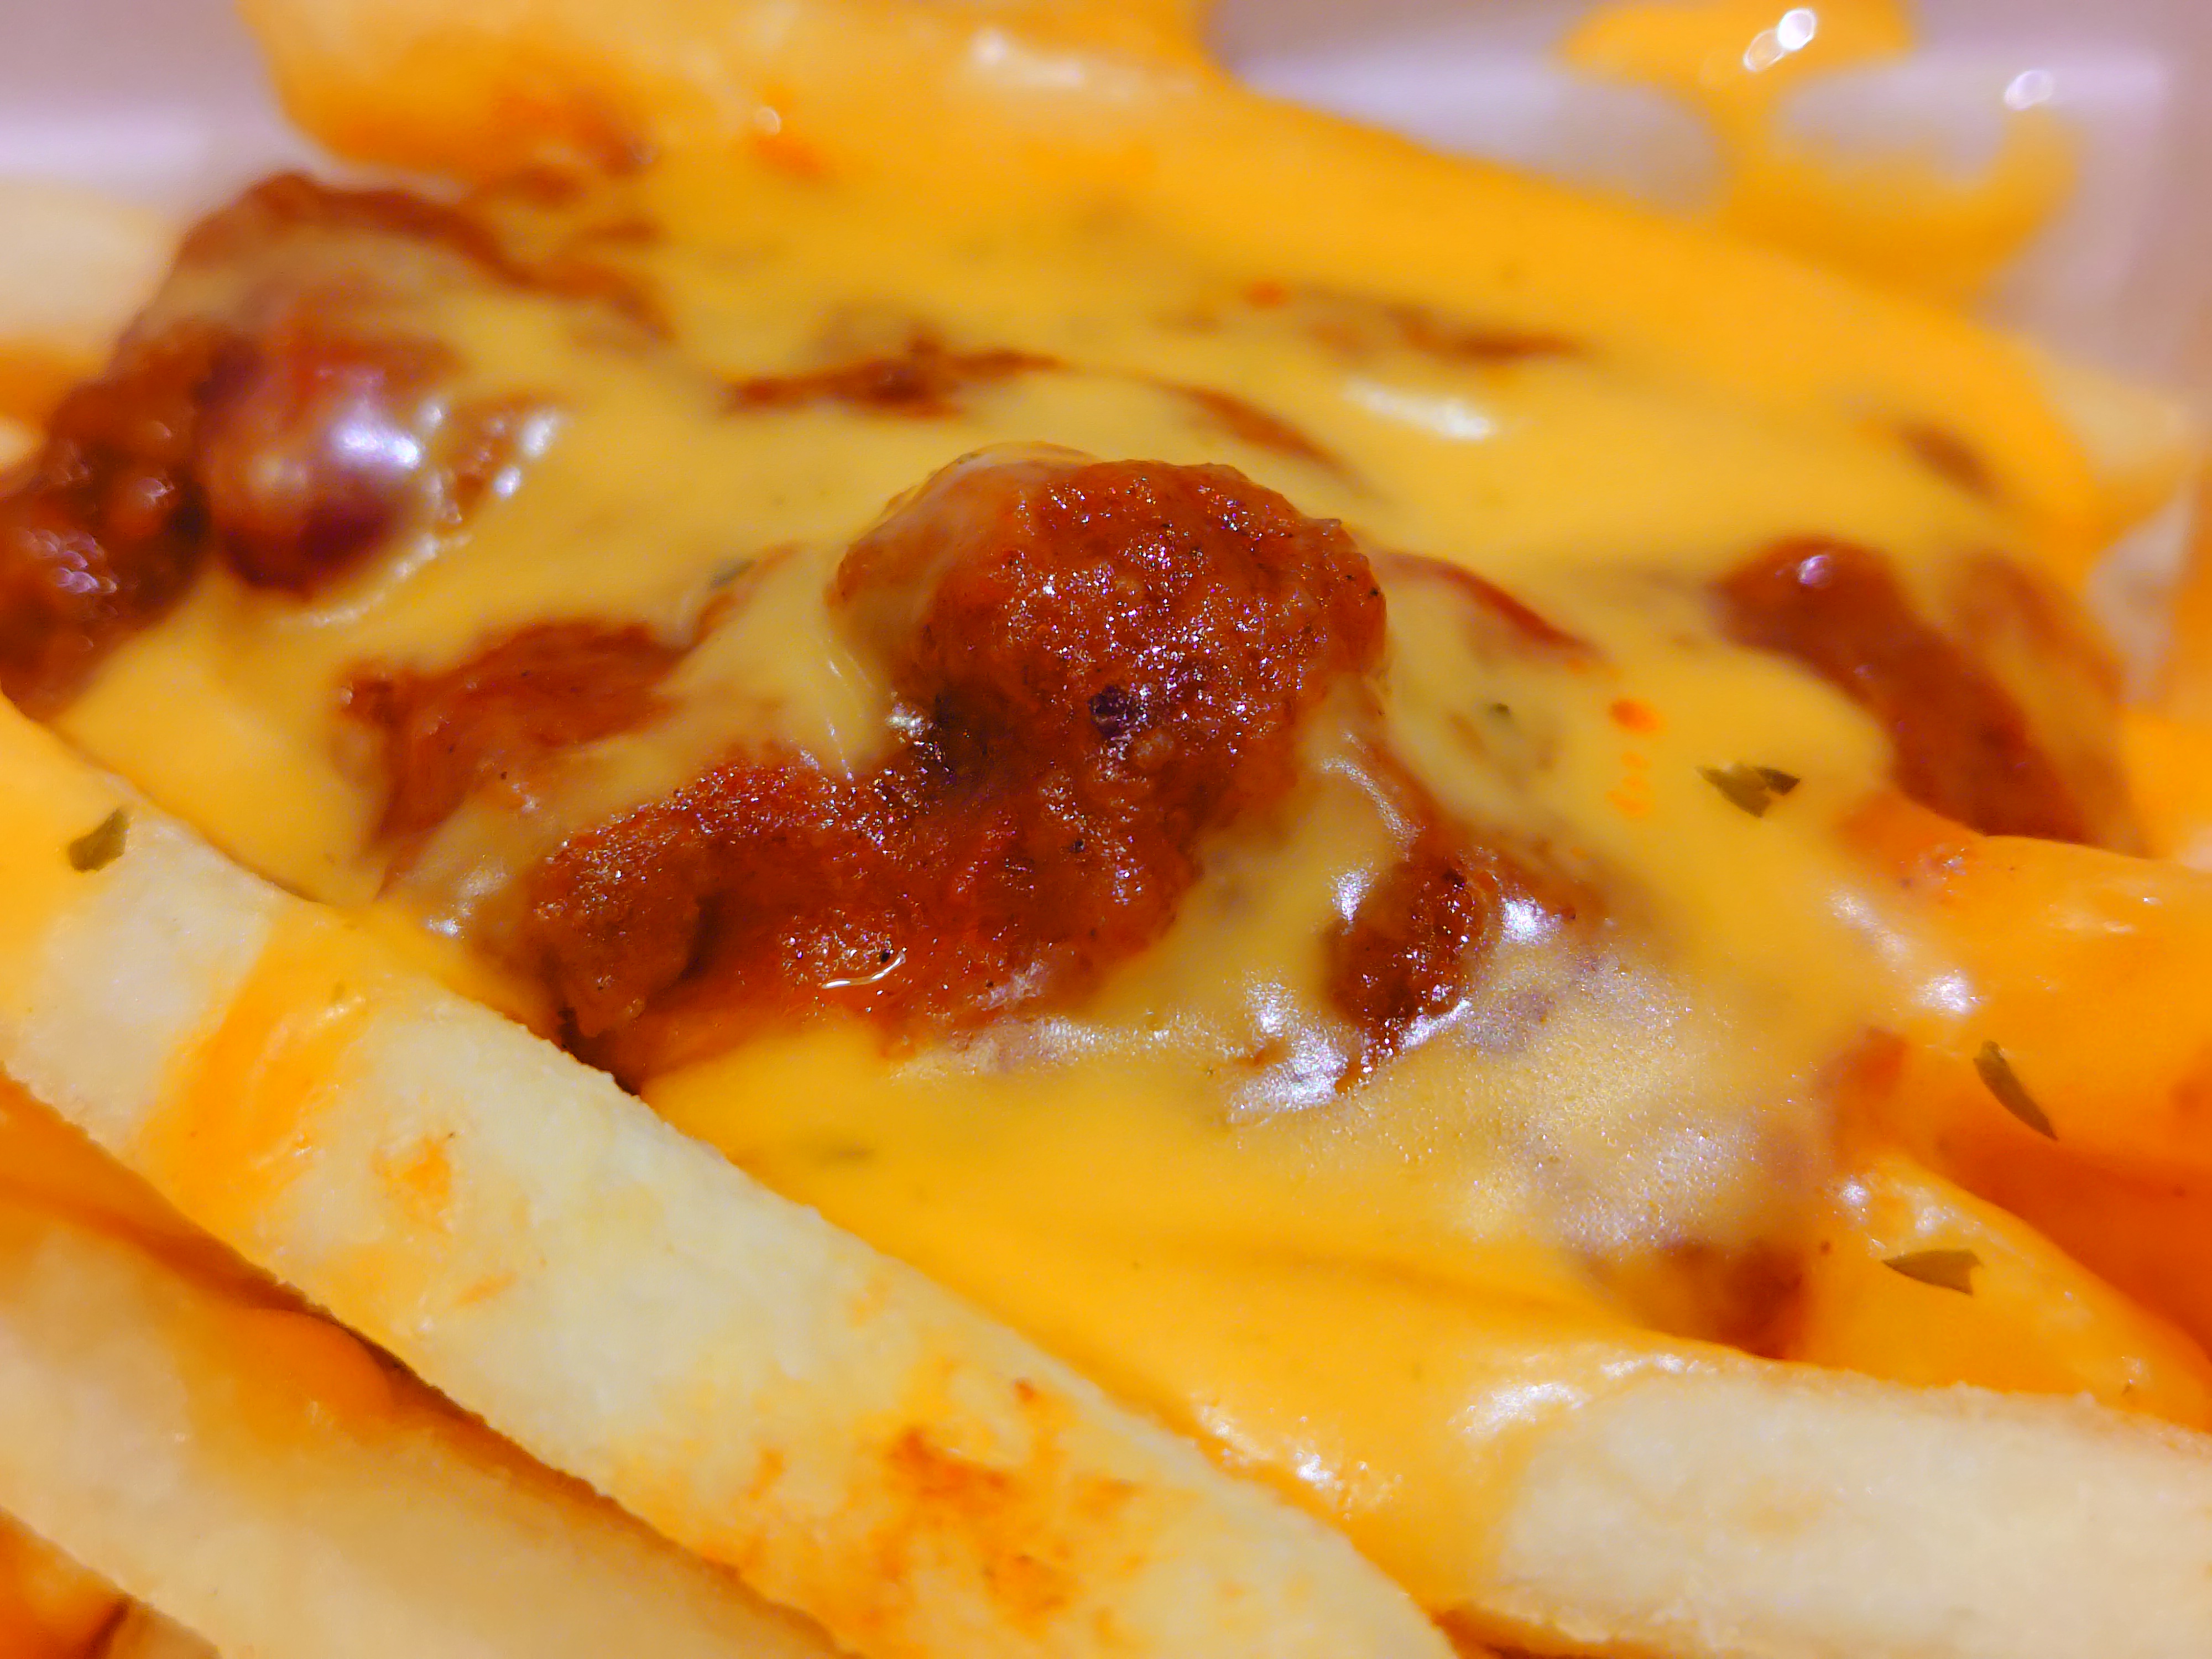
The chili cheese fries look like this. They're also dark.
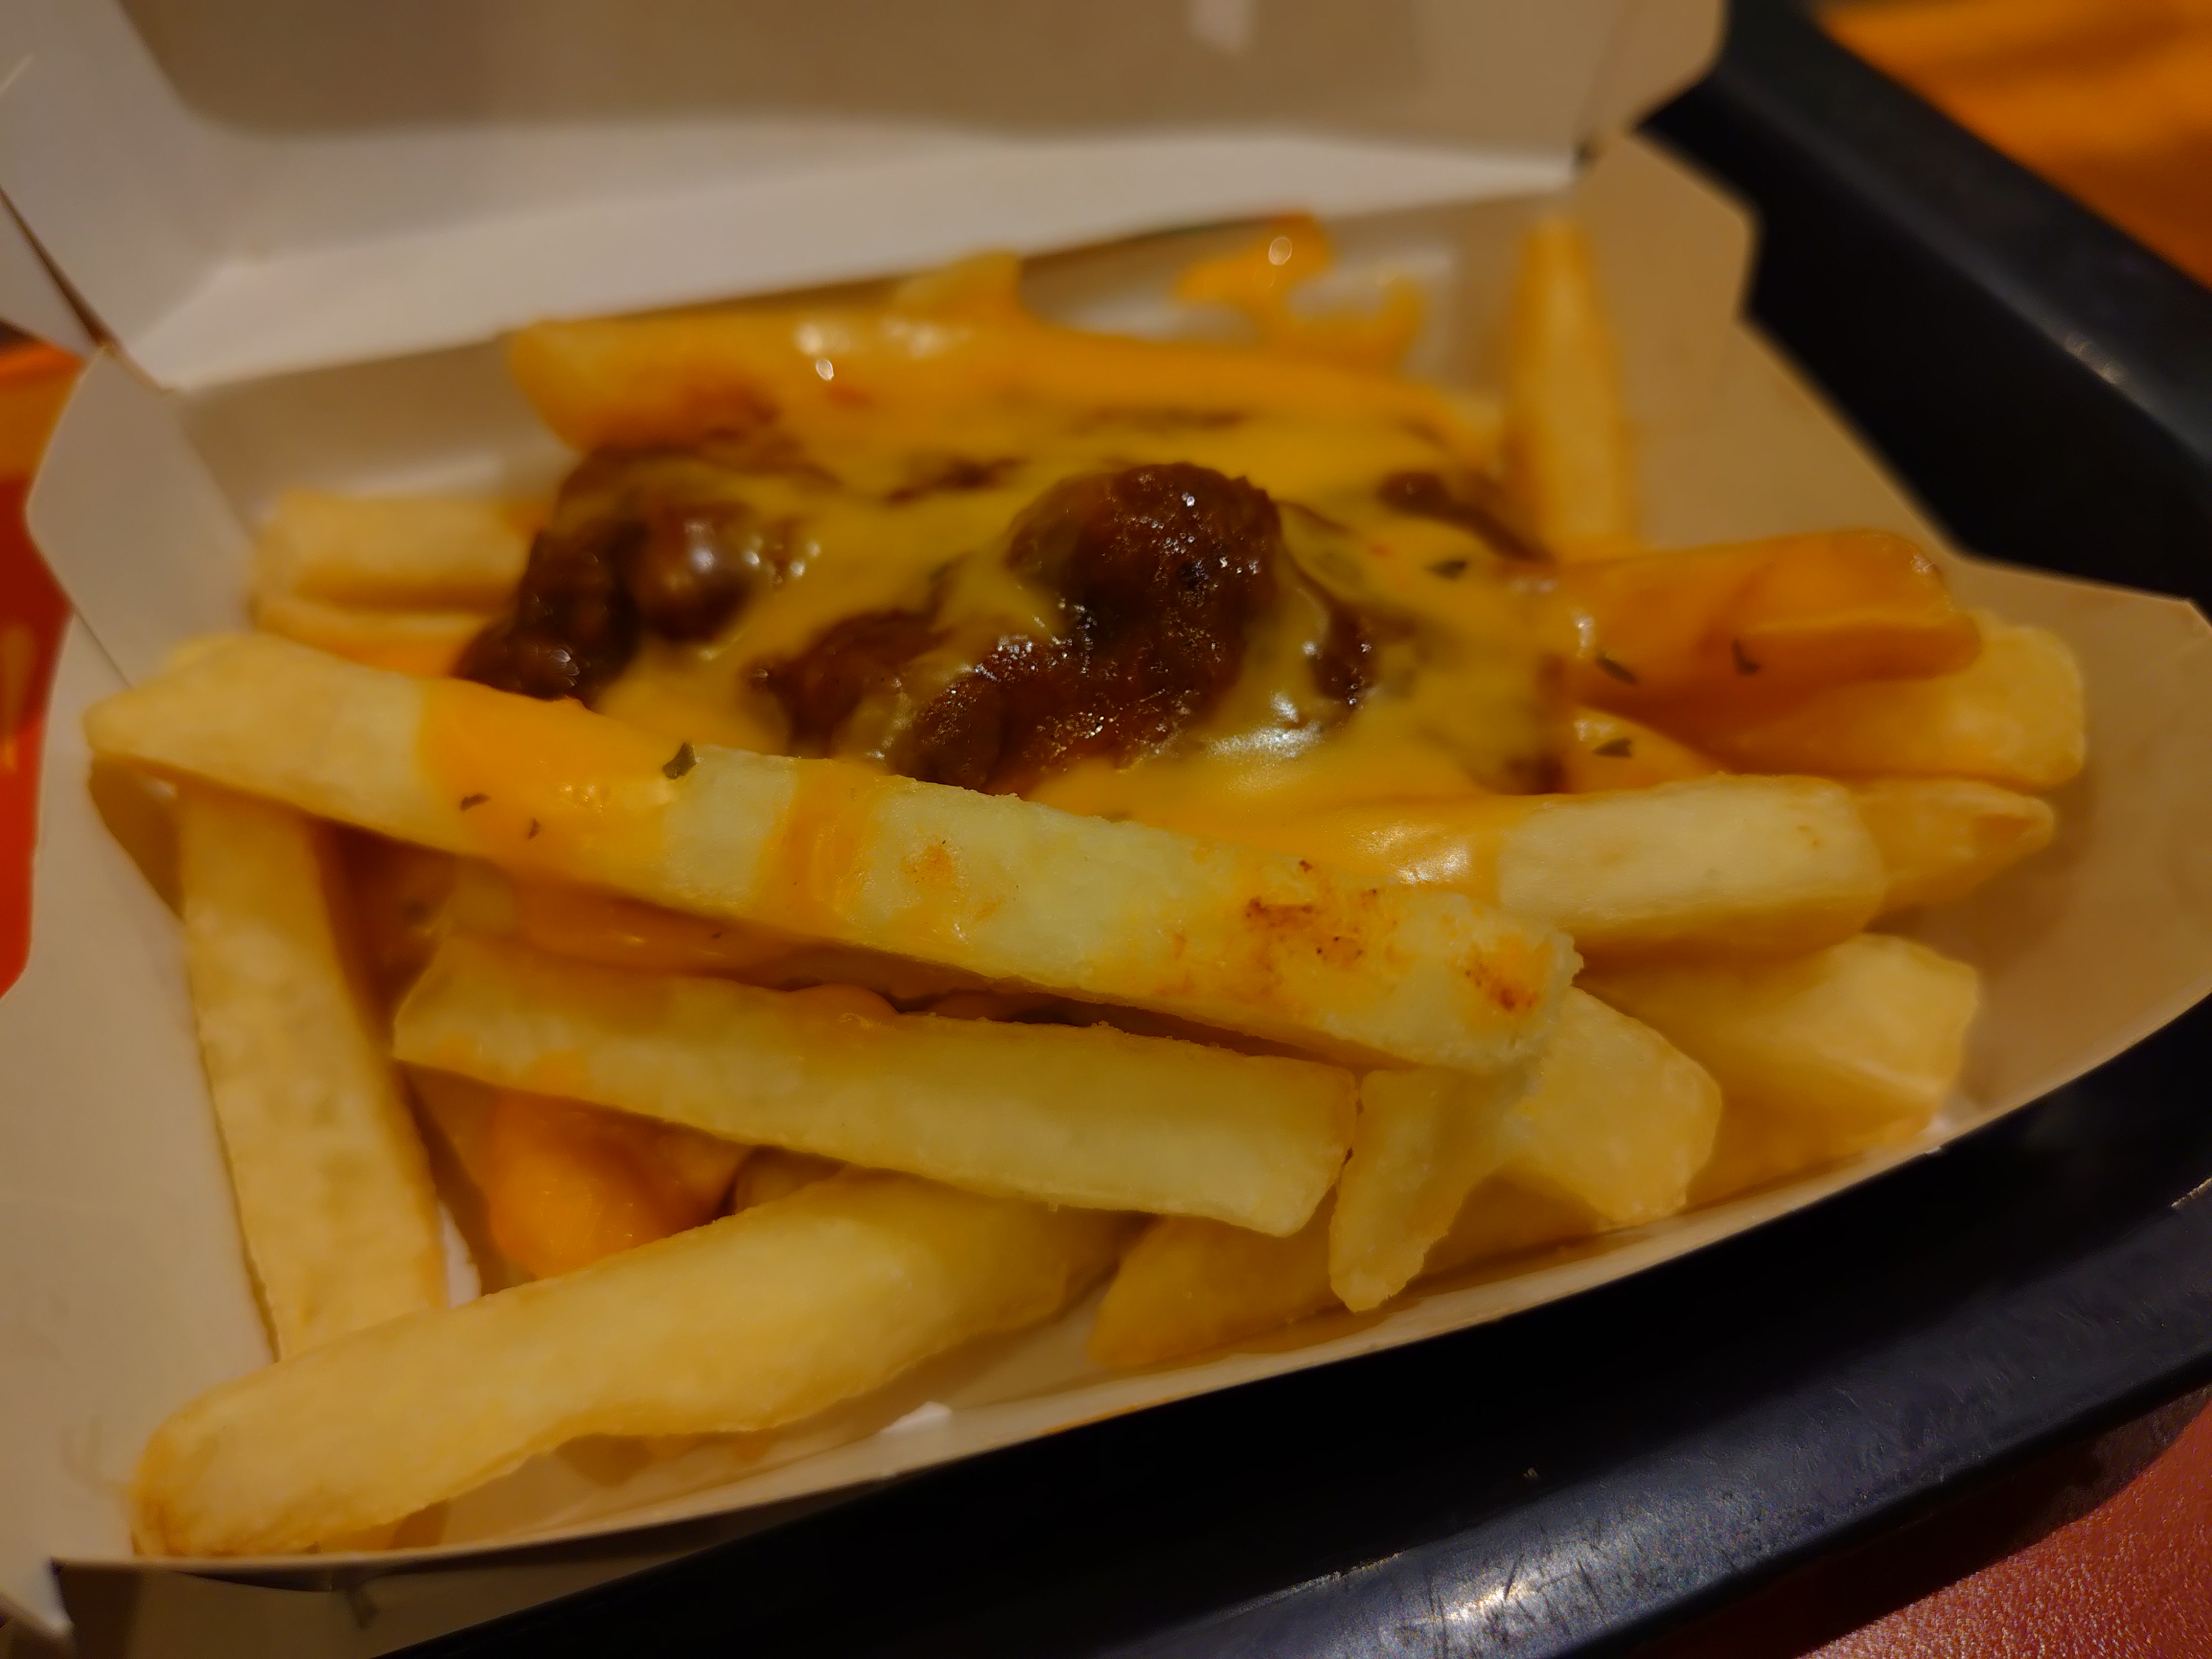
When I got closer, I noticed some bright spots. The lighting conditions were not particularly different, so it seems like this is a camera whose corrections change significantly depending on where you focus.
I took a photo of the back of a server in a server room. It wasn't pitch black because of the lights on, but it was impressive to be able to take a clear, handheld shot even in this darkness.

Below is a video of the same location. This is closer to what I saw with my own eyes, and you can see that the photo has been brightened and corrected.
I was able to get good shots in less bright areas too.

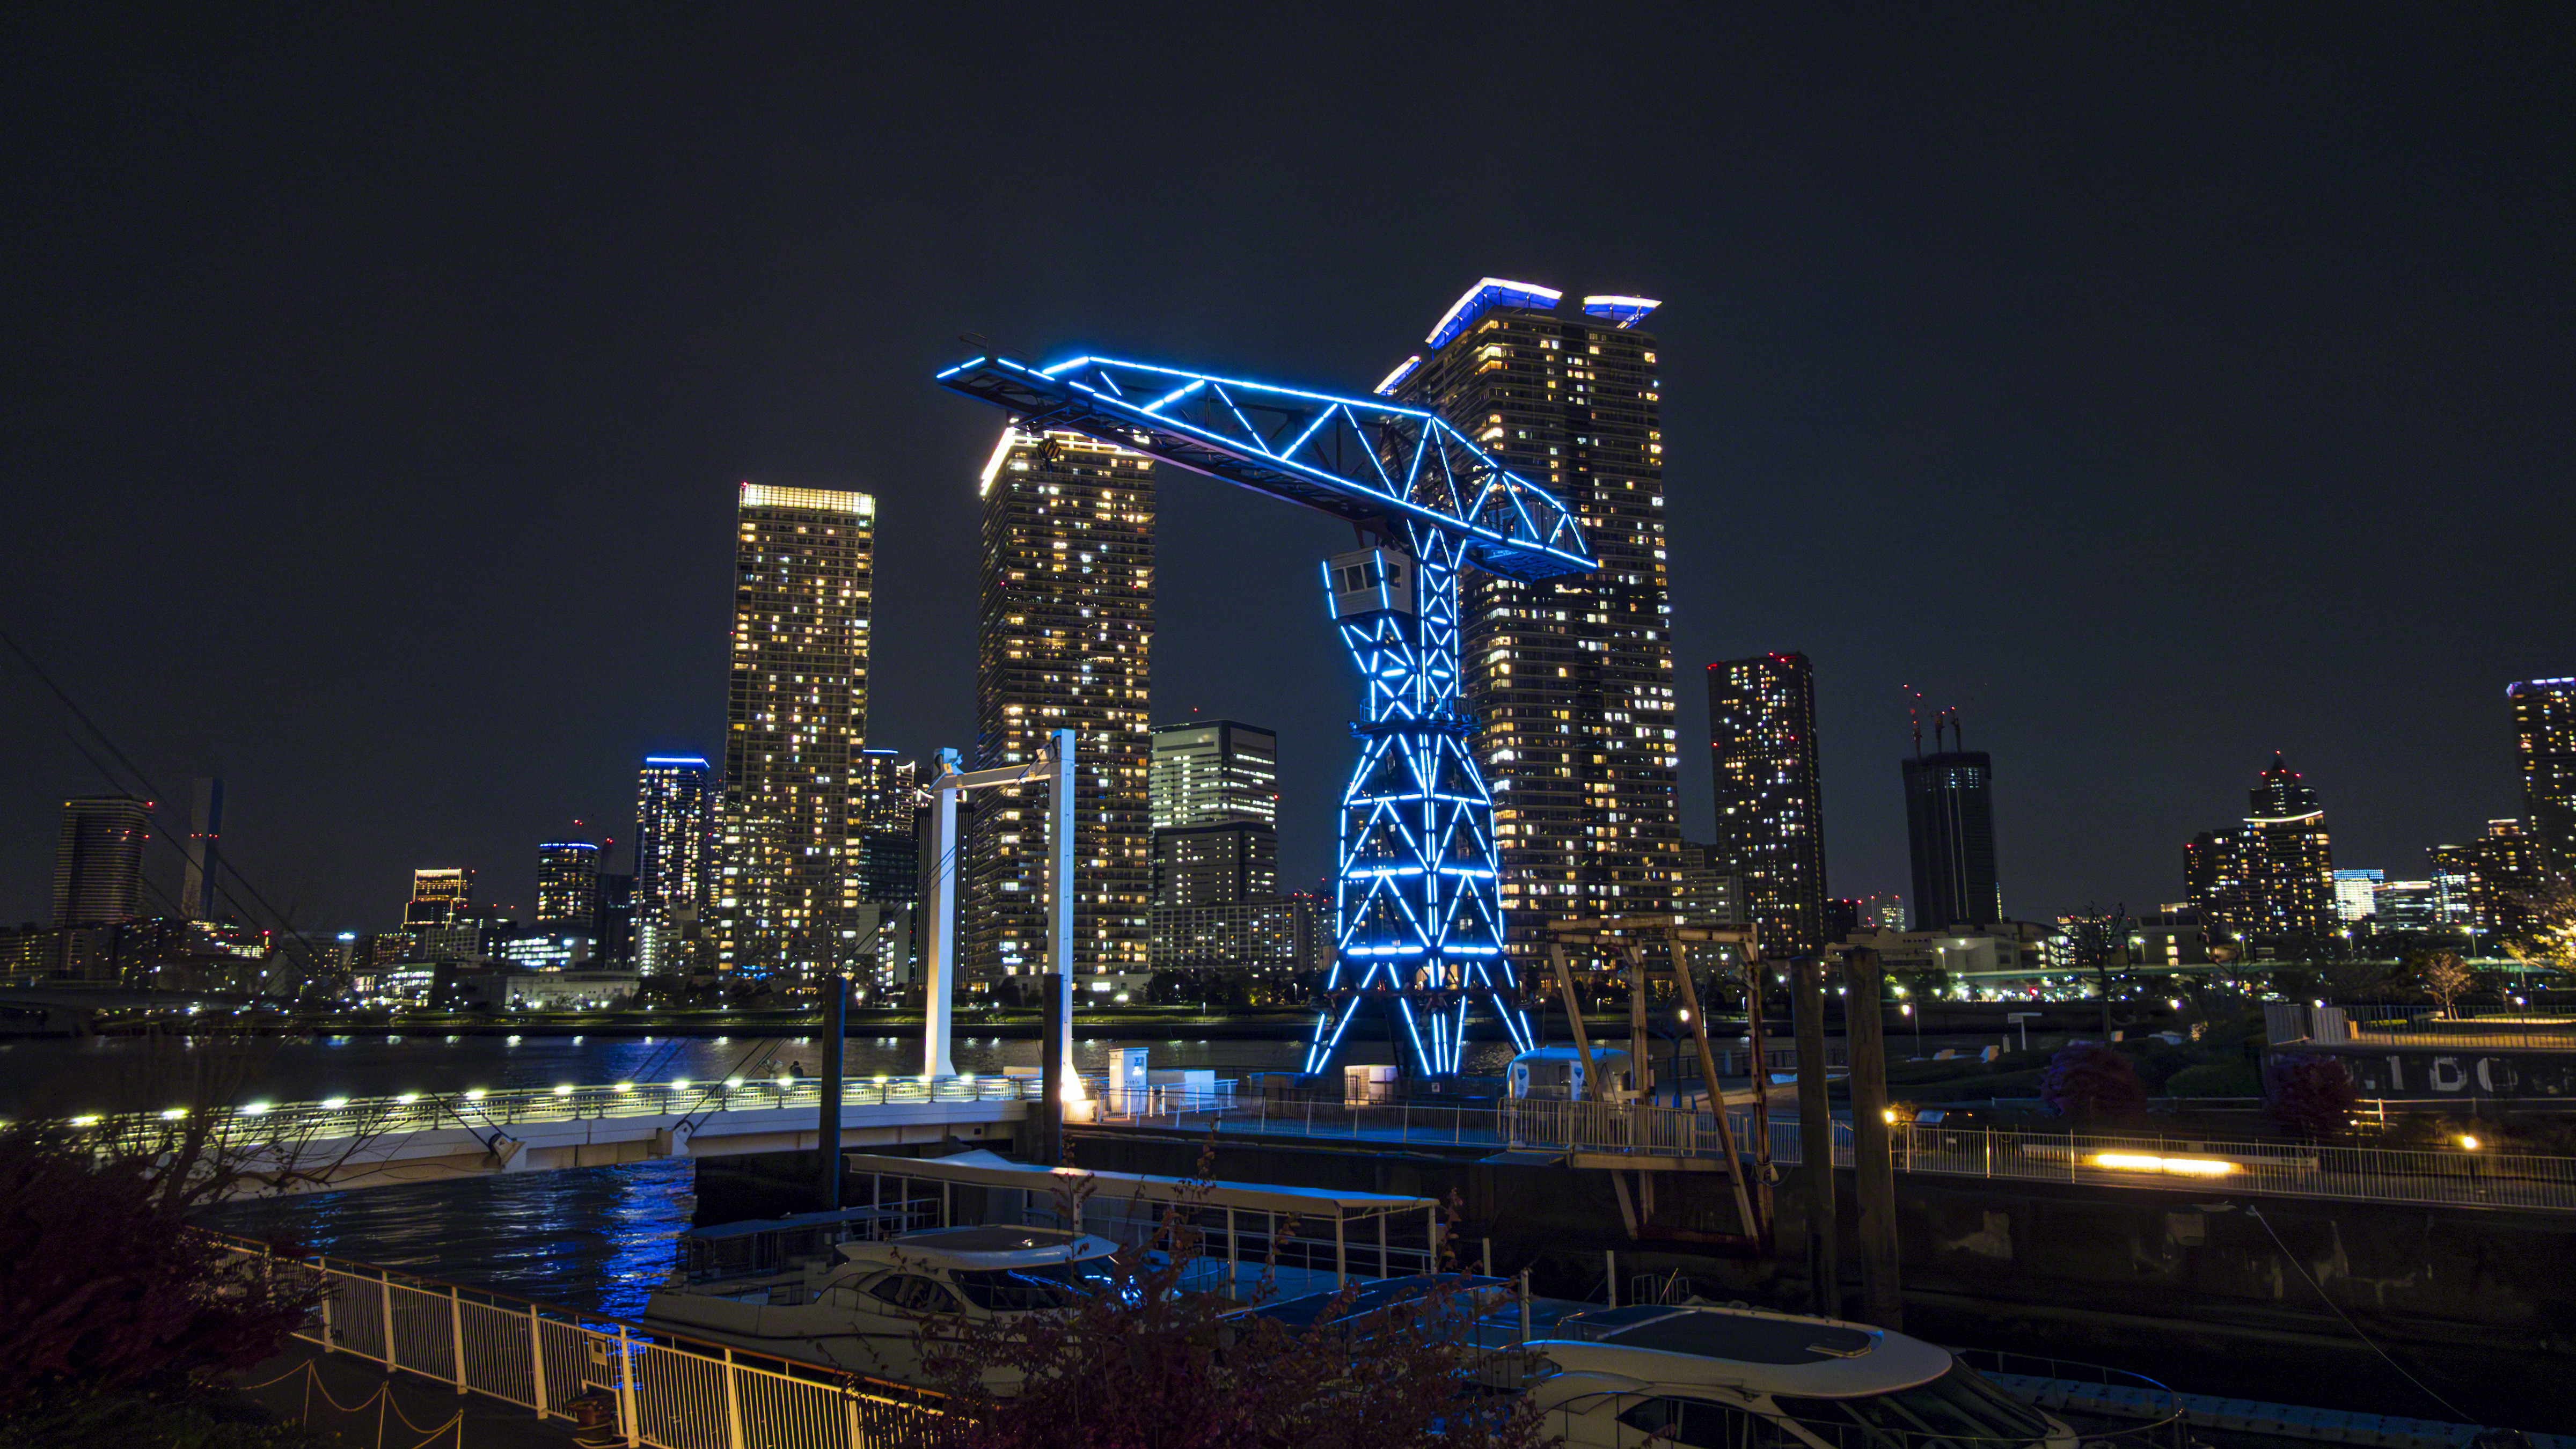
The sample photo that came with the unit looked like this:
The Xperia 10 VII's camera and shutter button are very responsive, allowing me to capture the image I want to capture almost exactly when I want it, making it very easy to use. It's also great for taking handheld shots in dark places, so it's great for capturing any scene, from morning to night.
There are pros and cons to making strong white balance and brightness adjustments, and if you think 'Isn't this too dark?' the moment you take a photo, you can sometimes get the image you want by focusing on the dark areas to make the whole image brighter, or vice versa. On the other hand, there are also times when the colors are adjusted to be a bit too extreme.
There was only one instance where functionality was restricted due to an increase in the device's temperature.

The Xperia 10 VII is sold at Sony stores and other locations, and the SIM-free device is sold on Amazon for 74,800 yen including tax.

Related Posts:
in Video, Smartphone, Review, Posted by logc_nt