In fact, you can easily increase the number of email addresses in Gmail. You can also use different email addresses for shopping, ticket reservations, etc. to prevent important emails from being overlooked.
Many people have experienced the problem of overlooking important emails such as ticket reservations and recall information due to the large number of emails they receive each day. Gmail has a feature called 'alias' that allows you to easily create a secondary email address, and by combining it with the filter function, you can make it easier to find important emails.
Let's use Gmail email aliases! Learn how to use them as sub-addresses and how to utilize them.
·table of contents
◆1: Receive emails via alias
◆2: Automatically sort emails received to aliases
◆3: Send email with an alias
◆1: Receive emails via alias
The alias feature is easy to use; just add the string '+○○○' before the '@' in your Gmail address. The alias for '△△△@gmail.com' becomes '△△△+○○○@gmail.com.' For example, you can use different email addresses depending on the purpose, such as 'Use the email address '△△△[email protected]' for various inquiry forms.'
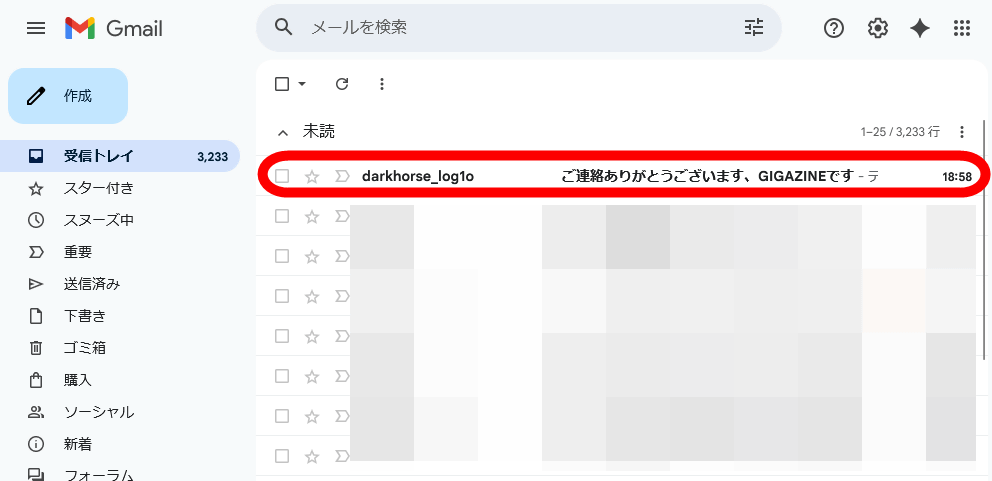
If you just want to receive emails, no complicated settings are required. As a test, enter the email address '△△△[email protected]' in the GIGAZINE inquiry form and send an inquiry.

A reply has arrived in the inbox of '△△△@gmail.com'.
◆2: Automatically sort emails received to aliases
By using aliases, you can assign any label to emails sent to an aliased email address and sort them accordingly. This allows you to avoid missing important emails such as replies to inquiries or ticket reservation results that may be lost in a large volume of emails.
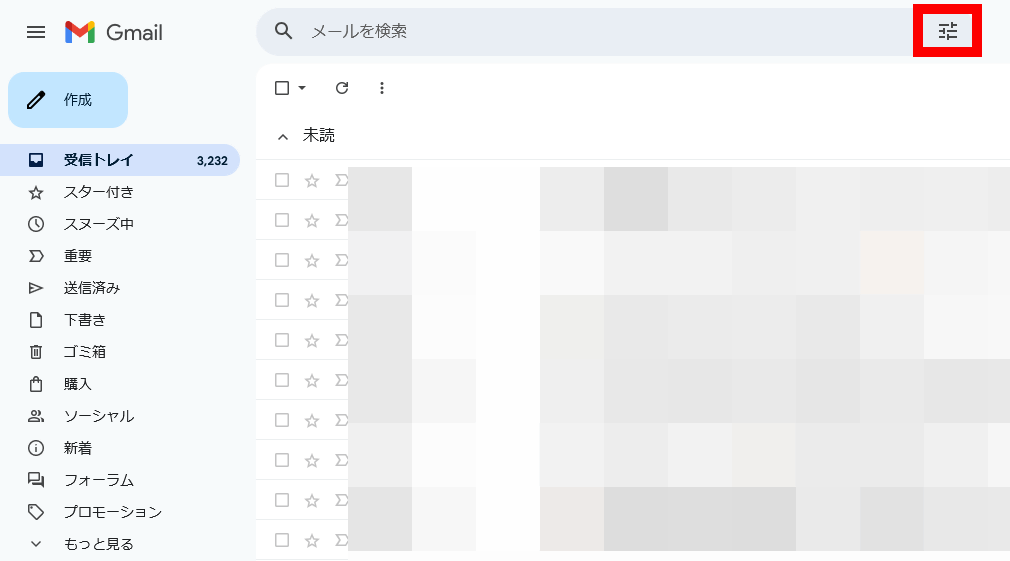
In this example, we will set up a setting to automatically sort emails received by '△△△[email protected]' by labeling them as 'Inquiries.' First, click the search options button in the search bar at the top of the Gmail screen.
Enter '△△△[email protected]' in the 'To' field and click 'Create filter.'

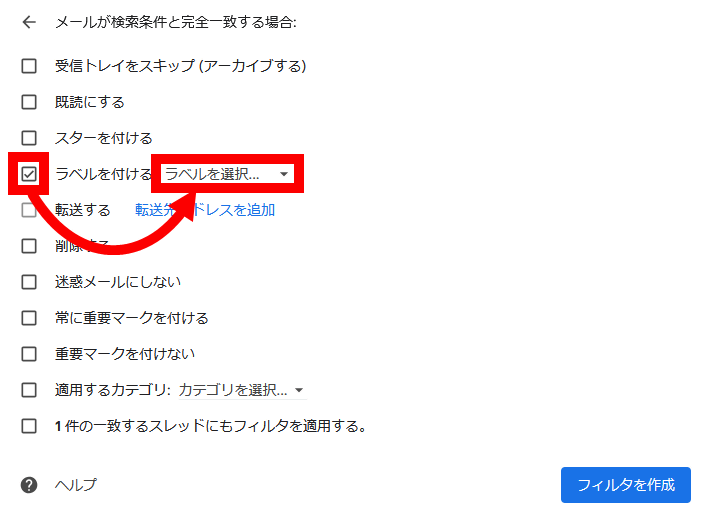
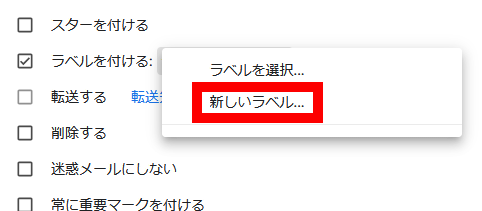
Check 'Add label' and click 'Select label'.
Click 'New Label'.
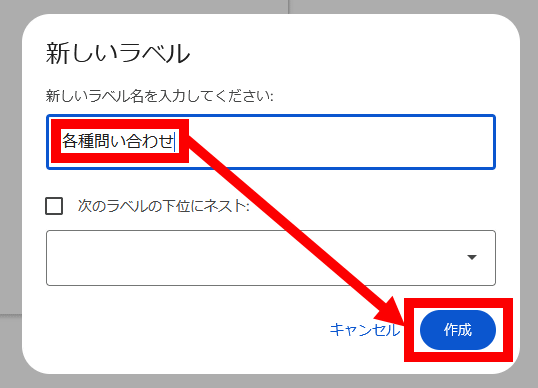
Enter 'Various inquiries' and click 'Create.'
Since I want to filter emails I've received so far, I check the box for 'Also apply filter to □ matching threads' and click 'Create filter.'
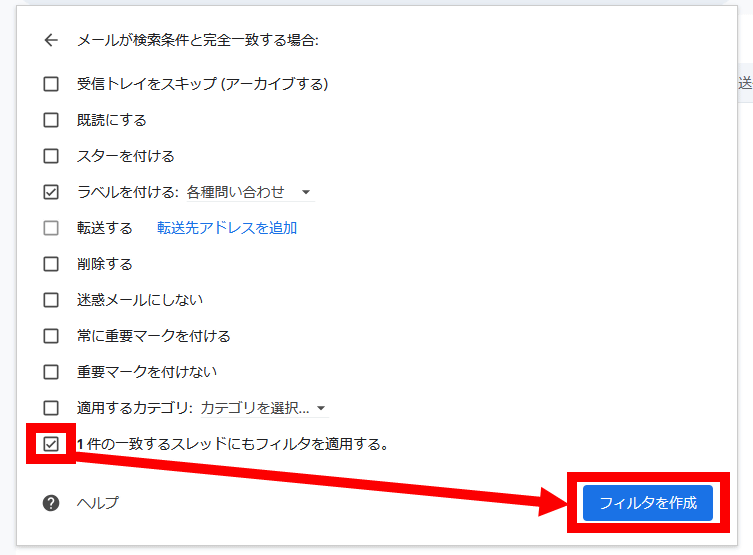
Now, emails sent to '△△△[email protected]' will automatically be labeled 'Inquiries.' You can then view the filtered emails by clicking 'Inquiries' in the sidebar.

If you find it troublesome to manually set up each alias, you can automate the process using Google Apps Script. The following article explains how to do this.
◆3: Send email with an alias
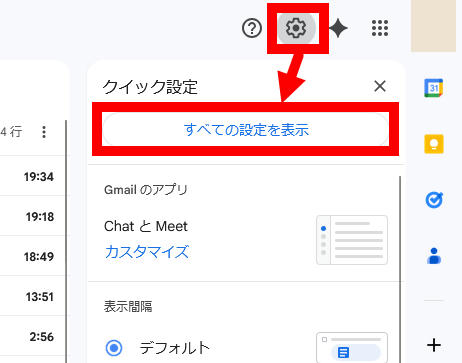
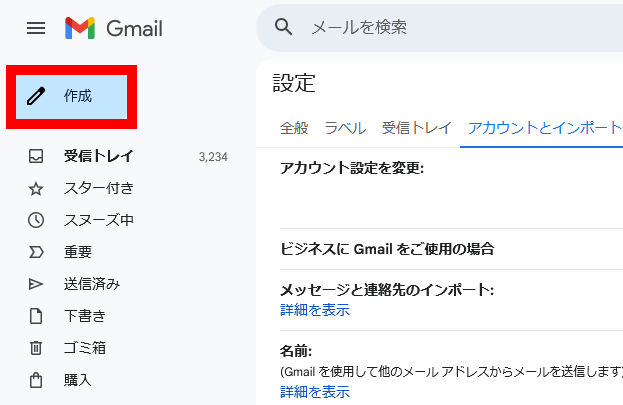
To send email using an alias, you need to configure it. First, click the Settings button in the top right corner of the screen, then click 'Show all settings.'
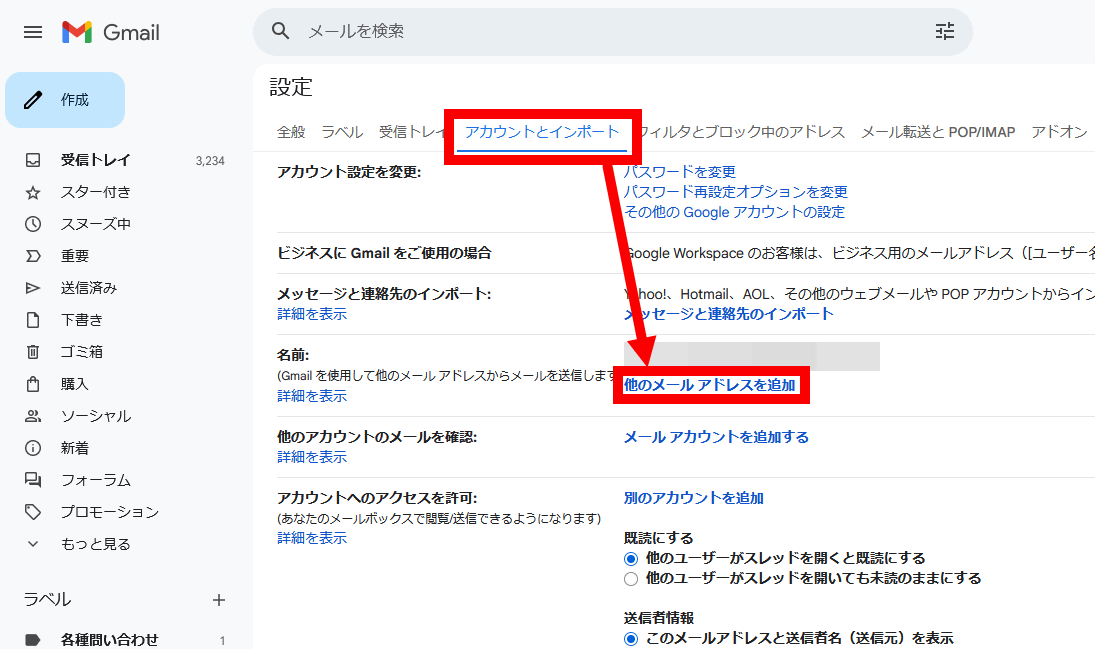
Click 'Accounts and Import' and then 'Add another email address.'
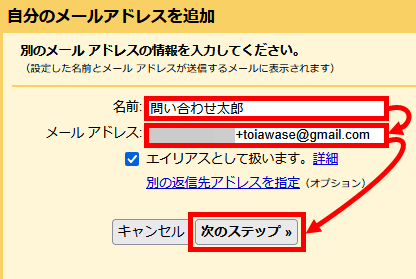
Enter the name you want to use when sending emails in the 'Name' field, enter the alias in the 'Email Address' field, and then click 'Next Step.'
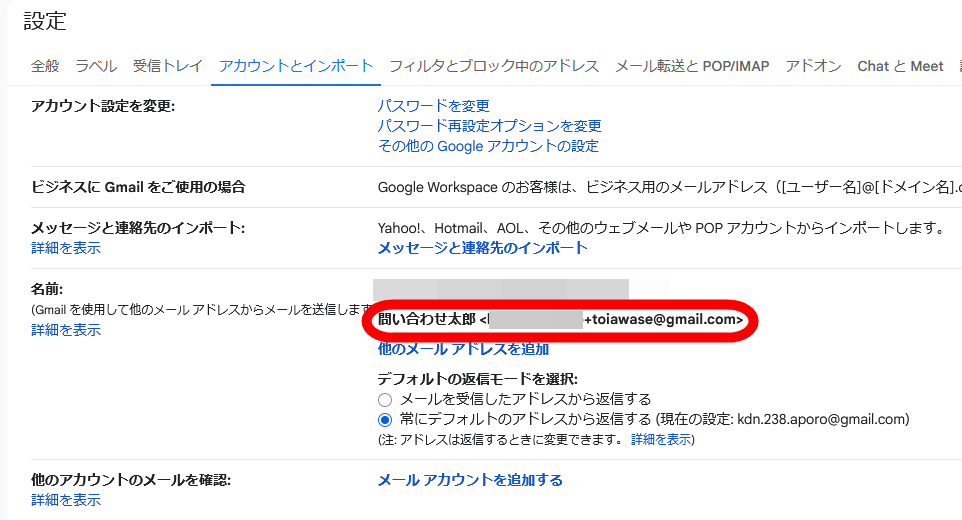
If the alias is displayed in the 'Name' field, the setup is complete.
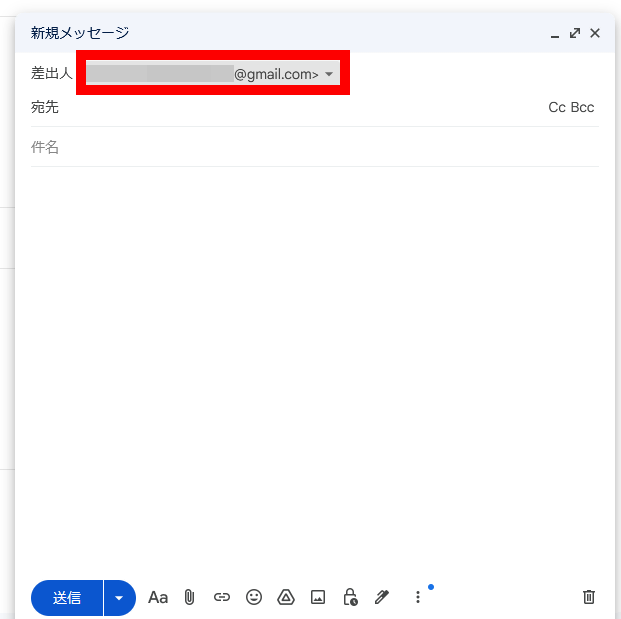
The steps to create an email are as follows: First, click 'Create.'
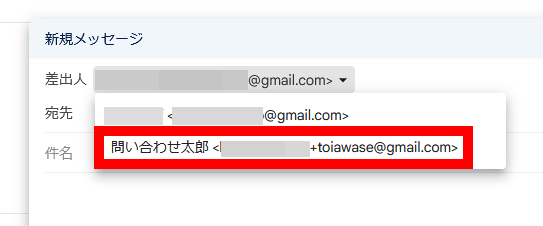
Click on the email address displayed in the 'From' field.
Suggested email addresses will be displayed, so just click on the email address you want to use and you can send the email in the same way as when composing a regular email.
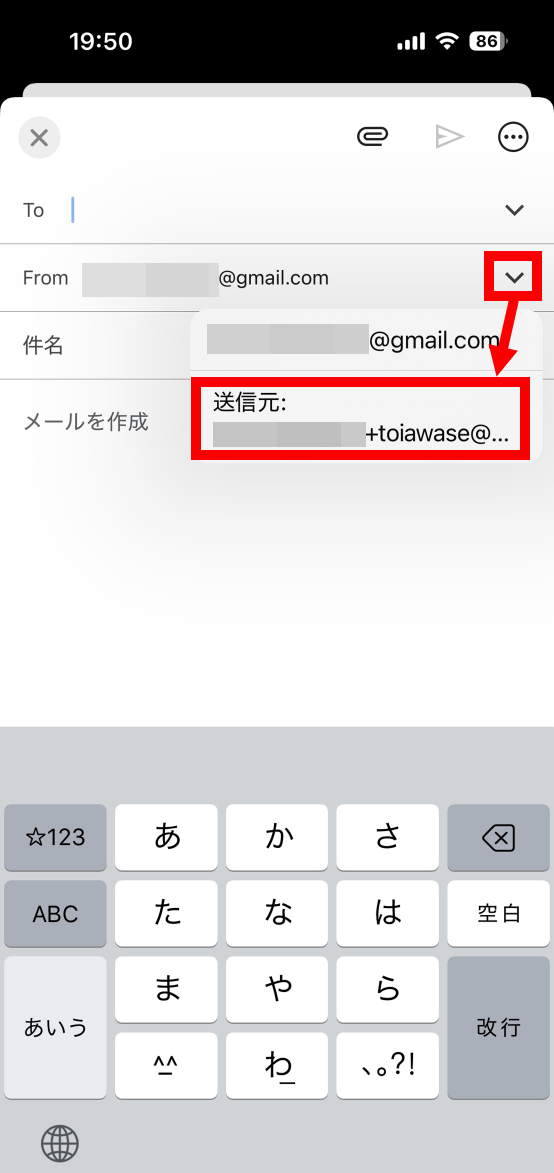
In the smartphone app version of Gmail, you can select the sending email address by tapping the button to the right of 'From' on the email composition screen. However, you must first configure the above settings in the web app version of Gmail.
Related Posts:


in Web Service, Review, Posted by log1o_hf