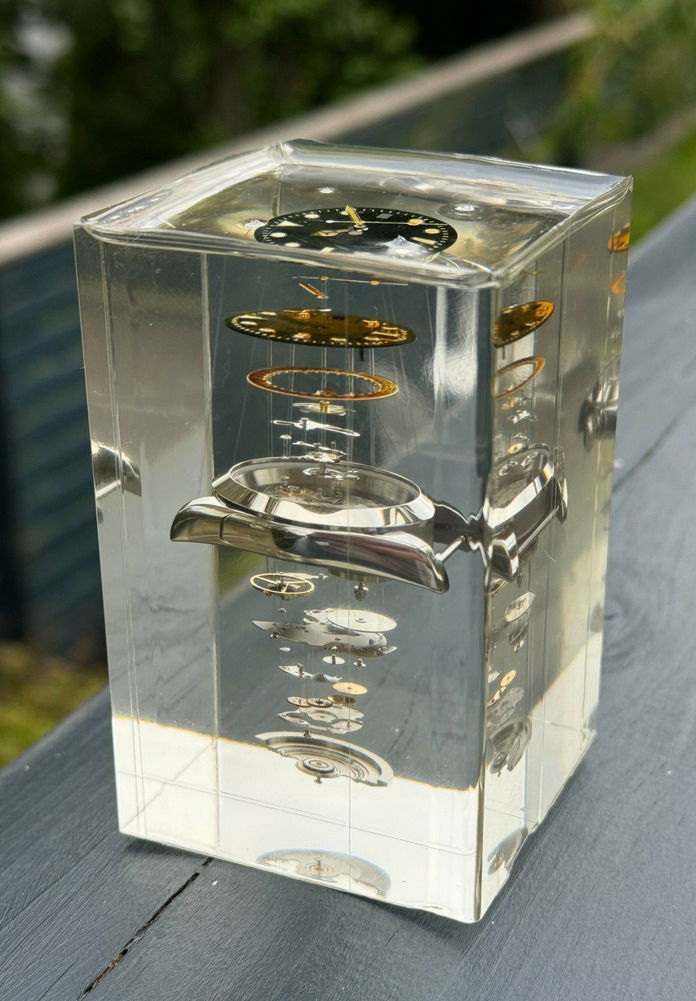
A mechanical watch exploded view of its parts floating apart is reproduced in real space using transparent resin blocks
Mechanical Watch: Exploded View - Fredrik F. Ellertsen
https://fellerts.no/projects/epoch.html
Ellertsen had always loved Bartosz Ciechanowski's blog , which explains how mechanical watch movements work: 'His blog was my favorite place on the Internet. His posts are not only well written, but also easy to understand, and the accompanying interactive illustrations are fantastic.'
Meanwhile, Ellertsen began to look for transparent resin blocks that had been disassembled to show the mechanism of mechanical watches. However, although he found blocks with various watch parts randomly embedded or blocks with parts arranged flat, he could not find any that were assembled correctly as mechanical watches.
So Ellertsen began working on a project to hand-encapsulate exploded diagrams of mechanical watches into blocks of resin. 'That's my favorite part - diving headfirst into a project that required skill sets I didn't even know existed, much less possess, and taking shape as the process evolved,' he says.
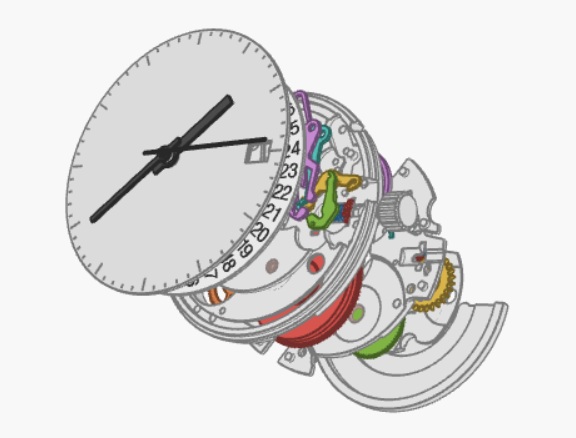
Here's an exploded view of a mechanical watch from one of Ellertsen's favorite bloggers, Bartosz Ciechanowski: Ellertsen's goal was to take the components of a mechanical watch and layer them like this, encapsulating them in a clear resin block that would work perfectly when stacked together.
To start the project, we first had to choose a watch to disassemble. Although Bartosz Ciechanowski did not state this in his blog, it seems that he based his blog post on
'The ETA 2824-2 is an extremely robust and popular automatic mechanical watch movement found in many watches. It is considered by the industry to be one of the best 'go-to' movements of all time,' says Ellertsen.
Ellertsen's original idea was to divide a disassembled model of a mechanical watch into layers, harden the resin for each layer, and finally stack and harden all the layers. However, when he actually tested it with a transparent epoxy resin , the following problems emerged.
1: The resin I purchased turned yellow after hardening.
2: Curing with a small UV light takes too long.
3: The joints between layers are very noticeable.
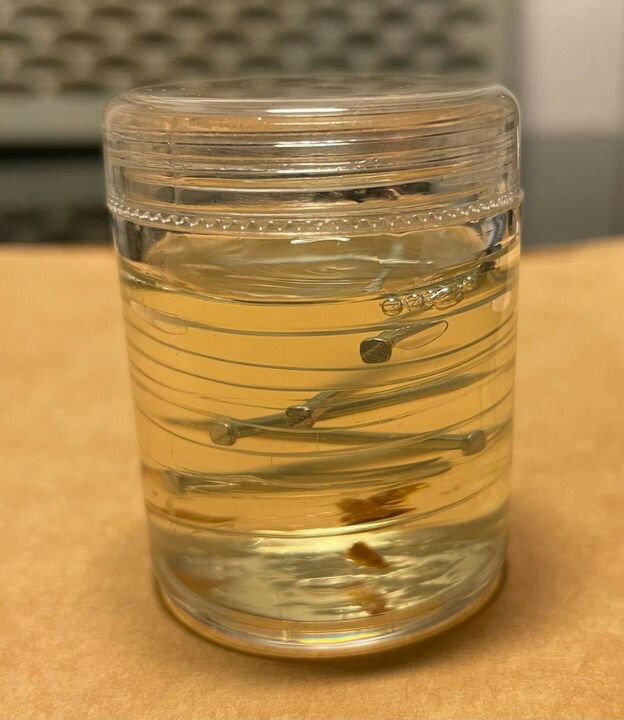
The photo below shows Ellertsen's first test block of resin, which contained nails instead of clock parts. The joints between the layers are clearly visible, and you can see air bubbles here and there.
Of the above problems, '1' and '2' can be solved by purchasing more expensive resin or introducing a large UV light, but '3' was difficult to solve.
Ellertsen came up with a method of using a silicone mold to make about 20 layers at once and stacking them in a semi-cured state. However, air bubbles tend to accumulate between the soft resin layers, and when trying to remove the air using a small vacuum chamber, the resin layers break down. In the end, Ellertsen abandoned the method of stacking layers containing mechanical watch parts.
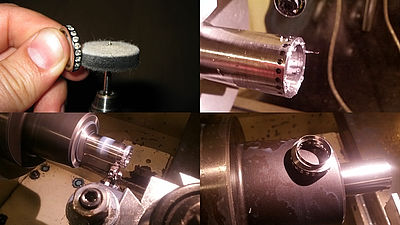
Ellertsen, who thought it would be better to encapsulate all the parts at once, considered a method of 'connecting and fixing each part with a very thin rod-shaped part.' After considering the refractive index of the resin and ease of processing, it was found that 'nylon fishing line used in fly fishing ' was suitable.
According to Ellertsen, nylon fishing line has a refractive index similar to that of epoxy resin and is inexpensive. The problem was that the fishing line was curved because it was wound on a spool, but by putting it in an oven and baking it at 150 degrees for about an hour, it was possible to make it reasonably straight and hard. Ellertsen applied a small amount of adhesive to the parts and the fishing line and connected them together.
The photo below shows 0.7mm fishing line attached to the screw of a mechanical watch.
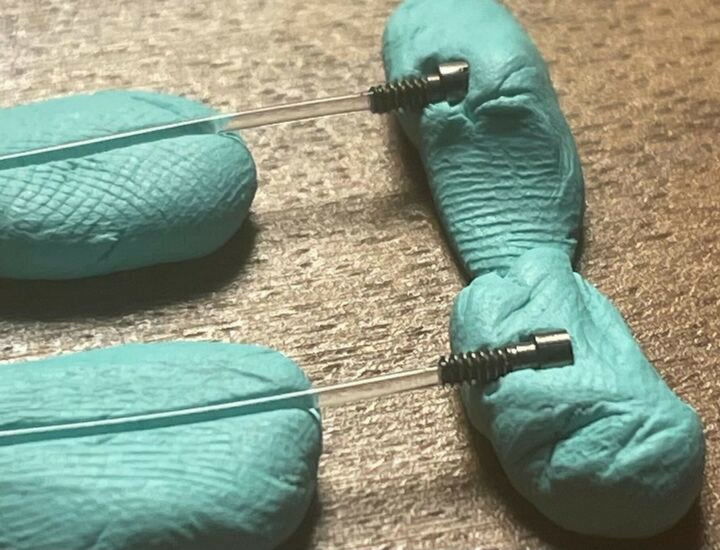
By using fishing line as pillars to connect the parts, the distance between them can be maintained as in an exploded view.
In addition, Ellertsen adopted a method of removing air bubbles using a vacuum chamber to thoroughly remove air bubbles from the resin as it hardens. According to Ellertsen, by placing a container filled with well-mixed resin in the chamber, creating a vacuum, and then repeating the process of returning the air several times, it is possible to remove most of the air bubbles.
Finally, the resin is poured into the mold containing the parts and the vacuum process is carried out again. The air bubbles that form during this process are not trapped in the resin, but occur around the parts, so the vacuum process is effective at suppressing them.
Ellertsen created several prototypes, identified the problems with this method, and refined the manufacturing method. Ellertsen created
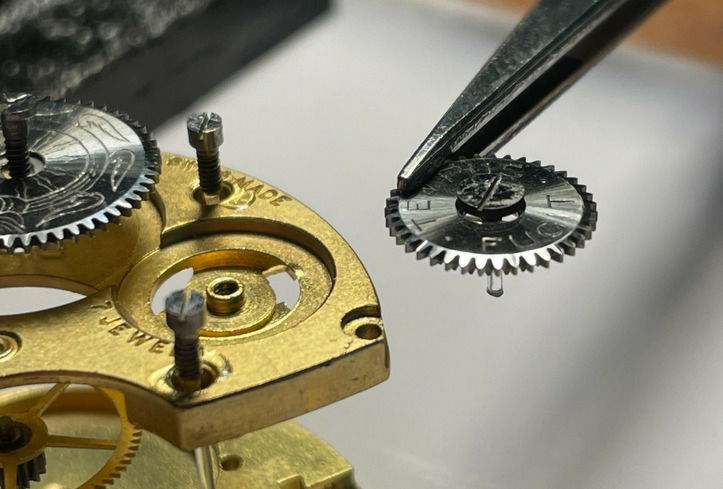
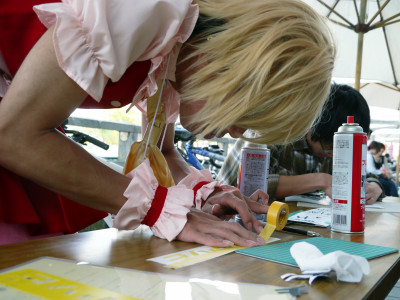
1: Disassemble the mechanical watch and clean the parts thoroughly.
2: Assemble from the side of the gear train (wheel train) that meshes with each other.
3: Assemble the dial side.
4: Pour resin into the mold containing the parts and allow it to harden.
The photo below shows Ellertsen's second prototype.
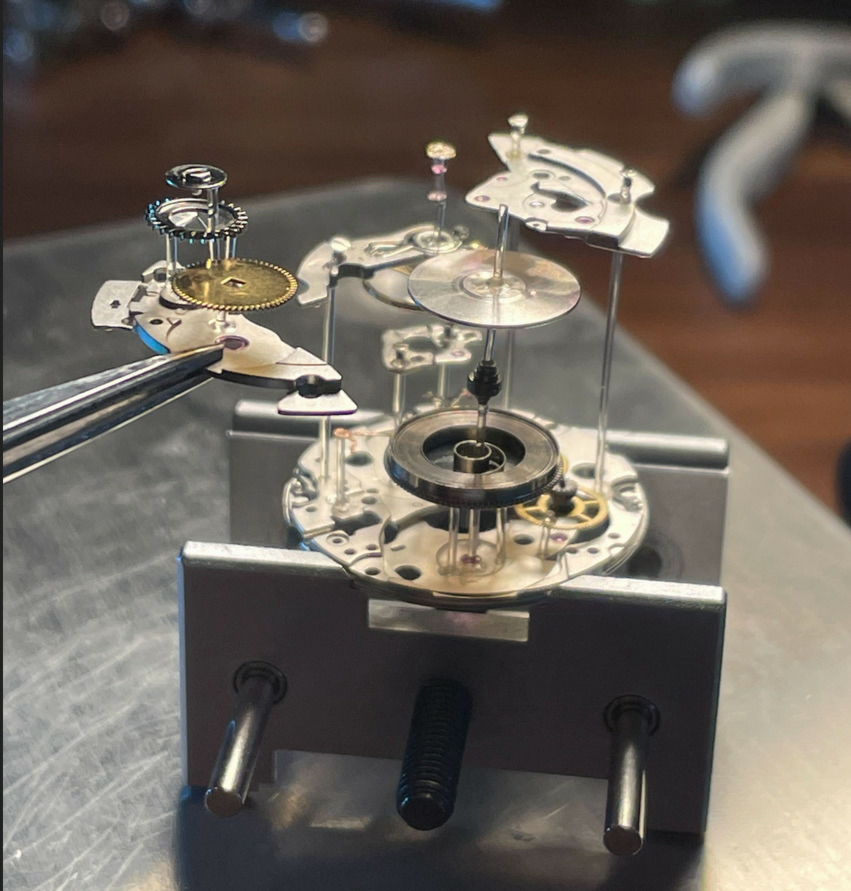
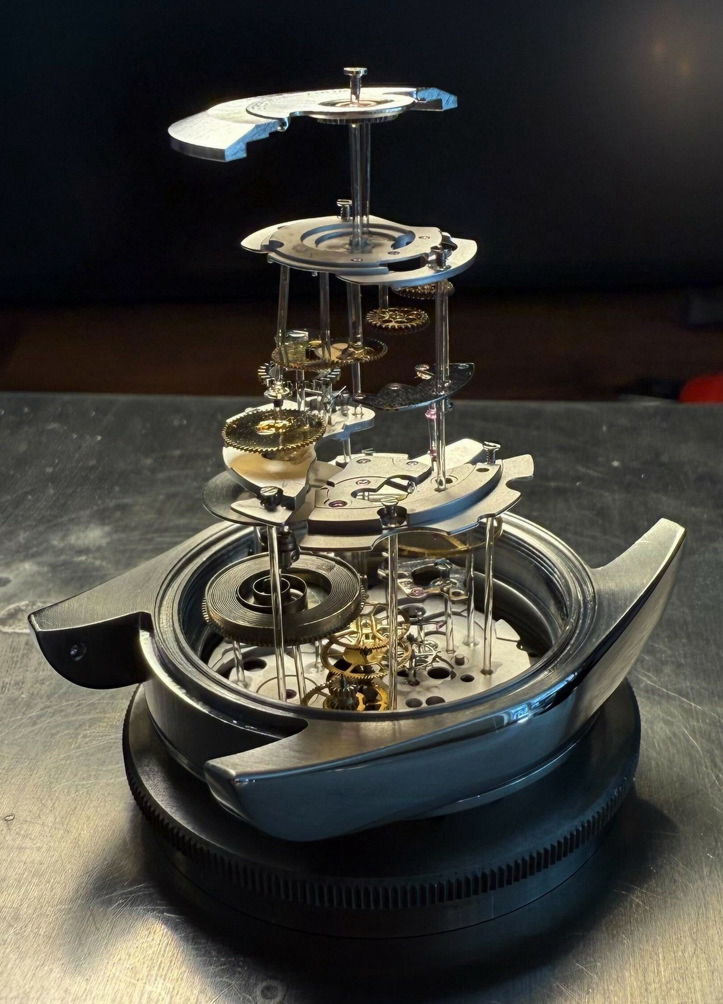
The fourth prototype is being made using the Chinese movement PT5000, which is based on the ETA2824-2. The parts are carefully assembled using fishing line as a support.
This is the fourth prototype. The paint on the dial and hands had melted, and the whole thing was warped.
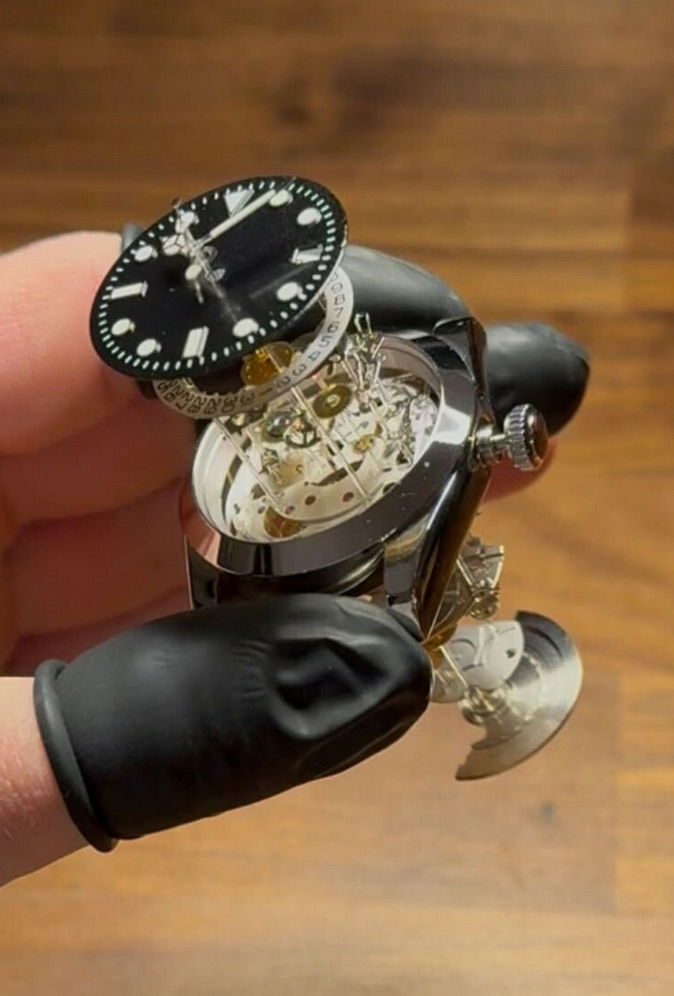
After fixing the problems found in the prototype, Ellertsen bought another completed PT5000 and started working on it. Here's what the parts attached to the case with fishing line look like.
The assembly is complete once the dial, date ring, and second hand are glued together.
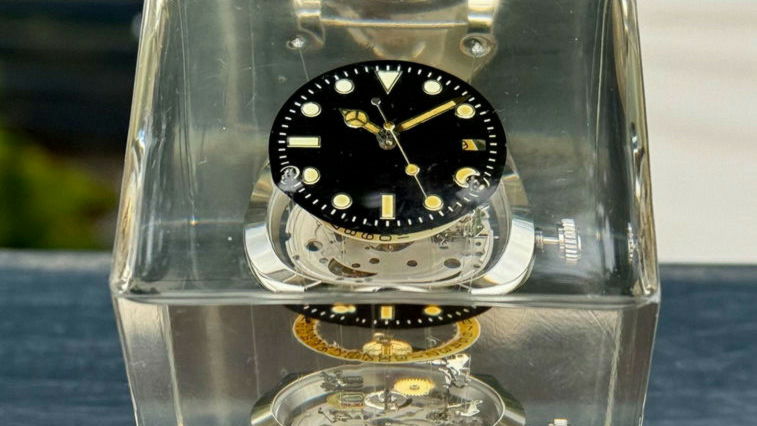
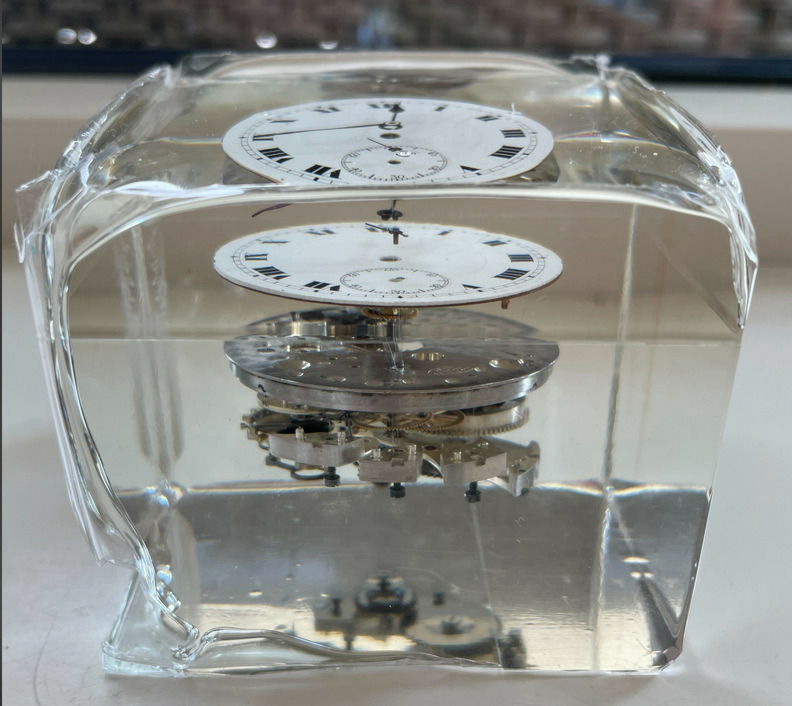
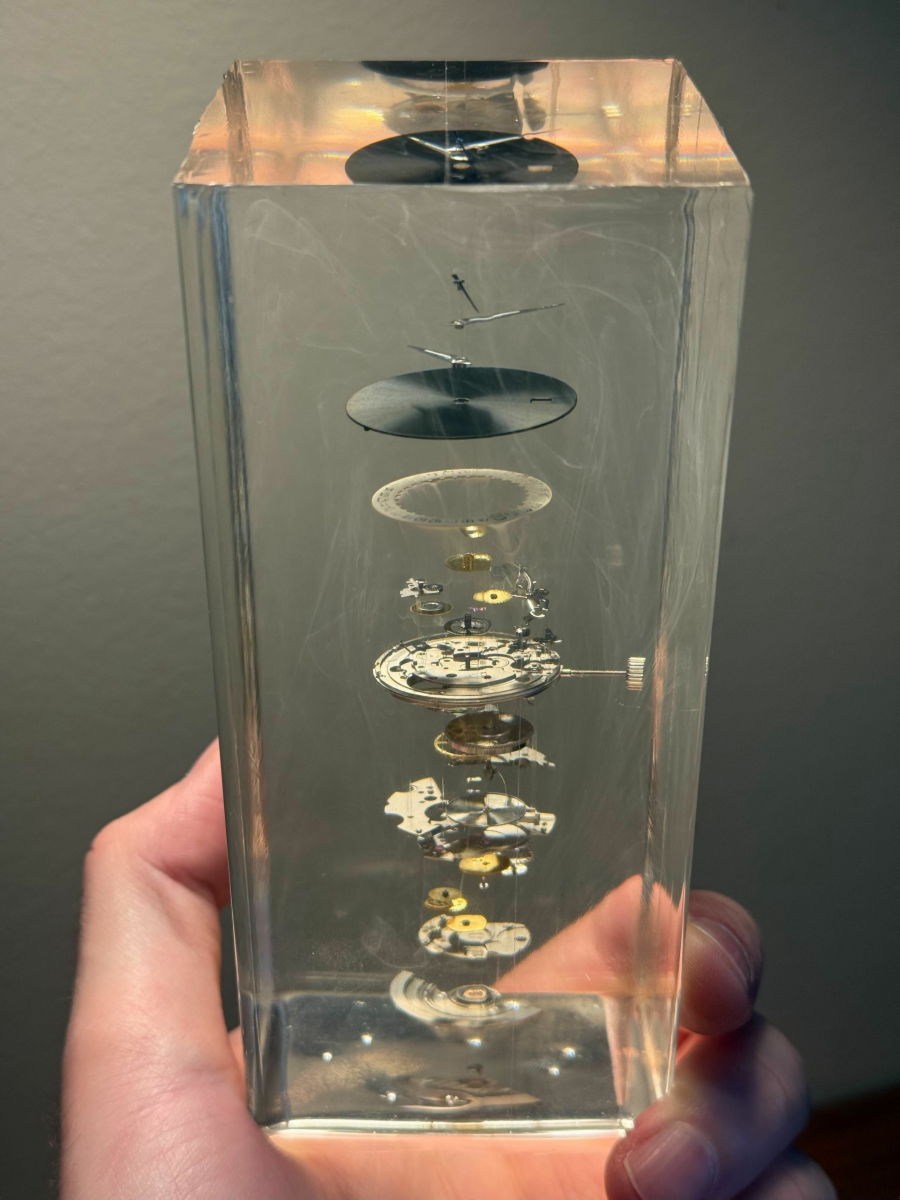
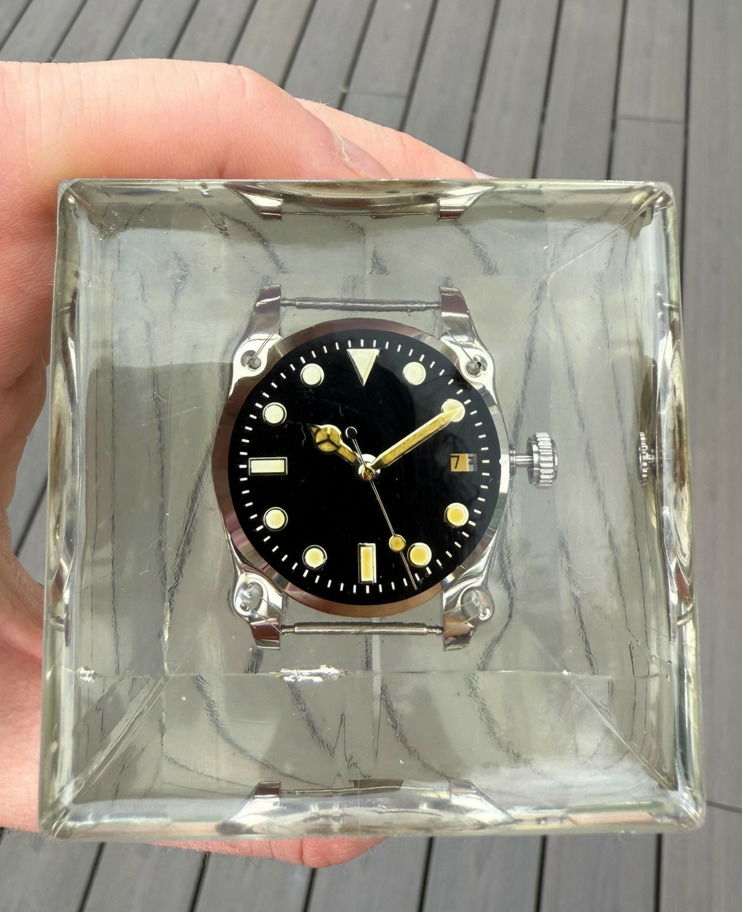
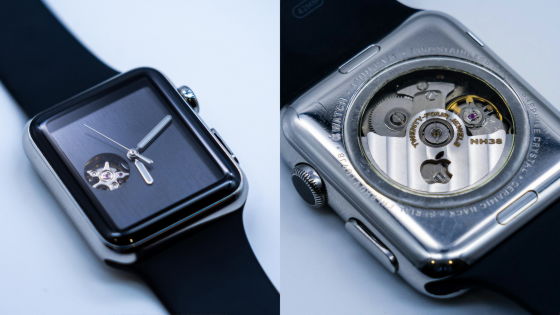
The final product is a resin block containing an exploded view of the watch.
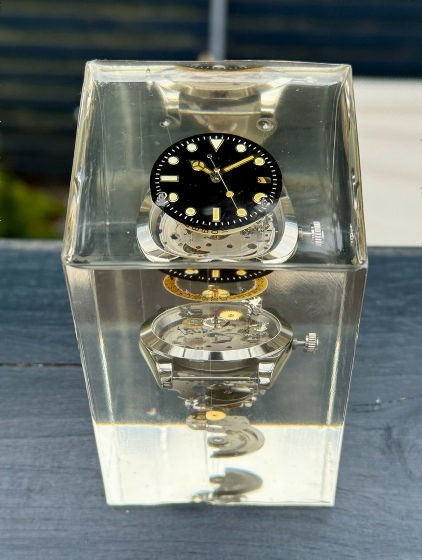
When viewed from the side, you can see that it looks just like an exploded view of a mechanical watch.
When viewed from above, it looked just like a clock.
'I don't have the tools or knowledge to polish this surface to a perfect mirror finish, but that's ok. After two and a half years of trial and error, I've achieved my original goal and I'm pretty happy with the results,' Ellertsen said.
Related Posts:

in Hardware, Posted by log1h_ik