A summary of the basic knowledge required to accelerate numerical calculations and AI training using GPUs and CUDA, with code examples
GPUs have far more cores than CPUs, allowing for a large number of parallel processes. IT engineer Rijul Rajesh has compiled the knowledge needed to take advantage of GPU performance in a blog post.
GPU Survival Toolkit for the AI age: The bare minimum every developer must know

The Transformer architecture used in modern AI models utilizes parallel processing to significantly improve performance, making understanding parallel processing essential for developing such AI. CPUs are typically designed to improve single-threaded sequential processing performance, and are not suited to efficiently distributing and executing the large number of parallel calculations required for complex AI models.
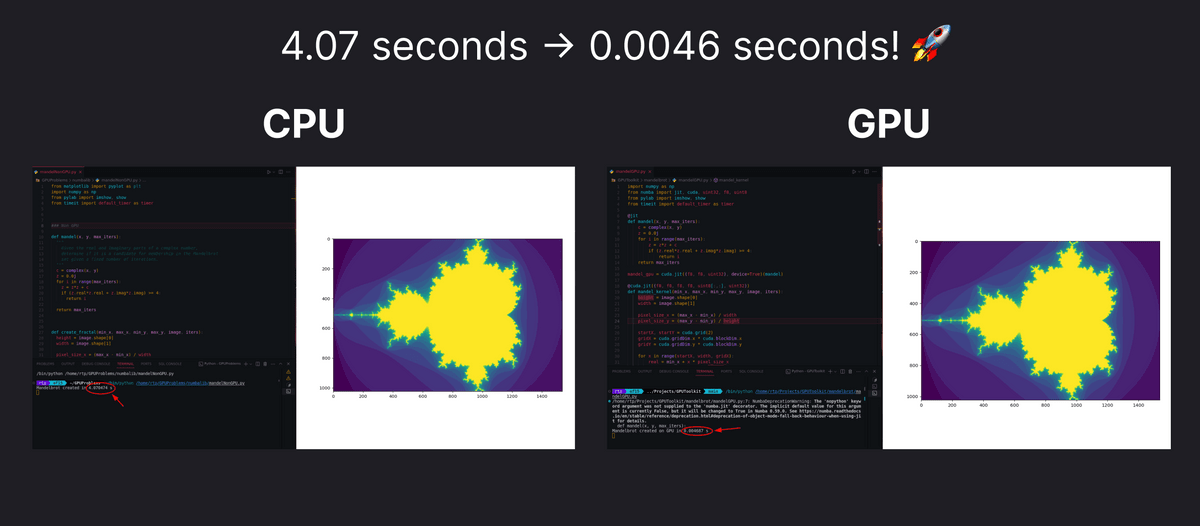
While CPUs are equipped with large, powerful cores, GPUs are equipped with many small cores, and the more cores they have, the more parallel processing can be performed simultaneously, making them suitable for tasks that rely on parallel processing, such as graphics rendering and complex mathematical calculations. By using the CPU and GPU appropriately depending on the task, processing speed can be greatly improved, such as completing a process that took 4.07 seconds in 0.0046 seconds, as shown in the figure below.
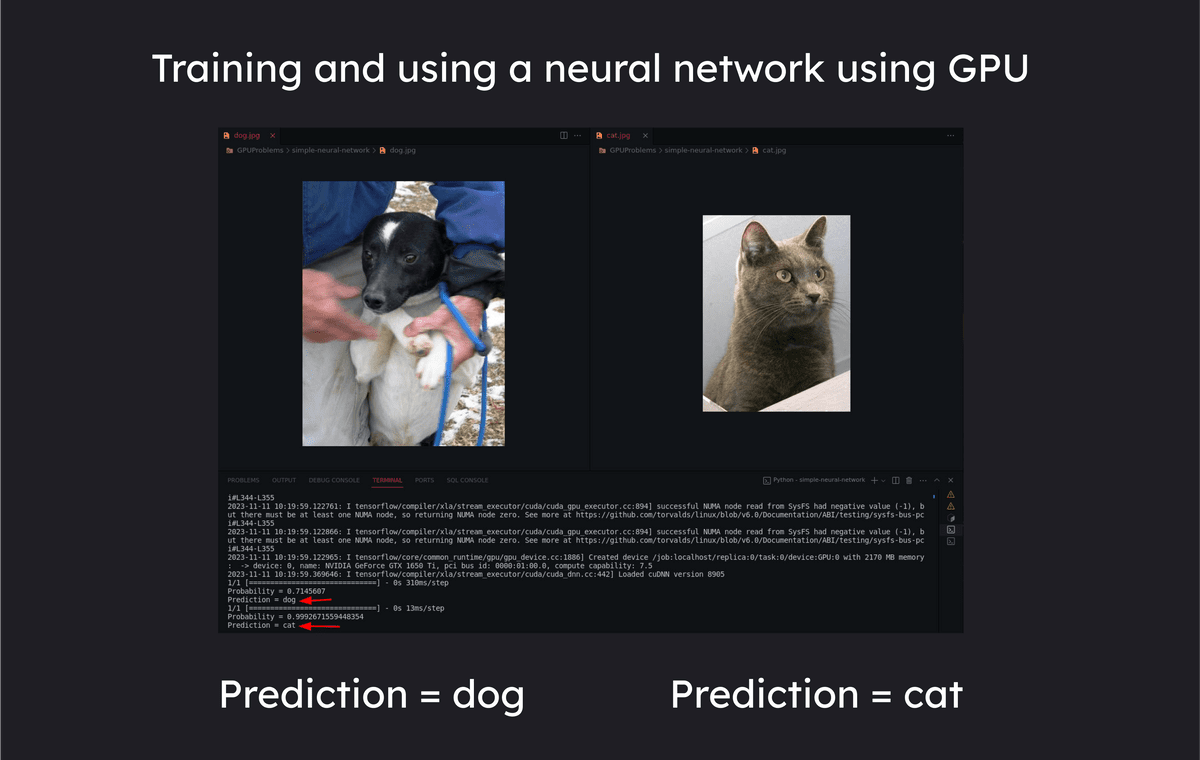
Furthermore, neural network training involves a large number of matrix operations, which are highly parallelizable, so using a GPU with a large number of cores can speed up the processing.
The differences between CPUs and GPUs can be summarized as follows:
◆CPU
CPUs are designed for sequential processing and excel at executing a single set of instructions in a linear fashion. They often have between 2 and 16 cores, each capable of processing its own set of instructions independently, but not at a massive level of parallel processing. They are optimized for tasks that require high single-threaded performance, and are used for:
・General-purpose computing
・System operation
- Processing complex algorithms with conditional branching
◆GPU
GPUs can have up to thousands of cores, grouped together into units called streaming multiprocessors. GPUs are designed for parallel processing tasks, such as dividing a task into smaller parallel subtasks that can be processed simultaneously, and can efficiently handle tasks such as:
・Graphics rendering
- Performing complex mathematical calculations
・Execution of parallelizable algorithms
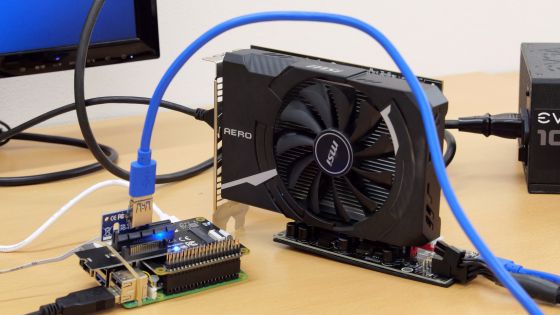
So, let's actually use the GPU using 'CUDA,' a parallel computing platform and programming model developed by Nvidia. First, go to

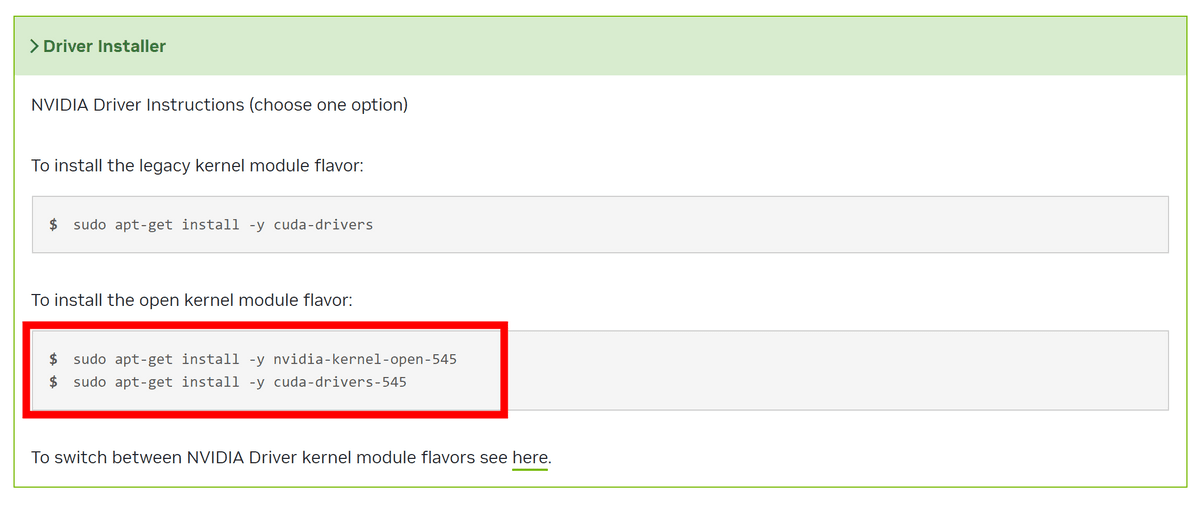
Once you have completed entering the 'Installer Type', the installation commands will appear at the bottom. For the 'Base Installer', simply follow the listed commands in order.

The 'Driver Installer' allows you to select one of two options. In this case, we will use
Add the following to '.bashrc' in your home directory and pass the path.
[code]export PATH='/usr/local/cuda-12.3/bin:$PATH'
export LD_LIBRARY_PATH='/usr/local/cuda-12.3/lib64:$LD_LIBRARY_PATH'[/code]
Also, install GDS with the following command. After installation, restart the system to reflect the changes.
[code]sudo apt-get install nvidia-gds[/code]
Useful commands for programming with GPUs
・'lspci | grep VGA'
It can identify and list the GPUs in your system.

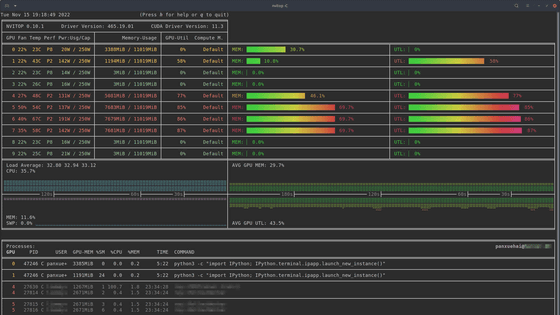
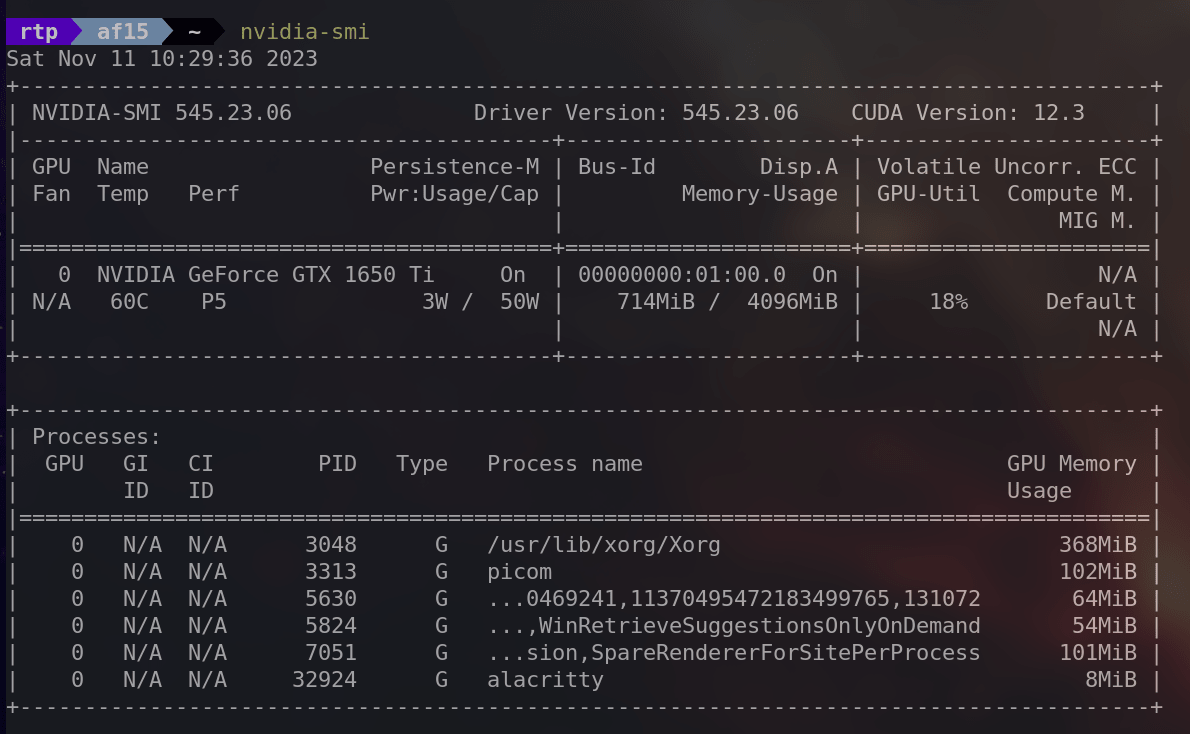
・'nvidia-smi'
nvidia-smi stands for 'NVIDIA System Management Interface' and provides detailed information about the NVIDIA GPU in your system, including utilization, temperature, memory usage, etc.
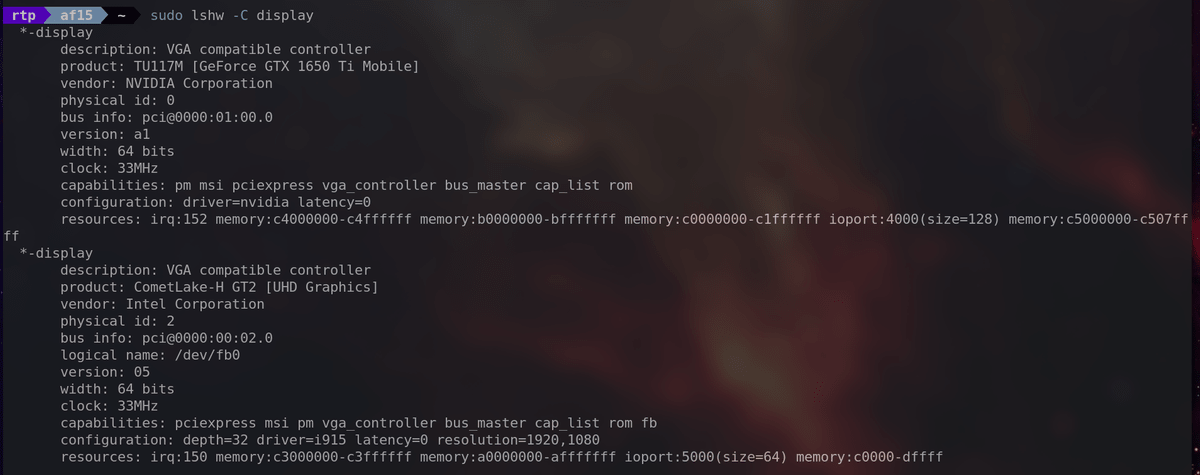
・'sudo lshw -C display'
Provides detailed information about the display controllers in your system, including graphics cards.
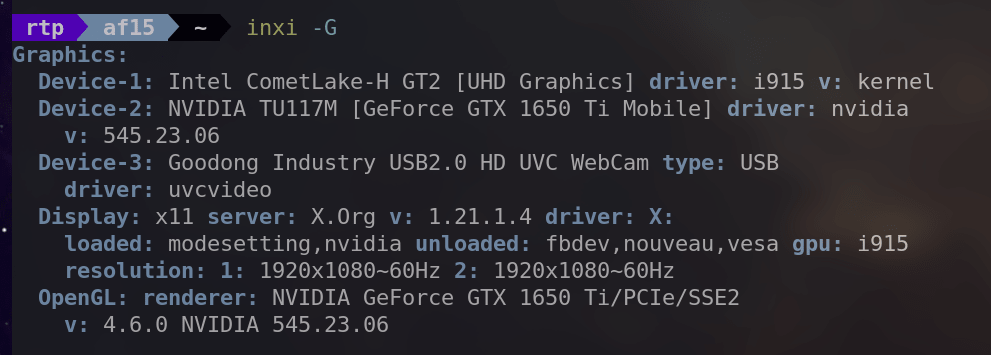
・'inxi -G'
Provides information about the graphics subsystem, including details about the GPU and display.
・'sudo hwinfo --gfxcard'
You can get detailed information about the graphics card in your system.

◆Try using the CUDA framework
To demonstrate GPU parallelism, we will perform the task of adding the elements of the following two arrays.
Array A: [1,2,3,4,5,6]
Array B: [7,8,9,10,11,12]
Adding up the elements together gives us the following:
Array C: [1+7, 2+8, 3+9, 4+10, 5+11, 6+12] = [8, 10, 12, 14, 16, 18]
If you were to implement this calculation code on a CPU, it would look something like this: It checks each element of the array one by one and adds them in order.
[code]#include
int a[] = {1,2,3,4,5,6};
int b[] = {7,8,9,10,11,12};
int c[6];
int main() {
int N = 6; // Number of elements
for (int i = 0; i < N; i++) {
c[i] = a[i] + b[i];
}
for (int i = 0; i < N; i++) {
printf('c[%d] = %d', i, c[i]);
}
return 0;
}[/code]
To maintain performance even when dealing with a large number of numbers, the following code uses CUDA to parallelize and simultaneously perform all the additions. '__global__' indicates that this function is a kernel function called by the GPU, and 'threadIdx.x' represents the thread index.
[code]__global__ void vectorAdd(int* a, int* b, int* c)
{
int i = threadIdx.x;
c[i] = a[i] + b[i];
return;
}[/code]
Once the kernel function is ready, we will create the main function. First, declare variables.
[code]int main(){
int a[] = {1,2,3,4,5,6};
int b[] = {7,8,9,10,11,12};
int c[sizeof(a) / sizeof(int)] = {0};
// Create a pointer to the GPU
int* cudaA = 0;
int* cudaB = 0;
int* cudaC = 0;[/code]
Next, we use 'cudaMalloc' to allocate memory within the GPU.
[code]cudaMalloc(&cudaA,sizeof(a));
cudaMalloc(&cudaB,sizeof(b));
cudaMalloc(&cudaC,sizeof(c));[/code]
Use 'cudaMemcpy' to copy the contents of the a and b arrays to the GPU.
[code]cudaMemcpy(cudaA, a, sizeof(a), cudaMemcpyHostToDevice);
cudaMemcpy(cudaB, b, sizeof(b), cudaMemcpyHostToDevice);[/code]
Then, we launch the kernel function 'vectorAdd' that we created first. 'sizeof(a) / sizeof(a[0])' means 'size of the entire array / size of one element of the array,' and we set it to launch vectorAdd the same number of times as the number of elements.
[code]vectorAdd <<<1, sizeof(a) / sizeof(a[0])>>> (cudaA, cudaB, cudaC);[/code]
The calculation results are obtained from the GPU.
[code]cudaMemcpy(c, cudaC, sizeof(c), cudaMemcpyDeviceToHost);[/code]
Finally, output the calculation results in the usual way.
[code] for (int i = 0; i < sizeof(c) / sizeof(int); i++)
{
printf('c[%d] = %d', i, c[i]);
}
return 0;
}[/code]
Save the above code as GPU.cu and compile it with the 'nvcc' command. When you run the resulting executable file, the output is as shown below. The entire code is available on GitHub . 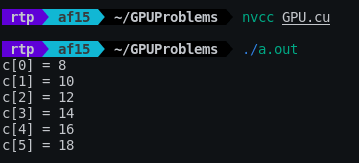
Rajesh's blog post also includes examples of using a GPU to generate the Mandelbrot set in 0.0046 seconds, a task that would take 4.07 seconds on a CPU, and training a neural network, so be sure to check them out if you're interested.
Related Posts: