I tried using Amazon's LED light-equipped security camera 'Ring Spotlight Cam Plus' in conjunction with the app
The Spotlight Cam Plus, a security camera with LED lights sold by Amazon, allows you to check the image of your home and turn on the lights from the app while you're out. I installed Spotlight Cam Plus at the entrance of my house, so I checked what I could do by linking it with the app.
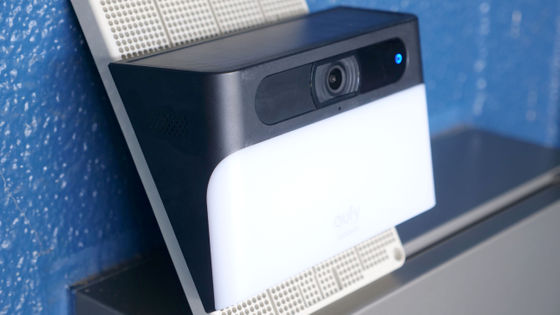
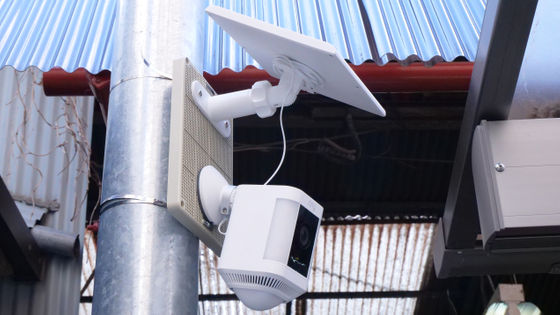
The installation has already been completed, so if you are concerned about the installation procedure or appearance, please first check the article below.
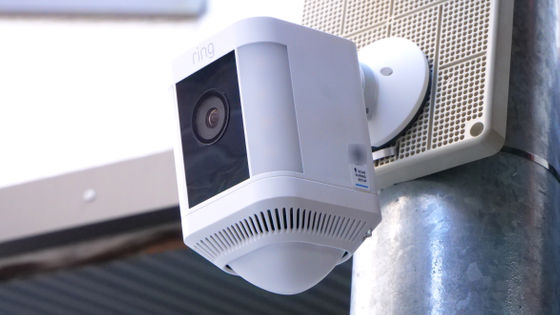
Table of Contents
1: Create an account
2: Connecting to Spotlight Cam Plus
3: Initial setup of Spotlight Cam Plus
4: Check the footage from Spotlight Cam Plus with the app
◆1: Create an account
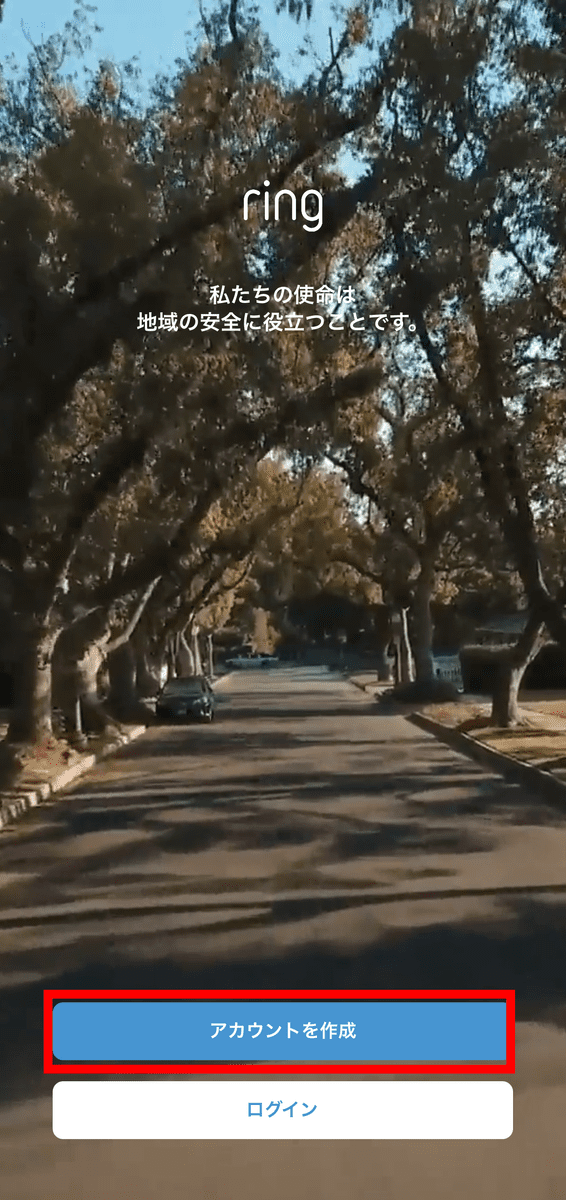
The Ring app is available for Android , iOS , and Fire OS, but this time we will use iOS.
When you open the app, you will see the following screen. First, you will need to create a Ring account, so tap 'Create Account.'
After entering your first and last name, tap 'Next.'
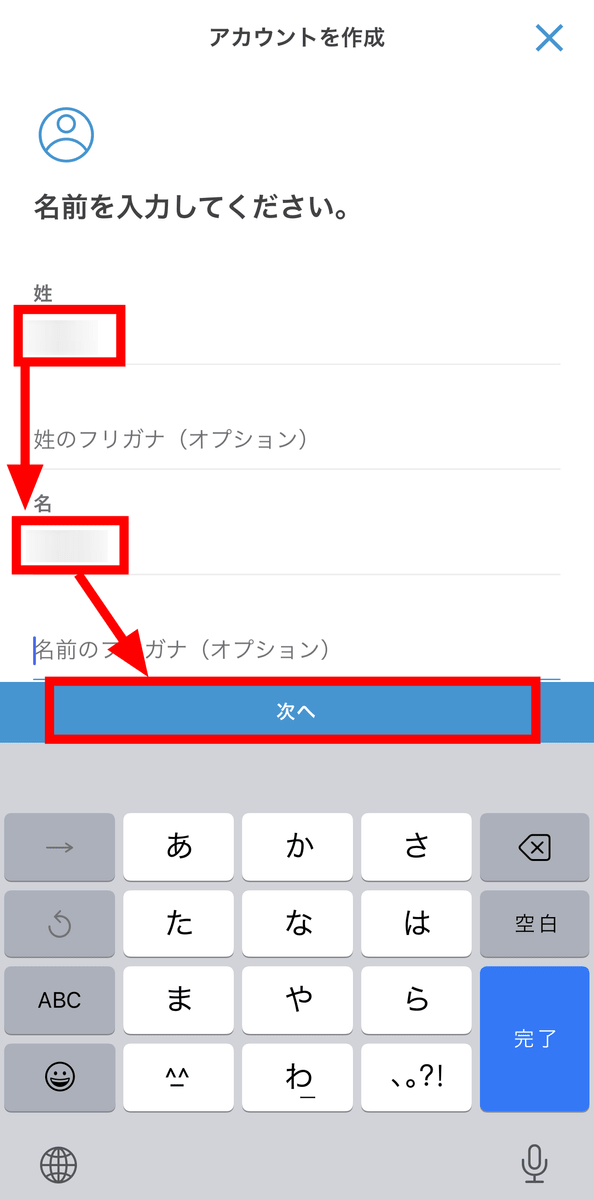
Japan is selected as the country from the beginning, so just tap 'Next'.

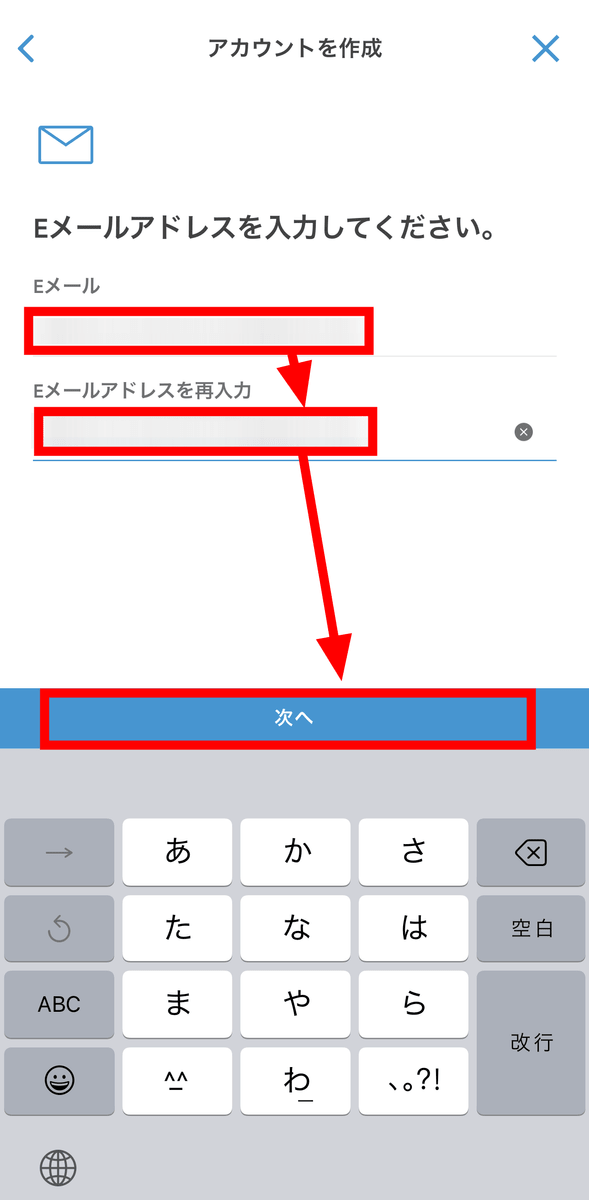
Enter your email address twice and tap 'Next.'
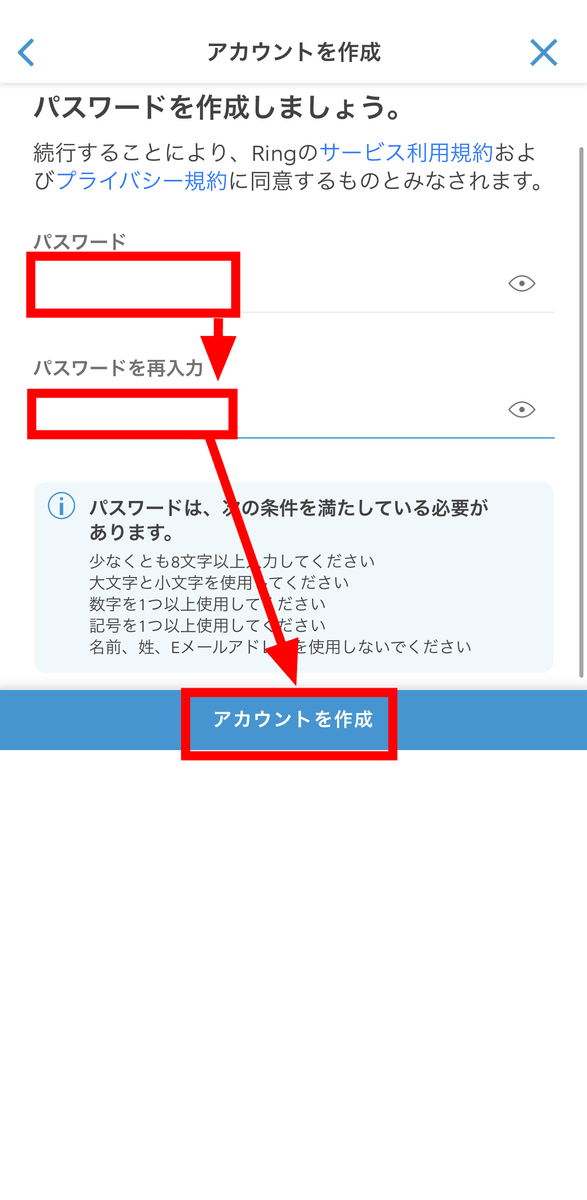
Enter your password twice and tap 'Create Account.'
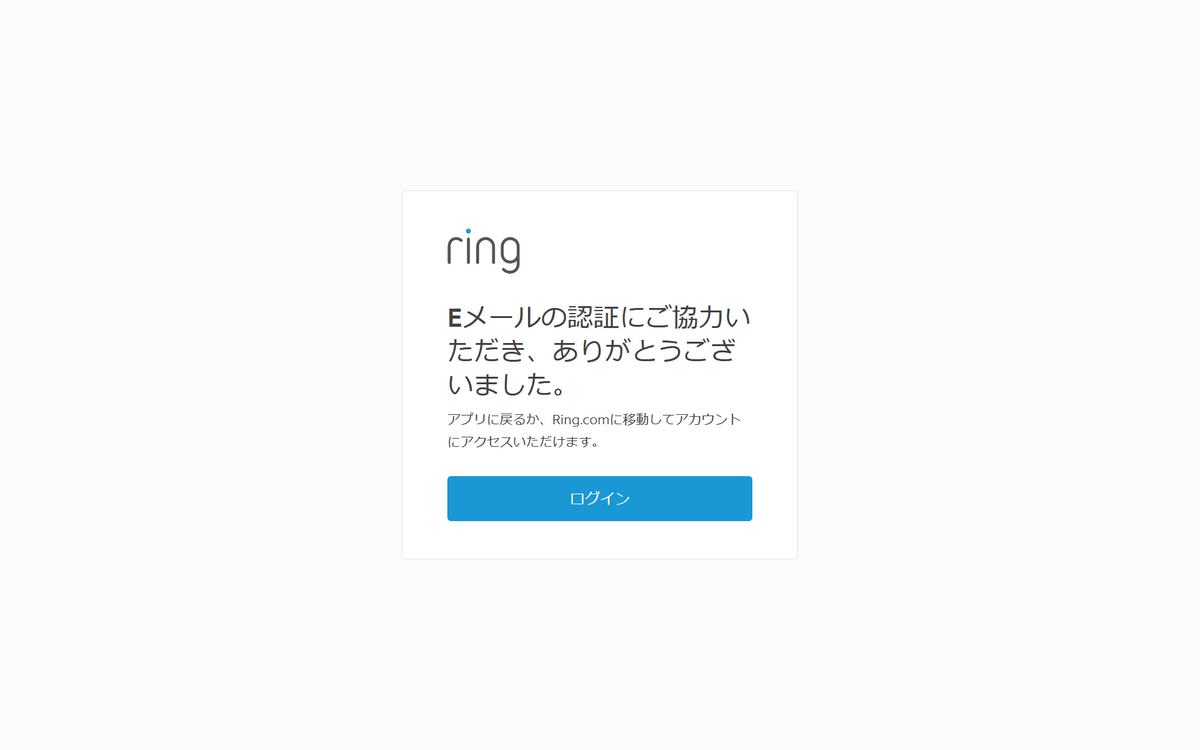
A confirmation email will be sent to the email address you entered earlier, so click on the link that says 'Verify now.'

If the following message is displayed at the link destination, authentication is successful.
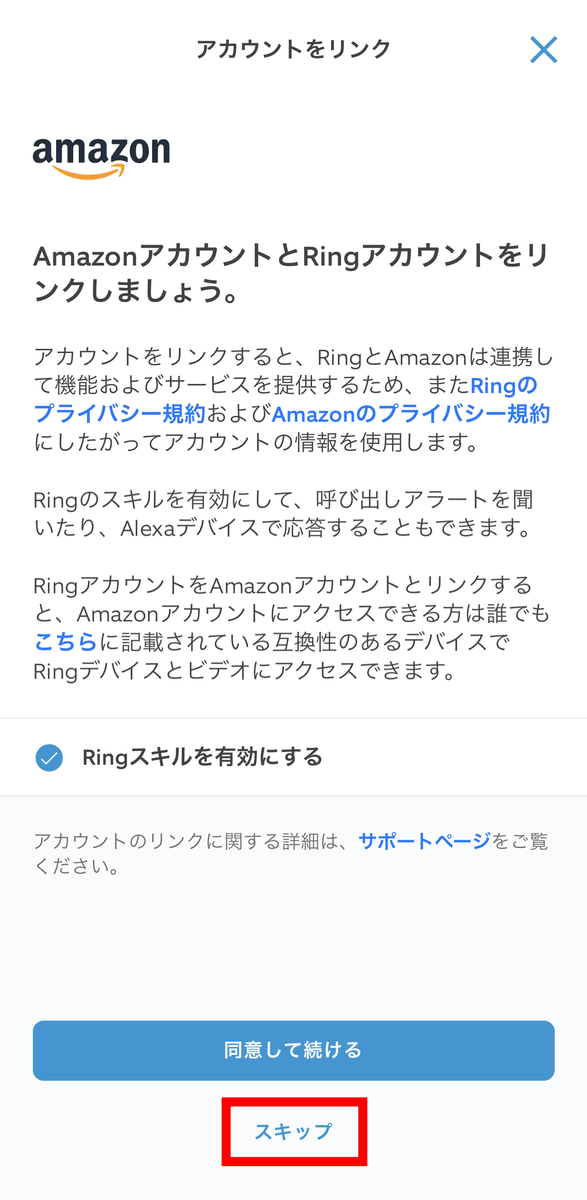
Return to the app and continue with the setup. By linking your Amazon account with your Ring account, you will be able to control devices using Alexa, but for now, tap 'Skip.'
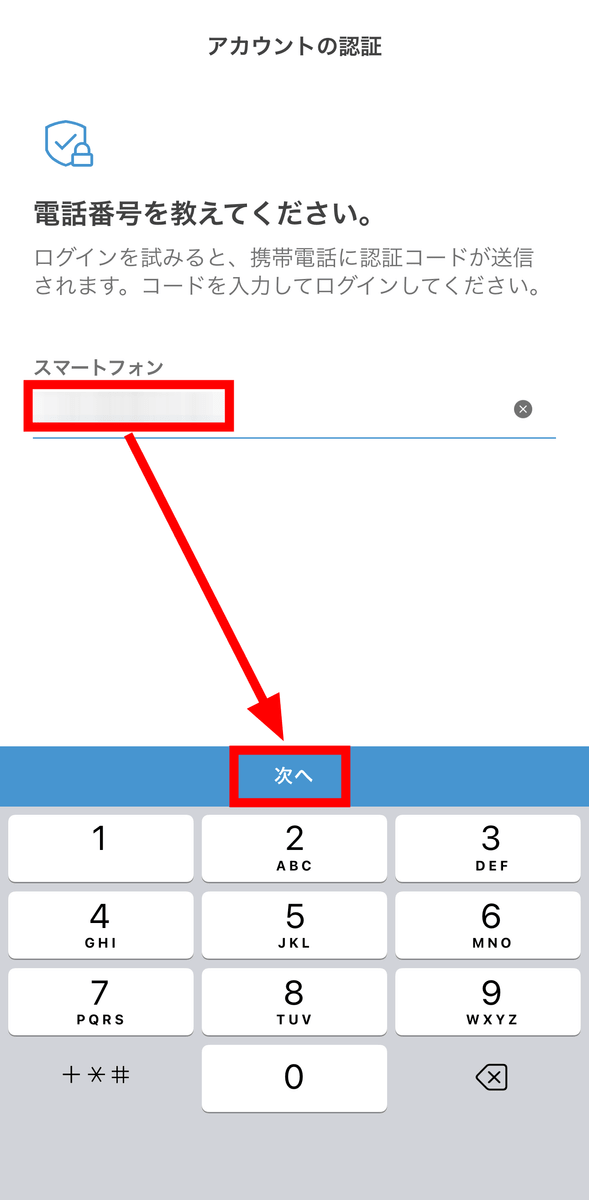
You will be asked to set up two-step authentication, so tap 'Next'.

Enter your phone number and tap 'Next.'
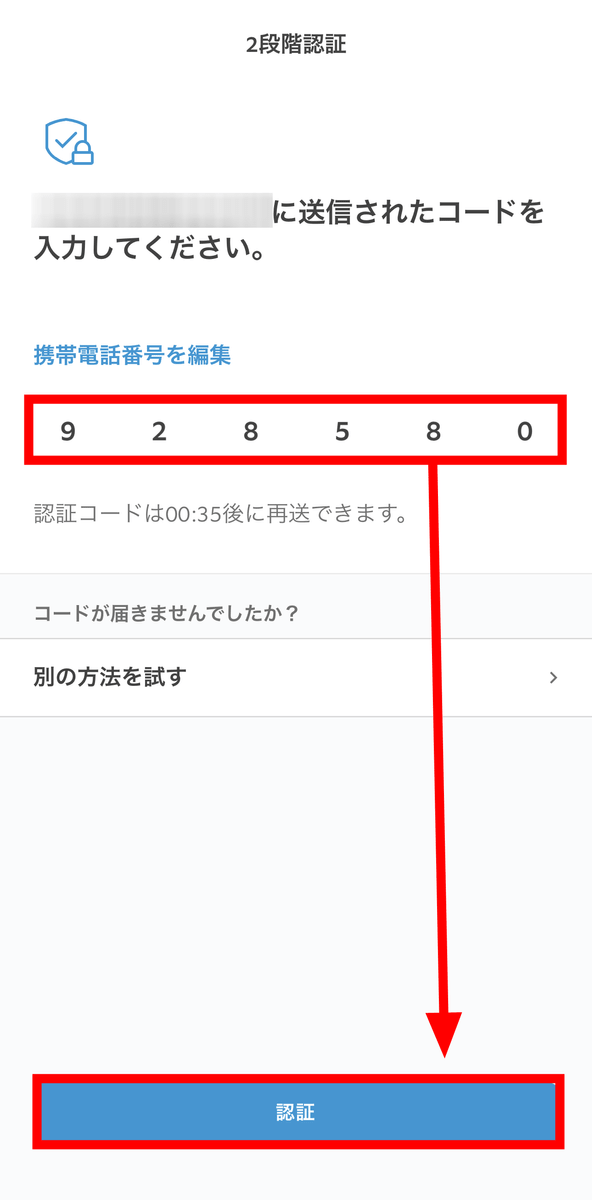
Check the code sent to you via SMS, enter it in the app, and tap 'Next' to complete the process.
◆2: Connecting to Spotlight Cam Plus
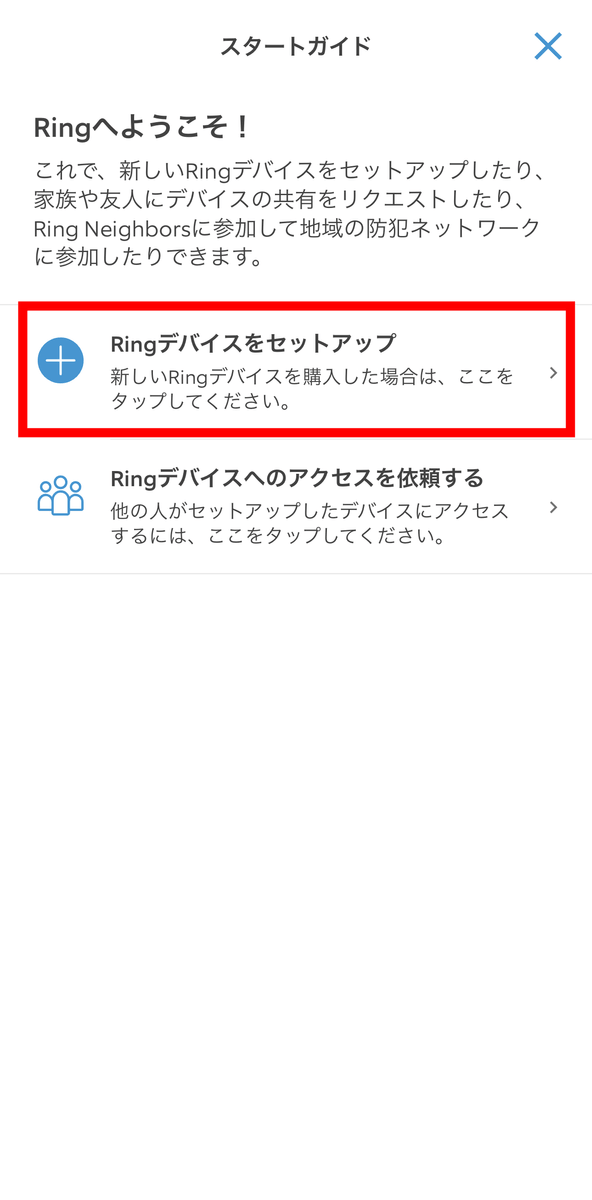
Tap 'Set up Ring device.'
Tap 'Security Camera.'

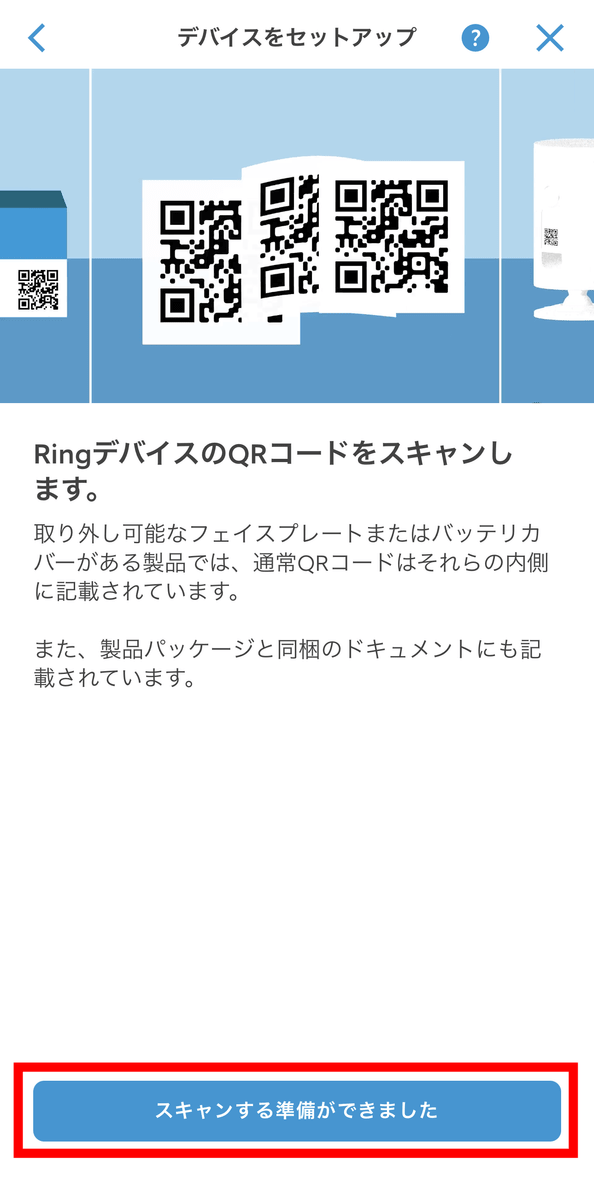
You will then be taken to the phase where you scan the Spotlight Cam Plus QR code, so tap 'Ready to scan.'
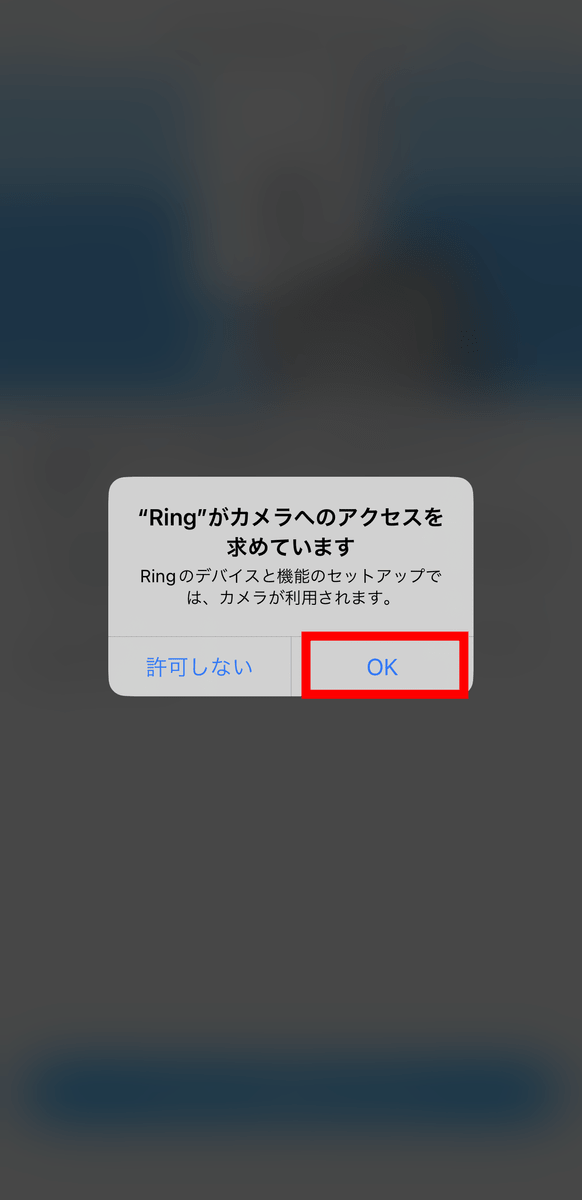
Tap 'OK' to allow access to the camera.
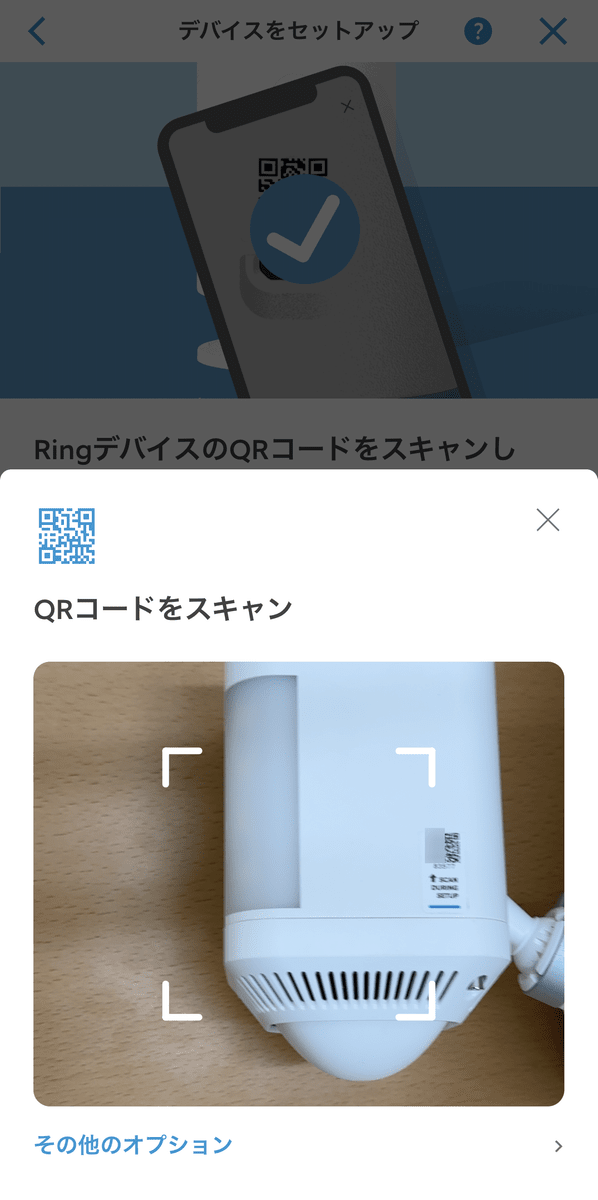
Place the device's QR code within the frame. The QR code is printed under the joints on the right side and back of the device, on the packaging and in the instructions. For more information, please refer to
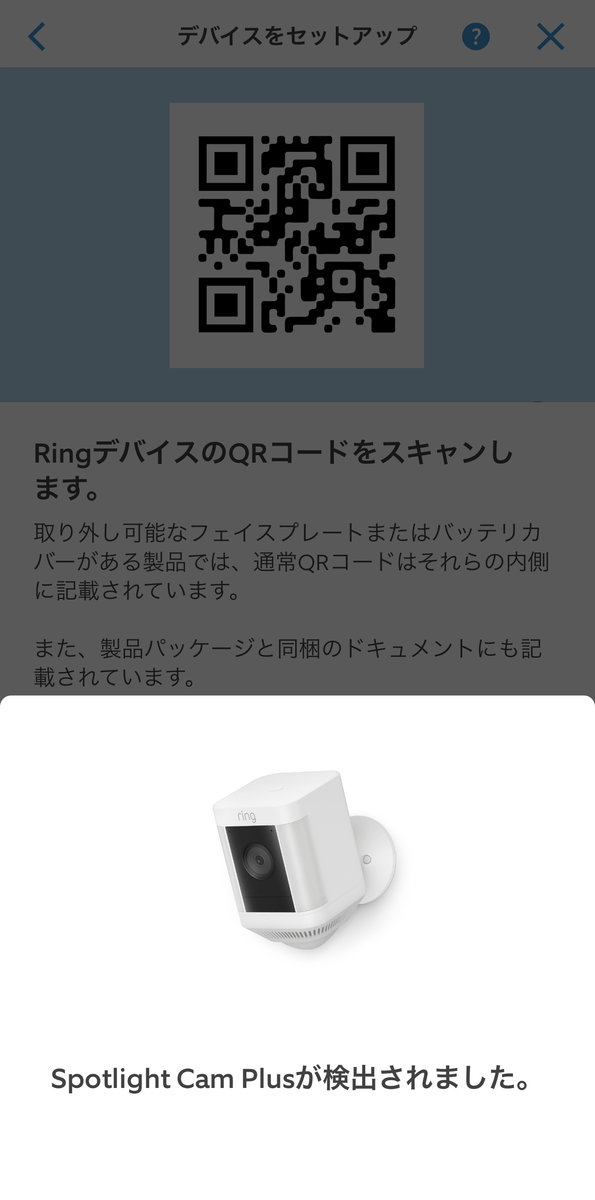
If the QR code is successfully detected, the message 'Spotlight Cam Plus detected' will be displayed.
◆3: Initial settings for Spotlight Cam Plus
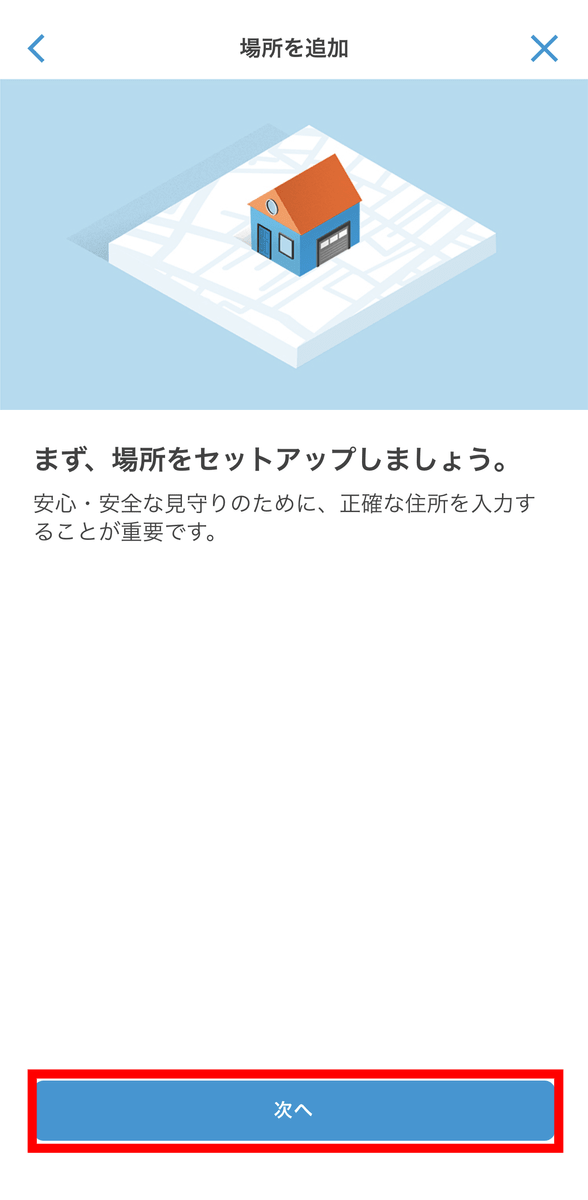
Next, move on to setting up your location. First, tap 'Next'.
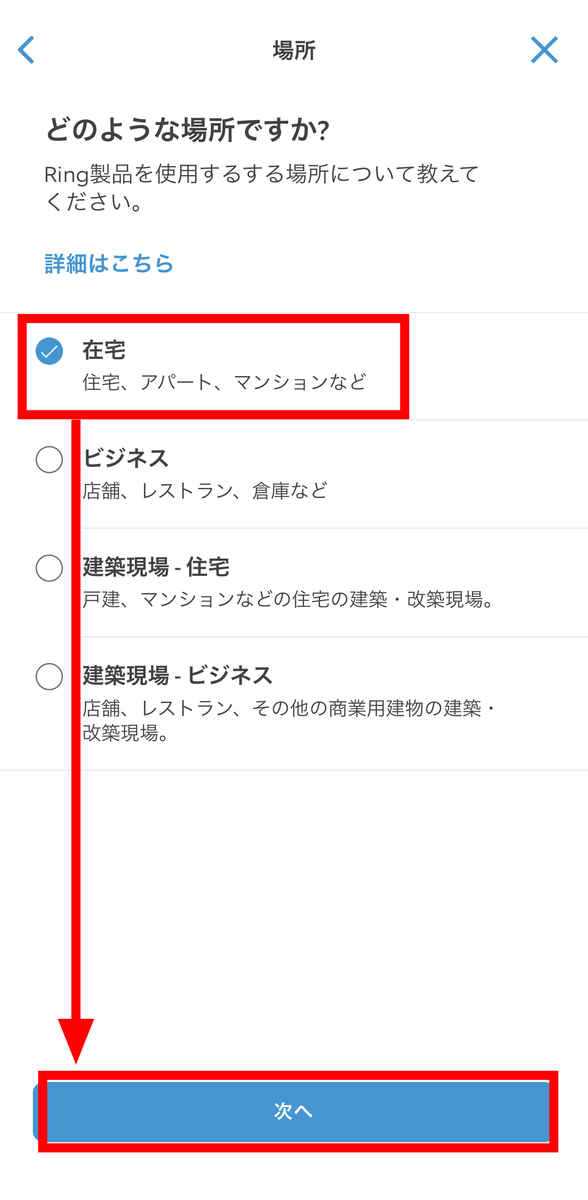
Select one of the following locations for where you will use the product: 'Home,' 'Business,' 'Construction site - Home,' or 'Construction site - Business.' Since this time we will be installing it in a normal home, select 'Home' and tap 'Next.'
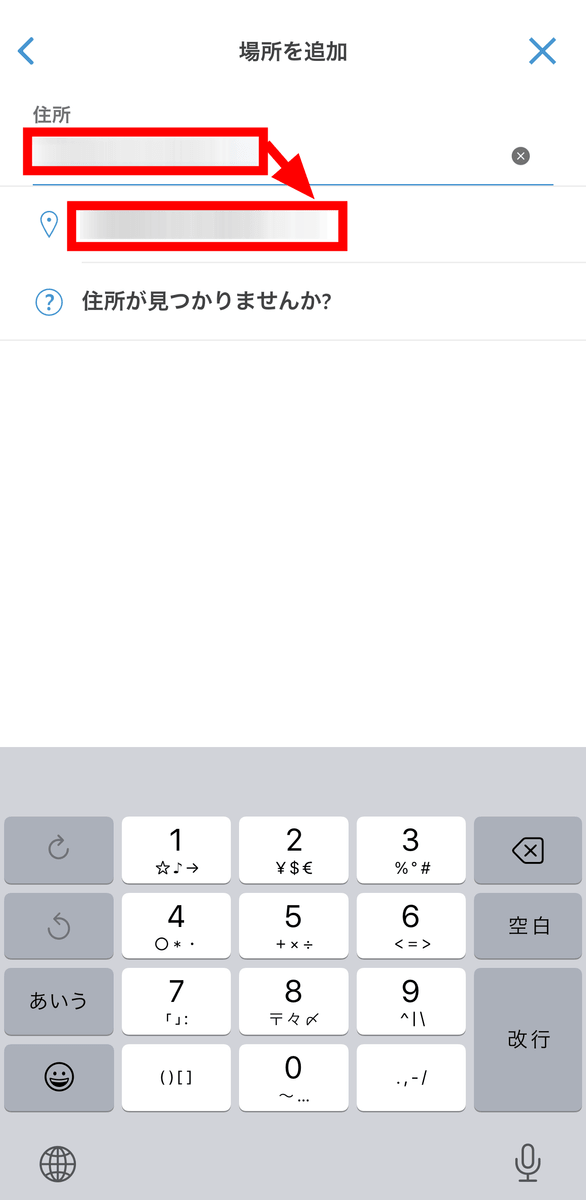
Enter the address and tap the suggestions that appear.
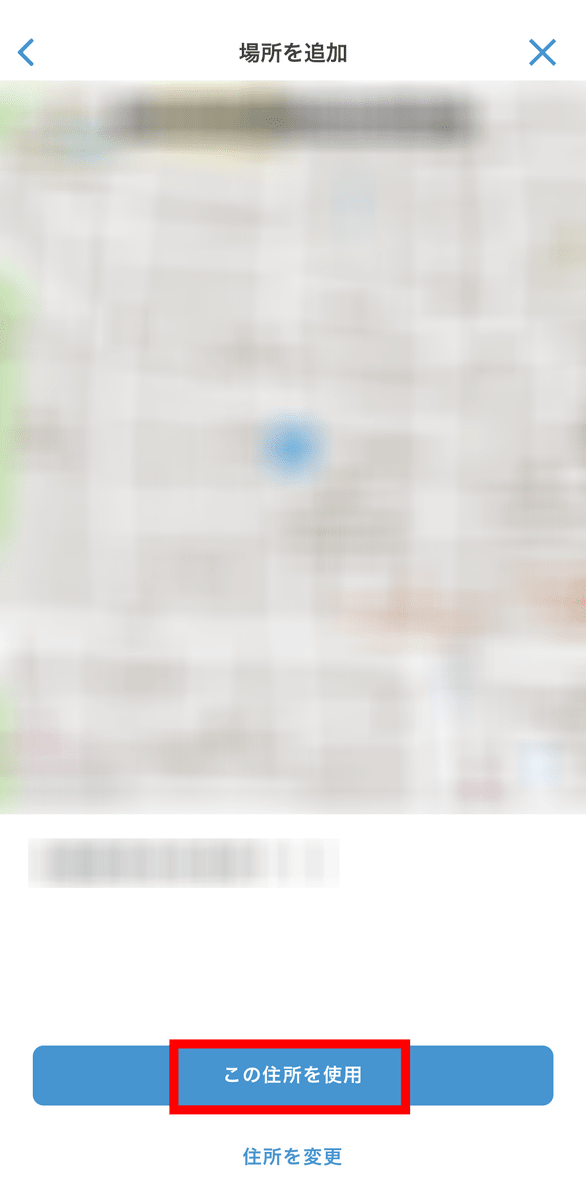
Check the location on the map and tap 'Use this address.'
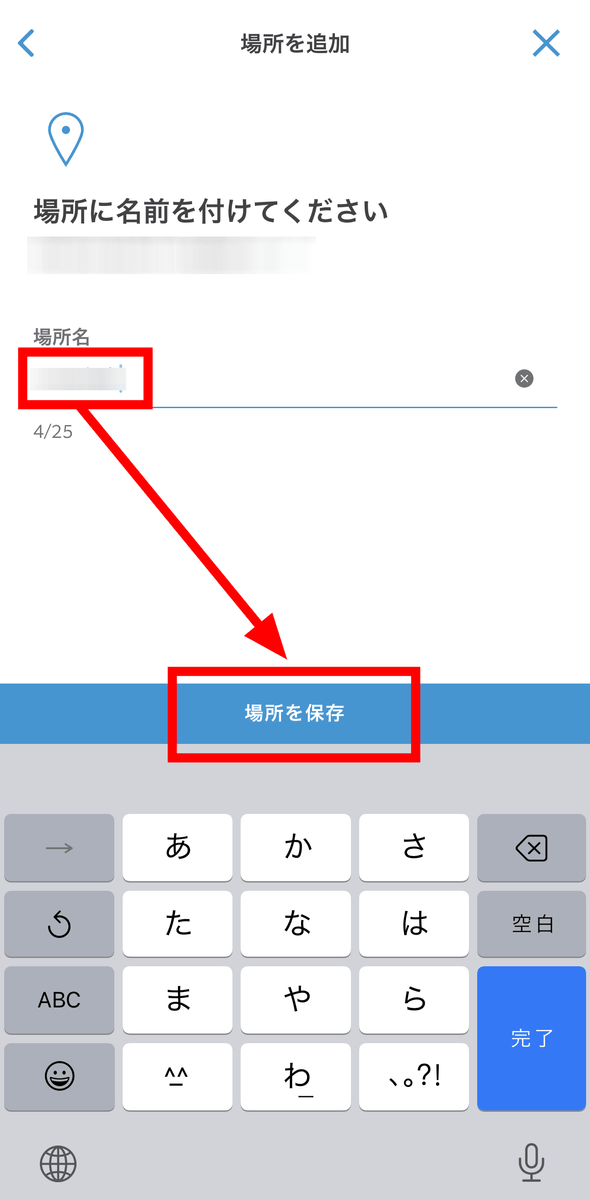
Name the place and tap Save Place.
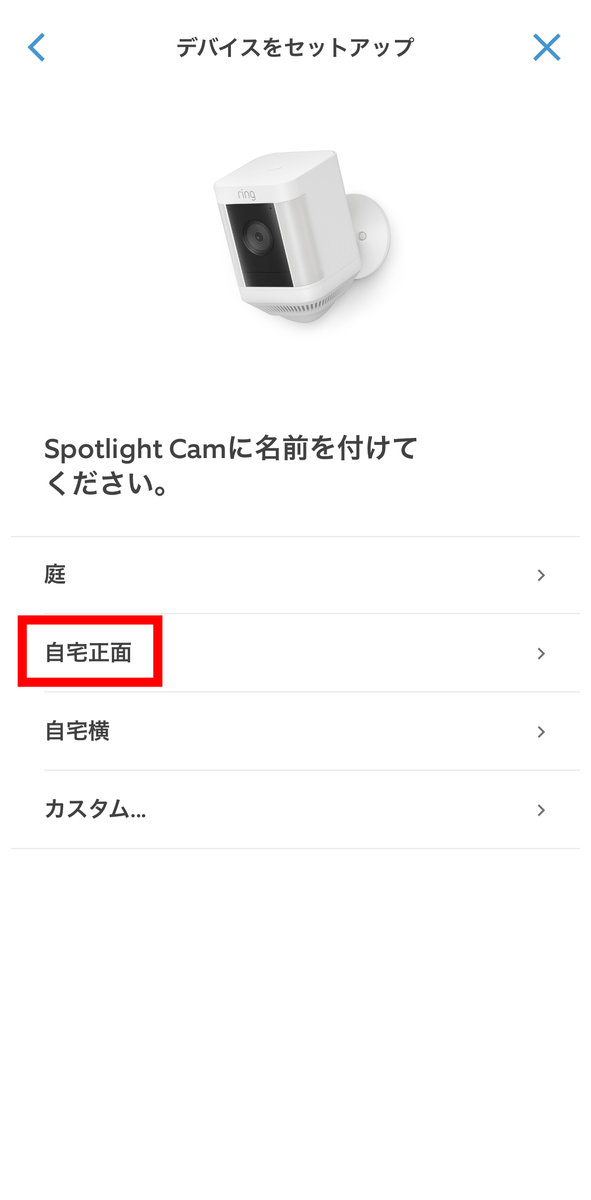
Give the device a name. You can choose from 'Garden,' 'Front of the house,' 'Side of the house,' or 'Custom,' but this time I'll tap 'Front of the house.'
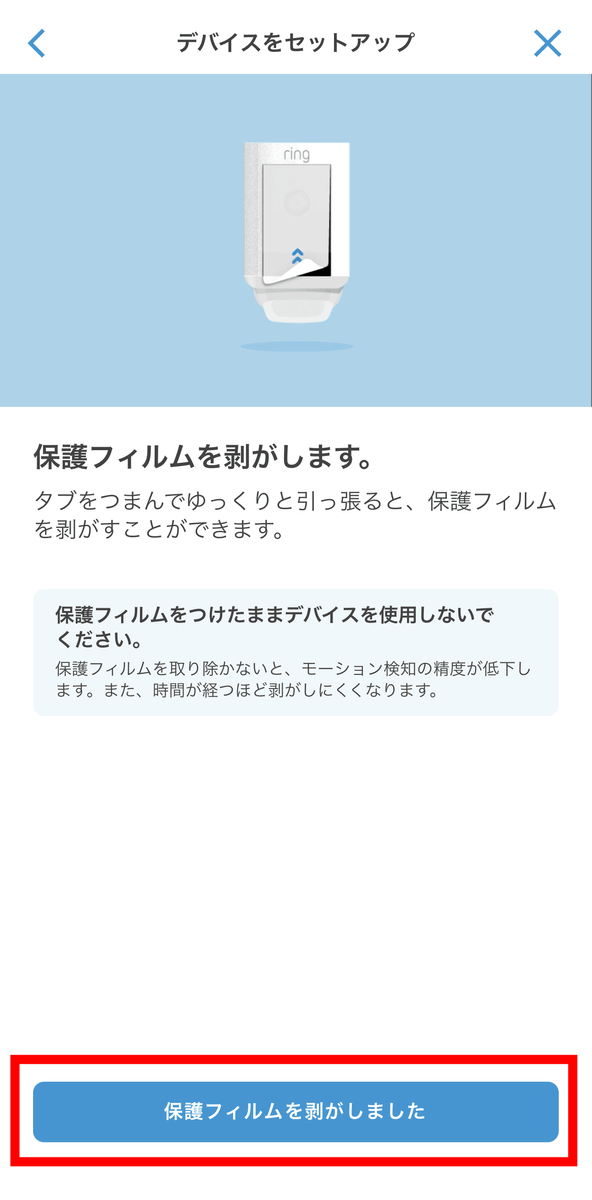
You will be asked to remove the protective film, but since you have already removed it this time, tap 'I have removed the protective film.'
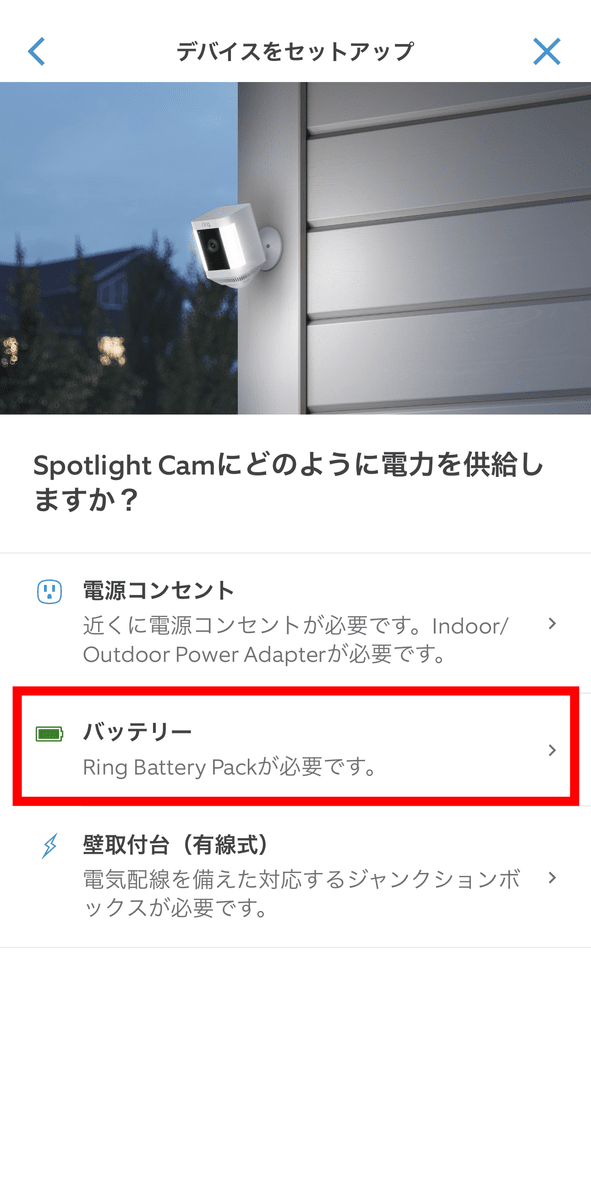
Choose the appropriate power supply for the Spotlight Cam Plus from the three options: 'power outlet,' 'battery,' or 'wall mount (wired).' Since I didn't have anything prepared this time, I selected 'battery.'
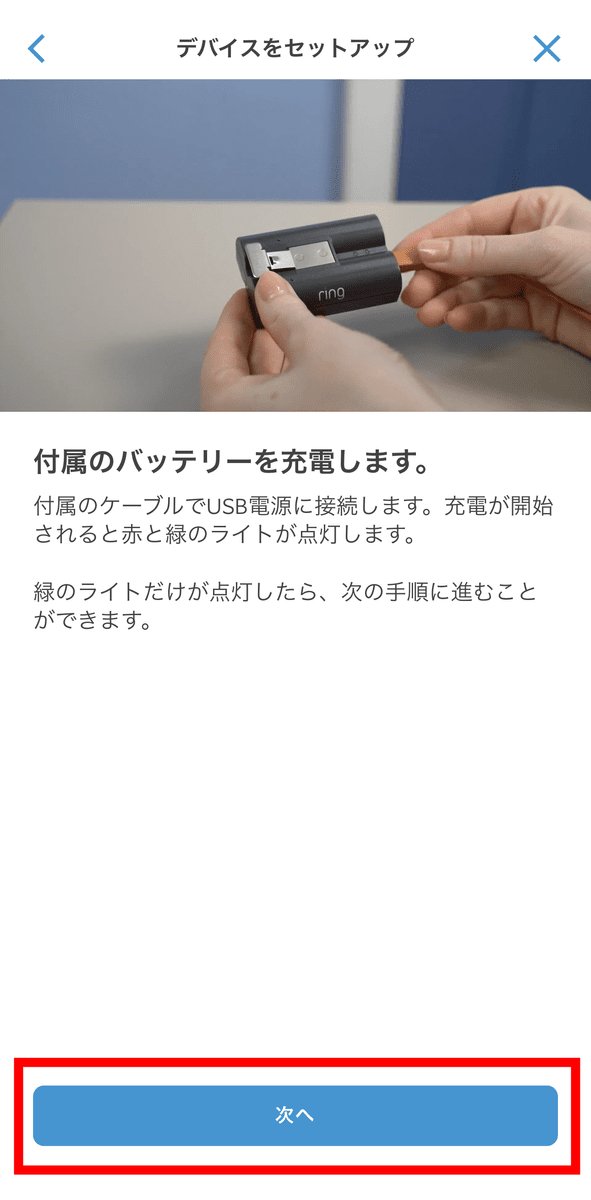
You will be prompted to charge the battery, so tap 'Next'.
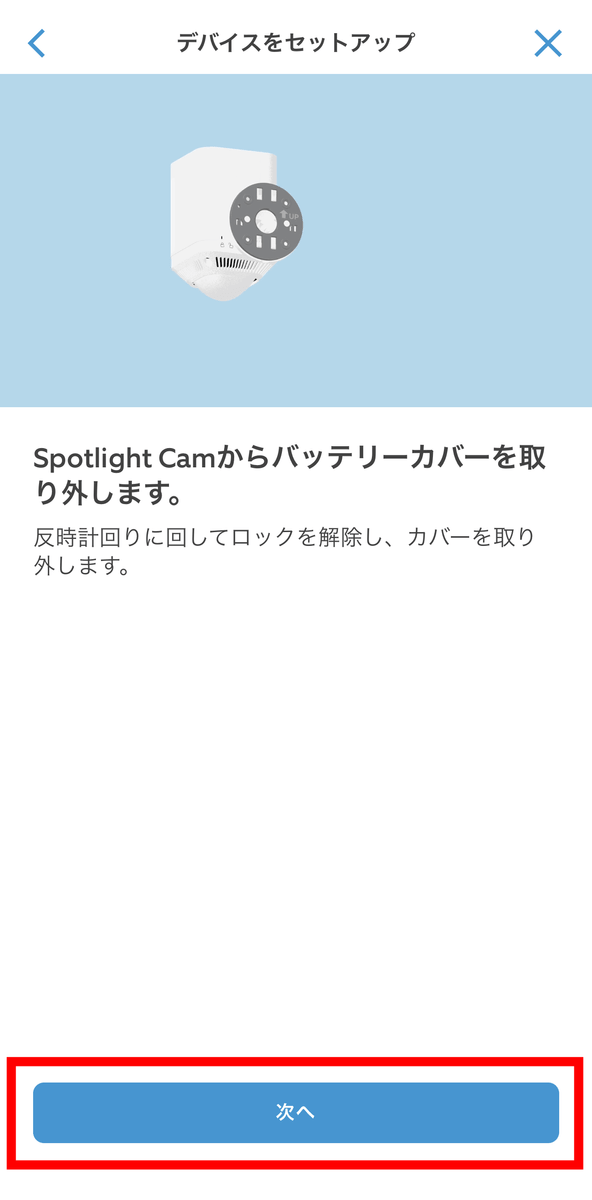
Tap 'Next'.
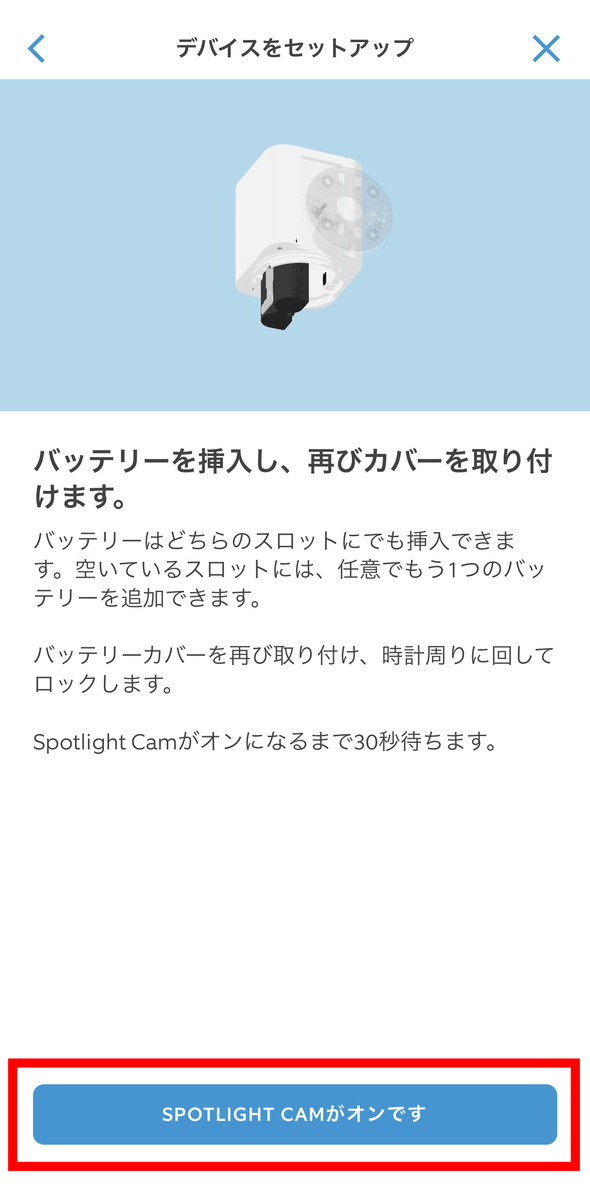
Once you have charged the battery and installed the cover, tap 'SPOTLIGHT CAM is on.'
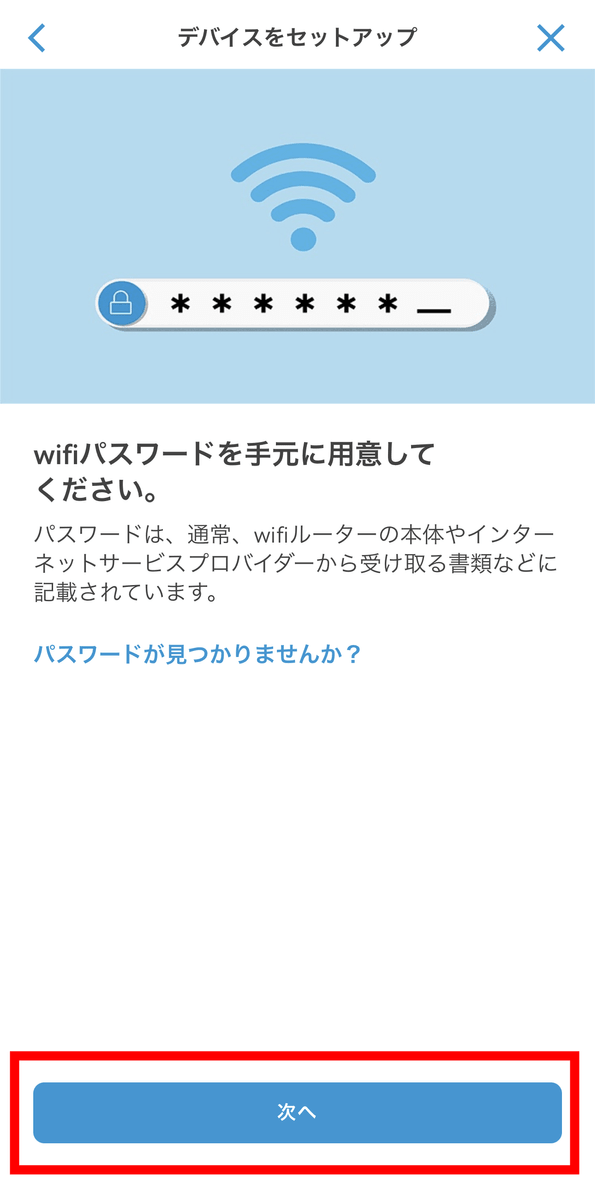
Next, set up Wi-Fi. Prepare the Wi-Fi password and tap 'Next'.
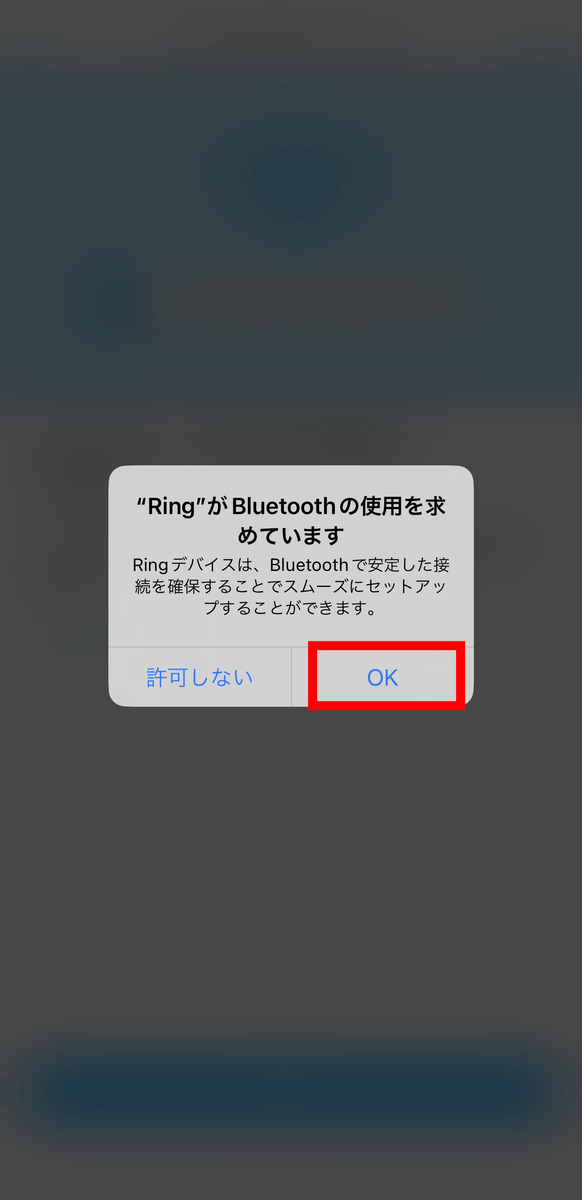
Tap 'OK' to allow the use of Bluetooth.
Tap 'Next'.
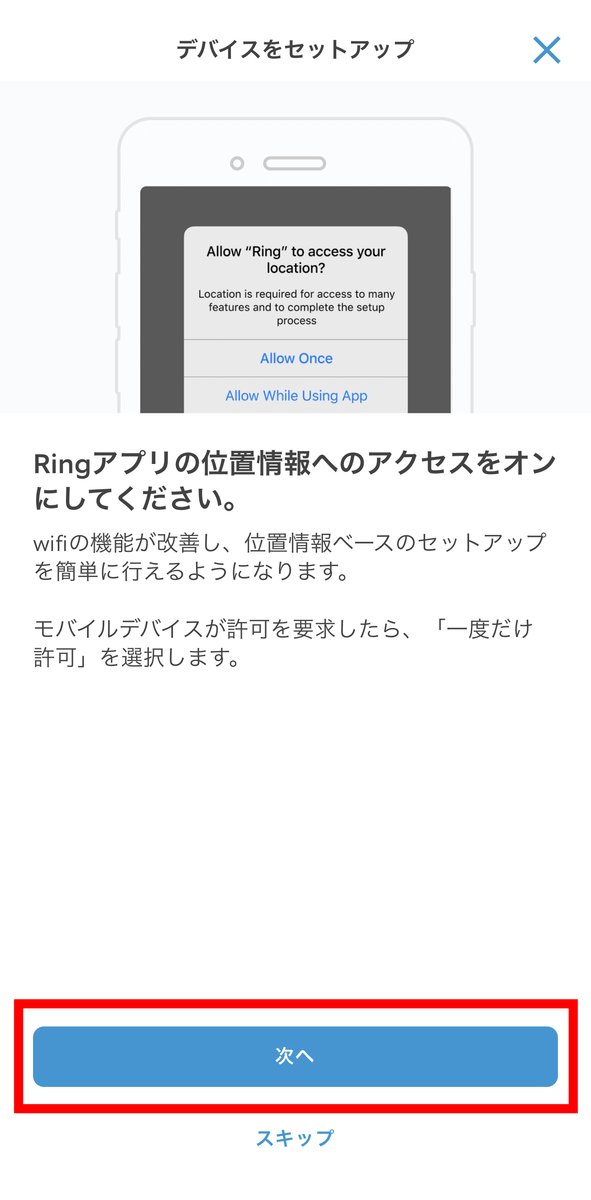
Allow the app to use your location. This time, tap 'Allow while using the app.'

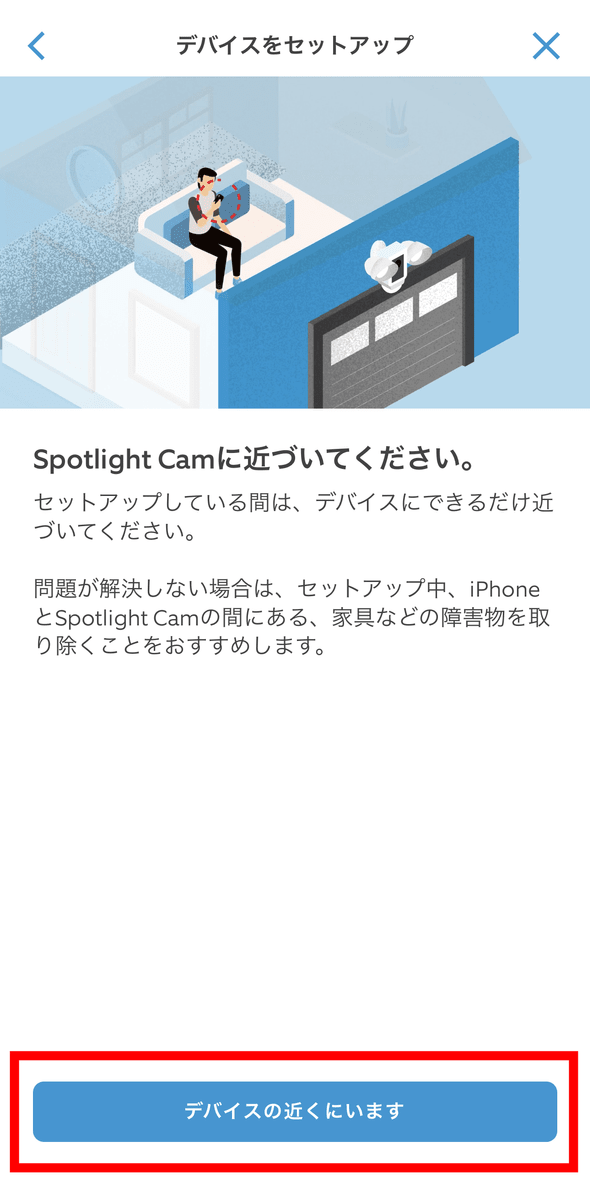
Go near Spotlight Cam Plus and tap 'Nearby Device.'
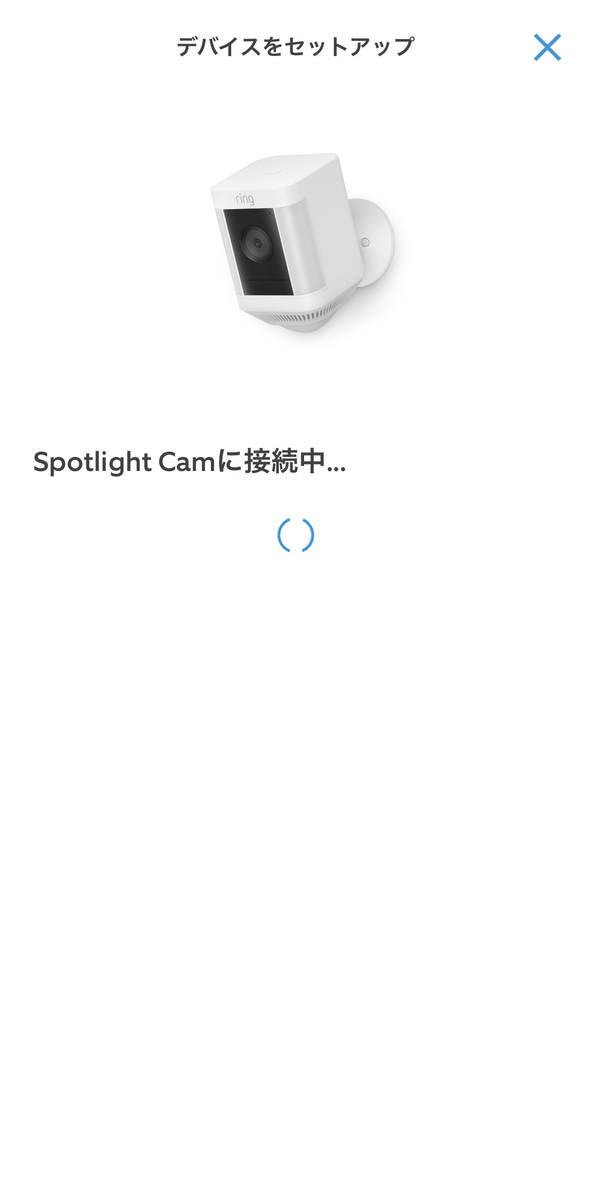
It will say 'Connecting', so wait for a while.
Select the Wi-Fi network you want to use for Spotlight Cam Plus. Note that Spotlight Cam Plus only supports the 2.4GHz band.
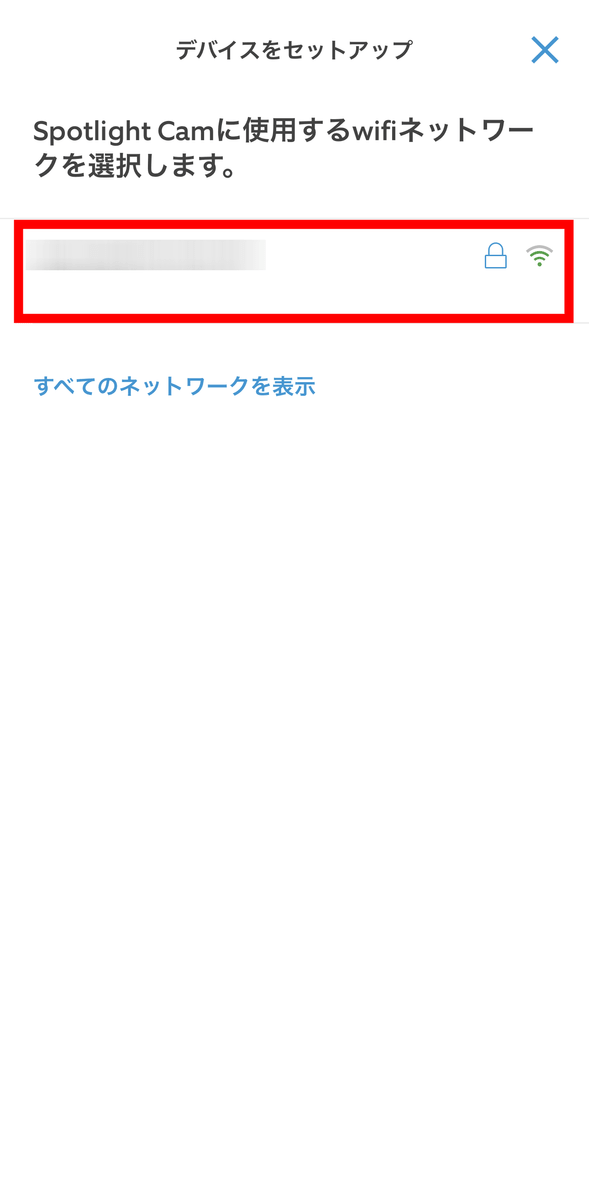
After selecting the network, enter the password and tap 'Next.'

If the connection is successful, the message 'Completed!' will be displayed, so tap 'Next'.

Tap 'Next'.
A guide will begin explaining how to install the device, but since it's already installed, tap 'Installation is already complete.'

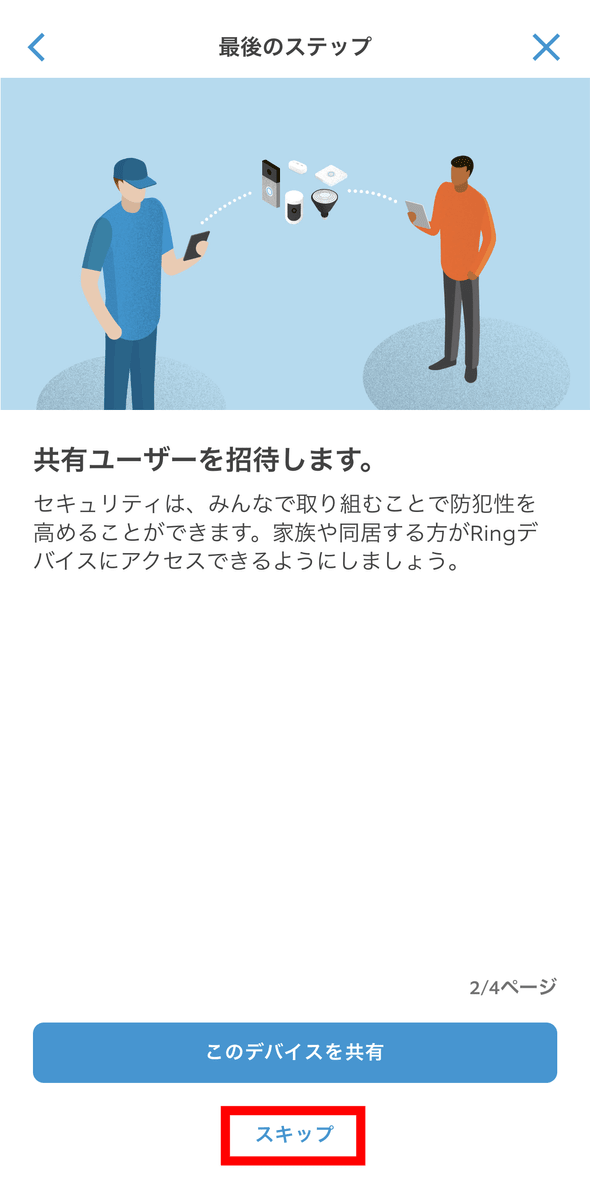
You can also allow access for family members and others, but this time select 'Skip'.
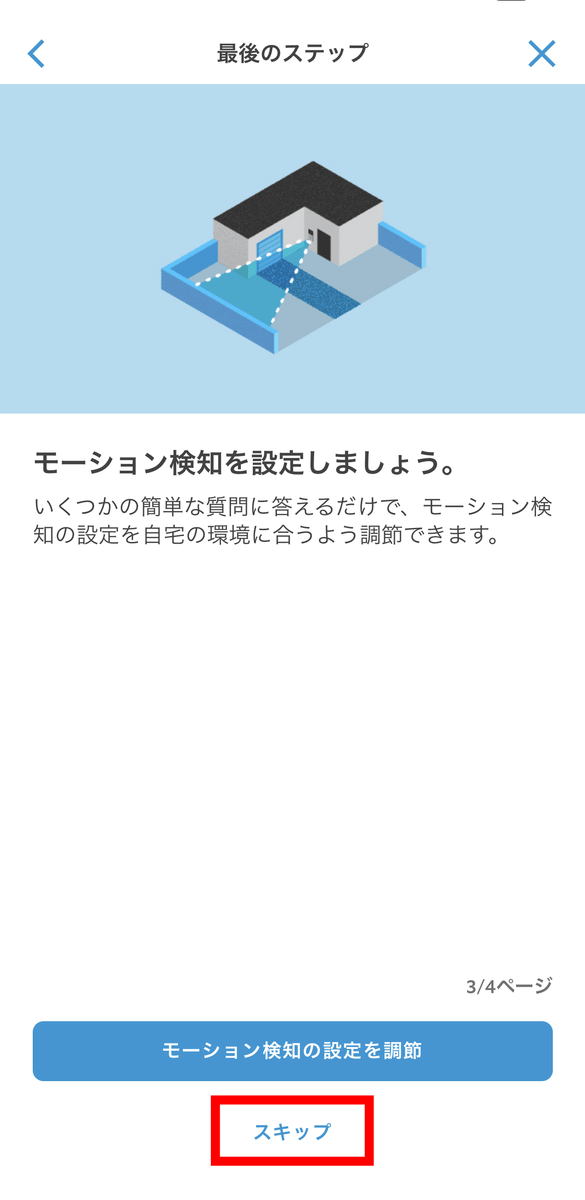
Next, you can set up 'Motion Detection', but select 'Skip'.
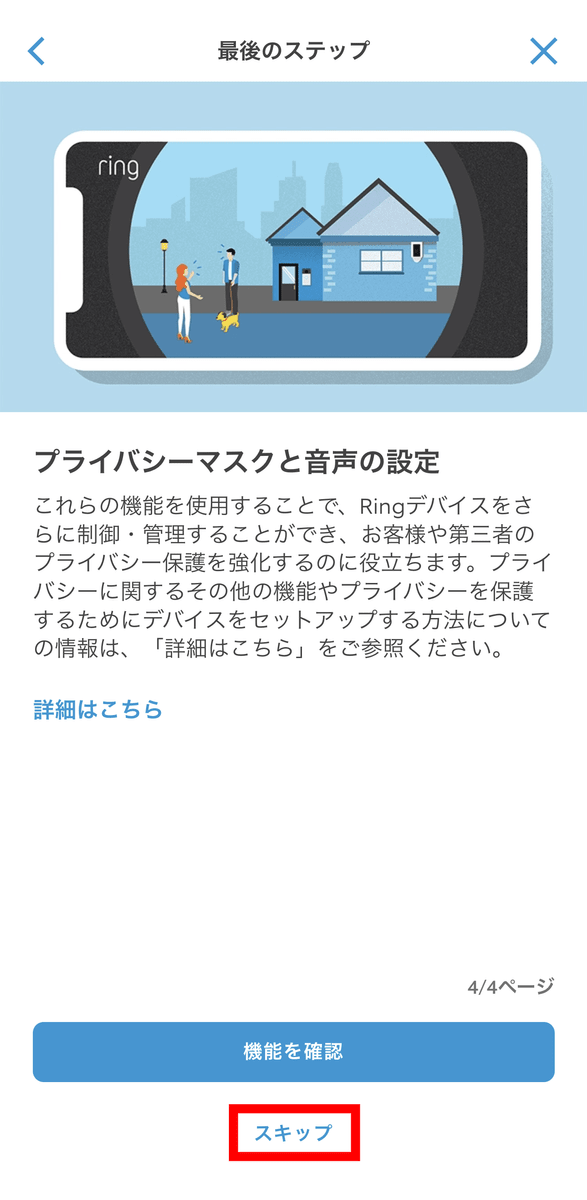
Skip 'Privacy mask and audio settings' as well.
Click 'Finish' to complete the initial setup.

◆4: Check the footage from Spotlight Cam Plus with the app
The basic premise is that some of the features of Spotlight Cam Plus can only be used by subscribing to
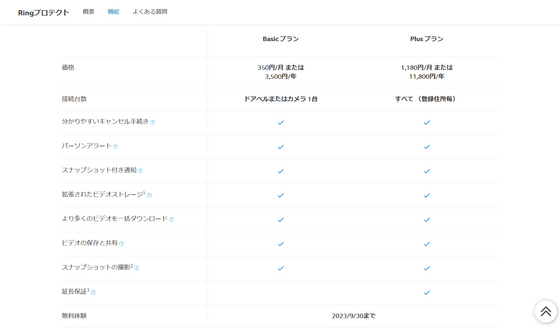
Until September 30, 2023, you will automatically sign up for a free trial of the Ring Protect Plan when you set up your camera. You will not be forced to switch to a paid plan after the deadline. There are two plans: the Basic plan , which does not include an extended warranty and requires a contract for each device, costs 350 yen per month or 3,500 yen per year. The Plus plan , which includes an extended warranty and requires a contract for each address, costs 1,180 yen per month or 11,800 yen per year. For more information, please see the following page.
Ring Protect Plan | Ring
https://ring.com/jp/ja/protect-plans
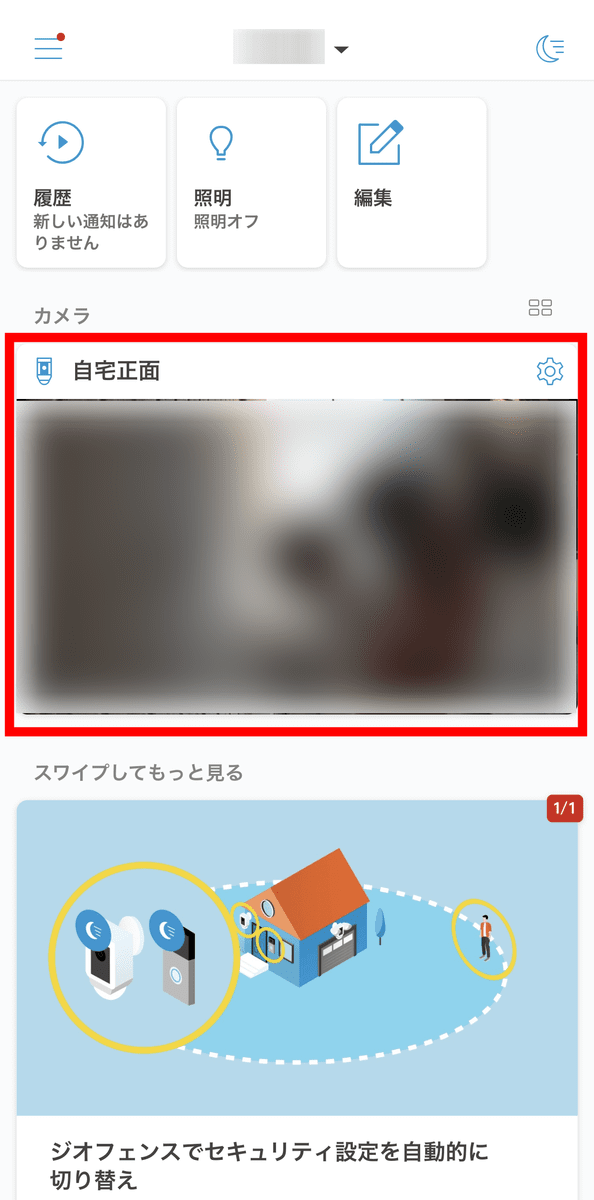
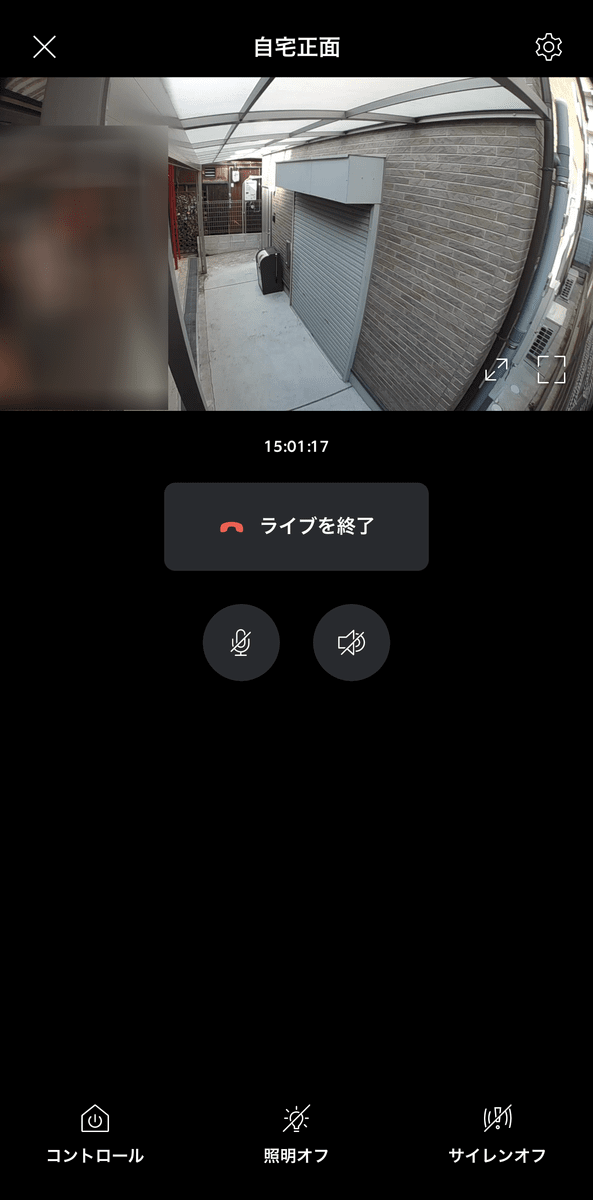
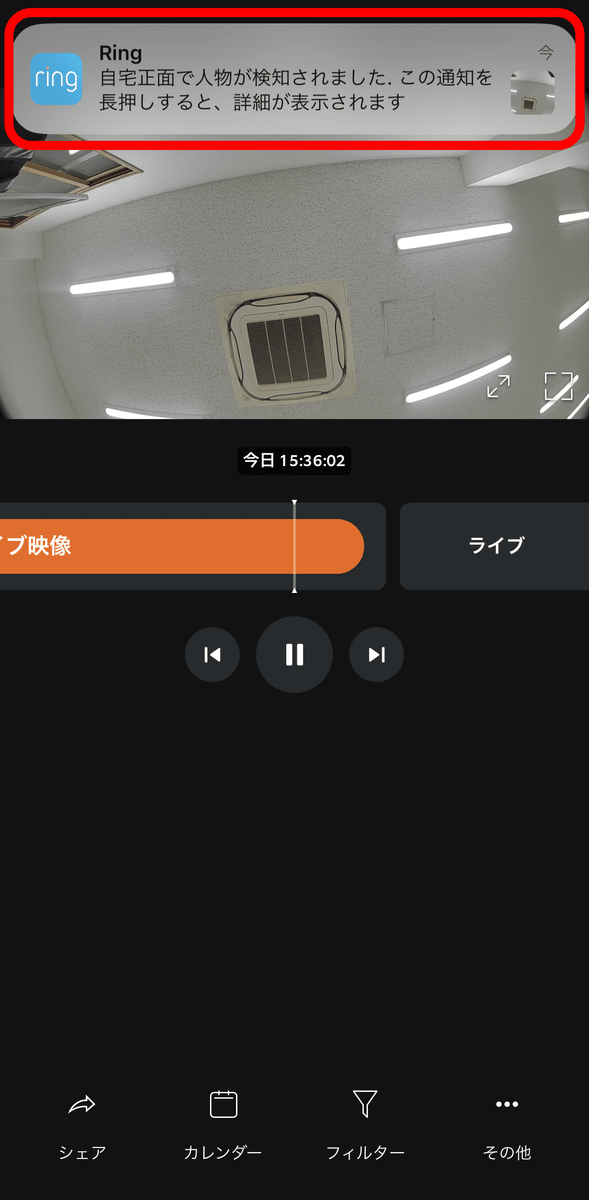
So, from here on, I will assume that you have the Ring Protect plan. The app's home screen looks like this, with a snapshot of the footage recorded by Spotlight Cam Plus displayed in the center. Tapping this area will take you to the management screen where you can view the footage from the camera.
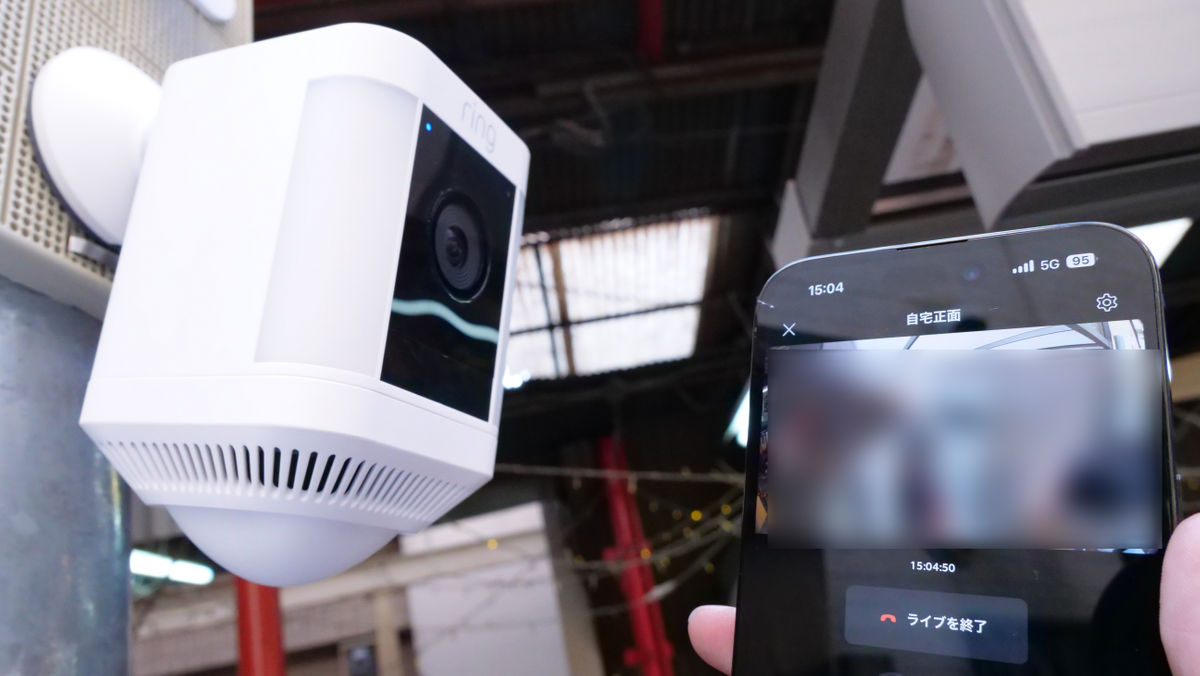
The management screen looks like this. There is a button at the top that allows you to check the live video, and in the center is a timeline of recorded events.
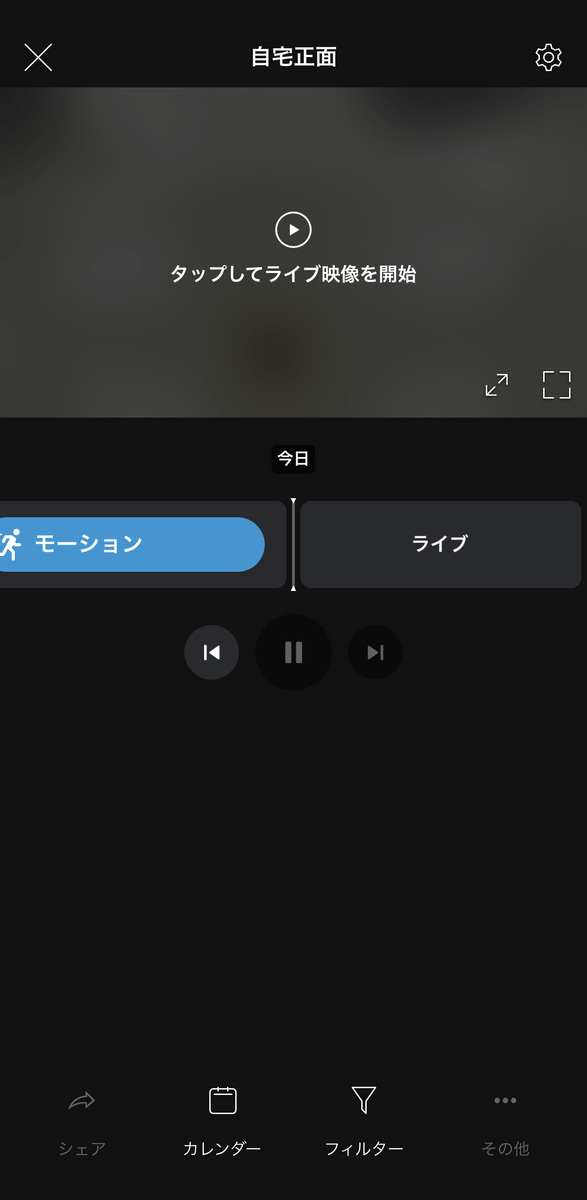
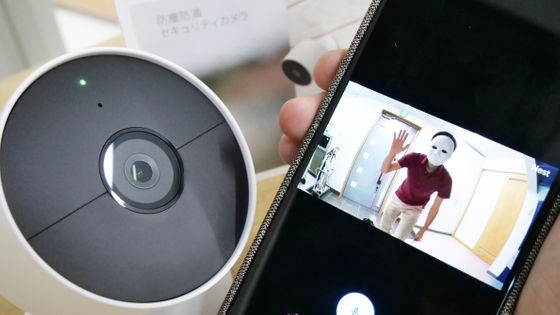
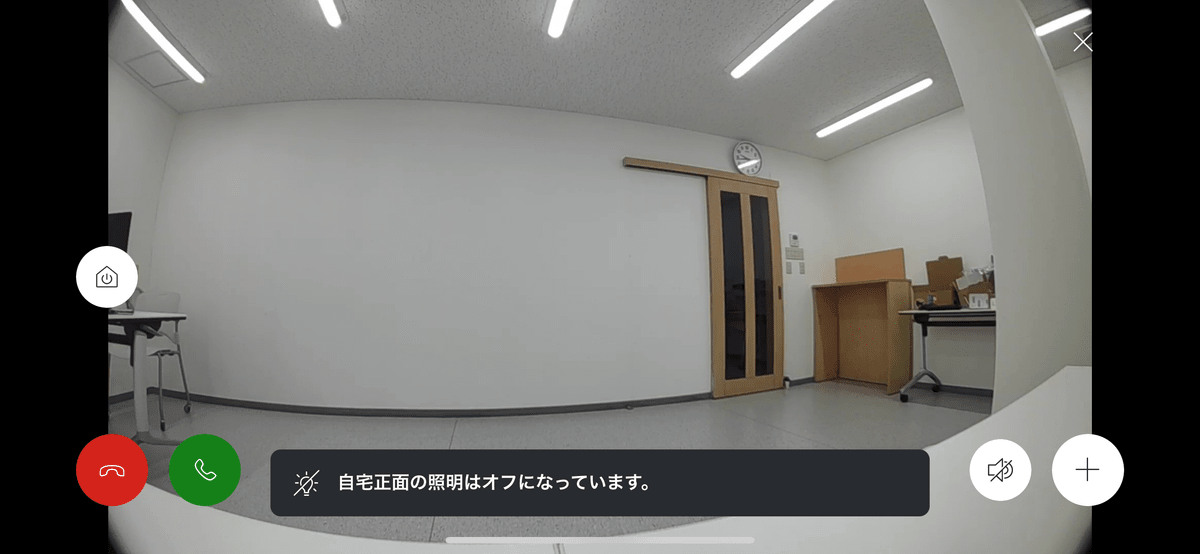
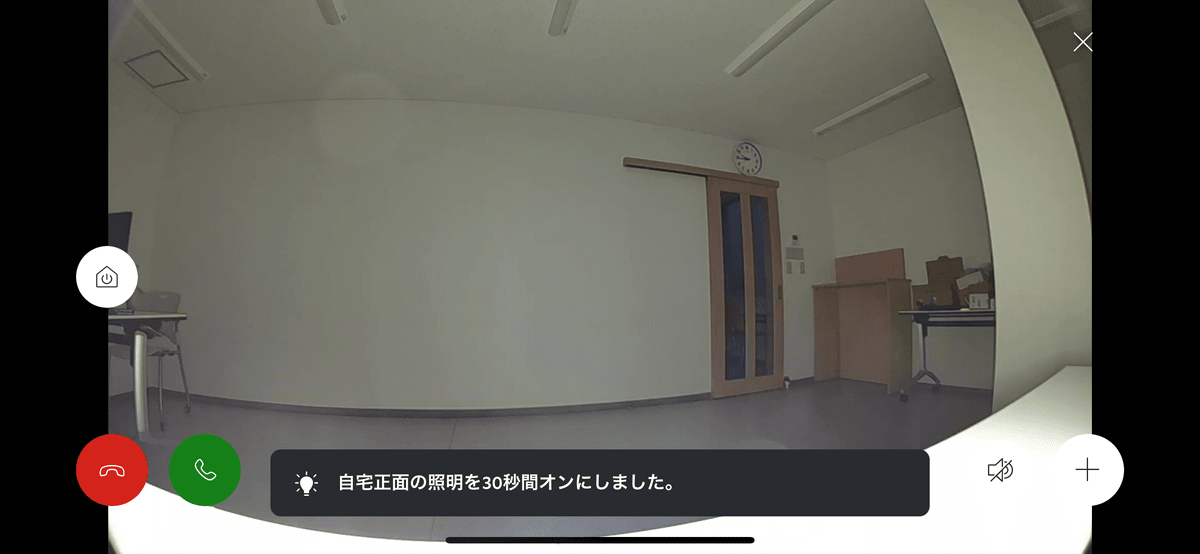
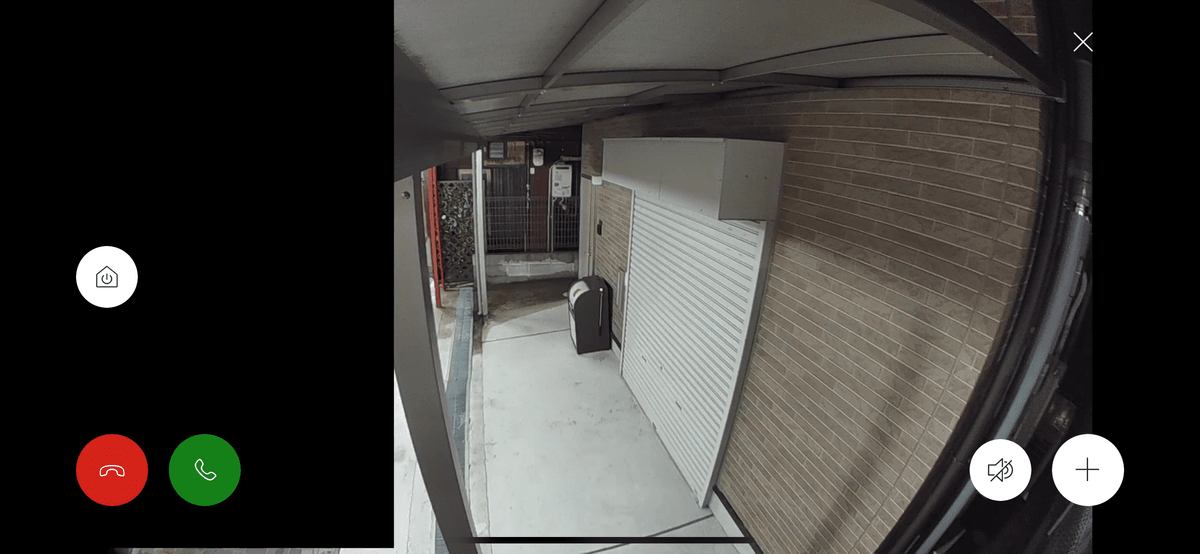
Tap 'Tap to start live video' to see the live video captured by Spotlight Cam Plus. Recording starts the moment you press the button, and stops when you tap 'End Live' or turn off your smartphone screen. From this screen, you can turn on the Spotlight Cam Plus speaker/microphone for two-way communication, or turn the lights or siren on or off.
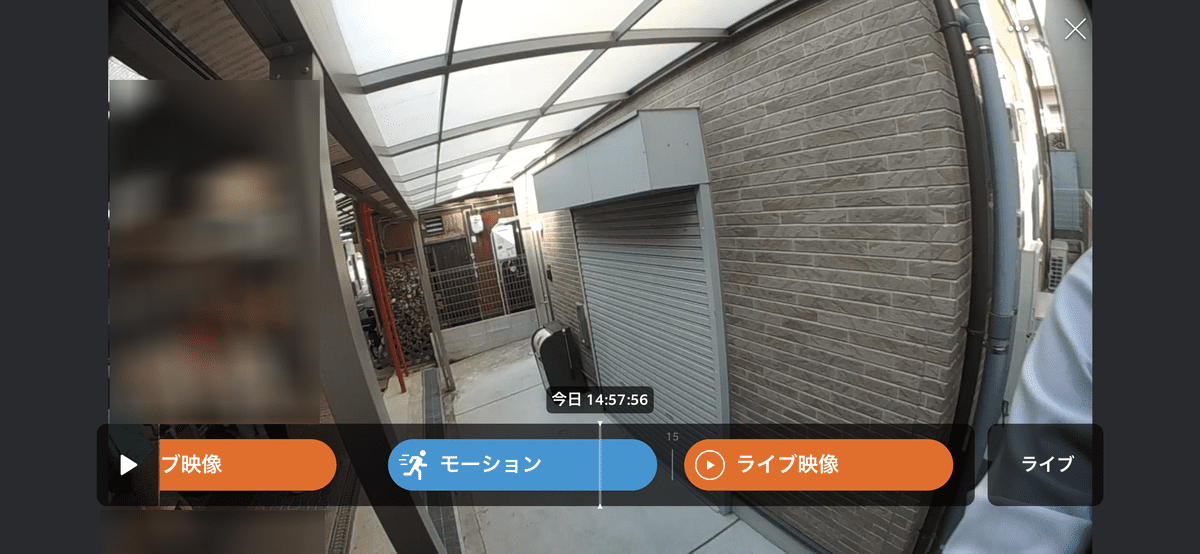
When motion is detected or live footage is viewed, it is automatically recorded and listed on the timeline as an 'event.' By tapping on each event, you can check when it occurred and what was captured on screen.
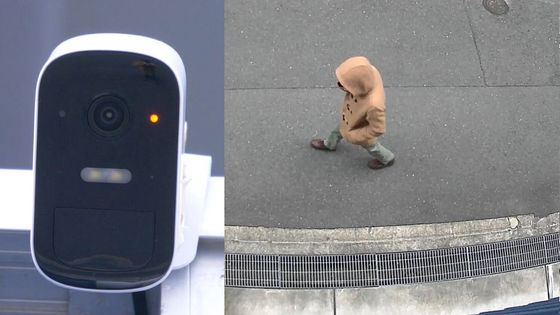
Here's one of the videos I recorded. Spotlight Cam Plus can shoot videos at 1080p, 24fps, and a 140-degree field of view. I saved it via the app and uploaded it without editing.
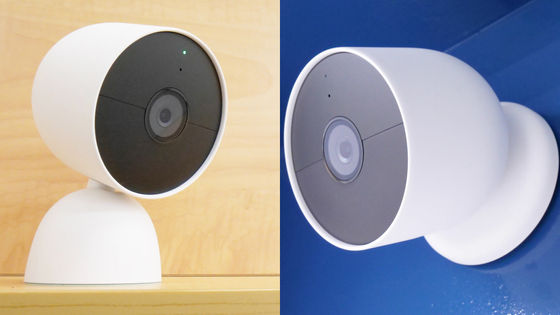
When compared to the Google Nest Cam, which has 1080p, 30fps and a 130-degree field of view, the difference is clear.
Google Nest Cam can automatically record full HD/30fps video - YouTube
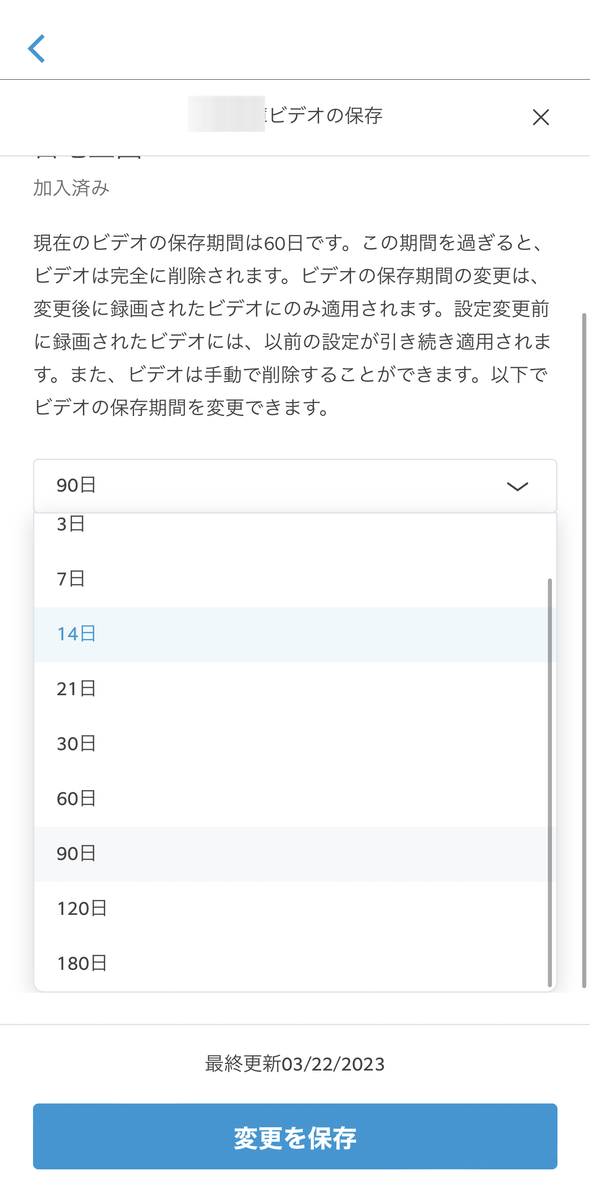
Recordings are stored for up to 180 days, compared to 30 days for Google 's cheaper plan and 60 days for its more expensive plan, so this is a big difference.
We also checked to see how much latency there was, which we could then compare with
Amazon's LED light equipped security camera 'Spotlight Cam Plus' review, delay speed verification - YouTube
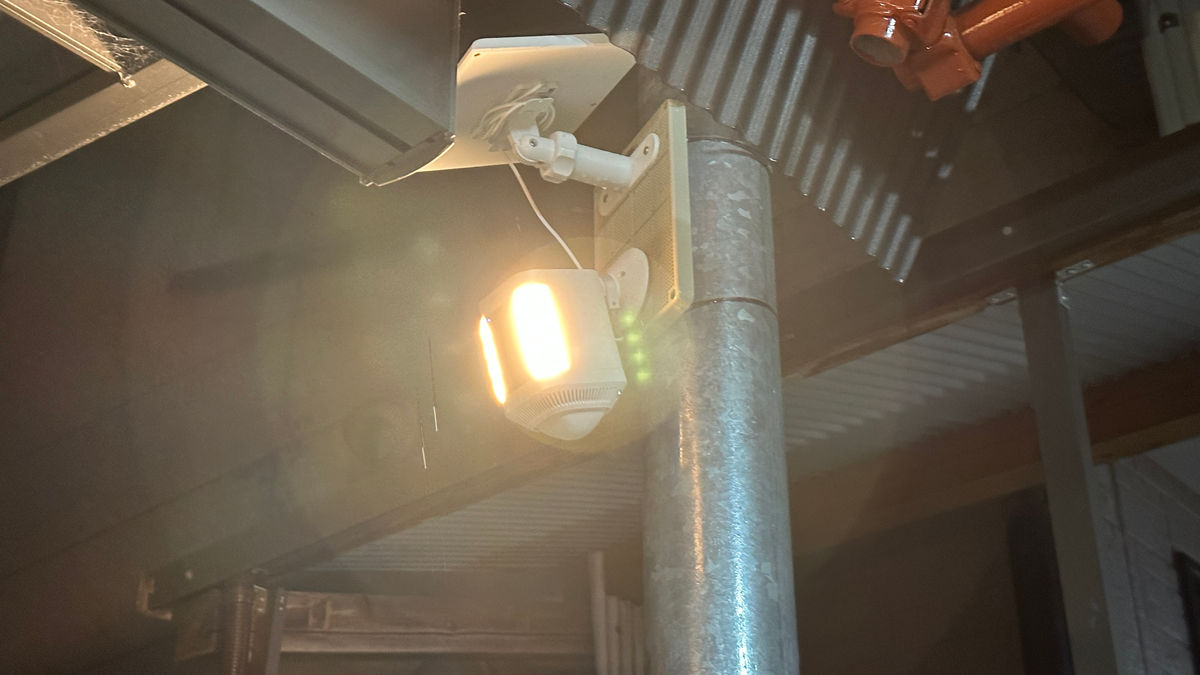
When motion is detected in the dark, the light turns on automatically. The light has an orange-ish warm white color. Of course, you can also turn it on and off manually. You can also set the brightness of the light and schedule the time and day to turn it off.
Here's what Spotlight Cam Plus looks like in a room with the lights on.
I turned off all the lights and took a photo of the same spot with the iPhone 14 Pro Max, and it was pitch black.

On the other hand, Spotlight Cam Plus is equipped with night vision, so you can get a clear image even in the dark.

When you turn the light on it gets a little brighter.
Next, I checked the sound of the siren. It's not loud enough to hurt your ears even if you hear it up close, but it's loud enough to startle you if it suddenly goes off. I'd say it's effective enough as a crime prevention measure.
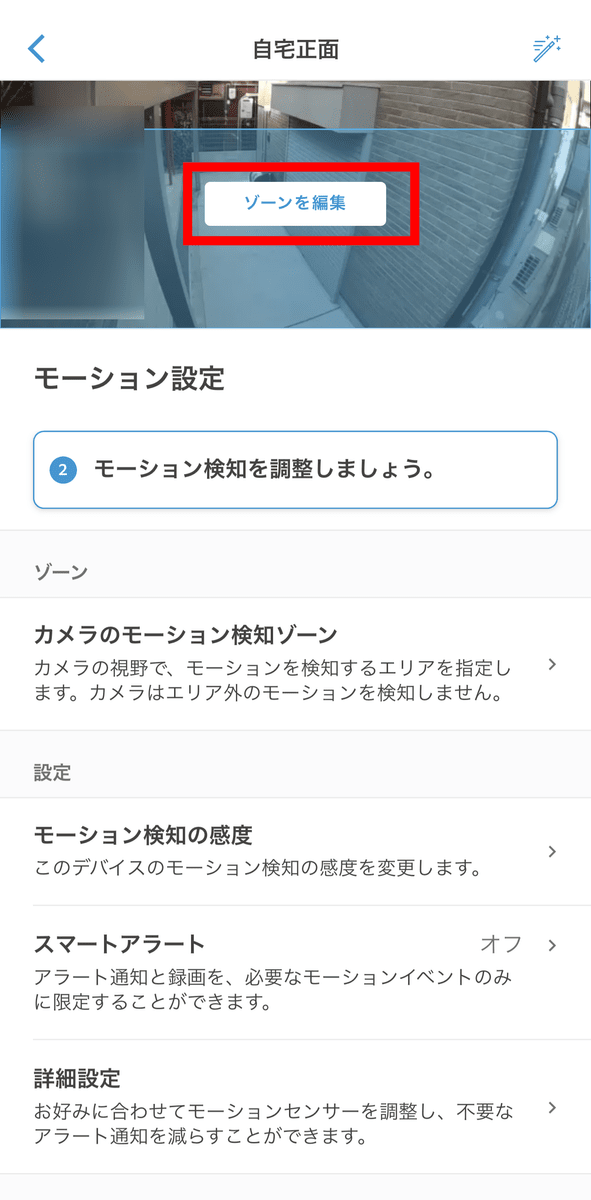
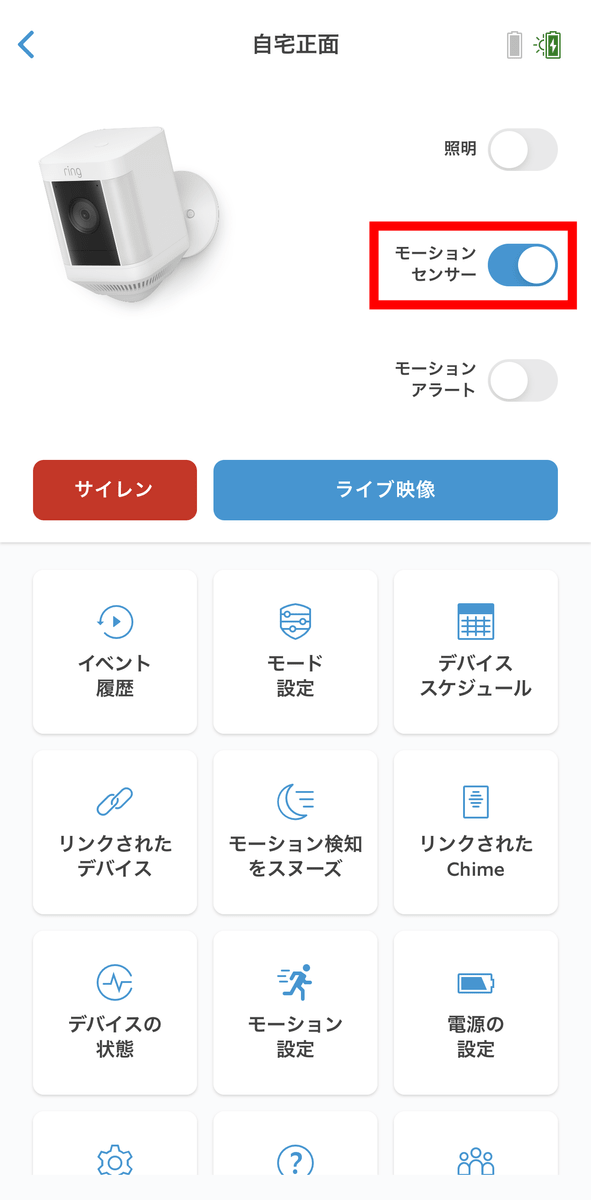
Other settings can be done from the gear icon.
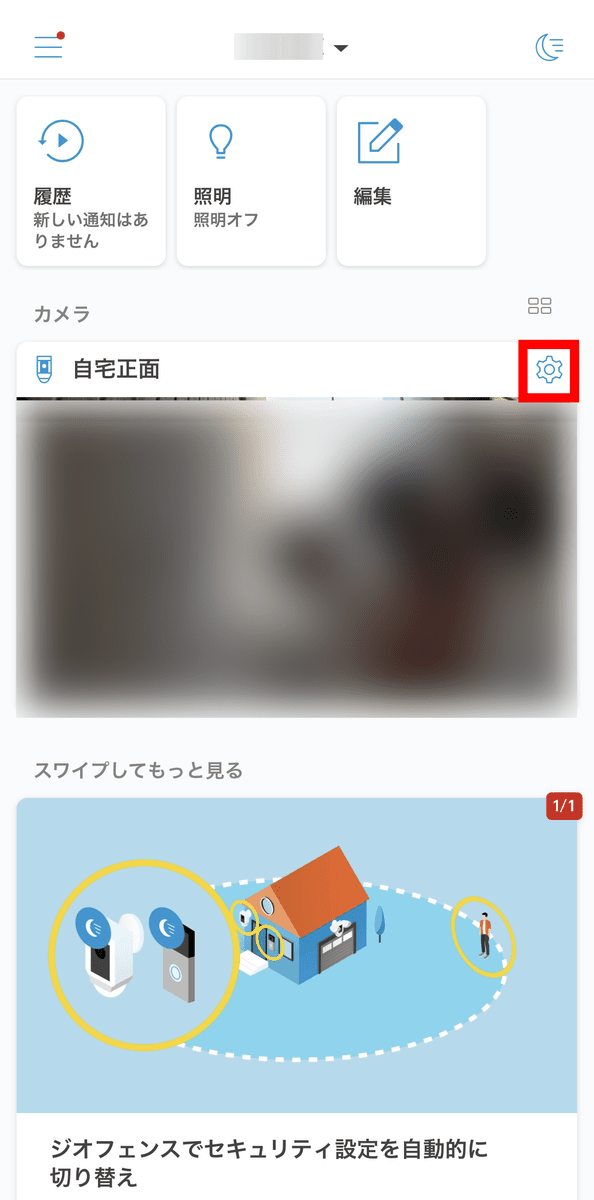
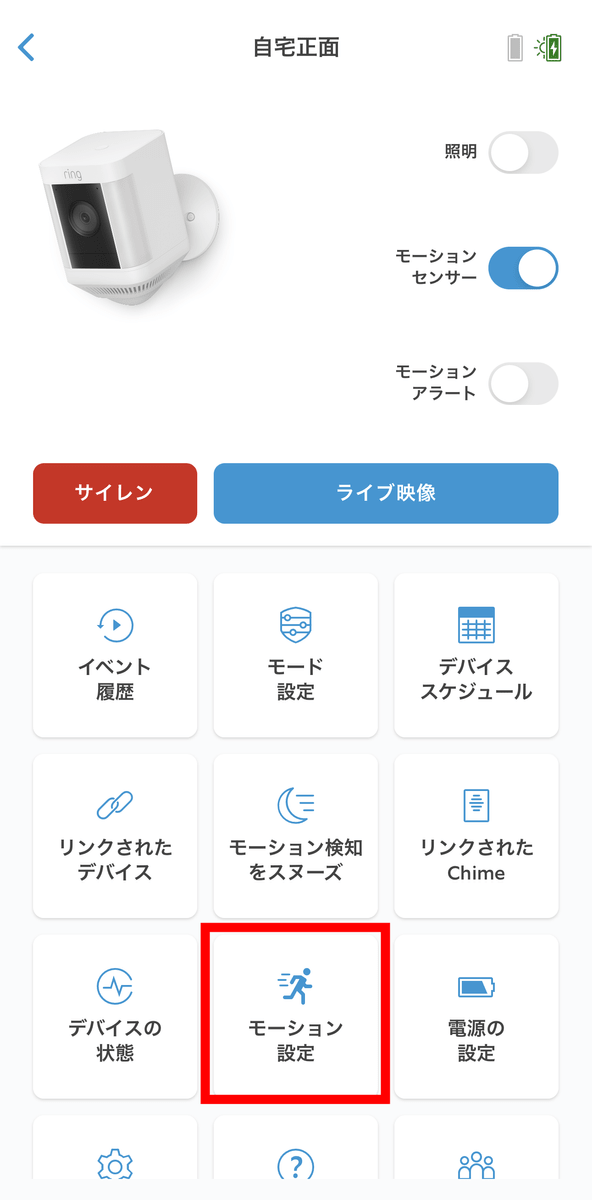
From here you can access event history, schedule, power settings, etc. This time, we want to set up motion detection, so tap 'Motion Settings.'
Then tap Edit Zone.
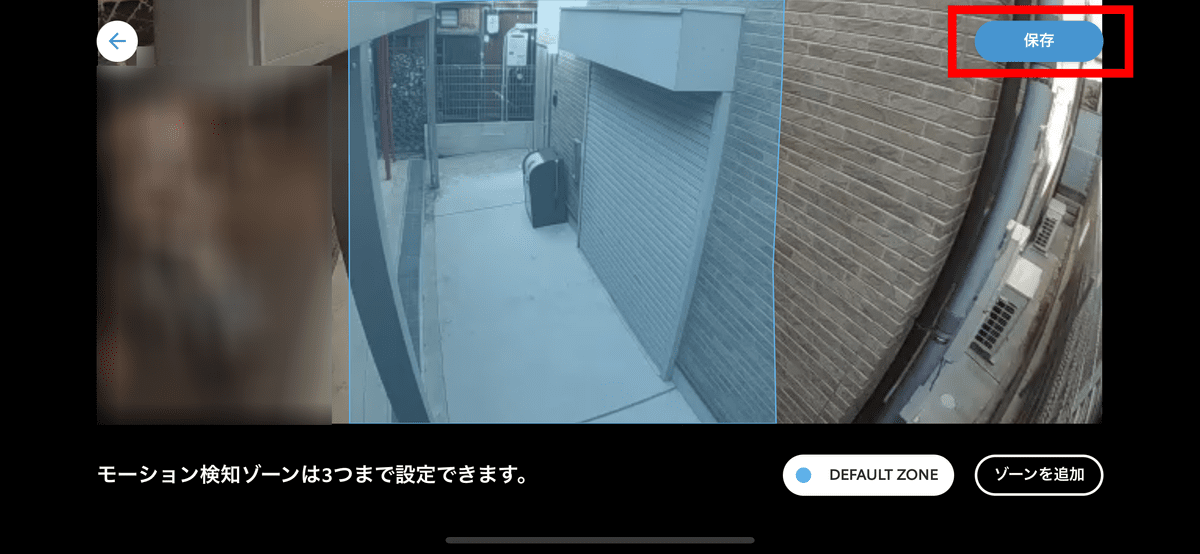
Here you can determine the range within which motion detection will work and ignore movements in irrelevant areas. Adjust the blue frame displayed on the screen and tap 'Done' to define the zone.
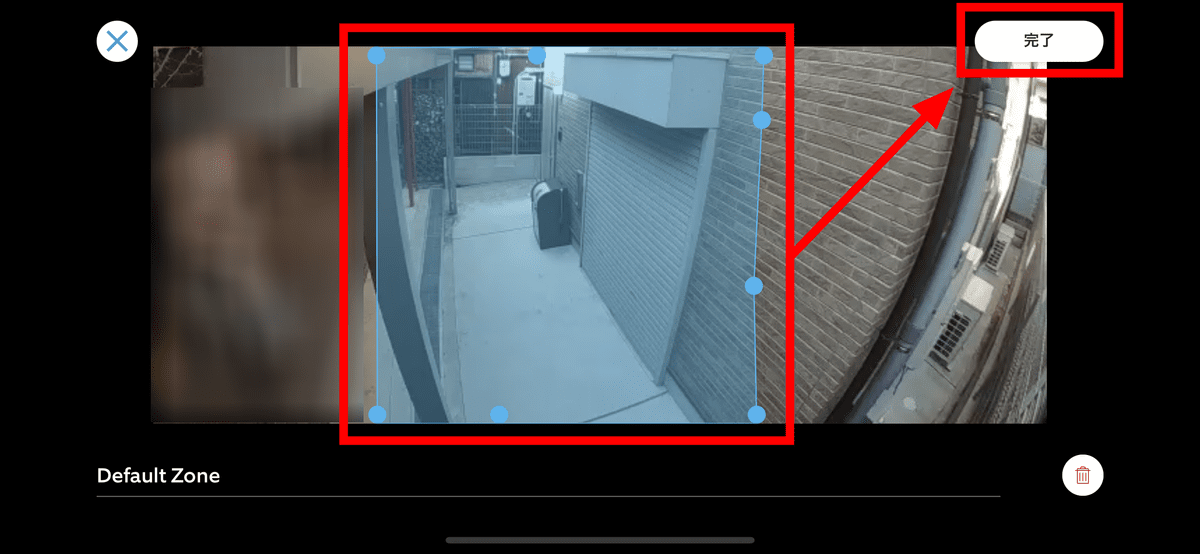
You can set up to three zones. Tap 'Save' in the upper right corner to save the zone.
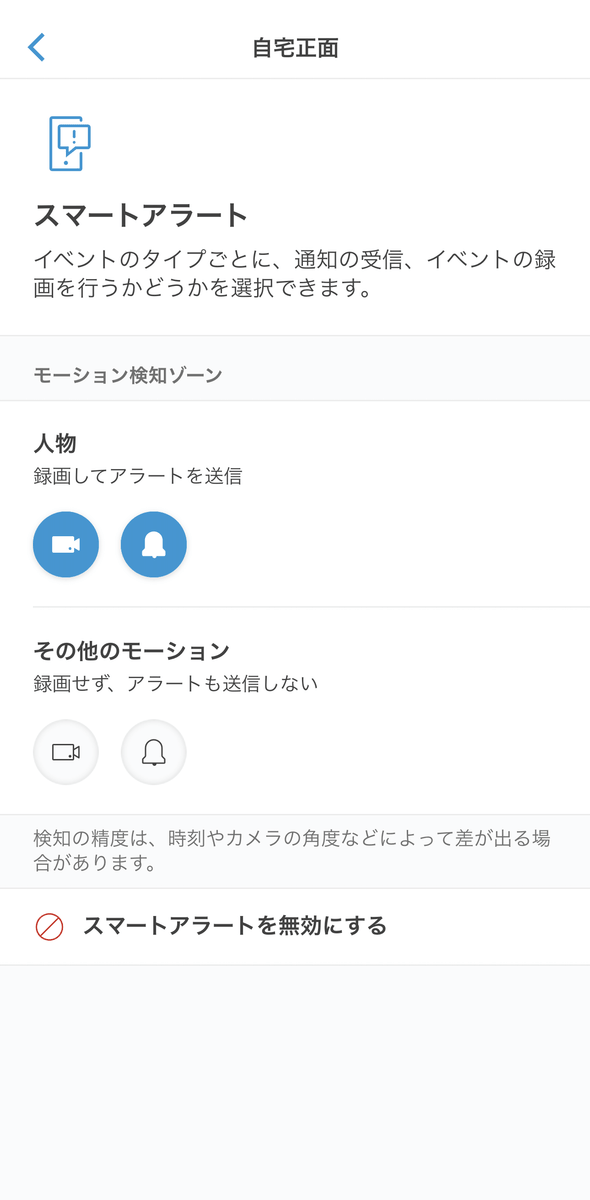
In addition, you can specify days and times during which 'motion alerts' that notify you of detected motion will not be sent, set the detection sensitivity and frequency, and limit the detection targets to 'people.'
When the motion detection is activated, Spotlight Cam Plus will record for 15 to 120 seconds until the motion stops and notify you in the app. You can change the recording time in the settings.
You can set a schedule to turn motion alerts on and off, but some people may want to schedule motion detection itself. However, you cannot do this, and you must manually turn motion detection on and off. With Spotlight Cam Plus, you can only set schedules for motion alerts and turning lights on and off. By the way, the motion detection toggle button is on the settings screen.
There is also a function called 'privacy mask' that blocks certain areas from being displayed.
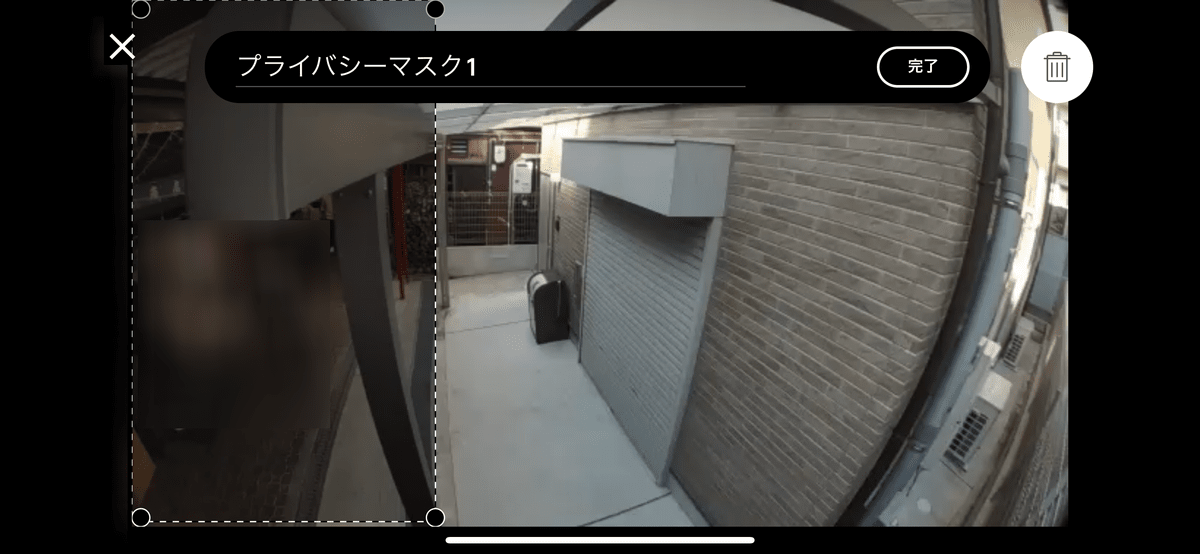
The area where a privacy mask is set will be blacked out and will not be displayed on the screen or recorded.
The iOS version had a widget that allowed direct access to the live feed, but the Android version had nothing in particular.
Spotlight Cam Plus has all the necessary functions as a 'security camera with a light,' and gives you peace of mind knowing that 'you are always being watched' and 'the light will turn on when you get home.' I can't help but compare it to Google Nest Cam, but although Spotlight Cam Plus does not have the functions that Google has to detect 'animals' and 'vehicles' separately, or register people and detect them with face recognition, it does the minimum job with motion detection, so there is no problem. Since it is a battery type, I am concerned about how long it will last on a single charge, but I will verify this in the next article.
Continued
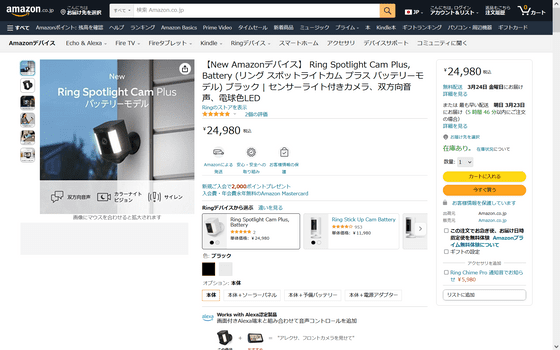
The price of 'Spotlight Cam Plus' is 24,980 yen including tax and is sold on Amazon.co.jp.
Amazon.co.jp: [New Amazon Device] Ring Spotlight Cam Plus, Battery (Ring Spotlight Cam Plus Battery Model) Black | Camera with sensor light, two-way audio, warm white LED: DIY, Tools & Garden
Related Posts: